Today, we’re going over some of the most helpful bread baking tips for beginners. From kneading to proofing and testing your dough, let’s equip you with all the beginner bread baking knowledge you’ll need for your bread making endeavors.
Can anything compete with a freshly baked loaf of bread? According to the Federation of Bakers, the equivalent of nearly 12 million loaves are sold every single day in the United Kingdom. Bread was also the most popular item purchased in 2017 and 2018 in the UK. With 99.8 percent of households purchasing at least one delicious loaf.
And of course, the UK is far from alone. Humans started consuming grains about 23,000 years ago, discovering bread-like crust from grains mixed with water. And in the United States alone, an estimated $5.6 billion worth of bread and rolls were sold in 2020. Now that's a lot of dough!
There are countless ways to enjoy bread. Of course, you can grab a delicious, fresh-out-of-the-oven loaf at your local bakery, but a homemade bread batch might be the custom joy you seek.

Ingredients Needed For Bread Baking
The basic ingredients needed to make artisan bread are incredibly simple, and you’re almost guaranteed to have the majority of what you need already at home. Especially if you are starting with a simple bread recipe, the only exception might be some yeast!
You know how you love that first bite of a fresh-outta the oven bread? You can thank yeast for that! Yeast is what makes your dough rise and creates those lovely air bubbles in the crumb. Without it, you would have an unappealing loaf or tortilla!
Do You Need A Stand Mixer and Dutch Oven to Make Bread?
The answer is no! A lot of recipes call for mixing in a stand mixer. A stand mixer definitely makes the process a bit easier, but people have been making bread for hundreds of years without a stand mixer. Now, if your recipe calls for baking in a dutch oven, you can easily use a sheet pan or a loaf pan, or even a baking stone. The benefit of a dutch oven is the evenness of the temperature when baking. Think about that perfect bake with a crunchy crust that you love on your favorite artisan bread. That's definitely one benefit of a dutch oven. These two pieces of equipment are nice to have, but my bread baking tip is that you can work your way up to them as you continue to make breads.
When You Need to Knead Bread Dough
Kneading bread isn’t as fun as needing to enjoy a fresh loaf. But believe it or not, you might not even have to knead your dough, depending on your recipe! While most traditional bread recipes will have you kneading dough for quite a while, easy bread recipes like quick breads don’t require kneading at all.
Quick breads are often dubbed the “cake mix” of the bread world. This is because they do not contain yeast and instead rely on other ingredients to allow the bread to rise. In most cases, a bread recipe without yeast requires little to no kneading.
In other cases, no-knead breads contain yeast but rely on time instead of your hands to activate the ingredient. For example, this classic No-Knead Bread recipe by Jim Lahey and featured in the New York Times relies on time to let the dough rest and the bread rise over 12+ hours.
If you’re a beginner bread baker a bit intimidated by kneading, try out a few bread mixes to get started. Or, you can try a no-knead recipe that relies on time to activate the yeast while you perfect your kneading skills on a different loaf. Win-win!

Mixing & Kneading Bread Dough
When you’re ready to tackle kneading bread dough, the key is consistency and practice! Kneading bread dough can also be very therapeutic as it forces you to use your hands completely and doesn’t allow for easy phone breaks in between.
To knead your dough, you can use your hands with an extra side of flour to prevent sticking or use a dough hook mixer. A dough hook mixer is a great idea if you need to make multiple loaves at once or decide to pursue bread-making regularly.
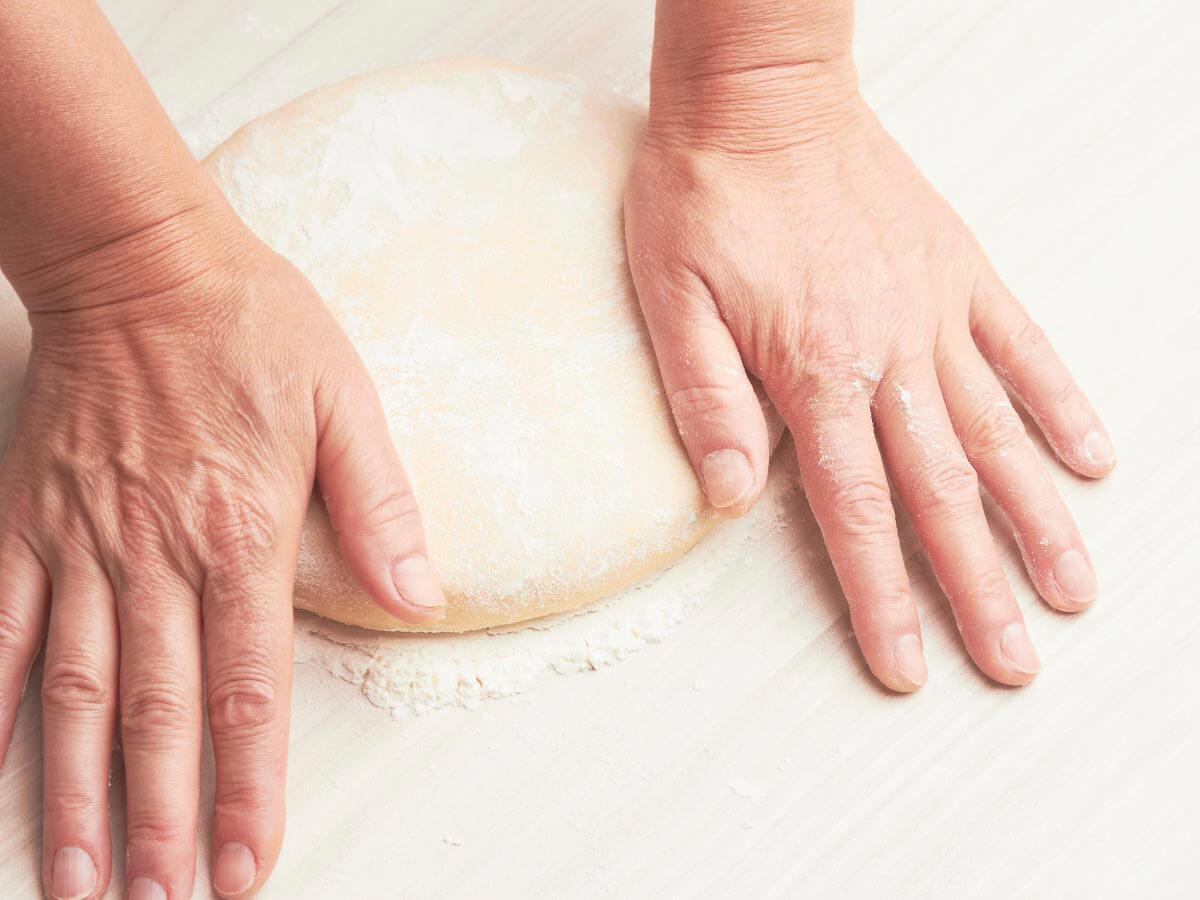
To knead your dough by hand, prepare a floured surface for your dough. You’ll want enough room to extend your arms and for the dough to sit in both clumped and flattened forms. Next, scrape your dough onto the floured surface and push it down and outward with the heel of your hand to flatten it.
Fold the dough back over itself and press down to reform a thicker mound. Turn the dough and repeat this process until the bread is properly holding its own form.
Kneading can be messy, so don’t be afraid to re-dust your workstation with flour as needed! Be careful about adding too much flour directly to your dough at this stage, however. Adding too much can affect the accuracy of your recipe.
Have I Kneaded My Bread Dough Enough?
There are a plethora of tests to help you determine if you’ve kneaded your bread dough thoroughly. One popular telltale sign is called the “windows” test, which involves stretching out a palmful of dough. If you’re able to stretch it into a translucent area akin to a windowpane or bubblegum, then your dough is ready.
This “window” is known as a gluten window and serves as a great test to see if the gluten molecules have activated enough in your dough. If you try to perform this test after only a few minutes of kneading, your dough will probably tear apart.
Some other tests include the poke test and shape test. For example, your dough should actually “bounce” back from a firm poke if it’s properly kneaded. And, it should hold its shape when held over a bowl and not sag back toward your surface.
Of course, these are general tests that hold for most bread doughs. Remember that additions to a traditional recipe might mean that some tests are more appropriate for recipes than others.
Rising Bread Dough
Most bread recipes will come with specific bread proofing directions that are relatively easy to follow! If you are trying a new recipe, make sure to read your recipe ahead of time. Some directions require overnight proofing, which can get you in trouble in a pinch if you haven't planned for the entire process to go overnight and you can't bake your bread until the next day.
Traditionally, bread proofs can be done at room temperature in a glass bowl. Place your dough in a ball at the bottom of your bowl, and cover the bowl with a damp paper towel or plastic wrap. You can also draw a line around the perimeter of your dough ball on the outside of your glass bowl with a dry erase marker. This will make it easier for you to determine when your bread has properly doubled in size.
Another casual way to proof bread dough is in the fridge. Recipes that call for overnight proofing should virtually always detail proofing inside a refrigerator. This is a slower method but super convenient for breakfast bread bakes.
When proofing your dough, be careful to stick to the recipe or experiment with purpose. “Overproofed” dough can result in accidentally sour or off-tasting bread, with a different texture than what you were hoping for.
Beginner Bread Baking
It’s easy to be intimidated at the start of your bread baking journey. Thankfully, the ingredients for bread are relatively affordable, and a single bag of flour from your local grocery store can easily last you dozens of loaves, dinner rolls, or even your favorite sandwich loaf.
Keep practicing your kneading (or no kneading needed!) techniques, and you’ll be creating bakery-quality bread loaves in no time. If you’re ready to learn more about the science behind baking fresh bread, go ahead and give our article Types Of Yeast And When To Use Them a read. Happy baking!
Looking For More Baking Tips?
Subscribe to my free newsletter to get new baking tips in your inbox monthly. Find me sharing new recipes and tips on Pinterest, Instagram, or Facebook.
As an Amazon Associate and member of other affiliate programs, I earn from qualifying purchases. What that means is if you click on one of our affiliate links, they may toss a few pennies our way for a commission.



Alison says
These are excellent tips for making bread at home. Thank you for explaining the distinction of when you need to knead bread and when you don't. I'm excited to start baking more bread at home!
serena says
Enjoy 🙂
Shannon says
This was really helpful. I never know if I've kneaded my bread long enough - I will be remembering the tip about it being somewhat bubble-gum like when it's ready.
serena says
Thanks Shannon
Wajeeha Nadeem says
I've always been unsure about baking bread at home, but this article has some great tips! Thanks!
serena says
Thanks so much!
Kristen says
This post was so helpful! Thank you for all the tips!
serena says
Thanks!
Dannii says
So many amazing tips here. You really can't beat the smell of freshly baked bread.
serena says
So true!