• Skip to primary navigation
  • Skip to main content
  • Skip to primary sidebar
  • Home
  • Collaborate with us
  • Contact

Serena Lissy logo

  • Recipe Index
  • Privacy Policy
menu icon
go to homepage
  • Christmas
  • Recipes
  • Photography
  • About
    • Facebook
    • Instagram
    • Pinterest
  • search icon
    Homepage link
    • Christmas
    • Recipes
    • Photography
    • About
    • Facebook
    • Instagram
    • Pinterest
  • ×

    Serena Lissy » Recipes

    Blog

    No Churn Chocolate Mint Ice Cream

    August 29, 2022

    Scoop of chocolate mint ice cream in bowl with ice cream cone

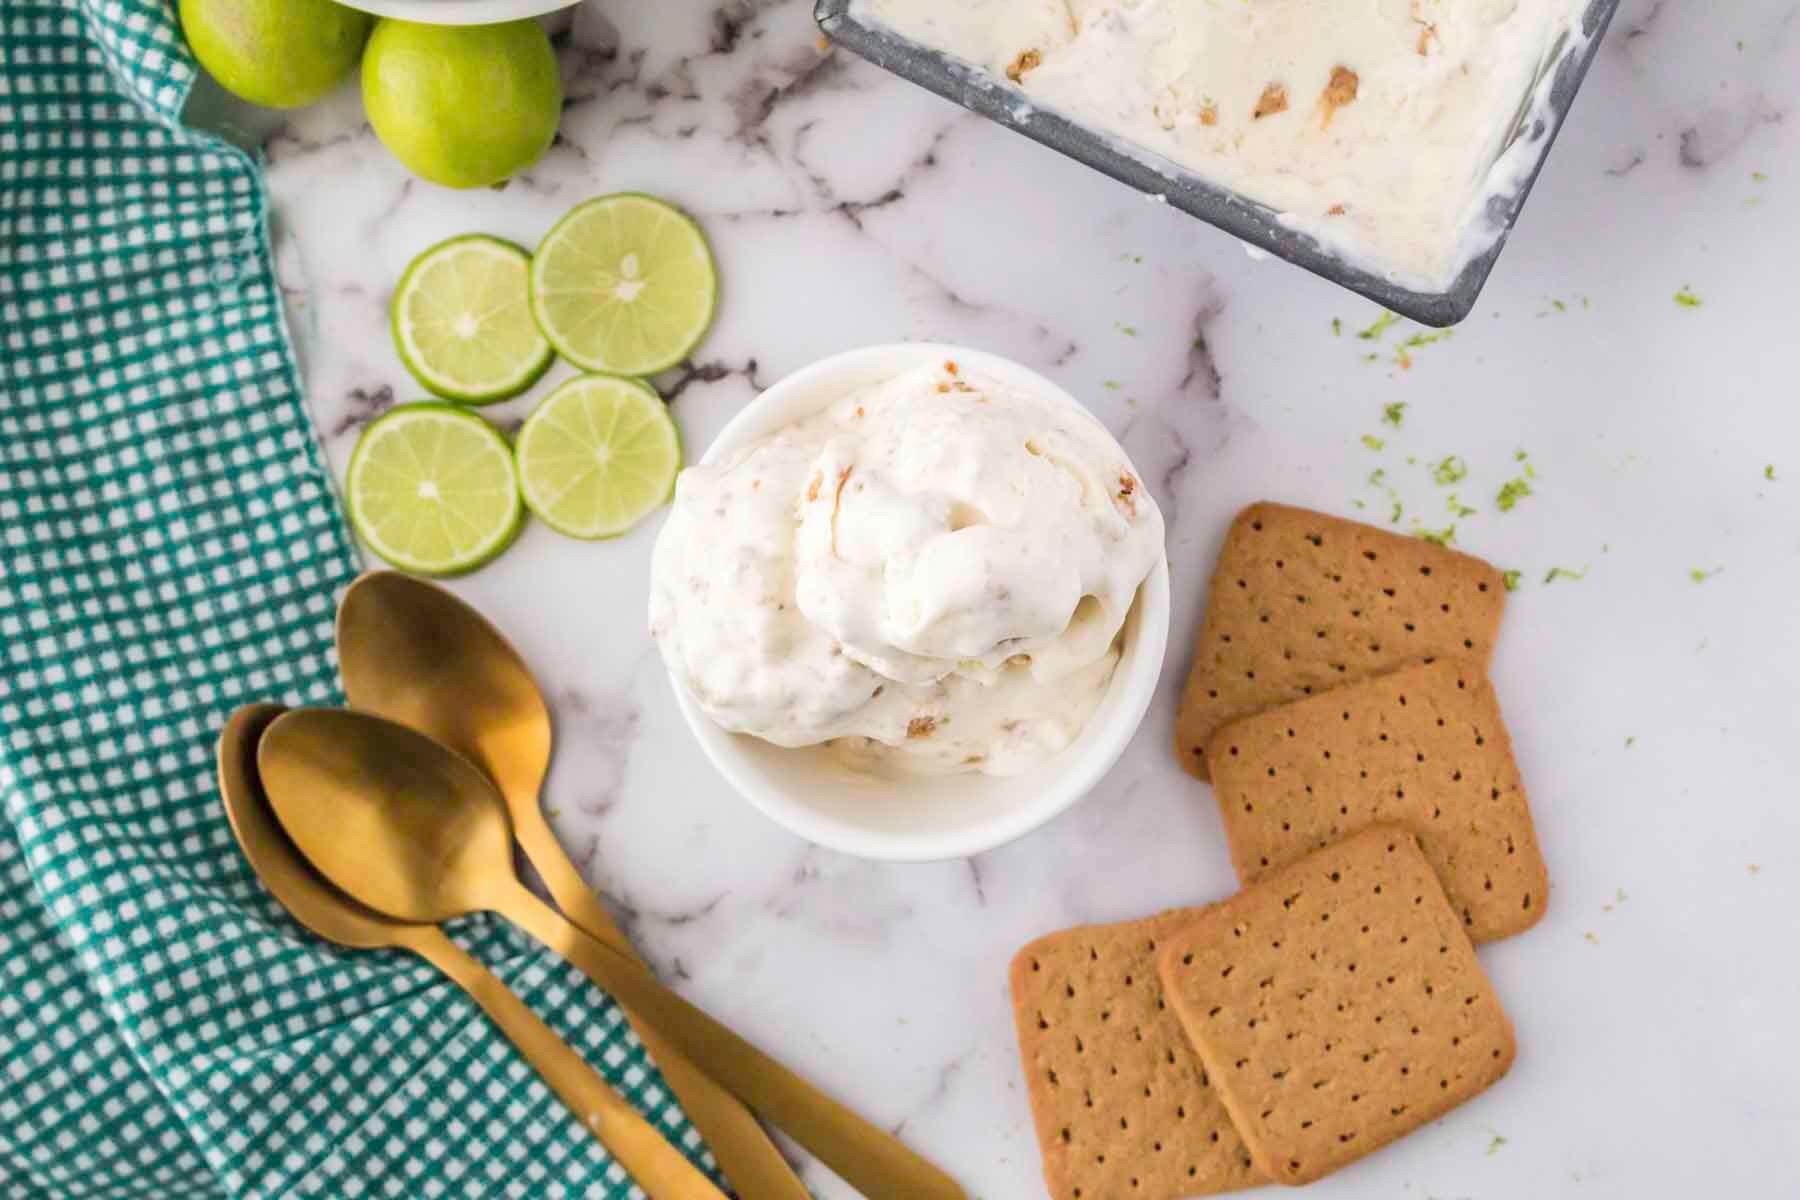
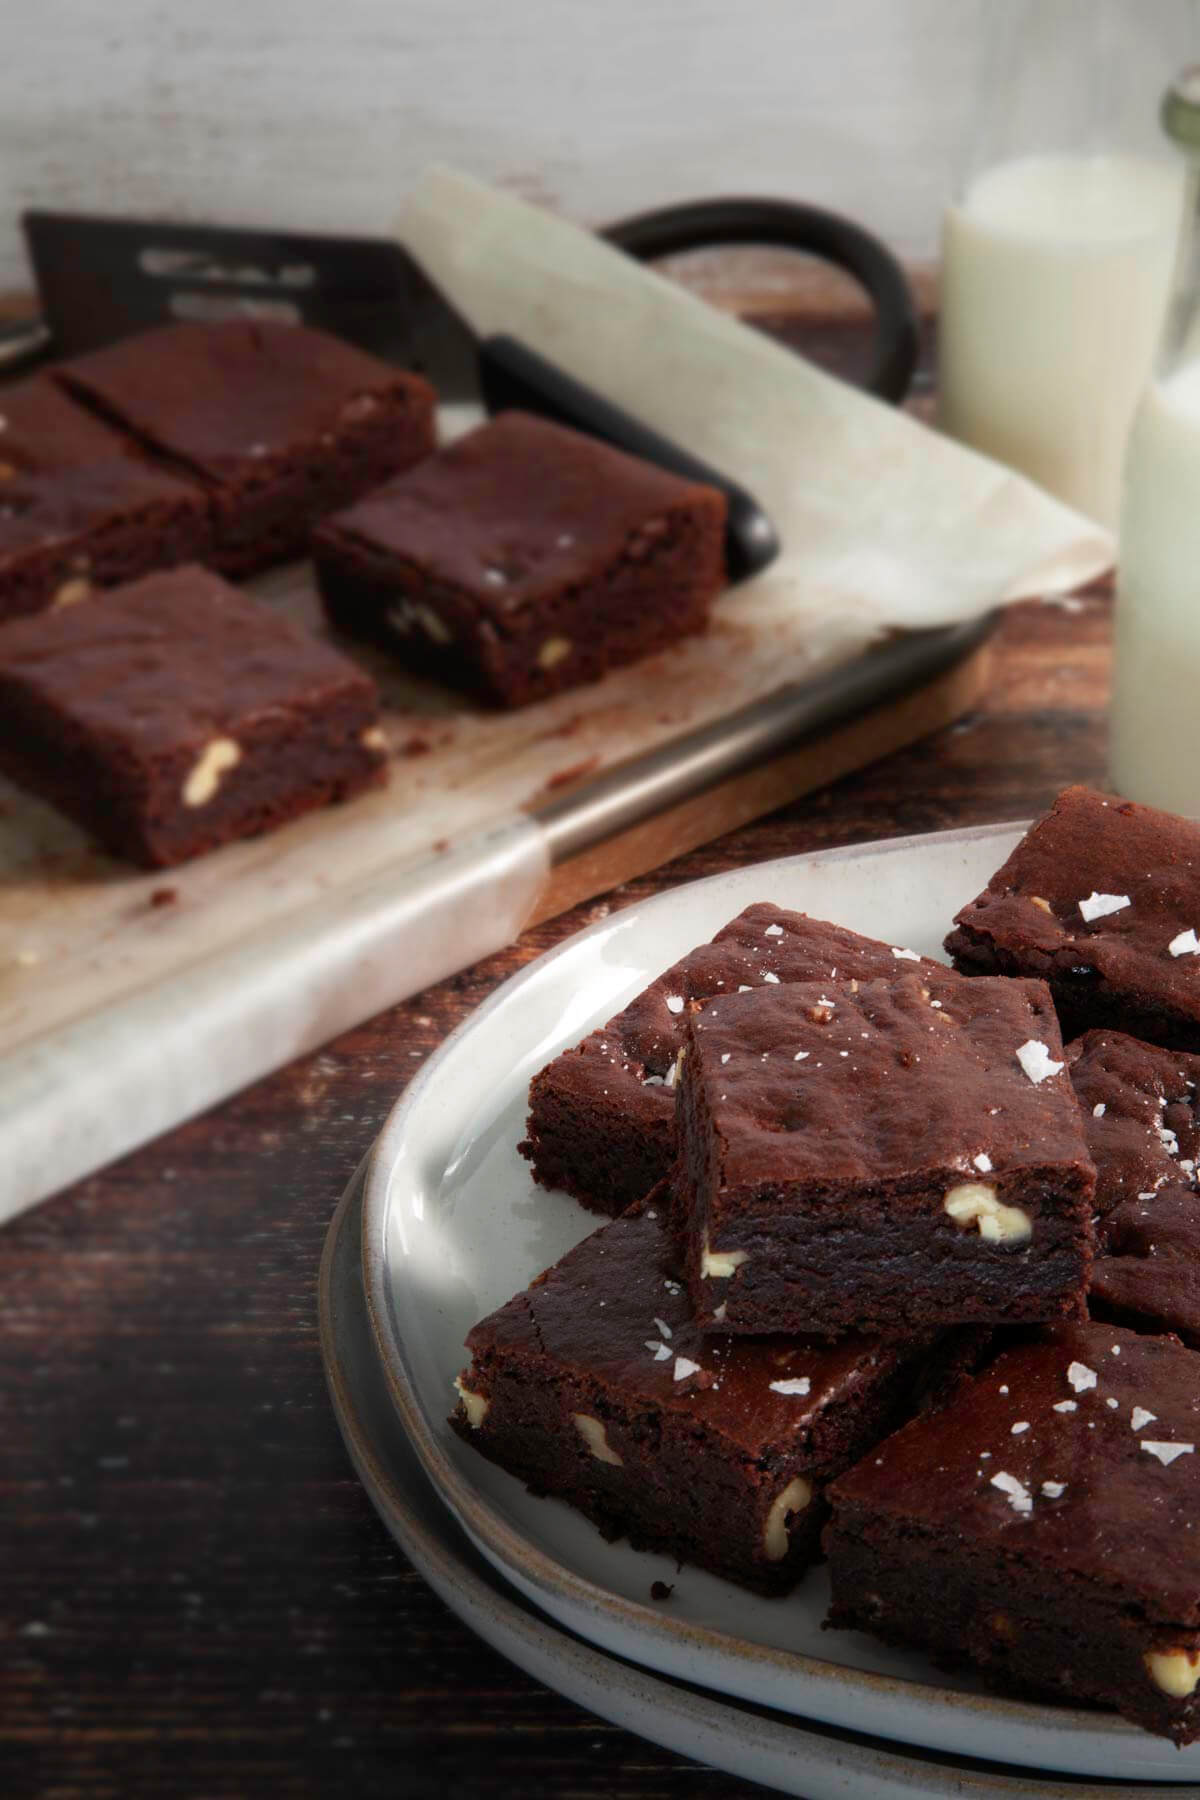
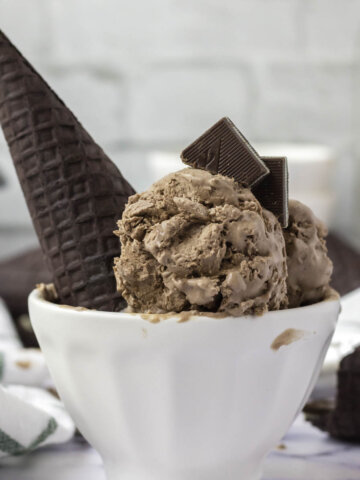
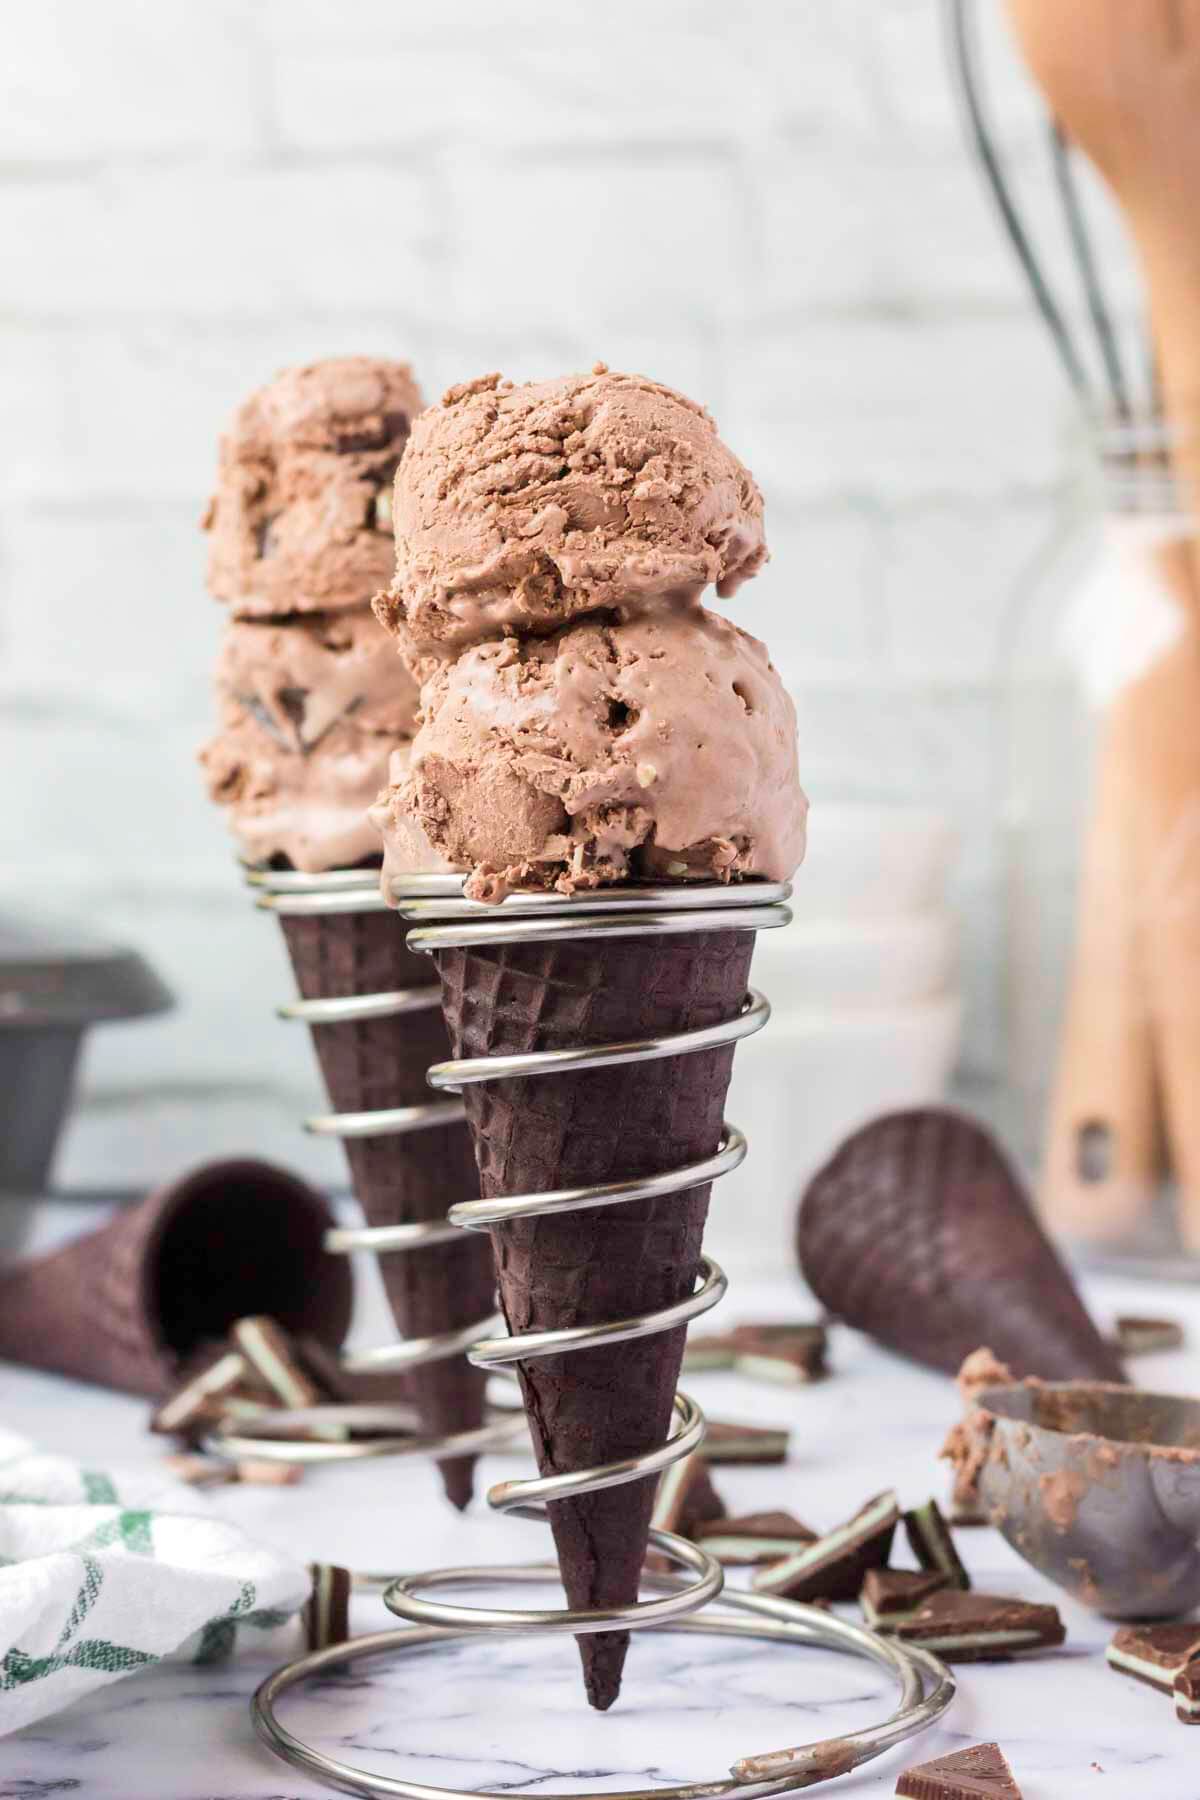
    Chocolate mint ice cream is a rich and chocolatey twist on a classic ice cream flavor. Sweet Andes mint pieces are suspended throughout a chocolate no-churn ice cream base to create this dark, cool, and creamy dessert.

    Chocolate lovers everywhere are sure to be obsessed with this intensely chocolatey version of mint chocolate chip ice cream. My chocolate mint ice cream is heavy on the chocolate and light on the mint, making it perfect for those who enjoy creamier, deeper, more indulgent flavors. The bits of Andes mints swirled throughout this chocolate no-churn ice cream adds just a hint of refreshing coolness to this otherwise rich homemade ice cream. Making it one of my favorite ice cream flavors.

    Two scoops of chocolate mint ice cream laying on table

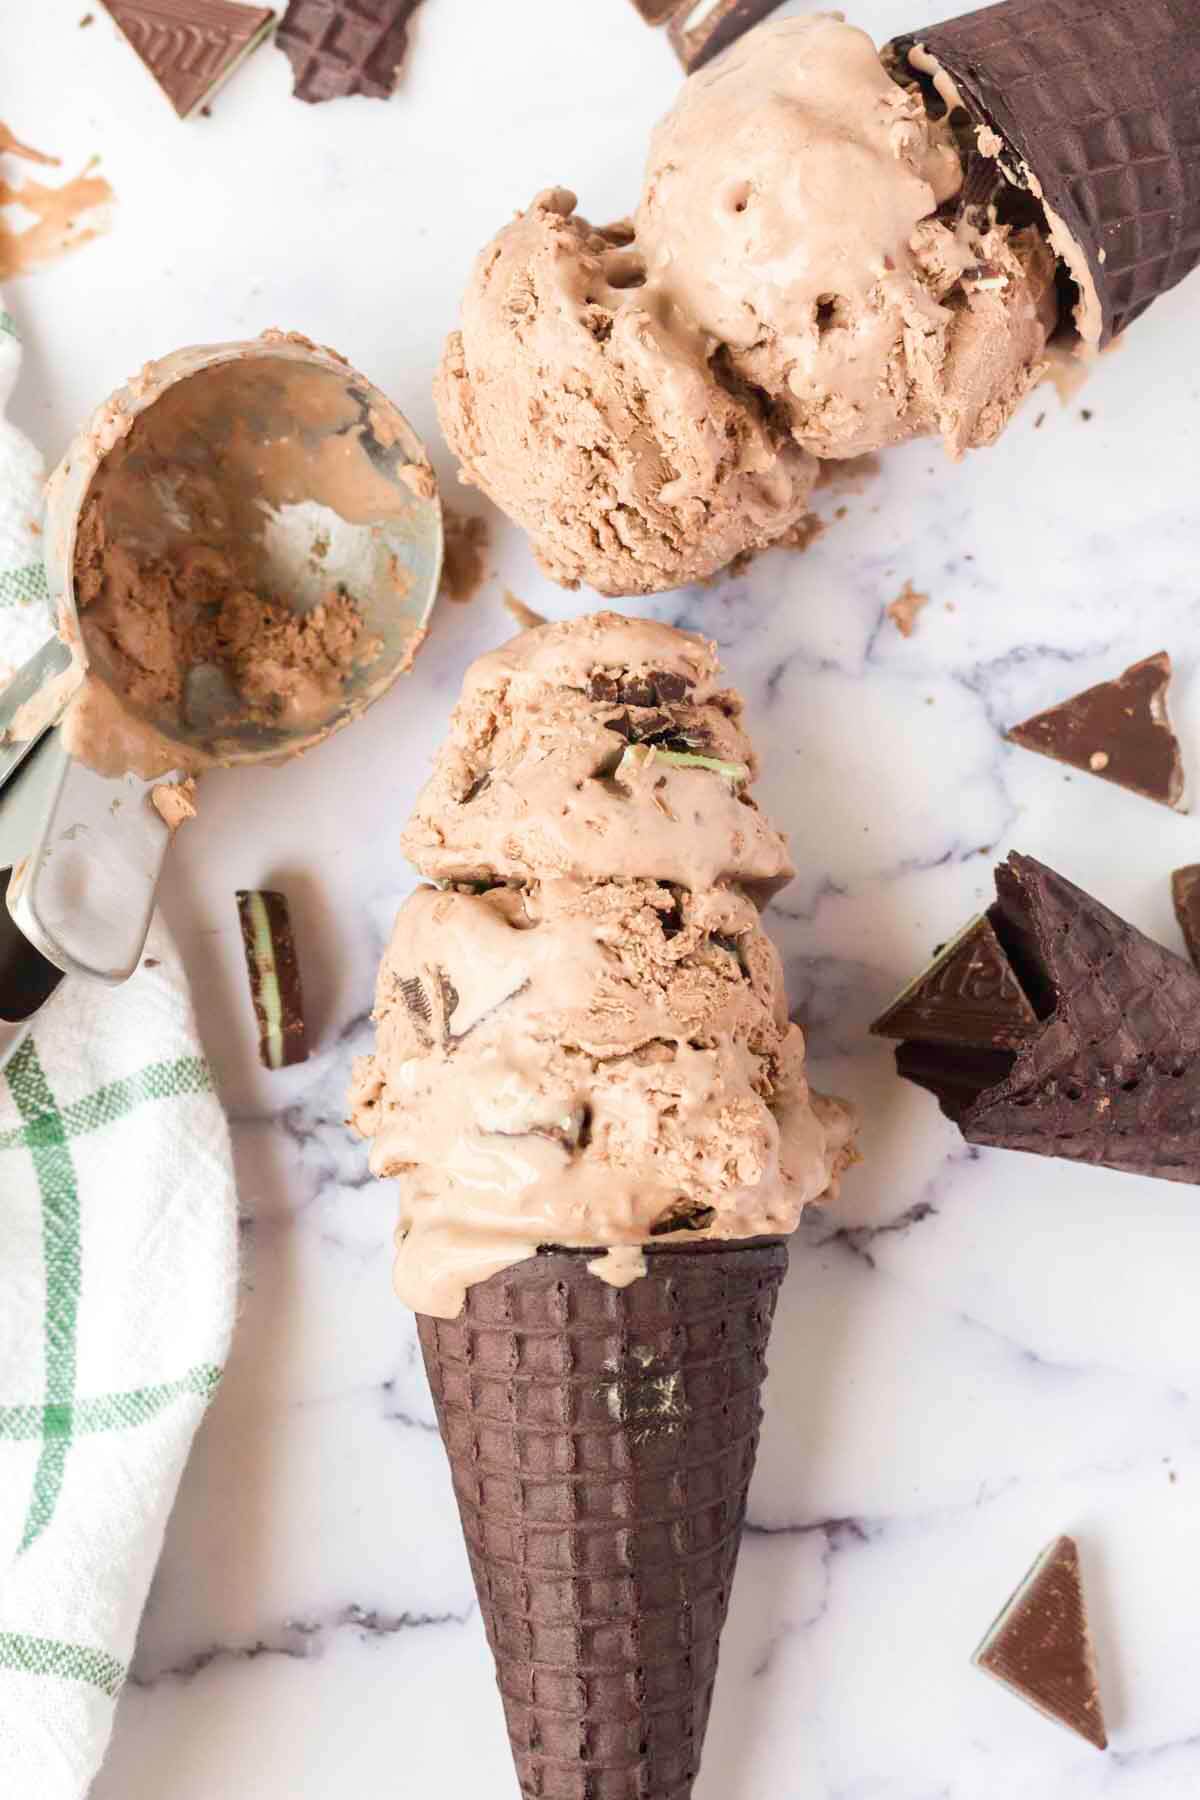
    One of the best parts of this chocolate mint ice cream is that it’s a great dessert to serve year-round. You can make this no-churn ice cream without turning on the oven or stovetop, making it a perfect summer treat! Or you can pair the deep flavors of this ice cream with a warm cookie or slice of cake and serve it as a decadent winter dessert. No matter what the occasion, you can feel confident serving this chocolate mint ice cream year round. Trust me, everyone is going to love it!
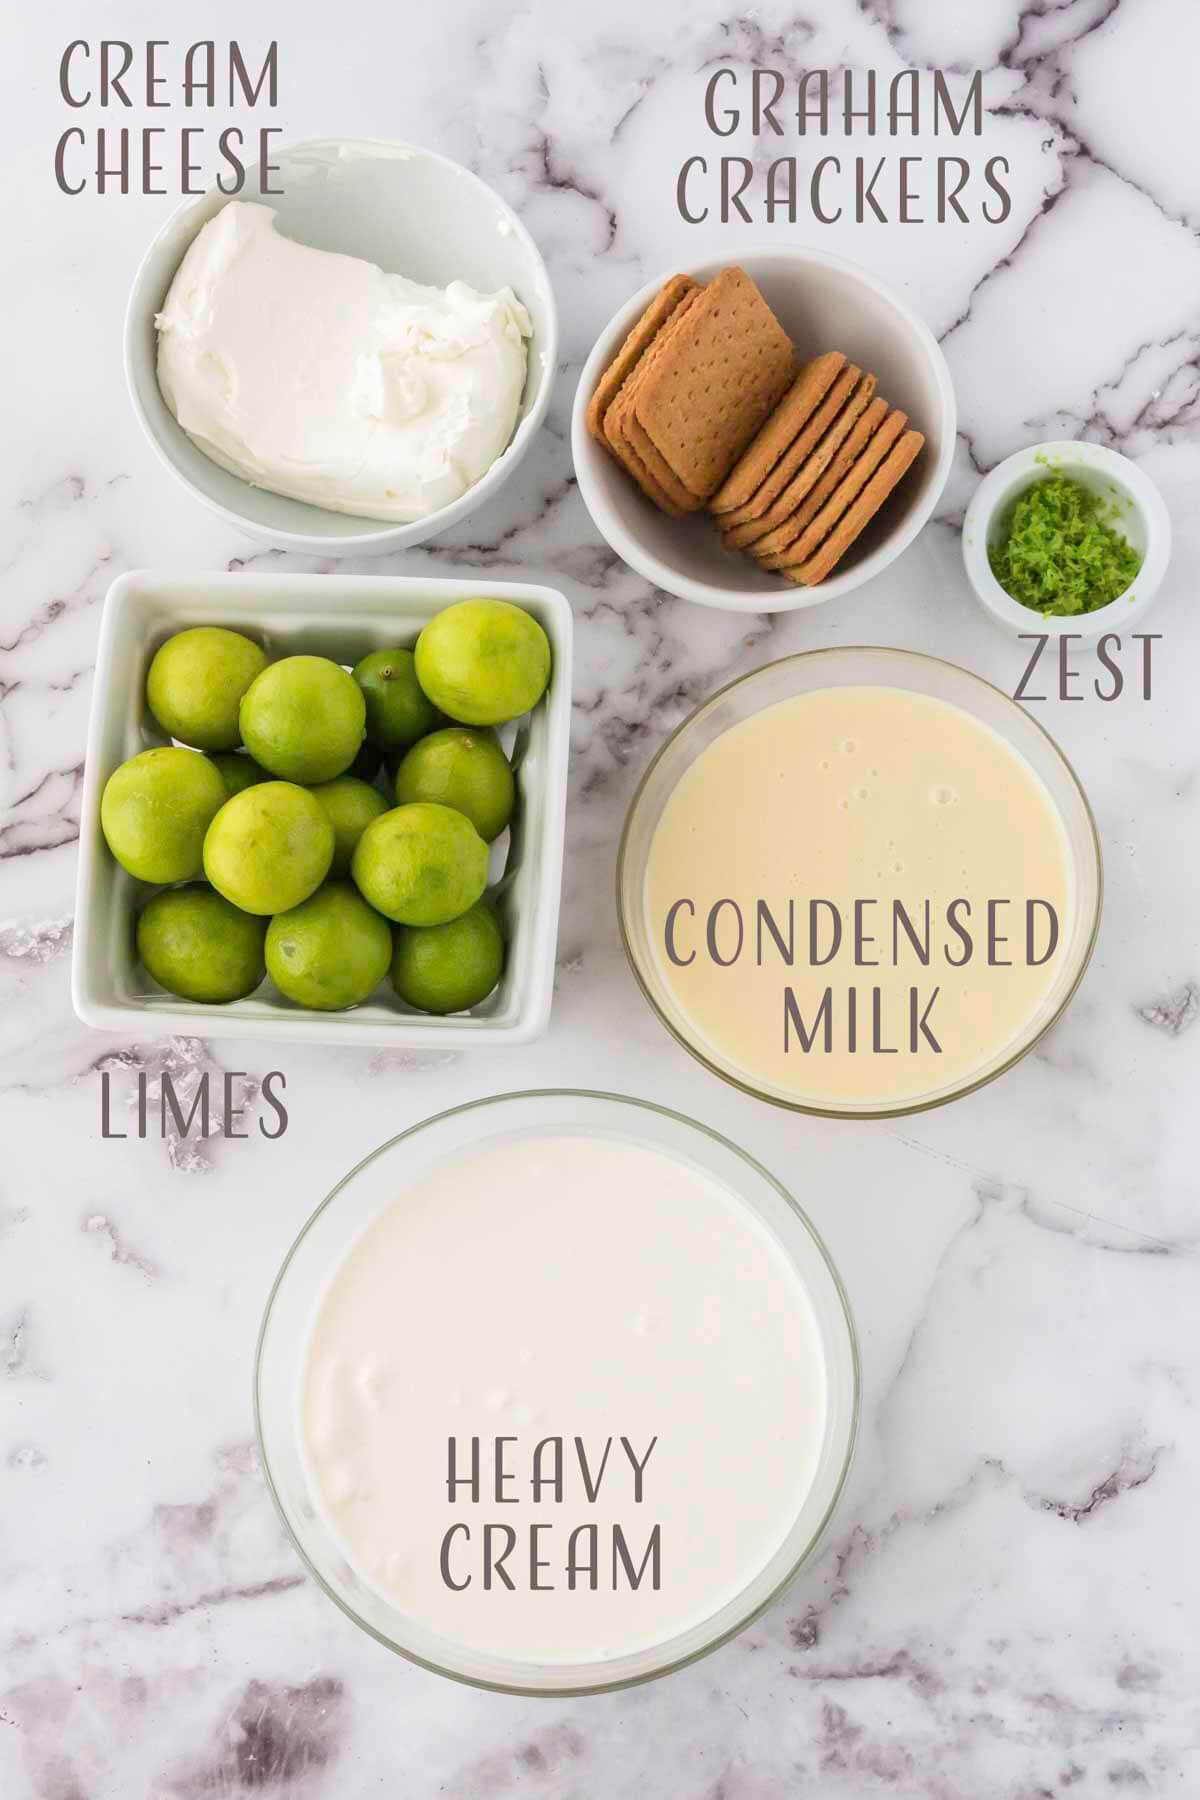
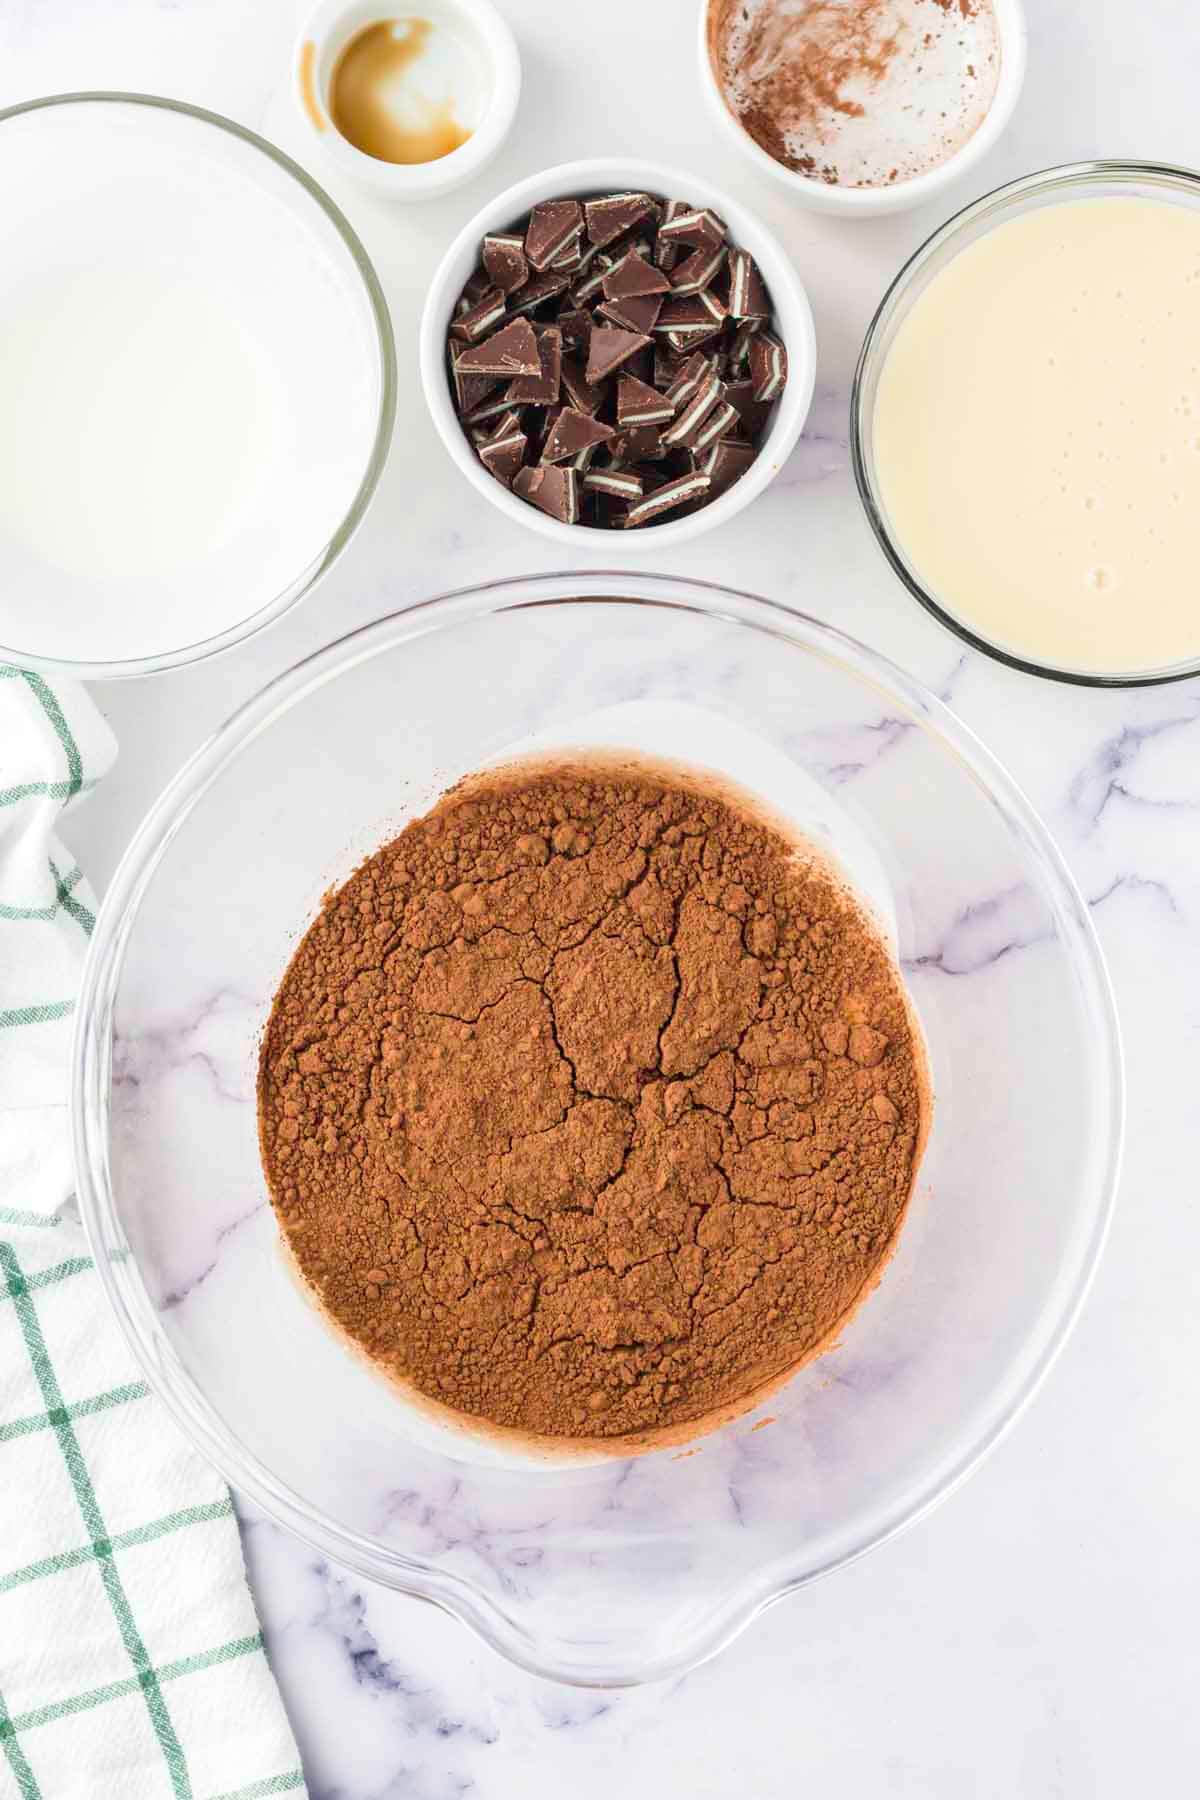
    Ingredients to make the ice cream

    Ingredient Notes

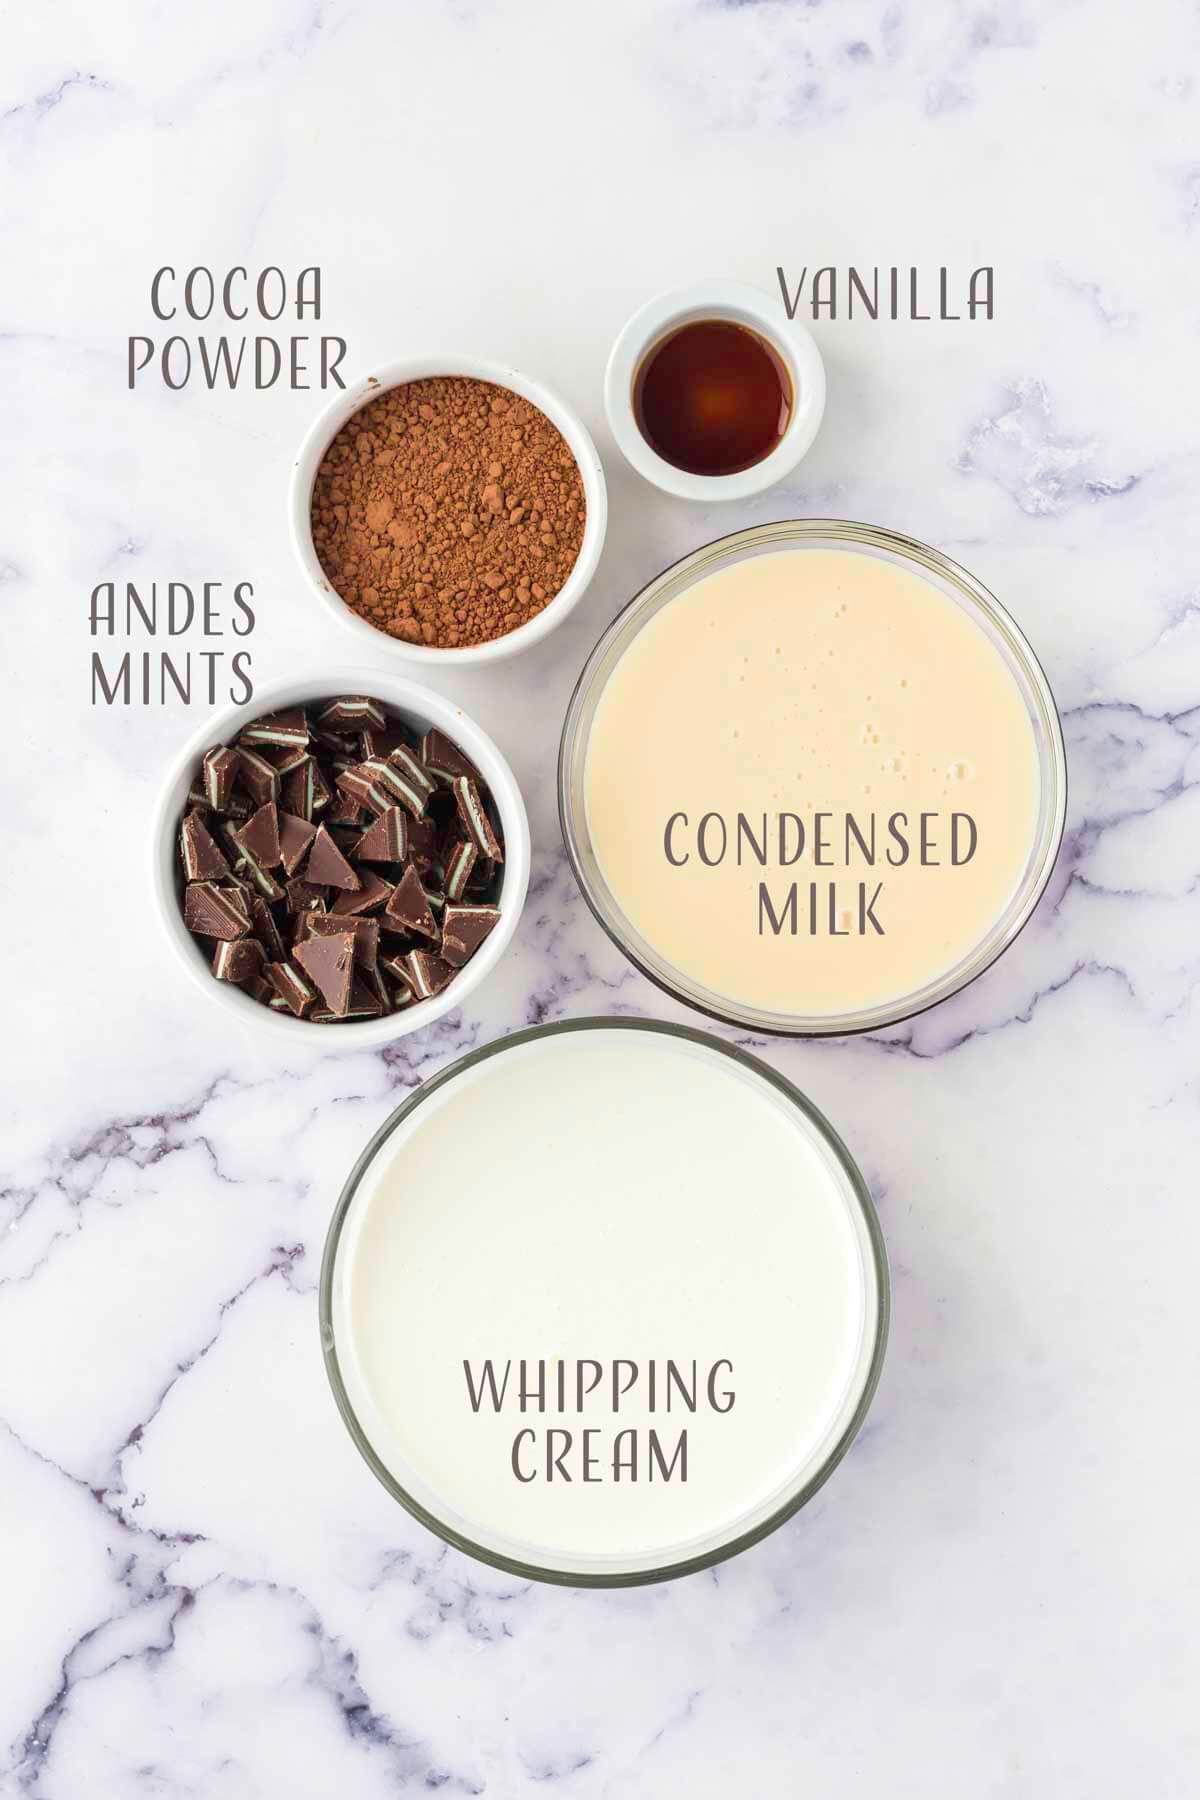
    Heavy Whipping Cream: Gives your no-churn ice cream base a creamy and fluffy texture.

    Sweetened Condensed Milk: Sweetens your ice cream without causing it to feel grainy or freeze too hard.

    Cocoa Powder: Adds an intense chocolate flavor to your no-churn ice cream base.

    Vanilla Extract: The light and sweet notes of this extract help to balance out the strong chocolate and mint flavors.

    Andes Mints: Add just a touch of minty goodness to this homemade ice cream.

    Equipment You’ll Need

    No ice cream maker? No problem! This chocolate mint ice cream is a no-churn ice cream, meaning that you’ll only need a few simple pieces of kitchen equipment to make it. Make sure that you have an electric mixer, a rubber spatula, a 9x5” metal loaf tin, or any other freezer-safe shallow container, and of course, an ice cream scoop.

    How to Make Creamy Ice Cream With A Few Simple Ingredients

    Step one to make the ice cream

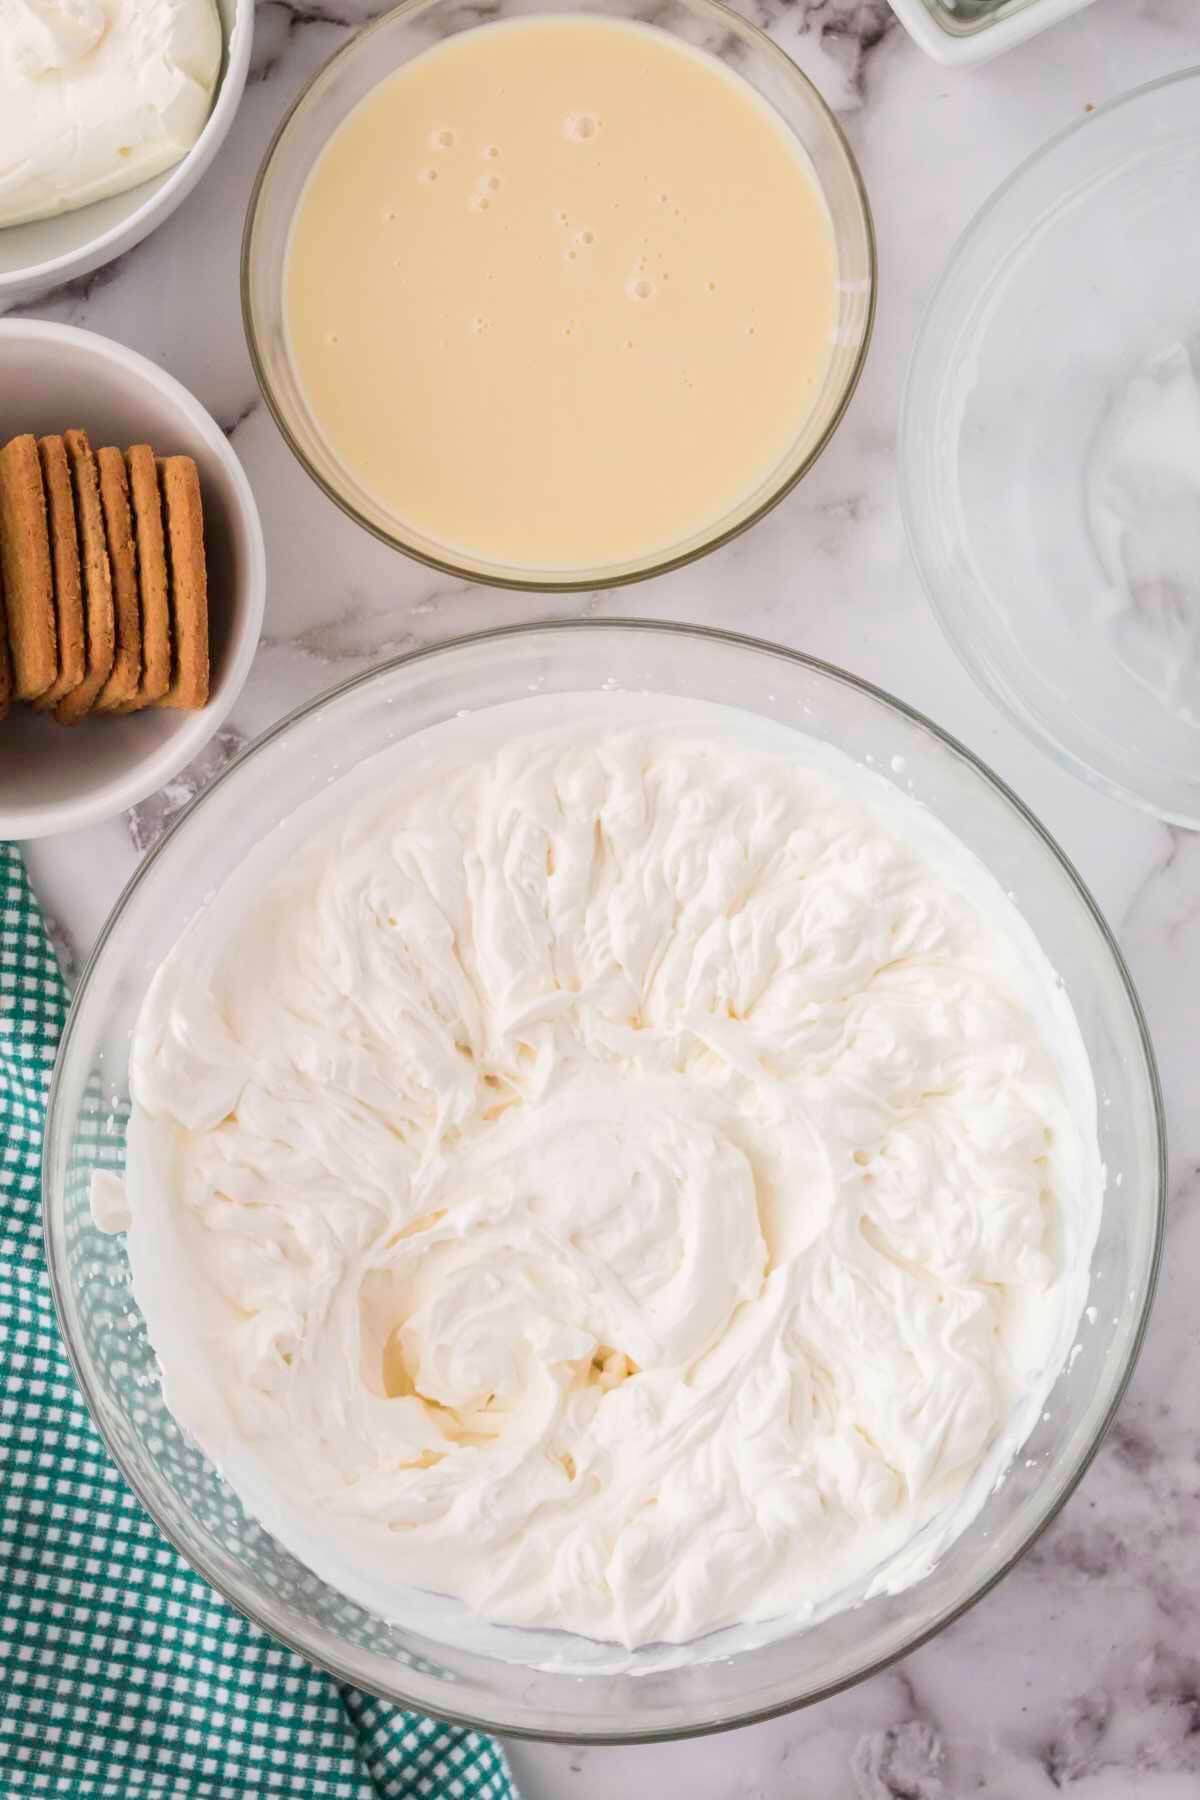
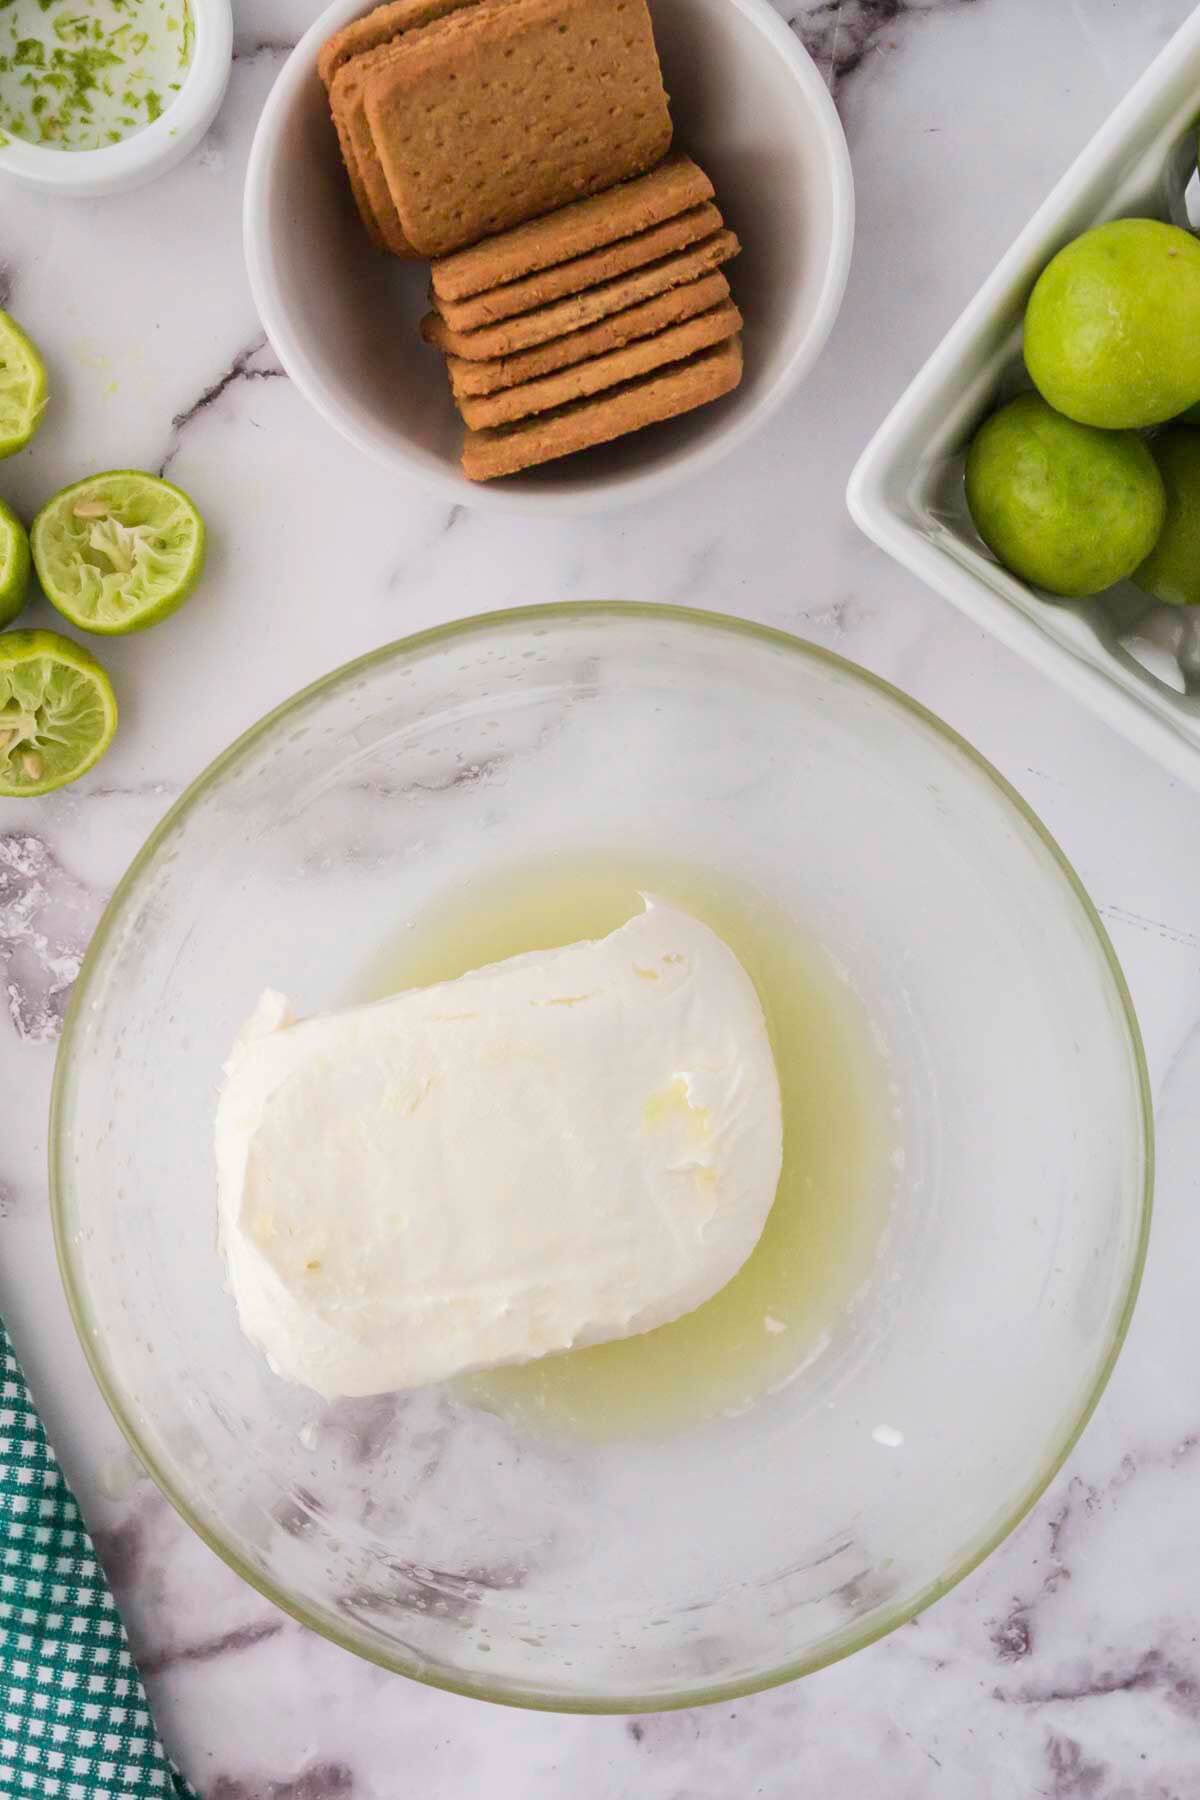
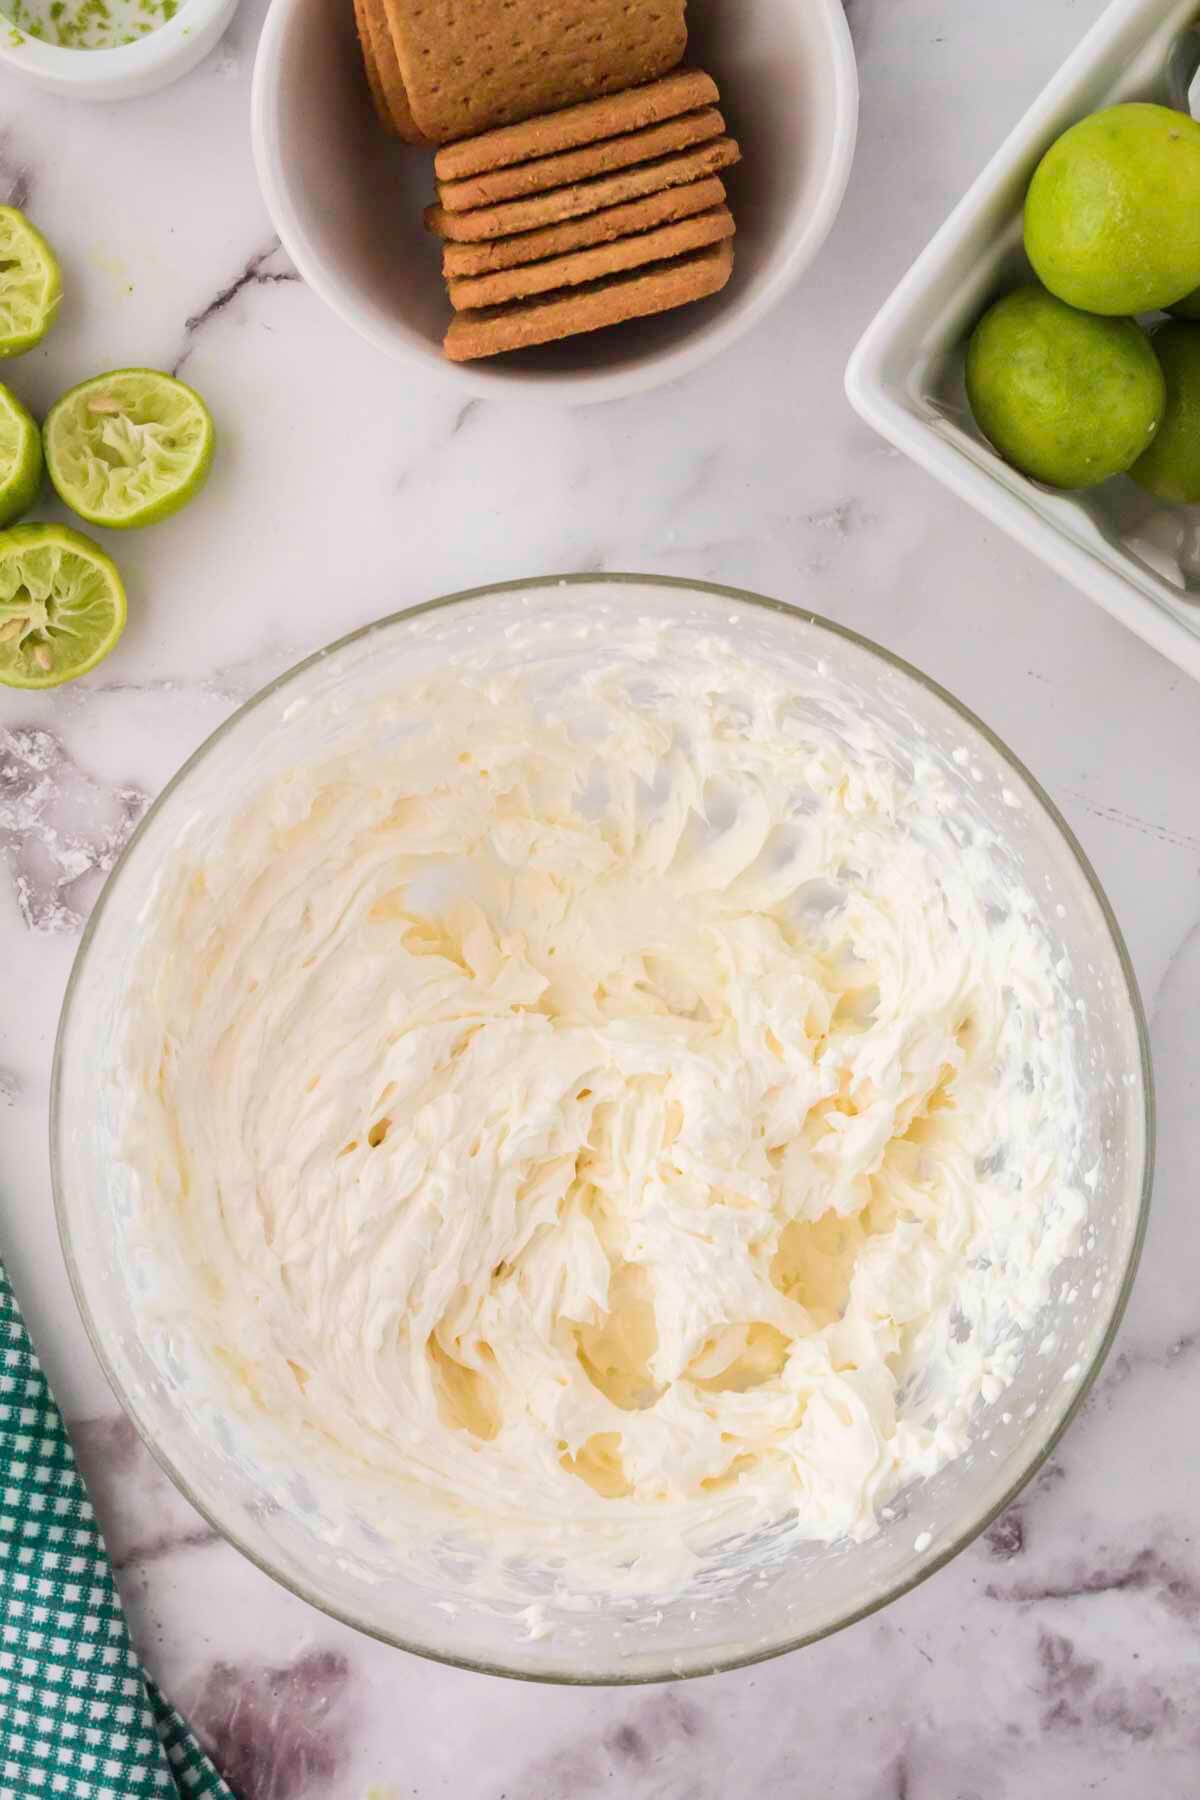
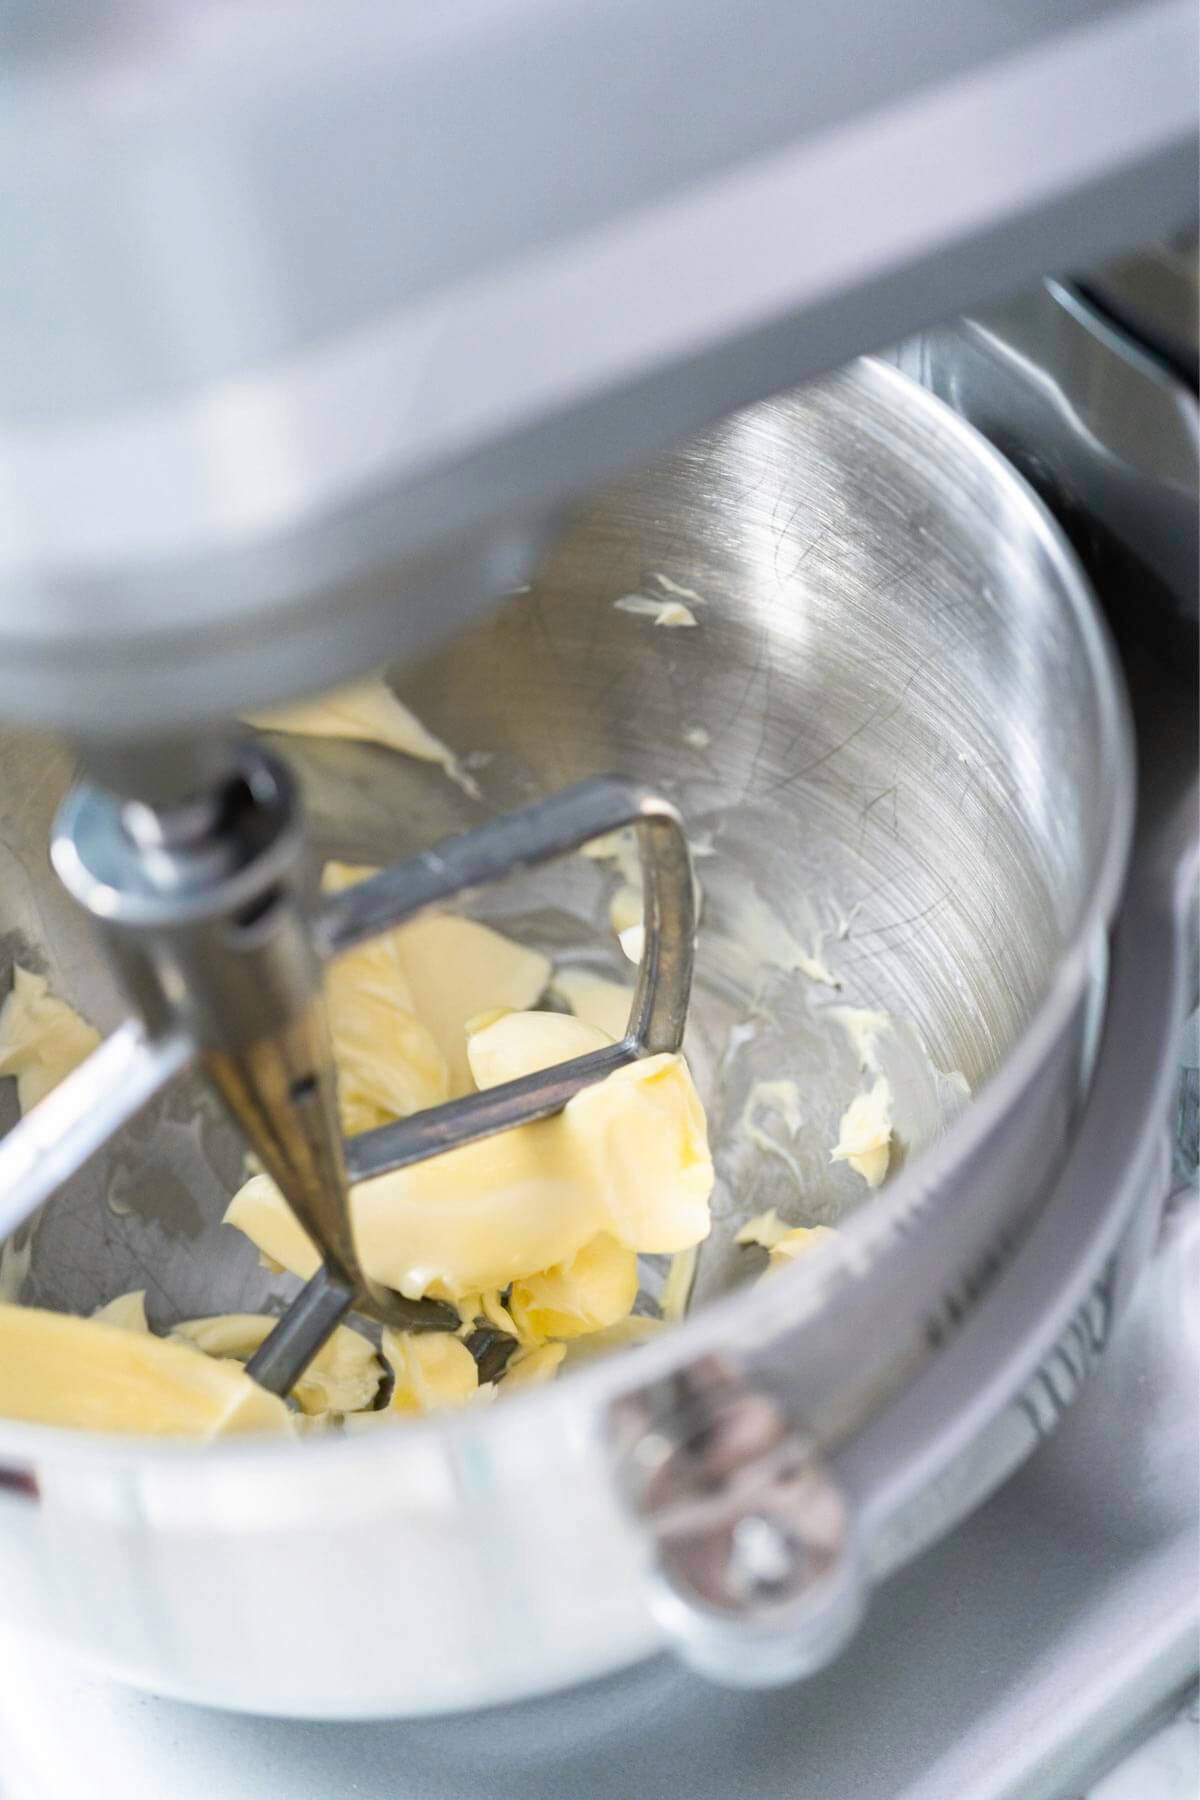
    Step 1. Place the heavy cream and cocoa powder into a large mixing bowl. Use an electric hand mixer to whip the mixture to stiff peaks. You could also use a stand mixer for this.

    Step two to make the ice cream

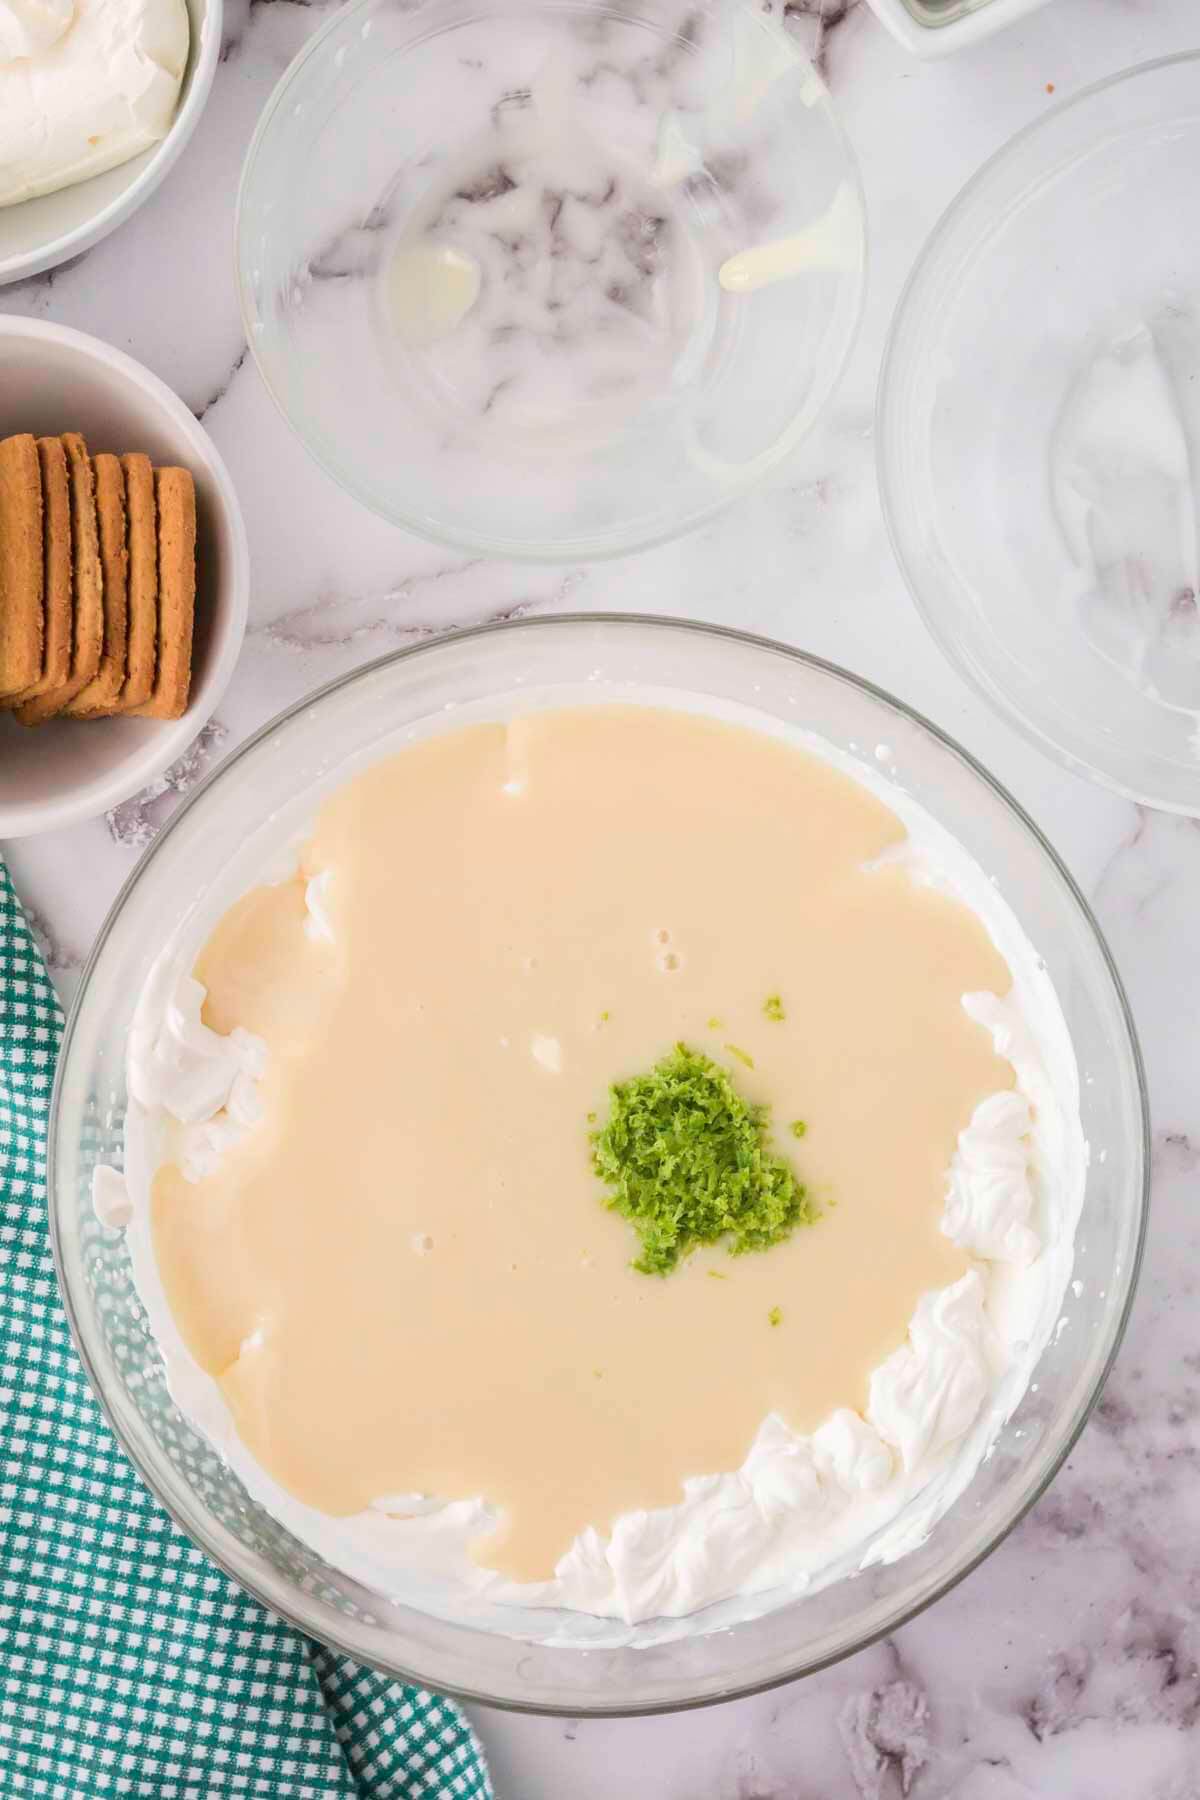
    Step 2. Add the sweetened condensed milk and chopped Andes mints and gently fold everything together.

    Pour ice cream into metal pan and place in freezer

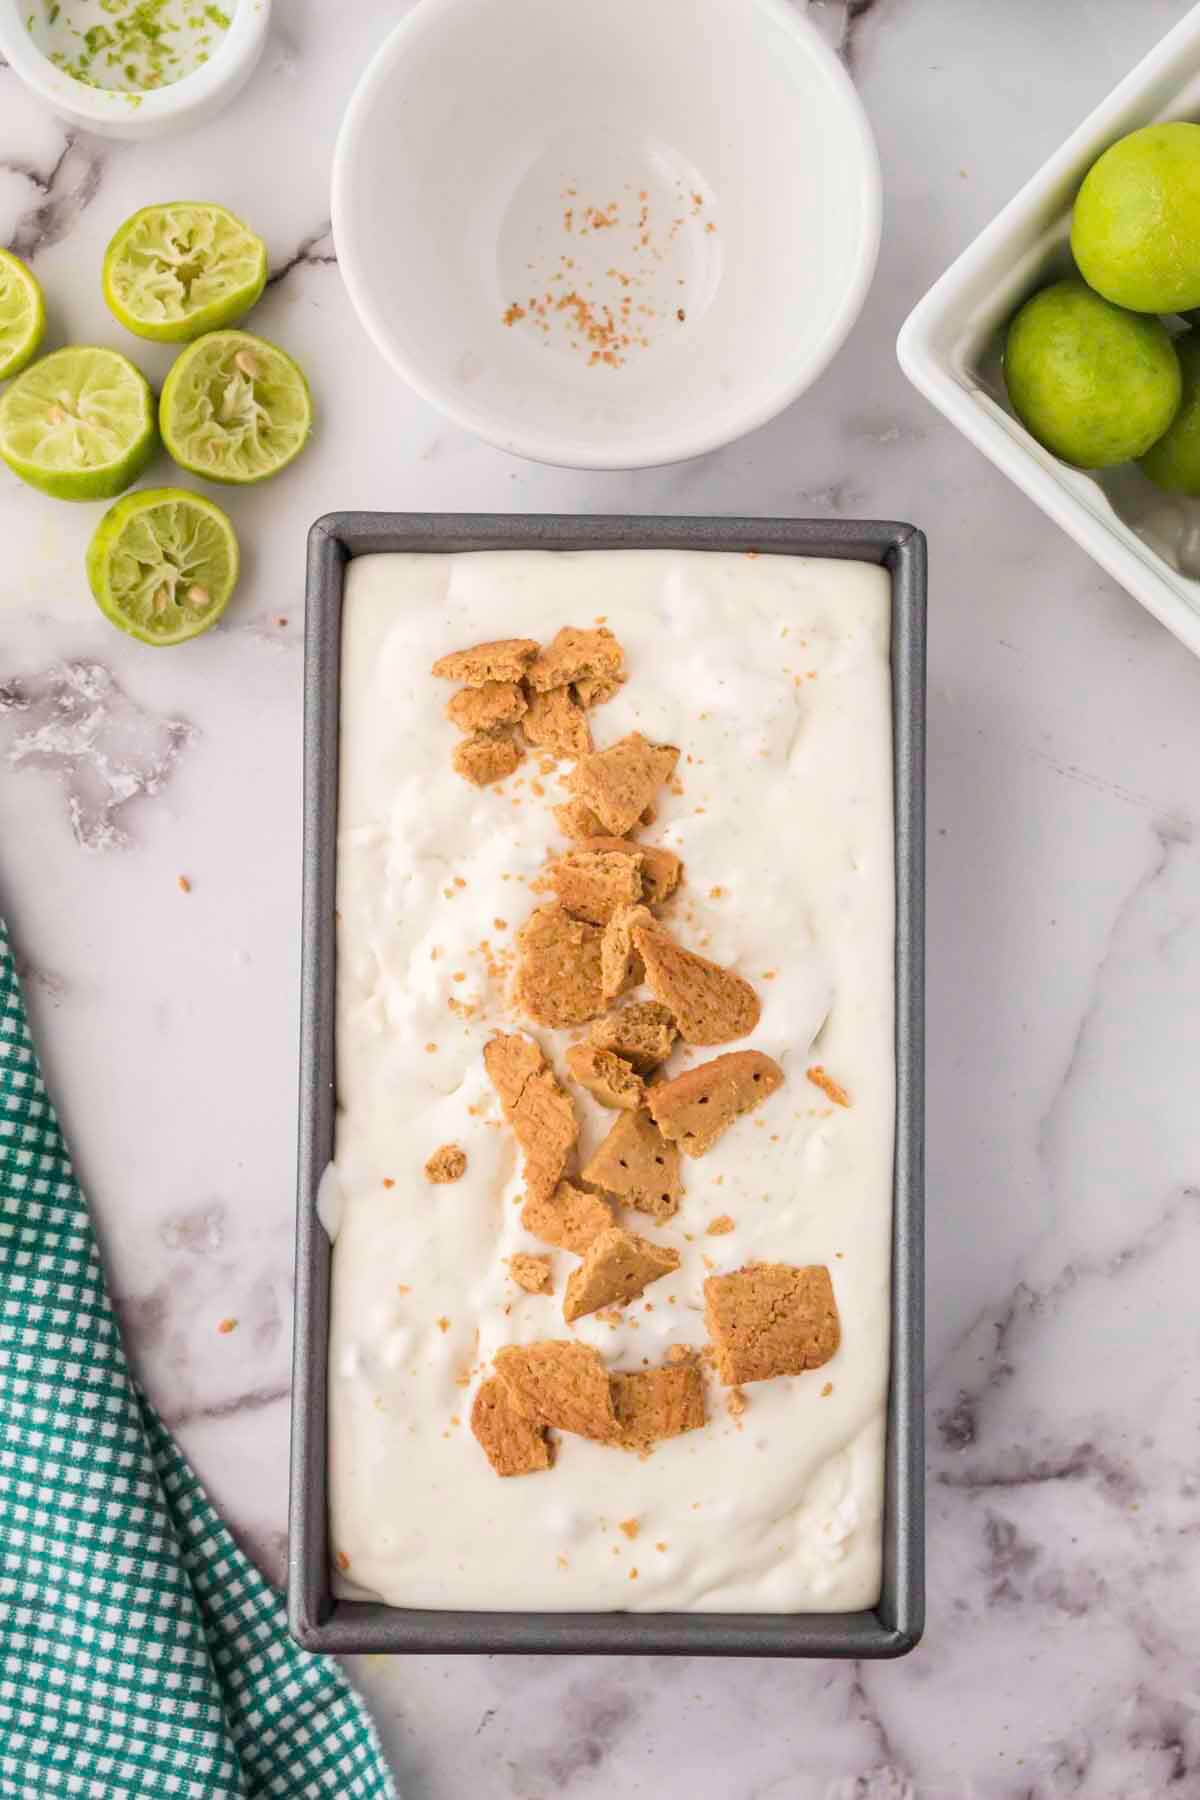
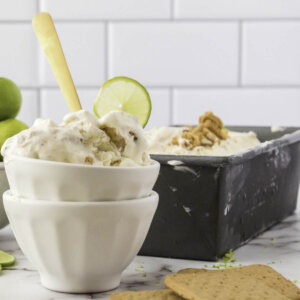
    Step 3. Transfer the mixture to a metal loaf tin and allow it to set in the freezer.

    Step 4. Once the ice cream is frozen solid, it’s ready to be served and enjoyed!

    Frequently Asked Questions

    Is chocolate mint ice cream good?

    If you like peppermint and chocolate, you’ll love this chocolate mint ice cream. The cool and creamy mint pieces cut through the deep and rich chocolate ice cream base. The result is a dessert that’s sweet, creamy, and decadent.

    Are Andes mints peppermint or spearmint flavored?

    Andes mints are actually crème de menthe flavored. Crème de menthe is a green, peppermint-flavored French liqueur. Don’t worry though, these sweet little mint chocolate bites are alcohol-free!

    What is the difference between chocolate mint and mint chocolate chip ice cream?

    Traditional mint chocolate chip ice cream combines a mint ice cream base usually made with fresh mint leaves with chocolate pieces. In this recipe, you’ll switch things up by instead swirling mint candy pieces throughout a chocolate ice cream base.

    What is chocolate mint? Is there any in this recipe?

    Chocolate mint is a variety of mint plants with a subtle chocolate flavor. Although I call this a “chocolate mint ice cream,” you don’t need to buy this special kind of mint to make it! The “chocolate mint” in the title simply refers to the mint candy pieces swirled throughout the chocolate ice cream base.

    Chocolate mint ice cream in cones

    Storage

    To keep things simple, I like to store this ice cream in the same loaf tin that I initially froze it in. Just add a layer or two of plastic wrap to the top, and this ice cream should stay good in the freezer for up to 2 months. I also like to use this airtight container I find on Amazon. They seem to work better in the freezer than a loaf pan. The key to making sure this ice cream doesn’t become freezer burnt is to keep oxygen out of your storage container.

    Expert Tips and Tricks

    • If you can’t find Andes mints, don’t worry! Any soft mint candy will work. Sometimes you can even find mint-flavored mini chocolate chips. I would, however, avoid using hard mint candies.
    • Want a richer, darker chocolate flavor? Try using Dutch process cocoa powder instead of regular cocoa powder.
    • Be sure to whip your cream to stiff peaks. This will keep your chocolate mint pieces from sinking to the bottom of your ice cream.
    • Keep your ice cream from freezing too hard by ensuring you don’t overmix it! Gently fold all the ingredients together until they’re just barely incorporated.
    • If you want to take this ice cream over the top, I'd recommend a hot fudge sauce to drizzle over a scoop. Oh my gosh, the best ice cream for a hot summer day.
    • I also like to shave just a bit of chocolate on top of the ice cream. I use a veggie peeler and just shave some dark chocolate chunks. It's a delicious way to add a bit of extra chocolate to this easy recipe.

    Have You Tried The Recipe?

    So, there you have it. The perfect summer dessert that doesn’t require any special equipment or skills. Just a few simple ingredients and some patience as the ice cream sets. Have you tried this recipe? Let us know how it went in the comments below! And if you’re looking for more delicious (and easy) frozen treats, be sure to check out our other easy ice cream recipes. Enjoy!

    Scoop of chocolate mint ice cream in bowl with ice cream cone

    No Churn Chocolate Mint Ice Cream

    The best ice cream you can make at home is now easier than ever! You can make delicious, rich chocolate treats in just minutes. This recipe is perfect for those who are looking to avoid churning their own dairy products.
    4.75 from 4 votes
    Print Pin Rate
    Course: Dessert, Snack
    Cuisine: American
    Prep Time: 10 minutes minutes
    Freezing Time: 5 hours hours
    Total Time: 5 hours hours 10 minutes minutes
    Servings: 6 Servings
    Calories: 733kcal
    Author: Serena

    Ingredients

    • 2 cups Heavy Whipping Cream
    • ⅓ cup Cocoa Powder
    • 1½ cups Sweetened Condensed Milk
    • 1 teaspoon Vanilla Extract
    • 1 cup Andes Mints

    Instructions

    • In a large bowl, combine the heavy whipping cream and cocoa powder. Use an electric hand mixer to whip the cream until stiff peaks begin to form.
    • Gently fold in the sweetened condensed milk, vanilla, and Andes mint pieces until the mixture is homogenous and the chocolate pieces are evenly distributed throughout the ice cream.
    • Pour the mixture into a 9x5 inch loaf pan and allow the ice cream to chill in the freezer for five hours.
    • Serve and enjoy!
       

    Notes

    After the ice cream has set, store it in the freezer covered with plastic wrap or transfer it to an airtight container.
    This ice cream will last about two months before it develops freezer burn.
    You can use either regular or Dutch process cocoa powder. The Dutch process powder will give the ice cream a bit of a darker, richer flavor.
    Be sure to stop mixing the ice cream as soon as stiff peaks begin to form. If you overmix the ice cream, then it will be harder to scoop and will not be as creamy.
    Recipe Source: SerenaLissy.com
    This website provides approximate nutrition information for convenience and as a courtesy only. Nutrition data is gathered primarily from the USDA Food Composition Database via Spoonacular API, whenever available, or otherwise other online calculators. While this information can be helpful in estimating the nutritional information of a recipe, it is by no means accurate or official and is not evaluated by the Food and Drug Administration.
     
    All images and content are copyright protected. Do not use our images without prior permission.

    Nutrition

    Serving: 1Serving | Calories: 733kcal | Carbohydrates: 69g | Protein: 11g | Fat: 49g | Saturated Fat: 34g | Polyunsaturated Fat: 2g | Monounsaturated Fat: 9g | Cholesterol: 116mg | Sodium: 140mg | Potassium: 433mg | Fiber: 3g | Sugar: 65g | Vitamin A: 1370IU | Vitamin C: 2mg | Calcium: 280mg | Iron: 3mg
    Tried this Recipe? Pin it Today!Mention @SerenaLissy or tag #serenalissy!

    Subscribe to my free newsletter to get new baking tips in your inbox monthly. Find me sharing new recipes and tips on Pinterest, Instagram, or Facebook.

    As an Amazon Associate and member of other affiliate programs, I earn from qualifying purchases. What that means is if you click on one of our affiliate links, they may toss a few pennies our way for a commission.

    No Churn Key Lime Pie Ice Cream

    August 26, 2022

    Bowl of key lime pie ice cream with a spoon

    Key lime pie no-churn ice cream is everything a summer treat should be. It’s cool, creamy, tangy, and of course, sweet! Made with fresh key limes, graham crackers, and a cream cheese swirl, this dessert is truly key lime pie in ice cream form.

    When it comes to summer desserts, it doesn’t get easier or more delicious than this no-churn key lime pie ice cream! Made with just five simple basic ingredients, this one-bowl dessert is a total crowd-pleaser! Heavy whipping cream, sweetened condensed milk, key limes, cream cheese, and graham crackers combine to create a treat so tangy and sweet, that no one will be able to resist it!

    Two waffle cones with key lime pie ice cream scoops

    Want to know what the best part about this homemade creamy ice cream recipe is? You don’t need any special equipment to make it! Just grab your trusty electric mixer, and in a matter of minutes, you’ll have a decadent key lime pie ice cream that’s ready to be frozen. Plus, this simple recipe is a fantastic way to use up any leftover limes you may have lying around. Trust me, your friends and family will be amazed at this cool, creamy spin on a classic summer pie!

    Ingredients for the Key Lime Pie Ice Cream

    Ingredient Notes

    ·      Key Limes—The zest and juice of these Florida limes will add the perfect amount of fragrant tartness. The zest really amplifies the natural flavor of the lime. I always prefer to use real key lime juice instead of bottled juice.

    ·      Graham Crackers—Mimic the classic sweet and cinnamony flavors of a crunchy graham cracker crust.

    ·      Cream Cheese—Adds richness and creaminess. Can be easily omitted or swapped out for your favorite dairy-free alternative.

    ·      Heavy Whipping Cream—Acts as the smooth and creamy base for this no churn ice cream.

    ·      Sweetened Condensed Milk—Adds the perfect amount of sweetness to this tart and tangy dessert.

    Ice cream base in a pan and ready for the freezer

    What is No Churn Method Ice Cream?

    The no-churn ice cream method is a quick and easy way to make all your favorite ice cream flavors at home! Unlike traditional ice cream (which is made by cooking and churning a custard base), no-churn ice cream can be made with just two simple ingredients and an electric mixer.

    All you’ll need to get started is some heavy whipping cream, a can of sweetened condensed milk, and a hand or stand mixer! Then, in a matter of minutes, you’ll have a rich and creamy homemade ice cream base that can be customized with your favorite add-ins and flavors.

    Equipment You’ll Need

    Don’t stress about investing in a home ice cream machine! Instead, all you’ll need to create this rich and creamy key lime pie ice cream is a hand mixer, a large mixing bowl, a rubber spatula, a metal loaf pan, and some measuring cups and spoons.

    How to Make Key Lime Ice Cream

    Step 1. Whip the heavy cream to stiff peaks in a large mixing bowl.

    Step One whip heavy cream

    Step 2. Add the sweetened condensed milk and lime zest and use a rubber spatula to fold everything together. Set aside.

    Add Condensed Milk and lime zest

    Step 3. In a medium bowl, beat together the cream cheese and key lime juice until smooth.

    Whip cream cheese and key lime juice in a bowl

    Step 4. Gently swirl the cream cheese mixture and crushed graham crackers throughout the key lime base.

    Swirl cream cheese mixture through the base in a bowl

    Step 5. Transfer the no-churn key lime pie ice cream to a metal loaf tin, cover it, and allow it to set completely in the freezer.

    Ice cream base in a metal tin for the freezer

    Step 6. Scoop, serve, and enjoy this delicious summer ice cream flavor!

    Finished Ice Cream in a metal tin

    Frequently Asked Questions

    What is the difference between key limes and regular limes?

    Key limes, also known as Florida limes or Mexican limes, are smaller than regular limes and lighter in color. Key limes are slightly less tart and have a more concentrated flavor than traditional limes. In a pinch, however, you can easily use the zest and juice of regular limes in this recipe!

    What is in the filling of a key lime pie?

    Traditional key lime pies boast a tart and tangy filling made of sweetened condensed milk, eggs, and key lime juice and zest. This key lime ice cream mimics these classic flavors by including key lime juice, key lime zest, and sweetened condensed milk. The cream cheese also helps to imitate the richness and tanginess of a key lime pie.

    Can key lime pie, no-churn ice cream be made gluten-free?

    Absolutely! Simply swap regular graham crackers for a gluten-free variety or omit them entirely.

    How to Store and Serve Key Lime Pie Ice Cream

    No-churn key lime pie ice cream can be stored in an airtight container in the freezer. This sweet treat should stay good for up to 3 months if stored properly.

    I find that this key lime pie ice cream is best served in a waffle cone topped with freshly whipped cream on a hot summer day. It is also tasty when scooped into a bowl and garnished with additional lime zest or graham cracker crumbs.

    Looking For More Ice Cream Recipes?

    Looking for more ice cream creations? Have a love of lemons? Then this lemon curd ice cream is your go-to. Have some extra apples from your harvest? Then this apple ice cream is for you. It's hard not to love a great scoop of ice cream once in a while.

    Ice Cream scooped in a bowl with graham crackers

    Expert Tips and Tricks

    ·      This ice cream freezes very hard, so you’ll want to ensure it thaws on the counter for at least 15 minutes before scooping and serving.

    ·      Want to give this ice cream a pop of color? Try adding a few drops of green food coloring to the whipped cream and sweetened condensed milk mixture.

    ·      For a tropical, dairy-free twist on this dessert, try making your ice cream base with whipped coconut cream and coconut sweetened condensed milk!

    Bowl of key lime pie ice cream with a spoon

    No Churn Key Lime Pie Ice Cream

    Key lime pie ice cream has never been easier than this. A simple no-churn recipe!
    5 from 2 votes
    Print Pin Rate
    Course: Dessert, Snack
    Cuisine: American
    Prep Time: 20 minutes minutes
    Freeze time: 5 hours hours
    Total Time: 5 hours hours 20 minutes minutes
    Servings: 8 Servings
    Calories: 516kcal
    Author: Serena

    Ingredients

    • 2 cups Heavy Cream
    • 1½ cups Sweetened Condensed Milk
    • 2 Limes Zest of limes
    • 5 Limes Juice of limes
    • 8 Ounces Cream Cheese - Softened
    • 8 Graham Cracker Squares

    Instructions

    • In a large mixing bowl, whip the cream to stiff peaks.
    • Fold in the sweetened condensed milk and lime zest. Set aside.
    • Use a hand mixer to whip together the lime juice and cream cheese.
    • Swirl the cream cheese mixture throughout the ice cream base.
    • Crush the graham crackers into coarse crumbs and swirl these throughout the mixture.
    • Transfer the ice cream to a metal loaf tin and allow it to set in the freezer for 4-6 hours.
    • Scoop, serve, and enjoy!

    Notes

    • Because of the cream cheese swirl, this ice cream tends to freeze very hard. Be sure to let it sit on the counter for 15-20 minutes before scooping and serving.
    • You can easily swap out the key limes for the zest of 1 and the juice of 3 regular limes.
    • I used store-bought graham crackers in this recipe, but you could use homemade or gluten-free instead!
    • Give this ice cream a fun pop of color by adding a bit of green food coloring.
     
    Recipe Source: SerenaLissy.com
    This website provides approximate nutrition information for convenience and as a courtesy only. Nutrition data is gathered primarily from the USDA Food Composition Database via Spoonacular API, whenever available, or otherwise other online calculators. While this information can be helpful in estimating the nutritional information of a recipe, it is by no means accurate or official and is not evaluated by the Food and Drug Administration.
     
    All images and content are copyright protected. Do not use our images without prior permission.
     

    Nutrition

    Serving: 1Serving | Calories: 516kcal | Carbohydrates: 40g | Protein: 8g | Fat: 37g | Saturated Fat: 23g | Polyunsaturated Fat: 2g | Monounsaturated Fat: 10g | Cholesterol: 115mg | Sodium: 224mg | Potassium: 320mg | Fiber: 0.2g | Sugar: 36g | Vitamin A: 1409IU | Vitamin C: 2mg | Calcium: 235mg | Iron: 0.5mg
    Tried this Recipe? Pin it Today!Mention @SerenaLissy or tag #serenalissy!

    Subscribe to my free newsletter to get new baking tips in your inbox monthly. Find me sharing new recipes and tips on Pinterest, Instagram, or Facebook.

    As an Amazon Associate and member of other affiliate programs, I earn from qualifying purchases. What that means is if you click on one of our affiliate links, they may toss a few pennies our way for a commission.

    Lemon Cupcakes

    June 13, 2022

    Lemon Cupcakes

    There's nothing like the tart, sweet lemon taste to brighten your day. These delicious lemon cupcakes are perfect for a quick snack or an easy dessert. They're also perfect for any occasion, from a birthday party to a relaxing afternoon tea. Best of all, they're really easy to make - you need a few simple ingredients and a little imagination! So what are you waiting for? Try this fantastic lemon cupcake recipe today!

    Lemon Cupcakes

    My lemon curd recipe inspired this recipe. It's lemon season just about everywhere, and I'm definitely team lemon. I can't get enough of that delicious fresh lemon flavor. I went with a modified recipe for CIA's lemon cake for the base recipe. These cupcakes are dense and full of flavor. And the lemon curd takes it over the top. But if you don't want to add the lemon curd, these homemade lemon cupcakes are just as delicious without the homemade lemon curd. Be sure to use fresh lemon juice, and don't use any bottled lemon juice for the best tart citrus flavor.

    Lemon Cupcakes Ingredients

    Ingredients

    • Bread Flour
    • Baking Soda & Salt
    • Room temperature Butter - Unsalted
    • Sugar
    • Eggs
    • Lemon Zest & Juice
    • Buttermilk
    Lemon Cupcakes Process Collage

    How to Make Lemon Cupcakes

    • Preheat the oven to 350°F and line a 24-cup cupcake or muffin pan with paper liners. This recipe makes about 28 cupcakes, so if you only have one 12-cup cupcake pan, it's ok to reuse. Make sure to let the pan cool before making the next batch.
    • Sift the flour, baking soda, and salt in a large mixing bowl.
    • In the bowl of a stand mixer, cream the softened butter and sugar with the paddle attachment. Start at low speed and increase to medium speed. Be sure to scrape down the sides of the bowl. Cream until mixture is smooth and light in color. About 5 minutes. You could also use a hand mixer for this if that is the equipment you have.
    • In a separate bowl, whisk the eggs and lemon zest. Next, add the wet ingredients in three additions to the creamed sugar. Be sure to incorporate after each addition fully and scrape down the sides of the bowl when needed.
    • Add the sifted flour mixture alternately with the buttermilk in three additions. Mix on low speed until just incorporated. Don't overmix. Add the lemon juice and blend. You may need to use an offset spatula to get everything mixed in from the bottom of the bowl.
    • Use a cookie scoop or an ice cream scoop and fill the cupcake liners to about ¾ full with the cupcake batter. Bake until the cupcakes spring back when lightly touched and a toothpick inserted in the center comes out clean. About 20 minutes.
    • Cool the cupcakes in the pan for a few minutes, brush the top of each cupcake with the lemon glaze, then remove and place on a wire rack to cool completely.
    Lemon Cupcake

    Substitutions and Variations

    I used buttermilk for this recipe. If you don't have buttermilk, I'd recommend powdered buttermilk. We use this buttermilk substitute all the time. It's so easy to keep in the pantry, and since we don't use buttermilk all the time, we don't waste a few cups of it since we don't need an entire quart of buttermilk.

    For your lemons, you could use either Meyer or Eureka lemons. I used eureka lemons for the cupcake but Meyer lemons for the curd. Meyer lemons tend to be a bit sweeter and less acidic than eureka lemons.

    For the frosting, I whipped up a basic meringue which is delicious and doesn't add a lot of sweetness to the cupcake giving me that perfect balance of sweet and tart. You could easily use a lemon buttercream or a lemon cream cheese frosting if you prefer an even more lemony flavor.

    Inside View of the lemon cupcake

    How To Fill Cupcakes With Lemon Curd

    We used an apple corer to remove some of the cupcake. I then piped the lemon curd into the opening with a pastry bag. Next, cut off a piece of the cupcake you initially removed and top the lemon curd with a portion of the cake. Frost as normal.

    How To Store The Lemon Cupcakes

    These cupcakes can be made ahead and stored. If you plan to use it within a few days, you can make the cupcakes and store them in an airtight container at room temperature. Pipe with lemon curd and frost when you are ready to enjoy.

    Unfrosted cupcakes can be frozen in the freezer for up to three months, either with lemon curd or without. Then, thaw overnight in the refrigerator and decorate when ready to enjoy.

    Whether you're Team Lemon or not, there's no denying that these lemon cupcakes are pretty stinkin' delicious. And if you're looking for an easy dessert to make (that will also impress your guests), look no further! I'm confident that this will become one of your favorite desserts.

    Other Lemon Recipes

    • Lemon Curd Ice Cream
    • Lemon Cheesecake
    • Blueberry Muffins with Lemon Curd Butter
    Lemon Cupcakes

    Lemon Cupcakes

    There's nothing like the tart, sweet taste of lemon to brighten up your day. These delicious lemon cupcakes are perfect for a quick snack or an easy dessert.
    5 from 5 votes
    Print Pin Rate
    Course: Dessert, Snack
    Cuisine: American
    Prep Time: 25 minutes minutes
    Cook Time: 20 minutes minutes
    Total Time: 45 minutes minutes
    Servings: 28 Cupcakes
    Calories: 199kcal
    Author: Serena

    Ingredients

    Lemon Cupcake

    • 1 lb 4 oz Bread Flour (575 grams)
    • ½ teaspoon Baking Soda (3.33 grams)
    • ½ teaspoon Salt (4 grams)
    • 10.5 ounces Unsalted Butter, softened (2 sticks plus 5 tbsp) (298 grams)
    • 18 ounces Sugar (510 grams)
    • 8 ounces Eggs (About 5 eggs) (226.6 grams)
    • Lemon Zest (6 lemons zested) (10 grams)
    • 1 ⅓ cup Buttermilk (303 grams)
    • ¼ cup Lemon Juice (57 grams)

    Lemon Glaze

    • ⅓ cup Lemon Juice (80 mL)
    • ¾ cup Sugar (149 grams)

    Meringue

    • 3 Egg Whites (106 grams)
    • ¼ teaspoon Cream of Tartar
    • ⅛ teaspoon Salt
    • 6 tablespoon Sugar (71 grams)

    Instructions

    Lemon Cupcake

    • Preheat the oven to 350°F and line a 24-cup cupcake pan with paper liners.
    • In a large mixing bowl, sift together the flour, baking soda, and salt.
    • In the bowl of a stand mixer, cream the butter and sugar with the paddle attachment. Start at low speed and increase to medium speed. Be sure to scrape down the sides of the bowl. Cream until mixture is smooth and light in color. About 5 minutes.
    • In a separate small bowl, blend the eggs and lemon zest. Add this in three additions to the creamed sugar. Be sure to fully incorporate after each addition and scrape down the sides of the bowl when needed.
    • Add the sifted dry ingredients alternately with the buttermilk in three additions. Mix on low speed until just incorporated. Don't overmix. Add the lemon juice and blend.
    • Use a cookie scoop and fill the cupcake liners to about ¾ full. Bake until the cupcakes spring back when lightly touched and a toothpick inserted in the center comes out clean. About 20 minutes.
    • Cool the cupcakes in the pan for a few minutes, brush the top of each cupcake with the lemon glaze, then remove and place on a wire rack to cool completely.

    Lemon Glaze

    • Place lemon juice and sugar in a small saucepan and heat on low until the sugar is dissolved.

    Lemon Curd

    • At this time, if you are filling with lemon curd, core each cooled cupcake with an apple corer. Leaving a small well in the center of each cupcake. Using a piping bag, fill to the brim with cooled lemon curd. Our lemon curd recipe is a great addition to this recipe, or you can use store bought.

    Meringue

    • Whip the egg whites and cream of tartar until soft peaks form. Add the salt.
    • Gradually add the sugar, increase the whipping speed, and continue to whip until the mixture is light and fluffy and stiff peaks form.
    • Using a pastry bag with a large round tip, pipe the meringue onto each cupcake, then toast with a cook's torch, or very carefully broil until golden brown.

    Notes

    Recipe Source: SerenaLissy.com 
    This website provides approximate nutrition information for convenience and as a courtesy only. Nutrition data is gathered primarily from the USDA Food Composition Database via Spoonacular API, whenever available, or otherwise other online calculators. While this information can be helpful in estimating the nutritional information of a recipe, it is by no means accurate or official and is not evaluated by the Food and Drug Administration.
    All images and content are copyright protected. Do not use our images without prior permission.

    Nutrition

    Serving: 1Cupcake | Calories: 199kcal | Carbohydrates: 27g | Protein: 2g | Fat: 10g | Saturated Fat: 6g | Polyunsaturated Fat: 1g | Monounsaturated Fat: 3g | Trans Fat: 1g | Cholesterol: 54mg | Sodium: 102mg | Potassium: 45mg | Fiber: 1g | Sugar: 27g | Vitamin A: 329IU | Vitamin C: 2mg | Calcium: 21mg | Iron: 1mg
    Tried this Recipe? Pin it Today!Mention @SerenaLissy or tag #serenalissy!

    Looking For More Recipes & Baking Tips

    Subscribe to my free newsletter to get new baking tips in your inbox monthly. Find me sharing new recipes and tips on Pinterest, Instagram, or Facebook.

    As an Amazon Associate and member of other affiliate programs, I earn from qualifying purchases. What that means is if you click on one of our affiliate links, they may toss a few pennies our way for a commission.

    Sliced lemon cupcake

    Easy Mango Bread

    June 1, 2022

    Slices of Mango Bread on Plate

    The best kind of bread is the quick and easy kind. This delicious Mango Bread has diced fresh sweet mangos and almonds with lime juice and zest mixed in! There's no need to knead or wait for your dough before baking because this easy mango bread only takes minutes from start to finish (less if you use a stand mixer). So you will be able to enjoy fresh homemade quick bread every time without any hassle at all.

    Mango Bread slices on a plate
    [feast_advanced_jump_to]

    It's mango season, and I couldn't resist picking up a few mangos. This year, we came back from Hawaii with a love for mango bread, so I decided to whip one up now that we are back home.

    Most of the ones on the islands use mango puree, but I love mango slices, so I decided to go with chopped mangos instead of mango purée. It's also a great way to use up any remaining ripe mangoes you may have.

    Ingredients

    Ingredients For Mango Bread

    All Purpose Flour

    Baking Soda & Salt

    Lime Zest & Juice

    White Sugar & Light Brown Sugar

    Egg

    Buttermilk

    Canola Oil

    Honey

    Almond Extract

    Large Fresh Mango cut into about ½" mango chunks

    Sliced Almonds

    Substitutions

    If you don't have almond extract, you could substitute it with vanilla extract.

    If mango bread isn't your thing, we have a great chocolate banana bread that is just as easy.

    Loaf of Mango  Bread

    Instructions To Make Mango Loaf Bread

    • Preheat the oven to 350°F. Butter a 9 x 5 inch loaf pan (bread pan) or use cooking spray.
    • Sift together flour, baking soda, and salt in a large mixing bowl. Add sugars and mix.
    • Whisk the egg with buttermilk, oil, honey, almond extract, lime juice, and lime zest in a medium bowl.
    • Pour the wet mixture into the dry ingredients and mix until just combined. You can use a stand mixer, hand mixer, or stir by hand with a spatula in a large bowl. Be sure not to overmix.
    • Fold in the chopped mangos and almonds.
    • Pour the batter into the prepared loaf pan.
    • Bake the loaf for 50-60 minutes until a toothpick inserted into the center of the bread comes out clean. Let cool for 10 minutes in the pan, then remove the bread from the pan and cool completely on a wire rack.
    Mango Bread Process Collage
    Mango Bread Slice

    Storage Of The Mango Bread

    This bread has about a 5-day shelf life if you leave it on the counter once cooked. Be sure to keep it in an airtight container. You could also keep this in the refrigerator to get a couple of more days of life from it.

    Mango bread freezes well. You can wrap it with plastic wrap and then cover it with foil or place it in a ziplock freezer resealable bag. Keep frozen for up to three months. When ready to enjoy, remove it from the oven and let it sit on the counter until thawed and ready to eat.

    Related Bread Recipes

    • Slices of Mango Bread on Plate
      Easy Mango Bread
    • Chocolate Rum Banana Bread on Plate
      Chocolate Rum Banana Bread
    • Pull Apart Pumpkin Loaf on Cutting Board
      Pumpkin Spice Pull Apart Bread
    • Pumpkin Bread Cake Balls
      Pumpkin Bread Cake Balls

    Love this recipe? Please leave a 5-star 🌟🌟🌟🌟🌟rating in the recipe card below & if you REALLY like this recipe, please say so in the comments below. Thank you!

    Slices of Mango Bread on Plate

    Mango Bread

    A delicious, easy-to-follow mango bread recipe, made with simple ingredients and perfect for breakfast, brunch or a snack.
    5 from 14 votes
    Print Pin Rate
    Course: Breakfast, Dessert, Snack
    Cuisine: American
    Prep Time: 15 minutes minutes
    Cook Time: 50 minutes minutes
    Total Time: 1 hour hour 5 minutes minutes
    Servings: 9 Slices
    Calories: 314kcal
    Author: Serena

    Ingredients

    • 1¾ cups AP Flour (250 grams)
    • 1 teaspoon Baking Soda
    • ¼ teaspoon Salt
    • 2 tablespoon Lime Zest
    • Lime Juice
    • 6 tablespoon Sugar (75 grams)
    • 6 tablespoon Light Brown Sugar (80 grams)
    • 1 Large Egg
    • 1 cup Buttermilk (240 mL)
    • ⅓ cup Canola Oil (80 mL)
    • 2 tablespoon Honey
    • 1 teaspoon Almond Extract
    • 1 Large Mango - Peeled and chopped into small cubes
    • ¼ cup Sliced Almonds

    Instructions

    • Preheat oven to 350°F. Butter a 9x5 inch loaf pan.
    • In a large bowl sift together flour, baking soda, and salt. Add sugars and mix.
    • In a medium bowl, whisk the egg with buttermilk, oil, honey, almond extract, lime juice and lime zest.
    • Pour the wet ingredients into the dry ingredients and mix until just combined.
    • Fold in the chopped mangos and almonds.
    • Pour the batter into the prepared loaf pan
    • Bake the loaf for 50-60 minutes until a toothpick inserted into the center of the bread comes out clean. Let cool for 10 minutes in the pan, then remove the bread from pan and let cool completely on a wire rack.

    Notes

    Recipe Source: SerenaLissy.com
    This website provides approximate nutrition information for convenience and as a courtesy only. Nutrition data is gathered primarily from the USDA Food Composition Database via Spoonacular API, whenever available, or otherwise other online calculators. While this information can be helpful in estimating the nutritional information of a recipe, it is by no means accurate or official and is not evaluated by the Food and Drug Administration.
     
    All images and content are copyright protected. Do not use our images without prior permission.

    Nutrition

    Serving: 1Slice | Calories: 314kcal | Carbohydrates: 45g | Protein: 6g | Fat: 13g | Saturated Fat: 2g | Polyunsaturated Fat: 3g | Monounsaturated Fat: 8g | Trans Fat: 1g | Cholesterol: 21mg | Sodium: 224mg | Potassium: 171mg | Fiber: 2g | Sugar: 24g | Vitamin A: 320IU | Vitamin C: 9mg | Calcium: 65mg | Iron: 2mg
    Tried this Recipe? Pin it Today!Mention @SerenaLissy or tag #serenalissy!

    Looking For More Recipes?

    Subscribe to my free newsletter to get new baking tips in your inbox monthly. Find me sharing new recipes and tips on Pinterest, Instagram, or Facebook.

    As an Amazon Associate and member of other affiliate programs, I earn from qualifying purchases. What that means is if you click on one of our affiliate links, they may toss a few pennies our way for a commission.

    Tips To Prevent Cookies From Spreading

    June 1, 2022

    Scoop of Cookie Dough

    Today, we’re going over our favorite tips to prevent cookies from spreading. Cookies that spread too thin during baking can become overly baked, burnt, and just plain hard and difficult to eat. And I'll say, no one wants burnt cookies. These tips are the first step to help you preserve the delicious bite of a perfectly baked good.

    Did you know that Americans consume over 2 billion cookies each year? However, only 4.8 percent of American households don’t eat cookies, which isn’t a surprise to those of us with a passion for baking and a sweet tooth for our favorite cookie recipes.

    Stack of Chocolate Chip Cookies

    Butter Temperature

    When mixing your cookie dough, it’s important to use butter at room temperature. Cold butter won’t only mix into horrible chunks, but it will result in strange consistencies as the butter fails to properly bind with the sugar in your dough.

    Butter that is too warm or melted will similarly prevent your cookies from holding shape at all, and you will get cookie spread. This common reason for cookie spread will result in runaway cookie mounds that slip and slide and might not even form on your cookie sheet resulting in very flat cookies.

    To help prevent your cookies from either of these disasters, remember to set out your butter ahead of other ingredients for your dough. First, cut out the amount of butter you intend to use, then set it aside while you measure and mix other ingredients. This will allow your butter to properly soften before mixing, and cutting it ahead of time will quicken the softening process, too. If you are running short on time, take a look at our write-up on how to quickly soften butter.

    Of course, there are exceptions to every rule. So go with the right butter temperature that your recipe is calling for. When a recipe calls for room temperature butter, make sure it’s just soft enough that it’ll make an ident if you poke it.

    If a cookie recipe calls for cold or chilled butter, use it straight from the fridge. If a cookie recipe calls for melted butter, only then can you use butter that’s completely melted. 

    Cubes of Butter in Mixer Bowl

    Check Your Flour

    With a little care and experimentation, there’s no flour in a recipe that can’t be replaced with another! Simply substituting all-purpose flour in a recipe with no prior preparation can result in cookies that spread or fall apart. There is nothing worse than messing up a great recipe by making a flour swap error.

    Pastry flour, for example, has less gluten when compared to all-purpose flour. Therefore, if you use this flour instead of standard AP flour in a cookie recipe, your cookies will have less structure from gluten formation. This will result in cookie spreading and a less-than-optimal cookie texture.

    Instead of replacing flour in a recipe haphazardly, consider making a trip to the market for the flour specified. Alternatively, put a bit of time into researching how you might be able to replace the flour in your recipe with another flour you have on hand. For example, this could reduce the number of liquid ingredients in other parts of the recipe or change the amount of flour from the specified amount.

    Also, I always recommend using a kitchen scale to measure your flour. Too much flour will result in tough cookies. Read more about the different flours and when to use them here.

    Flour in a bowl

    Don’t Overmix Butter and Sugar

    Overmixing your butter and sugar creates a huge risk of cookie spreading. This can result in essentially melted butter that is liquidy instead of creamy. It can also result in an overwhipped dough. Overwhipped dough has too much air in the mix, causing the collapse of your baked goods in the oven.

    It’s heartbreaking to watch cookies rise before falling apart and leaving craters in the center! Don’t leave the stand mixer running unattended. Instead, cream your butter and sugar for only a couple of minutes with an electric mixer, or whip by hand if you have the muscle power and patience.

    The Right Temperature For Your Cookie Dough

    One of the easiest ways to give your cookies a bit of resistance to spreading is to refrigerate or freeze your raw cookie dough before baking! Warm cookie dough tends to spread in the oven. About an hour in the fridge after mixing your dough is considered the minimum amount of time to ensure that the dough is chilled all the way through. A cold cookie dough takes a bit longer in the oven to spread. Usually, you are done with the baking before they get a chance to spread. So if your recipe calls for a chilling step, don't skip it.

    Some bakers also swear by freezing their cookie dough before baking, and baking them from frozen, too! This can create a cookie that is perfectly melty on the inside. The biggest downside to this method is the amount of freezer space you might need to use since you’ll have to shape your cookies ahead of time and keep them from sticking to one another.

    Cookie dough on sheet pan

    Temperature Of Your Oven

    Depending on your cookie recipe, a wide range of oven temperatures can create the perfect cookie consistency. Cookies are typically baked around 350℉. A lower temperature often requires longer baking times and more opportunities for your cookies to spread.

    What’s tricky about oven temperatures is that not all ovens are made the same! So if you’re suddenly struggling with your favorite recipes, try investing in an oven thermometer. Often our ovens are brought up to approximate temperatures vs. the ones that are actually marked.

    If your cookies are still coming out a bit too thin or even melty, try increasing your oven temperature to 375℉. In this scenario, you'll have to keep a closer eye on your shorter bake time, but it can be worth it for that perfect bite!

    Reshaping Spreading Cookies

    It may not be the neatest option, but you can force your cookies to stop spreading by using a spoon or other utensil during the baking process! It’s great to learn how to optimize your cookie batter to prevent spreading cookies, to begin with, but what about the cookies you’ve already whipped up?

    Remove them from the oven as soon as you notice them starting to spread. Then use a spoon or other utensil to push the edges of each cookie back toward its center. Place your batch back in the oven and watch them (hopefully) bake as usual! You can repeat this twice during a bake, but your batter might be too liquid to hold shape if you need to do so continuously. Your best bet is to have a solid recipe for your batch of cookies.

    Stack of Cookies on table

    Preventing Cookies from Spreading

    Nobody likes an overspread cookie. They are often burnt on the bottom and thin throughout. This leaves you with nothing more than an enjoyable version of a cookie crisp. Thankfully, tips to prevent cookies from spreading are easy to implement and often require minor adjustments.

    Use your butter at room temperature, and keep a strict time limit on creaming your butter and sugar together. Try increasing your oven temperature for a shorter bake time if they continue to spread, and it's always a good idea to test your temperature with an oven thermometer for accuracy. Use parchment paper on your baking tray and let your cooking sheet cool off if you reuse it. Never put your dough on a hot baking sheet. Finally, don’t be scared to interrupt your bake and physically push your spreading cookies back into place. You’ll have deliciously thick, chewy cookies in no time.

    Looking For More Baking Tips?

    Subscribe to my free newsletter to get new baking tips in your inbox monthly. Find me sharing new recipes and tips on Pinterest, Instagram, or Facebook.

    As an Amazon Associate and member of other affiliate programs, I earn from qualifying purchases. What that means is if you click on one of our affiliate links, they may toss a few pennies our way for a commission.

    Condensed Milk Brownies

    May 19, 2022

    Condensed Milk Brownies On Plate

    These dark chocolate condensed milk brownies are the ultimate in fudgy goodness. They're also rich, so you'll want to eat them slowly and savor every bite! The rich and fudgy chocolate brownies are made with sweetened condensed milk to give them an ultra decadent taste. A little goes a long way, so you'll be able to enjoy this delicious dessert for days!

    Brownies on a plate with cup of  milk

    Brownies are one of those classic desserts that almost everyone loves. And while there are all sorts of variations on the recipe, sometimes you just can't beat the original. These condensed milk brownies are a classic for a reason - they're delicious, chocolatey, and super easy to make! Plus, with basic pantry ingredients, you can make this easy brownie recipe any time the mood strikes. So give them a try and see for yourself why these brownies are such a favorite!

    Ingredients for Condensed Milk Brownies

    Ingredients

    Eagle Brand Sweetened Condensed Milk: Sweetened condensed milk is an essential part of this brownie recipe. It adds not only fat, sweetness, and moisture but also enhances the flavor. This is definitely the secret ingredient to fudgy brownies.

    Unsalted Butter: What's not to love about rich buttery flavor

    Brown Sugar: Gives the brownies a bit of moisture and adds a tiny bit of caramel flavor.

    Salt: We use this because our butter is unsalted.

    Vanilla Bean Paste: You could also use vanilla extract if you didn't have paste.

    Unsweetened Cocoa Powder: We used Hershey's Cocoa Powder, Special Dark

    All Purpose Flour: Be careful not to overmix the flour. Even the most careful baker can't avoid a tough brownie if they overmix their batter. Be sure to measure this with a kitchen scale to avoid too much flour which will make the brownies dry.

    Baking Powder: Helps leaven and add rise to your brownies.

    Walnuts: I used walnuts, you could also use pecans if you like those better. 

    Brownies process collage

    Instructions

    Preheat the oven to 350°F and line a 9 x 13 inch pan with parchment paper and set aside.

    In a medium sized saucepan, melt the condensed milk and butter together over low heat. Once melted remove from heat and stir in the brown sugar, salt, and vanilla bean paste.

    Next stir in cocoa powder, AP flour, and baking powder. Don't overmix at this step. Then stir in the chopped nuts. Pour the chocolate mixture into your prepared pan. 

    Bake brownies for 20-30 minutes in the preheated oven. You will see the sides set and separate from the edges of the pan, and the middle has a tiny bit of wobble. Remove from oven once done and let cool for best results. When I remove them from the oven I sprinkle sea salt on the top of the brownies. 

    Use the parchment paper to lift the brownies out of the pan and then cut with a sharp knife.

    I like to use just one saucepan for all the mixing. If you find you don't have a large enough saucepan, you can pour the melted condensed milk and the melted butter into a large bowl and mix the dry ingredients in by hand with a spatula or electric mixer on low. You could also use a stand mixer if you have one. Just be sure to scrape the bottom of the bowl to get all the brownie batter combined. 

    Baking time will vary depending on your oven. You can test for doneness by inserting a toothpick into the brownies. When you pull it out, you should see some of the batter and a few crumbs. You could also test for doneness with an instant read thermometer. You want these brownies to register at 165°F. 

    Variations

    These are some of the best brownies you are going to have. But if you would like to incorporate a few other ingredients to make them less sweet or even sweeter here are a few I recommend. 

    You could add dark chocolate chips to your brownie batter to make even more chocolatey brownies. 

    I added walnuts, but you could easily use pecans, peanuts, or even almonds.

    You could add dried fruit as well. This is one of my favorite combinations. Something like dried sour cherries would be great in this brownie recipe.

    We also have a delicious White Chocolate Raspberry Blondie if brownies aren't your thing.

    Condensed Milk Brownies on plate

    Equipment

    9 x 13 inch metal baking pan: Light colored metal pans are great for baking. Dark metal or glass can sometimes heat unevenly and can cause burnt edges. 

    Kitchen Scales: Nothing makes baking more accurate and easier than a great quality scale. Too much flour can dramatically change your brownie recipe. You can easily go from delicious brownies to dry and hard brownies. 

    The Best Way to Store Brownies

    If you want to keep the brownies for a bit before eating them, it's best to wait to cut them until you are ready to eat them. You don't want them to dry out before you get to enjoy them.

    Tightly wrap the brownies in plastic wrap or store them in an airtight container.

    Store your brownies at room temperature for 3 to 4 days. You can also keep them refrigerated for up to two weeks. When ready to eat, take them out of the refrigerator and let them get to room temperature. 

    How To Freeze Brownies

    If you want to keep your brownies for a longer period of time, they freeze well. Wrap the brownies tightly in plastic wrap and place them in a Ziploc freezer bag. You can keep brownies in the freezer for up to three months. When ready to enjoy, take them out of the freezer and let them come to room temperature. 

    Condensed Milk Brownies On Plate

    Sweetened Condensed Milk Brownies

    These rich and fudgy chocolate brownies are made with sweetened condensed milk to give them an ultra decadent taste.
    5 from 10 votes
    Print Pin Rate
    Course: Dessert, Snack
    Cuisine: American
    Prep Time: 15 minutes minutes
    Cook Time: 30 minutes minutes
    Total Time: 45 minutes minutes
    Servings: 12 Brownies
    Calories: 480kcal
    Author: Serena

    Ingredients

    • 2 cans Sweetened Condensed Milk 794 grams
    • 1 cup Unsalted Butter 220 grams
    • 2 tablespoon Brown Sugar
    • ¼ teaspoon Salt
    • 1 tablespoon Vanilla Bean Paste
    • ¾ cup Cocoa Powder 70 grams
    • 2 cups AP Flour 240 grams
    • 1 ½ teaspoon Baking Powder 6 grams
    • ½ cup Chopped Walnuts 65 grams

    Instructions

    • Preheat the oven to 350°F and line a 9 x 13 inch pan with parchment paper and set aside.
    • In a medium sized saucepan, melt the condensed milk and butter together over low heat. Once melted remove from heat and stir in the brown sugar, salt, and vanilla bean paste.
    • Next stir in cocoa powder, AP flour, and baking powder. Don't overmix at this step. Then stir in the chopped nuts. Pour the chocolate mixture into your prepared pan. 
    • Bake brownies for 20-30 minutes in the preheated oven. You will see the sides set and separate from the edges of the pan, and the middle has a tiny bit of wobble.
    • Remove from oven once done and let cool for best results. When I remove them from the oven I sprinkle sea salt on the top of the brownies. 
    • Use the parchment paper to lift the brownies out of the pan and then cut with a sharp knife.

    Notes

    Recipe Source: SerenaLissy.com
    This website provides approximate nutrition information for convenience and as a courtesy only. Nutrition data is gathered primarily from the USDA Food Composition Database via Spoonacular API, whenever available, or otherwise other online calculators. While this information can be helpful in estimating the nutritional information of a recipe, it is by no means accurate or official and is not evaluated by the Food and Drug Administration.
     
    All images and content are copyright protected. Do not use our images without prior permission.

    Nutrition

    Serving: 1Brownie | Calories: 480kcal | Carbohydrates: 58g | Protein: 9g | Fat: 25g | Saturated Fat: 14g | Polyunsaturated Fat: 3g | Monounsaturated Fat: 6g | Trans Fat: 1g | Cholesterol: 63mg | Sodium: 190mg | Potassium: 378mg | Fiber: 3g | Sugar: 39g | Vitamin A: 650IU | Vitamin C: 2mg | Calcium: 238mg | Iron: 2mg
    Tried this Recipe? Pin it Today!Mention @SerenaLissy or tag #serenalissy!

    Looking For More Baking Tips and Recipes?

    Subscribe to my free newsletter to get new baking tips in your inbox monthly. Find me sharing new recipes and tips on Pinterest, Instagram, or Facebook.

    As an Amazon Associate and member of other affiliate programs, I earn from qualifying purchases. What that means is if you click on one of our affiliate links, they may toss a few pennies our way for a commission.

    How To Quickly Soften Butter

    May 10, 2022

    Cubes of Butter

    About 297.78 million Americans used butter in 2020, and it’s no wonder! Butter provides not just an excellent base for flaky baked goods, but it also gives us that too-delicious buttery taste that makes pastries a simple delight.

    Butter has been blamed for causing heart disease in the past due to it being a high-calorie food with high saturated fat content. However, many studies have failed to find a connection between heart disease and saturated fat intake. At the end of the day, any food eaten in moderation is vital.

    Stick of butter softening

    When baking or preparing meals with butter, it’s essential to prepare it correctly for excellent buttery taste and not waste calories. Today, we’re learning how to quickly soften butter to save you from crumbling dough and burnt butter pans.

    The Importance of Softened Butter

    We’ve all run into a recipe (or multiple) that calls for room temperature butter. Butter is a crucial ingredient for flaky pastries and baked goods, as the ingredient can hold air but also expand, creating tiny air pockets of buttery goodness.

    Countless baking recipes, think of your favorite cookie recipes or pie doughs, ask for you to “cream together butter and sugar” as a first step. This process produces fluffy mounds of buttery and sugary goodness but can be confusing to achieve for new and veteran bakers alike.

    When creaming together butter and sugar, your butter needs to be soft enough to react with the sugar properly. This is because of the fat content in butter, which responds perfectly with the jagged edges of sugar crystals to take in air into your mix. This creates a light and fluffy texture in minutes with an electric mixer and a few more minutes when beaten by hand.

    If your butter isn’t properly softened ahead of time, the sugar crystals will start cutting into your cold pieces of butter and create small granules of chunky butter/sugar bits. This is unappetizing, but if you continue with this mix and try to make any sort of dough to follow, you’re bound to have an uneven bake and random globs of butter after the fact. Yuck!

    Thankfully, softened butter isn’t as soft as you first might believe. It should still feel cool to the touch, and many use a finger indentation to tell when their butter is ready! Here are some other easy methods to soften butter ahead of your baking.

    Softening butter at room temperature

    Softening Butter at Room Temperature

    The most obvious and classic way to soften butter at room temperature is to let it sit at room temperature on your kitchen counter! When softening a whole stick of butter from the fridge, it will take about an hour or more of sitting time to soften. It depends on your room temperature, but an hour is a good rule of thumb. This method will give you the most consistent results with minimal effort. But it does take the most extended amount of time.

    This seems like a lot of time, but it might be the easiest way and no big deal for those who like butter on our toast and take the ingredient out before preparing breakfast. Take out a bit extra, and you’ll be ready when it comes time to bake with soft butter.

    Slicing Butter at Room Temperature

    For many recipes, particularly those in baking, creaming your butter and sugar together will be your first step. But if you take the time to cut your cold butter into small cubes and measure out your other ingredients afterward,  you might find that your butter softens to the perfect consistency just before you need it! In addition, cutting butter ahead of time in smaller pieces increases its surface area, letting your room’s warmer temperature heat it a bit faster.

    A similar method to soften your butter involves more labor, a rolling pin, and wax or parchment paper. First, place your pre-measured or cut butter between two pieces of wax paper. Next, grab your rolling pin, and get to work flattening and spreading out those sticks of butter! Finally, lift off the top piece of wax paper and let your softened butter sit for a few minutes until room temperature.

    If you put enough time and muscle into this step, your butter might be room temperature already after rolling out. So, this is the faster softening method for impatient bakers.

    Softening Butter with the Microwave

    Softening Butter With the Microwave Method

    Another common yet riskier way to soften butter is to pop it in the microwave and heat it. You’ll only want to do this for a few seconds, and it might take some testing to get the right amount of time, depending on your butter amount.

    When tackling this method, place your butter in the microwave, and heat it for a few seconds. I usually use a low power level on the microwave to ensure I don't overcook it. Then attempt to mix the butter into a creamy consistency in its bowl. Repeat until the butter is malleable.

    You can try an easy kitchen hack known as an indirect microwaving method if you have a smaller amount of butter to work with. Instead of microwaving the butter directly, microwave a small bowl or cup of water for a few minutes. Immediately remove the water bowl and place your butter inside the microwave with residual heat. Close the door, and let it sit in the microwave for a bit. This method can produce room temperature butter at a higher success rate if you're quick enough.

    Indirectly Heating Butter

    Yet another great way to indirectly heat your butter to room temperature is to heat some water in a large bowl or container. Next, place your butter in a smaller bowl or container. This could even be something as simple as a zip-top plastic bag. Let it lightly sit inside the bowl of hot water to dethaw and warm.

    Submerging the smaller bowl into the larger one will quicken this process. This is a great option to speed the softening of your butter ingredient without the risk of melting it too quickly or messily.

    When heating butter in this way, it should take only 5-10 minutes to soften butter if your water is hot enough. Super quick and easy to tackle while you prepare and pre-measure other ingredients!

    Cubes of Butter

    How To Test When Butter Is Properly Softened

    The quickest and most accurate method is to insert the probe of an instant-read thermometer into the stick of butter. You are looking for the temperature of the butter to be between 68F and 72F if the recipe calls for room temperature butter. This also works with cubed butter if you have cut the butter into small chunks. Another reliable method is to poke your finger onto the butter's surface. It should leave an indent but not stick to your finger.

    How to Quickly Soften Butter

    Softening butter is all about preparation, surface area, and heat! Leave your pre-measured butter out at room temperature if you have time to plan. If you don’t, give one of our microwave or water submersion methods a try if you are looking for quick ways to soften butter!

    You’re ready to tackle some of our most delicious recipes here at SerenaLissy.com. Enjoy our Dulce de Leche Sandwich Cookies and Homemade Girl Scout Cookie Samoas today.

    More Tips To Make You A Better Baker

    How To Choose The Right Pie Pan

    Flour 101

    The Function of Sugar in Baking

    Looking For More Baking Tips?

    Subscribe to my free newsletter to get new baking tips in your inbox monthly. Find me sharing new recipes and tips on Pinterest, Instagram, or Facebook.

    As an Amazon Associate and member of other affiliate programs, I earn from qualifying purchases. What that means is if you click on one of our affiliate links, they may toss a few pennies our way for a commission.

    How To Store And Freeze Cupcakes

    March 21, 2022

    Cupcakes to be stored

    Cake has been an age-old dessert, from simple sheet cakes to extravagant wedding and party cakes. But cupcakes were supposedly first invented in America, with Amelia Simmons’ “American Cookery” cookbook in 1796. The cookbook is also believed to be the first cookbook written by an American published in the United States.

    Back then, cupcakes were referred to as cakes baked in small cups, and today they are scrumptious delicacies with the satisfying taste of cake in a more manageable and adorable size. Today, we’re exploring just how to best store and freeze cupcakes. Of course, frosting a cupcake straight out of the oven leads to a melted frosting disaster, but sometimes we don’t have the time to bake, wait and frost.

    Three Cupcakes ready for storage

    Storing homemade cupcakes for icing and eating later is essential for any cupcake lover. Let’s get started!

    Storing Undecorated Cupcakes

    There’s a reason behind letting foods cool before storing! When stored in an airtight container, warm and hot food releases steam that can condensate on the food’s surface. For cupcakes, this can result in sticky cupcake tops with excess moisture and cupcake sides that don’t cleanly separate from their cupcake liners.

    Let your unfrosted hot cupcakes cool completely before frosting or storing them for later. Letting them cool on a cooling wire rack instead of on the baking tray can prevent overbaking and soggy bottoms.

    When choosing how to store your cupcakes, a standard plastic air-tight container is a great option to balance maintaining freshness with an airlock and preventing stickiness that can occur with plastic wrap.

    Choose a plastic storage container that is tall enough for your cupcakes to stand upright. You also want to place cupcakes in a single layer in the container for best results. Bonus points if it’s tall enough to hold frosted cupcakes, which we’ll get to in a moment! Finally, store your unfrosted cupcakes at room temperature in a dry place, on a counter, or in an extra cabinet. They will have a shelf life of about a week.

    How to Freeze Unfrosted Cupcakes

    When freezing unfrosted cupcakes, it’s arguably even more important to ensure that your cupcakes have cooled down before you begin. If you aren't careful, condensation that forms on your cupcakes will turn into ice in the freezer. Once those cupcakes are defrosted, you’ll be in for a soggy mess.

    Instead, let your cupcakes cool completely, then wrap them in plastic wrap individually. You can place the cupcakes in their plastic wrap in the freezer or place them in a larger plastic freezer bag or container for more security. Keep in mind that placing them in a container can protect your cupcakes from becoming squished as you inevitably place more things in the freezer before unfreezing all of the batch.

    While saran wrap isn’t recommended for cupcake storage at room temperature, it’s a great choice when freezing cupcakes since the lower temperature won’t cause sticky tops and helps prevent freezer burn. However, when you’re ready to unfreeze your baked goods, be sure to peel back the plastic wrap, especially from your cupcake tops, before they hit room temperature.

    Plenty of times, I've committed to bringing dessert but then end up with a busy schedule and no time to bake. I love being able to freeze a bunch of cupcakes then pull them out a couple of days before the day of the event. This is such an easy way to help manage your schedule.

    Cupcakes for storage

    Storing Frosted Cupcakes

    Storing frosted cupcakes isn’t too different from storing unfrosted cupcakes, but you might need a taller plastic container! You wouldn’t want all of your hard work to go to waste because of a plastic top crushing them all in one go.

    As a general rule of thumb, about 3 inches tall should accommodate most designs, and depending on how much room you have in the container, and you can even opt to pipe frosting onto the cupcakes right in the container.

    Store this container at room temperature on a counter just like unfrosted cupcakes, and eat within a few days up to a week for optimal freshness! I also like to use a cake carrier for this. It holds a lot and is usually tall enough to cause no damage to the cupcakes. And the carrier is easy to grab and go when you need them for a special occasion.

    How to Freeze Frosted Cupcakes

    Perhaps the question of the day is, how can you even attempt to freeze frosted cupcakes? Keeping the frosting away from anything else in your freezer and still maintaining the beautiful flow of cupcake frosting…is it even possible?

    Of course, it is with a bit of prep and maybe a little extra freezer space! Remember that it will take a bit longer to freeze frosted cupcakes compared to unfrosted cupcakes or even cookies and batter. First, let your cupcakes cool as usual.

    Next, frost with your favorite frosting, and then freeze these frosted cupcakes individually, with no wrapping. This will ensure that your frosting has a chance to maintain its shape in the freezing process and not smush into other freezer goodies.

    Finally, wrap all frozen cupcakes as you would an unfrosted one with plastic wrap, then freeze individually or in a plastic container. When defrosting, remove the plastic wrap immediately, then let thaw to room temperature. Delicious!

    Can I Store My Cupcakes In The Refrigerator?

    We’ve learned how to best store and freeze both unfrosted and frosted cupcakes. But why is storing your cupcakes in the fridge a bad idea? Is it really better to store them in a container at room temperature?

    Refrigerating your cupcakes is a quick way to dry them out. The sugar content in your cupcake will quickly crystallize and harden, resulting in crumbly cupcakes, and not in a good way. Instead of a satisfying cakey bite, you'll be met with a hard edge and a mess of crumbs.

    Of course, there are exceptions to most rules. If your cupcakes contain fillings or frosting made from dairy products, you’ll need to store them in a fridge to prevent spoilage. You can also store fresh cupcakes in a fridge for a short period of time before serving to preserve cupcake frosting that might melt otherwise before an outdoor event.

    Cupcakes ready for the freezer

    So Can You Freeze Cupcakes?

    Definitely yes, but I'd recommend freezing your cupcakes for no longer than three months.

    Cupcake baking can seem like the simpler version of regular cakes. But any seasoned baker will tell you that cupcakes can take just as much time, and sometimes more time, than a cake! In addition, every small cupcake needs delicate care, decoration, and protection from other food things that could get them crushed.

    Now you can streamline your cupcake-making techniques and treat yourself to more cupcakes without the stress. Ready to read more about baking techniques, storage, and recipes on SerenaLissy.com? Check out our article on Top 10 Baking Tips for the Perfect Cake and try our Chocolate Peppermint Cupcakes recipe today.

    Looking For More Recipes

    Subscribe to my free newsletter to get new baking tips in your inbox monthly. Find me sharing new recipes and tips on Pinterest, Instagram, or Facebook.

    Getting Started With Snapseed

    January 3, 2022

    Cell Phone with Photography App

    As a food photographer, I love the Snapseed app and believe it's one of the best photography apps for free you can have. With Snapseed, you can easily edit your photos to make them look like a masterpiece. However, with such an extensive toolbox and range of options for editing on this app, it may seem overwhelming during the editing process, even if you're already experienced in photo-editing apps! In our post, Getting Started With Snapseed, we take a step-by-step approach to showing how simple these tools are. As a result, you can quickly master the mobile app, even if you are a complete beginner to smartphone photography.

    Cell Phone with Photography App

    Oh, and did I mention it's a free app! And it's available for IOS and Android devices. This popular app has some pretty powerful features, and it works almost identical on Android or IOS devices. These are just some of the main reasons professional photographers utilize this app.

    Download The Snapseed Photography App

    First, you will need to download Snapseed from your phone's App Store for free for your mobile device. (Apple App Store or the Google Play Store is where you will get this) There are no hidden in app purchases or subscription fees.

    iPhone Users download here

    Android phones download here

    Snapseed Screen Shot

    Open An Image In Snapseed Photo Editor

    In the Snapseed app, tap Open. This will take you to your phone's photo library. Next, tap the photo you want to open.

    There are two Snapseed photo editing areas within the app; Looks and Tools. You can easily switch between these areas by tapping Looks or Tools at the bottom of the screen. We will mainly focus on Tools, although Looks are fun to play with if and are a great option if you have a specific Instagram look, or you want different photo effects, or a filtered look.

    Improve Color And Exposure

    The first thing I like to use in the app is the color corrections and the exposure adjustments. With just a few simple adjustments, you can take a dull photo and make it have much more life. First, open a picture and then tap Tools. You will see a Snapseed Photo Editing Tools menu as in the image below.

    The Tune Image option allows you to adjust the color and exposure and a few other things. For example, the image below shows you how you can go from a dark, underexposed image into an image with great color and exposure. This is probably one of the best photo apps for quickly performing these tasks.

    In the Tools section, tap Tune Image. Then, swipe up or down on your phone to open the Tune Image menu.

    Tune Image Options That Affect Your Color And Exposure

    • Brightness: Brighten or darken your entire image.
    • Contrast: Increase or decrease the difference between the bright and dark areas.
    • Saturation: This makes the colors more or less vibrant.
    • Ambiance: Adjust color saturation and contrast at the same time.
    • Highlights: Darken or lighten only the bright areas of your image.
    • Shadows: Darken or lighten only the shadow areas of your image.
    • Warmth: Add a warm orange or cool blue color cast to your image.
    Tune Image Menu on Snapseed

    Once you have chosen a tool, swipe left or right over your photo to make the adjustment. At the top of your screen, you can see the setting adjustments you made and a little icon that you can touch to see your adjustment before and after. Tap and hold the icon to see the original photo. Then, release your finger to return to the image you are editing. This is an easy way to know if you have taken the adjustment too far before clicking the checkmark and saving.

    You can continue to use the Tune Image menu over and over. Just go through the same steps and choose another tool. Be sure to click the checkmark after each edit if you are happy with it and want to save it.

    White Balance Screen Shot of Snapseed

    White Balance With The Photography App

    The White Balance tool lets you enhance your photo by applying different color tints. I use this to enhance colors and correct unwanted color casts. You could also use it to change the mood of your image, although we don't use this much in the food photography category.

    In the Tools section of Snapseed, tap White Balance. Next, swipe up or down to open the White Balance tools, then select a setting from the menu.

    There are two tools in the White Balance category:

    • Temperature: This is used to make your colors cooler (more blue) or warmer (more orange).
    • Tint: Adds a bit of green or pink color tint to your image.

    I use this to correct my image and usually make it warmer. I typically photograph on a table by a large glass slider. The slider has a film built into the glass to protect the home from sun damage and heat, which adds a blue cast to the images. So I add a touch of warmth here to correct the blue. Or you could use it to correct your golden hour image if you find it didn't have as much warmth as you had hoped for, or it was too warm, and you need to add a bit of blue to correct it.

    VIew Edits Screen on Snapseed

    Modify Individual Edits

    This is probably one of my favorite features of the app. Snapseed uses "non-destructive editing." This means at any time, you can go back to one of your last edits and make changes or delete. After you have made some edits tap the Edit History icon on the top of your screen. Then select view edits in the menu.

    A stack of edits you have made will show up on the bottom right. See the image above for an example.

    Tap on any edit, and Snapseed will provide you with three options:

    • Trash Icon: You can use this to delete your edit.
    • Brush Icon: You can use this to open up the masking feature. This is a bit beyond our post about getting started, but you can easily experiment with the advanced tools on your own.
    • Slider Icon: This will let you modify your edit. It will open up the editing tool and you can make changes to your edits.
    Crop Screen on Snapseed

    Improve Composition of Your Images

    Crop and Rotate are the primary tools I use here. I use the crop feature most for social media images. Usually square for Instagram or other social networks. Rotate I seem to mostly use when I don't use a tripod, and my picture is just slightly crooked, or something isn't perfectly level. These are powerful tools to quickly enable you to get the image you want for your Insta feed.

    In the Snapseed Tools, select Crop. Select an aspect ratio. For instance, original, square, or 3:2. You could also choose free if you want to crop without any constraints. You get quite a few editing options with the crop tool.

    Drag the corner handles to adjust the crop and select the checkmark once you are done.

    In the Snapseed Tools, select Rotate. Snapseed will analyze your image and attempt to correct it. This is always hit or miss, and I prefer complete manual control. To rotate your image manually, drag your finger over the image and use the gridlines to get it straight. Checkmark to save once you have it where you like it.

    Rotate Screen on Snapseed

    A Great Way For Flawless Edits

    If you are a fan of precise control to get great photos, this edit feature is perfect for serious photographers using mobile photography. The healing tool lets you easily remove unwanted objects from your image. You can see in the example below I had some stray fabric pieces from the muslin that I wanted to get rid of.

    In the Snapseed Tools menu, select Healing. Next, pinch outwards with two fingers to zoom in on the area with the item you want to get rid of. You will see a dotted line around the area you are working on. Next, use your finger to brush over the object you want to get rid of. This will become highlighted in red. When you release your finger, the item gets replaced with pixels nearby.

    If the result isn't what you wanted, click the curved back arrow at bottom of the screen to undo it. This tool sometimes takes some practice. So don't be too hard on yourself. Just give it a few tries, and you will see how easy it becomes.

    Healing Edit on Snapseed

    Making A Selective Edit

    The second tool that I like for editing is the Selective tool. This lets you edit different colors of your photos individually. After selecting a specific area of color, Snapseed will let me adjust the brightness, contrast, saturation, or structure.

    In the Snapseed Tools, select Selective. Tap the area of color you want to adjust. For instance, see the image below. I wanted to change the brightness of the blueberries in the wicker basket. Once you tap the area you wish to adjust, Snapseed will place a small circle on your image. You will see four letters, BCSS. (Brightness, Contrast, Saturation, Structure) Select a tool, then drag left or right to adjust. Pinch in or out with two fingers to adjust the size of the adjustment area. The area affected will be highlighted in red. Now swipe up or down to access the adjustment options. You can always preview your adjustment with the preview icon, and then select the checkmark once you have what you like. You can add as many adjustment points as you want.

    Selective Edit With Snapseed

    Save Your Snapseed Edit and Export Your Image

    The Export feature of Snapseed is where there is a difference between Android and IOS. I'm attaching a screengrab of the most recent definitions from Snapseed as to the saving process for each operating system. At the bottom of your screen, you will tap Export. Depending on your operating system, you will have 2 - 3 options to pick from. On an IOS system, I prefer to use Save A Copy. This enables me to keep my original and edited versions in my photo gallery. On the Android system, I like to use Export. This allows me to keep my original and edited versions as well.

    Save Screen on Snapseed

    Snapseed: A Creative App That Provides Next Level Editing

    One of the best photography apps out there is Snapseed. It's a great, free app that you can download from your mobile device's store and use to edit photos with ease! With this powerful toolbox at your fingertips, it may seem overwhelming when looking for all the options available on this app. However, even if you're already experienced in photo-editing apps like Photoshop or Lightroom, these beginner tools are easy to master with our step-by-step approach. Anyone can get more creative shots of their favorite food without any stress involved! So head over to our blog for some more fantastic cell phone food photography tips.

    Editing Image on Snapseed

    Looking For More Photography or Baking Tips?

    Subscribe to my free newsletter to get new baking tips in your inbox monthly. Find me sharing new recipes and tips on Pinterest, Instagram, or Facebook.

    As an Amazon Associate and member of other affiliate programs, I earn from qualifying purchases. What that means is if you click on one of our affiliate links, they may toss a few pennies our way for a commission.

    Getting Started With Snapseed Pin

    Dulce De Leche Sandwich Cookies (Alfajores)

    December 20, 2021

    Salted Dulce De Leche Cookie

    We are on day number 6 and are halfway done in the 12 days of holiday baking! I hope you have been enjoying these recipes as much as I have. Yesterday we made Peppermint Pattie Brownies from America's Test Kitchen, and I saw another recipe for Salted Dulce de Leche Sandwich Cookies from them. I had never made these before, but I figured I'd give Dulce de Leche Cookies a try!

    Dulce De Leche Cookie

    Homemade Dulce de Leche Cookies

    "A little smile, a word of cheer, a bit of love from someone near, a little gift from one held dear, best wishes for the coming year...These make a Merry Christmas!" -John Greenleaf Whittier

    This is the perfect cookie recipe for fans of the salty-sweet flavor combination. The cookies are buttery and flavorful soft shortbread cookies, and the sweet dulce de leche is irresistible. On top of that, the mixed in coarse sea salt into the dulce de leche is a delightful addition. The large salt granules gave it a slight crunch. This is an easy Dulce de Leche cookie recipe that is sure to be a hit over the holidays!

    Ingredients

    Dulce De Leche Cookies Ingredients
    • All Purpose Flour
    • Superfine Sugar
    • Salt
    • Unsalted Butter 
    • Cream Cheese
    • Vanilla extract
    • Dulce de Leche
    • Coarse Sea Salt
    • Confectioners' Sugar

    Tools to Make Dulce De Leche Cookies

    You don't need a lot of tools to make these cookies. I'd recommend a silicone baking mat or parchment paper on top of a half sheet pan. Use a 1 ¾ inch cookie cutter or whatever you have that is similar in size.

    How to Make Dulce de Leche

    You can easily make your own Dulce de Leche at home. All you need is a can of sweetened condensed milk and time to let it cook. 

    1. Take the label off the can of sweetened condensed milk and place the can into a large pot. Fill the pot with water until the water is about 1 inch above the top of the can.
    2. Bring water to a simmer and continue to cook over low heat for about 4 hours. Continue to refill the water level as necessary. Don't let the water level go below the can, so keep watch!
    3. Once done, set aside to cool.

    Don't have time or the desire to make Dulce de Leche yourself? No problem! You can buy canned Dulce de Leche at pretty much any grocery store.

    How To Make Dulce de Leche Cookies

    Dulce De Leche Cookies Process Collage
    1. In the bowl of a stand mixer fitted with paddle attachment, mix flour, superfine sugar, and salt on low speed until combined. You could also use a large bowl and an electric mixer to do this.
    2. Add butter, 1 piece at a time into the dry ingredients, and mix until crumbly. 
    3. Add cream cheese and vanilla and beat until mixture begins to form large clumps.
    4. Knead dough by hand, until it forms a cohesive mass. 
    5. Divide dough ball in half, form each half into disk, wrap disks in plastic wrap, and refrigerate for 30 minutes.
    6. Adjust oven rack to middle position and heat oven to 375°.
    7. Line 2 baking sheets with parchment paper. Roll each disk of dough ⅛ inch thick; refrigerate for 10 minutes.
    8. Using 1 ¾ inch cookie cutter, cut dough, gathering and rerolling scraps once.
    9. Space cookies 1 ½ inches apart on prepared sheets.
    10. Bake 1 sheet at a time, until light golden brown, about 10 minutes, rotating sheet halfway through baking.
    11. Let cookies cool on baking sheet for 3 minutes, then transfer to a wire cooling rack and let cookies cool completely.
    12. Microwave dulce de leche in bowl at 50 percent power for 20 seconds. Stir in sea salt.
    13. Spread bottoms of half of cookies evenly with warm delicious dulce de leche, then top with remaining cookies, pressing lightly to adhere.
    14. Dust cookies with confectioners' sugar before serving

    These cookies are great packaged in holiday cookie boxes, or if you have decorative pieces as we did, you can put a decorative plastic wrap around them and tie a big bow on top for an easy gift. They are always some of the best cookies for a cookie swap or just as an addition to any cookie tray.

    If you have missed the other days of our holiday baking, you can find all the recipes here.  I hope you enjoy these as much as we did and don't forget to save some for yourself.

    Salted Dulce De Leche Cookies

    Looking For More Recipes?

    Subscribe to my free newsletter to get new baking tips in your inbox monthly. Find me sharing new recipes and tips on Pinterest, Instagram, or Facebook.

    Dulce De Leche Cookies

    Dulce De Leche Sandwich Cookies

    A buttery shortbread cookie sandwiched with a creamy layer of Dulce de Leche with a sea salt crunch.
    5 from 11 votes
    Print Pin Rate
    Course: Dessert
    Cuisine: American
    Prep Time: 10 minutes minutes
    Cook Time: 10 minutes minutes
    Cooling Time: 5 minutes minutes
    Total Time: 25 minutes minutes
    Servings: 24 Cookies
    Calories: 144kcal
    Author: Serena

    Ingredients

    America's Test Kitchen - Dulce De Leche Cookies

    • 2 ½ cups all purpose flour
    • ¾ cup superfine sugar
    • ¼ teaspoon salt
    • 16 tablespoons unsalted butter cut into 16 pieces and softened
    • 1 ounce cream cheese softened
    • 2 teaspoons vanilla extract
    • ¾ cup dulce de leche
    • ¾ teaspoon coarse sea salt
    • Confectioners' sugar

    Instructions

    • Using stand mixer fitted with paddle, mix flour, superfine sugar, and salt on low speed until combined.
    • Add butter, 1 piece at a time, and mix until crumbly, 1 to 2 minutes.
    • Add cream cheese and vanilla and beat until mixture begins to form large clumps.
    • Knead dough by hand, just until it forms cohesive mass. Divide dough in half, form each half into disk, wrap disks in plastic wrap, and refrigerate for 30 minutes.
    • Adjust oven rack to middle position and heat oven to 375° F.
    • Line 2 baking sheets with parchment paper. Roll each disk of dough ⅛ inch thick; refrigerate for 10 minutes.
    • Using 1 ¾ inch round cookie cutter, cut dough, gathering and rerolling scraps once; space cookies 1 ½ inches apart on prepared sheets.
    • Bake 1 sheet at a time, until light golden brown, about 10 minutes, rotating sheet halfway through baking.
    • Let cookies cool on the cookie sheet for 3 minutes, then transfer to wire rack and let cool completely.
    • Microwave dulce de leche in bowl at 50 percent power for 20 seconds. Stir in sea salt.
    • Spread bottoms of half of cookies evenly with warm dulce de leche, then top with remaining cookies, pressing lightly to adhere.
    • Dust cookies with confectioners sugar before serving.

    Notes

    Recipe Source: SerenaLissy.com
    This website provides approximate nutrition information for convenience and as a courtesy only. Nutrition data is gathered primarily from the USDA Food Composition Database via Spoonacular, whenever available, or otherwise other online calculators.
    All images and content are copyright protected. Do not use our images without prior permission.
     

    Nutrition

    Serving: 1cookie | Calories: 144kcal | Carbohydrates: 16g | Protein: 1g | Fat: 8g | Saturated Fat: 5g | Polyunsaturated Fat: 1g | Monounsaturated Fat: 2g | Trans Fat: 1g | Cholesterol: 21mg | Sodium: 102mg | Potassium: 18mg | Fiber: 1g | Sugar: 6g | Vitamin A: 249IU | Calcium: 6mg | Iron: 1mg
    Tried this Recipe? Pin it Today!Mention @SerenaLissy or tag #serenalissy!

    Here are a few of our favorite cookie recipes:

    • Holiday Sugar Cookies
    • Red Velvet Cookies
    • Mexican Wedding Cookies

    As an Amazon Associate and member of other affiliate programs, I earn from qualifying purchases. What that means is if you click on one of our affiliate links, they may toss a few pennies our way for a commission.

    Original post December 18, 2014; updated December 20, 2021

    Peppermint Pattie Brownies

    December 20, 2021

    Peppermint Pattie Brownies

    This brownie recipe is one of the easiest dessert recipes you'll come across – just a few ingredients, some baking time, and voila! The perfect holiday treat: Peppermint Pattie Brownies. These rich chocolatey squares are stuffed with York Peppermint Patties for a festive flair that everyone will love.

    Peppermint Pattie Brownies

    Peppermint Pattie Brownies

    "Like snowflakes, my Christmas memories gather and dance - each beautiful, unique and too soon gone." -Deborah Whipp

    Wow, it's day number 5 in the 12 days of holiday baking, and each day of pastries has been beautiful, yummy, and too soon gone! This brownie recipe is better than any boxed brownie mix, and easy recipes are always a crowd-pleaser. Especially for any fans of chocolate mint flavors. How can anyone go wrong with brownies that have peppermint patties baked inside?

    I know I can bake this brownie all year long, but it seems to fade like a snowflake, like other Christmas memories. I always forget about them until the holidays. Maybe it's the peppermint that makes me think of them. If you read yesterday's post, it's no secret that I have a slight addiction to peppermint and chocolate. So it's probably in my waistline's best interest that I only make these Peppermint Pattie Brownies during the holidays and give away as many as I can.

    Ingredients

    Peppermint Pattie Brownies Ingredients
    • All Purpose Flour
    • Baking Powder
    • Salt
    • Unsalted Butter
    • Unsweetened Chocolate
    • Sugar
    • Eggs
    • Vanilla
    • Small York Peppermint Patties

    How to Make Peppermint Pattie Brownies

    Peppermint Pattie Brownies Process Collage

    First, move the oven rack to the middle position and heat the oven to 350°F. Next, make a foil sling for an 8-inch square baking pan, and grease the foil with nonstick cooking spray. 

    In a bowl, whisk flour, baking powder, and salt together. Microwave butter and chocolate at 50 percent power in 30-second increments in a medium heatproof bowl. Stir occasionally until melted and smooth. This usually takes two to three minutes. Let cool slightly. You could also use a double boiler for this if you didn't want to deal with microwaving the chocolate.

    In a large bowl, whisk sugar and eggs together. Add vanilla and the chocolate mixture. Whisk until it's combined. Add the dry ingredients and stir until just incorporated. Leave one cup of batter in the bowl, but pour the rest into your prepared pan. 

    Space the York Peppermint Patties apart on top of the batter in a single layer. Then spread the remaining brownie batter over the patties. Bake brownies for 30 to 35 minutes until just set in the center. Rotate the pan halfway through baking. Let the brownies cool for 2 hours. Then use the foil overhang to lift the brownies out of the pan. Cut into 36 pieces before serving.

    How to Serve Peppermint Pattie Brownies

    The recipe calls for you to bake in an 8-inch square pan and cut them into 36 brownie bites. I like keeping them small because each brownie will have some of the York Peppermint Pattie visible. It's the minty candy layer in the middle that makes these unique, so you might as well show it off!

    These can easily be packaged in a holiday box with tissue paper or as part of a cookie tray. I know for each recipe I keep telling you to save some for yourself, but I must warn you this brownie is dangerous. Every time I save a bite, or two, or maybe a row, and next thing you know, I'm making a second pan of them.

    Recipe Tips For The Best Fudgy Brownies

    • Better chocolate means better brownies. So I always recommend, if you want the best brownies, always go with a good quality chocolate when called for in recipes.
    • It's always better to pull the brownies out of the oven too early than too late. There is nothing good about dry chocolate brownies, so err on the side of caution and take out a bit early when in doubt. A toothpick inserted in the center should have just a few crumbs attached when you pull it out.
    • Wait for the brownies to cool before cutting and eating them. I know this is the most difficult part for me. But by waiting, it reduces the crumbling when you slice them.

    I hope you enjoy these peppermint pattie brownies as much as I do. The peppermint patties provide a delicious layer of flavor and are perfect for the holiday season. Give the recipe a try, and let us know how they worked for you.

    And if you have missed the other four days, we now have Special K Bars, Rocky Road Bark, Mexican Wedding Cookies, and Peppermint Bark. 

    Peppermint Pattie Brownies

    Looking For More Recipes?

    Subscribe to my free newsletter to get new baking tips in your inbox monthly. Find me sharing new recipes and tips on Pinterest, Instagram, or Facebook.

    Peppermint Pattie Brownie

    Peppermint Pattie Brownies

    A fudgy peppermint chocolate brownie with a layer of York Peppermint Patties for bites of mint chocolate brownie heaven.
    5 from 11 votes
    Print Pin Rate
    Course: Dessert
    Cuisine: American
    Prep Time: 10 minutes minutes
    Cook Time: 35 minutes minutes
    Cooling Time: 2 hours hours
    Total Time: 2 hours hours 45 minutes minutes
    Servings: 36 pieces
    Calories: 138kcal
    Author: Serena

    Ingredients

    America's Test Kitchen Peppermint Pattie Brownies

    • ¾ cup AP Flour
    • ½ teaspoon baking powder
    • ¼ teaspoon salt
    • 8 tablespoons unsalted butter
    • 2 ounces unsweetened chocolate
    • 1 cup sugar
    • 2 large eggs
    • 1 teaspoon vanilla extract
    • 16 1 ½ inch York Peppermint Patties, unwrapped

    Instructions

    • Adjust oven rack to middle position and heat to 350°F.
    • Make foil sling for an 8 inch square baking pan, and grease the aluminum foil and sides of the pan.
    • Whisk flour, baking powder, and salt together in a bowl.
    • Microwave butter and chocolate in second bowl at 50 percent power, stirring occasionally, until melted and smooth, 2 to 3 minutes; let cool slightly.
    • Whisk sugar and eggs together in large bowl.
    • Add vanilla and chocolate mixture and whisk until combined.
    • Add flour mixture and stir until just incorporated.
    • Pour all but 1 cup batter into the prepared baking pan. (This is about half of the batter)
    • Spread an even layer of peppermint patties ½ inch apart on top of the batter.
    • Spread remaining batter over patties.
    • Bake until just set in the center, 30 to 35 minutes, rotating pan halfway through baking.
    • Let bites cool in pan for 2 hours on a wire rack.
    • Using foil overhang, lift bites out of pan. Cut into 36 pieces before serving.

    Notes

    Recipe Source: SerenaLissy.com
    This website provides approximate nutrition information for convenience and as a courtesy only. Nutrition data is gathered primarily from the USDA Food Composition Database via Spoonacular, whenever available, or otherwise other online calculators.
    All images and content are copyright protected. Do not use our images without prior permission.

    Nutrition

    Serving: 1Brownie | Calories: 138kcal | Carbohydrates: 24g | Protein: 1g | Fat: 5g | Saturated Fat: 3g | Polyunsaturated Fat: 1g | Monounsaturated Fat: 1g | Trans Fat: 1g | Cholesterol: 16mg | Sodium: 32mg | Potassium: 41mg | Fiber: 1g | Sugar: 18g | Vitamin A: 92IU | Calcium: 10mg | Iron: 1mg
    Tried this Recipe? Pin it Today!Mention @SerenaLissy or tag #serenalissy!

    As an Amazon Associate and member of other affiliate programs, I earn from qualifying purchases. What that means is if you click on one of our affiliate links, they may toss a few pennies our way for a commission.

    Here are a few of our favorite chocolate and peppermint recipes:

    • Peppermint Bark
    • Chocolate Peppermint Cupcakes
    • The Best Homemade Brownies

    Original recipe December 17, 2014; Updated December 20, 2021

    Mexican Wedding Cookies

    December 13, 2021

    Mexican Wedding Cookies

    We are up to day three in the 12 days of Christmas baking. Today we are going with a simple Mexican Wedding Cookies recipe. It seems like at the holidays, everything is covered with chocolate. So I decided to stay chocolate-free for this recipe. These nutty little morsels do not disappoint. It's a simple cookie, but the flavor of the butter and nuts shines through. You can even freeze the dough and pull out a few at a time to enjoy another day or for any special occasion.

    Mexican Wedding Cookies

    "Christmas is doing a little something extra for someone" -Charles M Schulz

    Mexican Wedding Cookies

    You know you have found a good cookie when one has to dust powdered sugar off themselves from head to toe. In addition to all the powdered sugar, I love the texture. It's pretty similar to shortbread cookies texture. Nutty, buttery, melt in your mouth goodness that's always a crowd-pleaser.

    These Christmas cookies make great holiday gifts. It always brings a smile to my recipient's face. It's that smile that tells me it was worth the time and reminds me how much I enjoy doing just a little something extra for people during the holidays.

    What are Mexican wedding cookies?

    Mexican wedding cookies are known by several different names around the world. You might know these cookies by one of the following names:  Mexican Tea Cookies, Russian Tea Cakes, Walnut Delights, Pecan Petites, Sugar Butter Balls, Snowball Cookies, Norwegian Snowballs, or Swedish Heirloom Cookies. These are just a handful of the many names these cookies are known by, so if you know them by something different, I would love to know what you call them.

    Contrary to what the name suggests, the origin of these cookies can be traced back to Medieval Arab baking. It's believed that these cookies migrated to the Americas in the 16th century through English nuns or Spanish conquistadors. However, in the 1950s, Mexican Wedding Cookies started appearing in U.S. cookbooks. In Mexico, these cookies are often known by the name polvorones.

    The type of nuts used in the recipe tends to vary based on the country of the recipe's origin too. However, what these cookies have in common is the ingredients (flour, butter, water, and ground nuts) and that these delicious cookies are commonly made for special occasions and the holiday season!

    Ingredients

    Mexican Wedding Cookies Ingredients
    • Walnuts
    • All Purpose Flour
    • Salt
    • Unsalted Butter
    • Superfine Sugar
    • Vanilla Extract
    • Confectioners Sugar

    How to Make Mexican Wedding Cookies

    Mexican Wedding Cookies Process Collage

    Heat your oven to 325°F. Then line two baking sheets with parchment paper. In a food processor, finely grind half of the nuts until they are like the texture of cornmeal and transfer to a medium bowl. With the remaining nuts, coarsely chop them in the food processor and add to the same bowl. Stir in the flour and salt. Grab a larger bowl and beat butter and superfine sugar with a hand mixer until light and fluffy. Add the vanilla extract. At low speed, mix in the nut flour mixture slowly until combined. Make sure to scrape the sides of the bowl and the beaters. Continue until the dough is cohesive. You could also put this in the bowl of a stand mixer and use the paddle attachment.

    Next, use one tablespoon of dough at a time, or use a cookie scoop, roll the dough into one-inch balls, and lay on prepared baking sheets. Bake for about 20 minutes until pale gold and the bottom of the cookies begin to brown. Let the warm cookies cool on the baking sheet for ten minutes and then transfer to wire racks to cool completely. Once cooled roll the cookies in confectioners sugar to give them the white dusting these cookies are known for!

    Store these cookies in an airtight container. These are a perfect cookie for the Christmas season and are a great addition to any cookie platter.

    Mix In Ideas

    There are so many variations on this cookie in terms of the nuts. I used walnuts for this recipe, but you could easily use almonds or pecans instead if you're a fan of pecans or almonds. Here are a few other mix ins you could try:

    • Chopped Pecans or Almonds
    • Mini Chocolate Chips
    • Macadamia nuts and shredded coconut
    • Add Cinnamon to the walnuts

    Give these Mexican Wedding Cookies a try. I think you will be surprised at how easy they are. Be sure to save some for yourself, or even better, double the recipe and freeze half for a later date.

    Mexican Wedding Cookies

    Looking For More Recipes?

    Subscribe to my free newsletter to get new baking tips in your inbox monthly. Find me sharing new recipes and tips on Pinterest, Instagram, or Facebook.

    Mexican Wedding Cookies

    Mexican Wedding Cookies

    A recipe for Mexican Wedding Cookies with a shortbread cookie dough rolled in powdered sugar with a nutty, buttery flavor.
    5 from 2 votes
    Print Pin Rate
    Course: Dessert
    Cuisine: American
    Prep Time: 10 minutes minutes
    Cook Time: 20 minutes minutes
    Cooling Time: 10 minutes minutes
    Total Time: 40 minutes minutes
    Servings: 48 Cookies
    Calories: 90kcal
    Author: Serena

    Ingredients

    • 2 cups walnuts
    • 2 cups AP flour
    • ¾ teaspoon salt
    • 16 tablespoons room temperature butter (Unsalted)
    • ⅓ cup superfine sugar
    • 1 ½ teaspoon vanilla extract
    • 1 ½ cup confectioners sugar

    Instructions

    • Heat oven to 325°F.
    • Line two baking sheets with parchment paper.
    • Finely grind ½ of the nuts in a food processor to the texture of cornmeal and transfer to a medium bowl.
    • Coarsely chop remaining nuts in the food processor and add to the same bowl and stir in flour and salt.
    • In a large bowl beat butter and superfine sugar with a hand mixer until light and fluffy. Add vanilla.
    • On low speed, slowly mix in the nut flour mixture until combined. Scrape bowl and beaters and continue until dough is cohesive.
    • Working with 1 tablespoon of dough at a time, roll dough into balls and lay on prepared baking sheets.
    • Bake until pale gold and bottoms are just beginning to brown. About 20 minutes.
    • Let cookies cool on baking sheet for 10 minutes then transfer to wire rack and let cool completely.
    • Roll cookies in confectioners sugar to coat.

    Notes

    Recipe Source: SerenaLissy.com
    This website provides approximate nutrition information for convenience and as a courtesy only. Nutrition data is gathered primarily from the USDA Food Composition Database via Spoonacular, whenever available, or otherwise other online calculators.
    All images and content are copyright protected. Do not use our images without prior permission.

    Nutrition

    Serving: 1Cookie | Calories: 90kcal | Carbohydrates: 10g | Protein: 1g | Fat: 7g | Saturated Fat: 3g | Polyunsaturated Fat: 2g | Monounsaturated Fat: 1g | Trans Fat: 1g | Cholesterol: 10mg | Sodium: 37mg | Potassium: 28mg | Fiber: 1g | Sugar: 2g | Vitamin A: 118IU | Vitamin C: 1mg | Calcium: 7mg | Iron: 1mg
    Tried this Recipe? Pin it Today!Mention @SerenaLissy or tag #serenalissy!

    Here are a few of our favorite cookie recipes:

    • Kringla Cookies
    • Chocolate Butter Cookies
    • Dulce de Leche Cookies
    • Baileys Chocolate Truffles

    As an Amazon Associate and member of other affiliate programs, I earn from qualifying purchases. What that means is if you click on one of our affiliate links, they may toss a few pennies our way for a commission.

    Original Post on December 14, 2014. Updated December 13, 2021

    • Go to page 1
    • Go to page 2
    • Go to page 3
    • Interim pages omitted …
    • Go to page 17
    • Go to Next Page »

    Primary Sidebar

    Hi, I'm Serena!

    Join us and you will learn all sorts of creative techniques from baking to food photography that is easy enough for a novice to recreate at home, but look and taste like they were made by a seasoned pro.

    Get Inspired, Cook Confidently, Eat Well

    More about me →

    Ice Cream Recipes

    • Scoop of chocolate mint ice cream in bowl with ice cream cone
      No Churn Chocolate Mint Ice Cream
    • Bowl of key lime pie ice cream with a spoon
      No Churn Key Lime Pie Ice Cream
    • Apple Ice Cream in a waffle cup
      Apple Ice Cream
    • Chocolate Chunk Ice Cream In A Bowl
      Chocolate Chunk Ice Cream
    • Frozen Greek Yogurt from your Instant Pot
      Instant Pot Frozen Greek Yogurt
    • Avocado Ice Cram In a serving Bowl
      Easy Avocado Ice Cream Recipe

    Popular Recipes

    • Jamaican Sweet Potato Pudding
      Jamaican Sweet Potato Pudding
    • Peanut Butter Fudge Cups
      Peanut Butter Fudge Cups
    • Samoas on a plate
      Make at Home Samoas - Homemade Samoas: Girl Scout Cookies
    • Italian Chocoalte Walnut Cake
      Italian Chocolate Walnut Cake (Torta di Noci)

    Photography Challenge

    Master The Art of Food Photography

    Footer

    ↑ back to top

    About

    • Privacy Policy

    Newsletter

    • Sign Up! for emails and updates

    Contact

    • Contact

    As an Amazon Associate, I earn from qualifying purchases.

    Copyright © 2023 Serena Lissy