• Skip to primary navigation
  • Skip to main content
  • Skip to primary sidebar
  • Home
  • Collaborate with us
  • Contact

Serena Lissy logo

  • Recipe Index
  • Privacy Policy
menu icon
go to homepage
  • Christmas
  • Recipes
  • Photography
  • About
    • Facebook
    • Instagram
    • Pinterest
  • search icon
    Homepage link
    • Christmas
    • Recipes
    • Photography
    • About
    • Facebook
    • Instagram
    • Pinterest
  • ×

    Serena Lissy » Recipes

    Blog

    Food Styling: Making It Real

    March 30, 2012

    Pastrami Sandwich

    Food styling is a difficult art form. I enjoy the creativity of it, but it takes practice to master. The right way to style food is knowing how to make the dish look and taste good!

    Pastrami Sandwich On Plate

    There are so many ways in which one can style food: with forks, knives, chopsticks, fingers; on plates or bowls or platters; over a bed of lettuce leaves or wrapped up in rice paper rolls. Napkins, plates, table tops; It's all about what best suits your dish and its desired presentation.

    When I am photographing it, the only part of my focus is on the side or piece that will be photographed. Before shooting, I like to sketch out a rough image in either my mind or by drawing it on paper and then figure out what props would work best for each photograph with this specific picture in mind. For example, if the photo needs to show off the front of the dish being eaten, I might serve something more appetizing than if it was meant to capture someone's hand scooping up food from a bowl.

    The key to expertly styling food is in the details. Learning what else you need beside the food is key to success. Food is a sensuous product and needs to appeal to all five of the senses in order to make it extra desirable.

    Simple Food Styling with Sandwich

    Live View

    I will also use the Live View feature of my camera. It helps me to see how the camera sees the setup. This is also helpful to quickly edit what is in the scene. Are all the garnishes showing up how I wanted them? Is the fork in the right spot...etc... This is just a quick way to frame the image. I like to think of it as my "on the go" composition step. Once I'm good with the composition, I then turn off the Live View feature and continue with the job.

    Turkey Sandwich

    Does Your Food Styling Show the Hero of the Image?

    Also when photographing food, it is important to showcase what is being sold. We recently photographed sandwiches for a local deli. For this project the sandwiches were the most important piece. So for all the images, the food styling request was that the sandwich needed to be the most abundant food in the image. The goal was to keep it simple and show off the sandwich.

    Show Off Your Food's Best Assets

    You can see in these images all the food is extremely fresh and was just created before the photograph. The lettuce has no wilt, the tomatoes are large, red and juicy. The sauerkraut is fresh and not watery or leaking juices. The perfect crisp on the top of the bread.

    Reuben Sandwich

    Be Creative With Your Food Styling

    Once we finished the job for the client, we then went to play with other compositions for the sandwiches. This is where the creativity really comes into play. It's amazing how many different ways you could showcase a sandwich. The choices were unlimited:

    • Black Background
    • White Background
    • Traditional Sandwich
    • Creative Shot with a bite
    • On a plate with chips
    • Utensils in the image
    • Decorative napkins or plates
    Food Styling with Ham Sandwich

    Be Swift

    Food doesn't age well. So you have to be quick with your images. That's why it's important to have everything planned out in advance. You don't want to lose the magic moment having to deal with bad food styling or fixing things you didn't think about.

    Do You Have Everything You Need in the Image?

    As you see from all the images, there was no one way to create this image. The most important piece during styling is that everything that ends up in the image, was meant to be there. A crumb on the plate, was put there specifically for the image. A fork dug into the food, makes it look more real and attainable to the viewer. Sometimes it adds balance to the photograph. These are such small details, but so important to a successful photograph.

    Ham Sandwich

    Cooking is Not Enough

    Cooking is not enough. To be a successful food blogger, you need to know about the best camera settings, lighting and editing techniques. You also need to know how to stylize your dishes for perfect photos that will attract readers online.

    As a food blogger, it's more than just cooking up fantastic recipes and getting them out there on social media. You have to make sure your blog has the perfect photography and styling skills too! If you want to learn a bit more about food photography we have a great series on the website giving you some great skills.

    Great Food Styling Books

    • One of my favorites is The Food Stylists Handbook, by Denise Vivaldo
    • Food Styling: The Art of Preparing Food for the Camera, by Delores Custer

    As an Amazon Associate and member of other affiliate programs, I earn from qualifying purchases. What that means is if you click on one of our affiliate links, they may toss a few pennies our way for a commission.

    Do Your Images Have Traction with Your Target?

    March 26, 2012

    Red Shoe
    Red Shoe

    Marketers will tell you that what you "say" to your target audience needs to "speak" to them. Your message needs to convey benefits that appeal to your potential customers while outlining the features that set your product apart from your competitor's. All true.

    Now let's take that one step further...

    It's been said that "a picture is worth a thousand words". Not only does your message need to resonate with your target, but your IMAGES need to reinforce that message: focusing on your potential customer's wants and needs; creating desire for your product based on the presentation of it; and drawing attention to the most desirable feature.

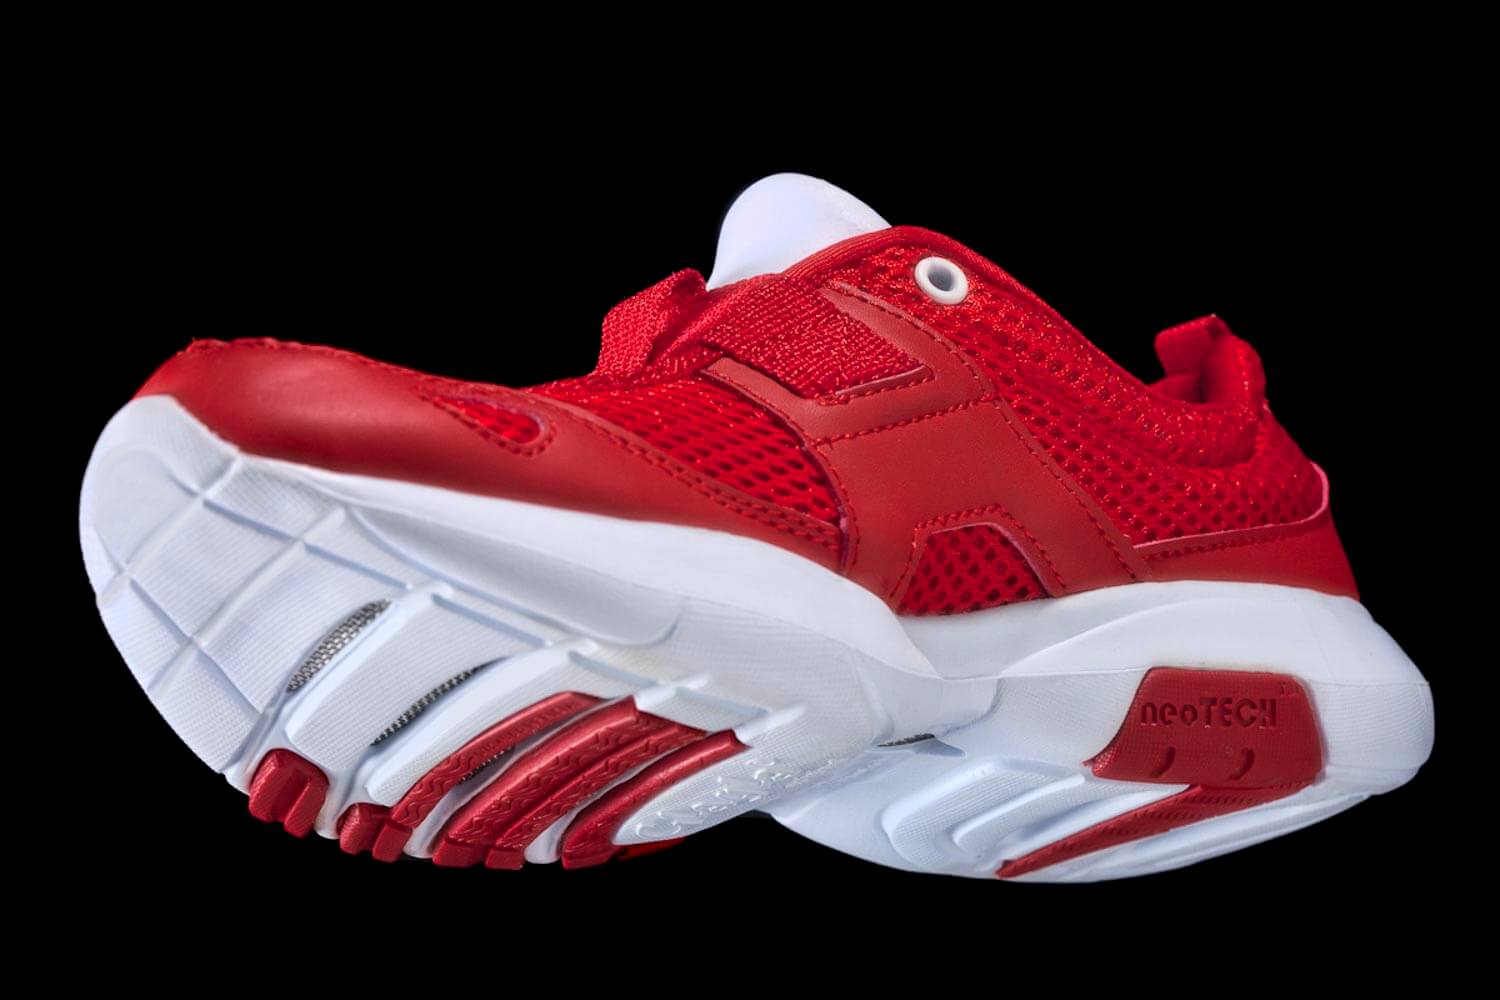
    The fitness apparal and equipment industry is a prime example of this principle. Let's say you manufacture and sell lightweight running shoes and cross-country runners are the ideal prospect to purchase your product. You SAY "lightweight" in your message, but your image shows the a close up of the shoe perched on a rock. There is nothing "lightweight" about a rock. Or maybe the shoe's best feature is its grip, but the sole never appears in any of your imagery. Even if your words say it, if your images don't convey it, there is a disconnect in the message to your prospective buyers.

    Be sure to have multiple images of each product for different campaigns. There may be one image of your product that works well for a magazine ad with a primary readership of avid athletes and fitness fanatics, but may not work in your digital marketing banner on a website with visitors who have an "interest in fitness". Each may be looking for a different feature or benefit that your product offers.

    The ultimate goal is to present your product professionally creating an image that transforms a prospective customer into a loyal customer. If your images don't have traction with your target, if they don't "see" what they are looking for, they may not even "hear" your message... and in that case, most likely, will not buy your product.

    So, how well do your product images display features and convey benefits reinforcing your marketing message?

    Take a closer look.

    Three Lightweight Shoes

    Make Your Food Pop: A Quick Lesson In Color

    March 23, 2012

    Taco Plate
    Tortillas for Pork Tacos

    I took a visit to Old Town in San Diego a few weeks ago, and was inspired to create those fresh warm tortillas that they are so known for. After living in So Cal for 20 years, I realized I have never made homemade tortillas, and to my surprise they were quite easy.

    After searching on the internet, I found a few recipes worth looking at. I took the parts I liked from each one and blended into my own creation. Once I mastered the consistency of the dough and the thickness, all was smooth sailing. Basically, flour, water, and  few other ingredients. Mix and roll flat. Cook on a hot skillet and viola! Homemade tortillas.

    The first batch didn't go as planned. They turned out a bit more like bad pancakes. Too thick. Second batch, I rerolled and got them much thinner.  The consistency was right and the flavor was great.

    I had recently been to a cooking demonstration at South Coast Winery in Temecula and they served us pulled pork tacos. So I figured why not give it a try.  Homemade tortillas, pulled pork, a fresh salsa verde recipe. Good stuff.

    The challenge to this series of shots was the colors. Lets face it, a  tortilla shell isn't giving us lots of great color for a yummy image. So we should take a quick color lesson from the color wheel. The three primary colors are red, blue and yellow. The three secondary colors are purple, orange and green. Tertiary colors result when primary colors are mixed with secondary colors. And if you have seen a color wheel, then colors on the opposite side of the color wheel are complementary. For instance, blue and orange are complementary, just like red and green, and purple and yellow. These colors contrast with each other, yet at the same time make each other active and visually appealing to the eye. So you see white isn't really in the mix, nor is brown from the cook marks. So we had to spice it up to make it look appealing, hence the salsa verde and tomatoes.

    Taco Plate

    The complementary red and green work well in these images. They seem to give it much more energy.

    Salsa Verde Tomato on Taco

    With this image we kept with the primary color of yellow from the tomato and the blue of the plate.

    Tomato on Tortilla

    This simple tortilla recipe was a fun exercise in playing with color. It's easy to pull out a color wheel and see what works together. Then thinking how you could plate a meal based on color of ingredients and table settings. I encourage everyone to give it a try!

    Chocolate Guinness Cake For St. Patricks Day

    March 16, 2012

    I think today we did get a little bit of the luck of the Irish. A homemade cake with a main ingredient of beer? How could this be bad? After a few requests to our friends, we  found a recipe from the Simply Recipes website for something worthy of St. Patricks Day. Chocolate Guinness Cake with Cream Cheese Frosting. I was a little skeptical since I am not a beer drinker, but I must say, I am enjoying the cake right now as I type this post.

    Guinness Cake on Plate

    Today was another exercise in natural light food photography. I do have to say, I am a fan of strobes. Always have been and always will be. The cake was done quite early today, but the sun was no where to be found when we needed it. Over the last four weeks of Food Fridays, we have been using natural light with similar challenges. As a result, today will most likely be our last Food Friday with natural light. As a gal that prefers to make her own sunshine, I enjoy turning my subject into an art form with the application of the right lighting. Plugging in the strobes and achieving the best light possible is really a matter of its quality and the angles at which it reaches its subject. Not waiting and hoping the clouds roll by.

    Advantages to Photographing With Natural Light

    I believe there are advantages and disadvantages to shooting with natural light. When the lights good...it is very good...but there are times that you just can't get the light you need to achieve the shot you are envisioning. I live my days working with soft boxes, umbrellas, grids and snoots and every thought is about shaping the light. Four weeks into my Food Friday project and I have learned a valuable lesson regarding my style of photography and what I like to do.  So if I get nothing more out of my Food Fridays other than a few pounds from all the eating, it was worth it to me. I'll stick with what I love to do, and do it the best I can.

    Guinness Cake on Plate with Fok
    Guinness Cake Up Close on Plate

    Happy St. Patricks Day!

    Looking For More Recipes?

    Subscribe to my free newsletter to get new baking tips in your inbox monthly. Find me sharing new recipes and tips on Pinterest, Instagram, or Facebook.

    As an Amazon Associate and member of other affiliate programs, I earn from qualifying purchases. What that means is if you click on one of our affiliate links, they may toss a few pennies our way for a commission.

    Food Photography: Composition Made Simple

    March 9, 2012

    Cake Roll on Plate

    This lemon dessert was so simple it gave us some free time to experiment with the camera angles for the composition of the images. We will start with the three traditional angles for food photography. The Diner's View, the Top Down View, and the Straight On View.

    Cake Roll on Plate

    The Diner's View would simply be at an angle as you were sitting looking at the food. Pretend you were dining at a table and the food was in front of you. The angle you see the food sitting naturally would be the Diner's View. Somewhere between 20 - 40 degrees. The lower the camera the more the background comes into play. Shooting from a higher angle, simply means you don't need to worry so much about a background. This angle tends to showcase the food well. It tends to bring a sense of desire to the food. Almost inviting the viewer to just dive in. If I were a restaurant or chef, that is definitely the feeling I would want my audience to have when they see my food. I want them to have a connection with the image, to almost feel as if it were in front of them.

    Top Down View of Dessert

    The next two photographs are called top down shots. Basically we are directly above the food looking down onto it. This is great if you want to show a lot of things in the image at once. These are often used for ingredient component images or the steps in a recipe. This point of view can really make an image unique. It hides a lot of unnecessary details. Usually with this style, all of the image is in focus, even at wide apertures. You will see this a lot in magazines or cookbooks. If your restaurant has a story about it's meals in a magazine, or your niche might be about your ability to utilize unique ingredients in your recipes, this is a great way to showcase the ingredients and let them be the hero of the photograph.

    Top View of Cake Roll

    Straight On View

    And the last view we have is straight on. The camera is almost parallel to the cake. These are great for dishes that you want to emphasize the height of the subject or a pulled back full table shot. These can also work well if you need to add copy to the image for your advertising.

    Cake Roll UpClose View

    The next two images are just different examples of orientation and cropping. The landscape shot of the roll achieves some depth by taking advantage of the diagonal lines in the image.

    Macro View Of The Lemon Cake Roll

    Lemon Cake Roll

    How To Make The Lemon Cake

    This dessert was very easy to make.

    Duncan Hines Angel Food Cake package baked according to the directions.

    The first layer inside the roll was Smuckers Strawberry Ice Cream topping.

    The second layer was a lemony creation that was a blend of Philadelphia Cream Cheese with Cool Whip topping, some lemon zest and a bit of yellow food coloring.

    Roll it all up, let it sit, and there you have it! A luscious lemony dessert that is a perfect finale to any gathering, from backyard BBQ, to pool party, or even an afternoon delight with your coffee.

    Other Lemon Recipes

    • The Best Lemon Cheesecake Recipe
    • How To Make Lemon Curd
    • Lemon Poppy Seed Bundt Cake

    Looking For More Recipes?

    Subscribe to my free newsletter to get new baking tips in your inbox monthly. Find me sharing new recipes and tips on Pinterest, Instagram, or Facebook.

    As an Amazon Associate and member of other affiliate programs, I earn from qualifying purchases. What that means is if you click on one of our affiliate links, they may toss a few pennies our way for a commission.

    Meet My Favorite Everyday Quick Pasta

    March 2, 2012

    Well we are back to Food Fridays and time was running a little short this week. So instead of looking up a recipe I opened up the cabinet and worked with what I had. I created a basic spaghetti with a simple tomato pasta sauce. If time permitted I would have ran to the store to get fresh tomatoes. Instead I used a can of Hunts diced tomatoes.

    The sauce was very simple:

    One can Hunts diced tomatoes

    Clove of garlic

    Dash of salt, and red pepper flakes

    Chopped fresh basil

    Olive oil

    Tossed it all in a saute pan and heated it up while cooking the spaghetti.

    Spaghetti is a little more difficult to work with. When just eating pasta I like to add a little oil to the water while boiling. Because this is for a photograph, I won't do that. I'm trying to avoid the pasta leaving oil marks on the plate if I choose to move it. I also don't want the pasta to get spotty as it is exposed to air if a piece has uneven oil distribution on it. And I want the sauce to cling to the pasta and if it has oil, the sauce will slide off the pasta.

    I cooked the pasta al dente, plated it and sprinkled parmesan cheese on top. Sticking with our established rules for Food Friday, this was prepared within 20 minutes, and everything you see is edible. Until next week, Bon Appetit!

    Product and/or People: An Image Debate

    February 27, 2012

    There is an age-old debate that exists among companies who sell products:  some have marketing departments that say, "People buy from people! There needs to be an emotional connection between the viewer and the product."; others say, "Focus on the product! Extraneous elements only detract from the primary purpose." What do we believe? What have we experienced in working with product companies?

    The short answer is ... a blend of the two is the best.

    Taking a closer look at this debate, we see that: a) the ratio of people with product or just the product alone will shift depending on what type of product it is and its purpose; and b) how the product is presented with the people depends on the product itself.

    Let's look at the image shown with this article. You will see that the focus is on the jewelry, yet there is a person in the image.  The potential buyer's eye goes directly to the product (good, that's what we are selling), yet still they take in the entire image where the person is wearing the product in a casual setting and they feel the beauty (good, that's what triggers desire to buy). Note that the person is the support for the product. You only see part of the person, but in this case, that's all that is needed to evoke emotion in the buyer.

    This image could be used for a display advertisement, a billboard, direct mail piece, online banner ad, social media ad, etc., etc. However, in a printed catalog or online shopping cart, this image could be used as a sample of the collection or category image, but the product itself and other similar products would then be shown individually. And therein lies the blend of both product and people.

    Another example may be a winery that is concentrating on wine sales.

    They should have an image focusing on the wine bottle - presenting the actual product as the buyer will see it when it is purchased.  This photo may or may not have someone holding the bottle depending on the purpose. Supporting images may show wine pouring, the vines from which the wine was made, the wine tasting room, a group of people toasting with the wine and so on. Again, a nice blend of product and people.

    Are your images professionally presenting your product AND evoking the emotional connection that make people want to buy what you are selling? Take a closer look.

    Cherry-Mallow Cookies: A Sticky Process

    February 24, 2012

    I've had this Food Friday concept for a while and have finally decided on the direction it will go this year. I am a lover of food and also photography, so the question was how do I blend them together to create a personal project that didn't become so large that it interfered with the normal workflows of the studio. As with any project, I established some ground rules for all future Food Friday projects:

    1. Start to Finish time to prepare and cook food - 60 minutes or less

    2. All food in photograph must be edible

    3. It needs to look delicious

    I know what you are thinking... I like to keep my rules to a minimum.

    For my first project I wanted to try a dessert. I pulled out the Better Homes and Gardens Special Interest Publication and went with Cherry-Mallow Cookies. Prep time 30 minutes and no baking involved. And they looked yummy. It fit my rules, so I went for it.

    What the recipe didn't tell you was that it was a sticky mess. I've never really cooked with marshmallow creme before, and I didn't realize how sticky it actually was. And the vanilla flavored candy coating at my local grocery store, never melted properly to be a smooth liquid worthy of dipping a cookie into. It was more like a glob of chocolate gunk. Because I have rule number two in place, next time I would probably go with a Ghirardelli white  chocolate baking bar. You know what you get with Ghirardelli and it would have made a nice substitute. Or a second alternative would be Bakers Dipping Chocolate by Kraft.

    The recipe was simple. Vanilla wafer sandwiches, inside filling was marshmallow creme with chopped maraschino cherries. Sandwich was then dipped into the white chocolate  candy coating and a maraschino cherry was placed on top.

    Start to finish time was probably about 45 minutes. Trying to figure out the candy coating resulted in a lot of wasted sandwiches that were dipped and just ugly with globs of chocolate on them. Then we had to make more marshmallow creme and cherry sandwich filling and start over. All in all, these were a nice little finger food. I do feel a bit of responsibility, and I must warn you of the extremely high sugar content in these little morsels. If you want to try these yourself, or just see the full recipe, take a look at Better Homes and Gardens

    Fog on the Vines

    February 18, 2012

    We woke up to such beautiful fog one of the mornings in Lodi last week. I couldn't resist pulling out the camera for some sunrise shots on the old gnarly vines.

    Wine & Chocolate

    February 16, 2012

    Some of our work was on display in Lodi during the Wine & Chocolate weekend event at the LangeTwins Winery. Such a fun event, that the entire town seems to participate. Click image for Video

    A Professionally Produced Photograph Isn’t Just a Luxury

    January 24, 2012

    For most potential customers, the first experience they have with your product is through photographs or images, be it through catalogs, brochures, or even websites.

    A professionally produced photograph isn't just a luxury. It’s an essential component of a well-created advertising and marketing campaign that, with proper use, will influence the way customers view and feel about your products.

    In today’s world, you only have a few moments to capture someone’s attention. So the photographs you use in your business have to be believable and of the highest quality.  That’s where a commercial product photographer can come into play.

    Goal Of A Commercial Photographer

    A primary goal of a commercial product photographer is to create a mood.  Documenting a product isn’t good enough. Creating an atmosphere that speaks directly to your target market is key. For example, if you look at the candy images below, one can see that the first image shot on a white background documents the product, isn’t very appealing, and doesn’t convey a message of a scrumptious dessert. But once we change the background by adding props, adjusting the lighting, and setting up the shot, the second image now has a much more appealing look.  The commercial photographer has changed the mood to evoke the consumer's desire to want a piece of chocolate.

    Chocolate candys in a white plate
    Styled Chocolate Candies in a plate

    Lighting in Photography

    Another goal of a commercial product photographer is to create dramatic effects and produce clarity of the product using lighting.  If lighting is used correctly, one can achieve a three-dimensional feel to a two-dimensional image. You want your target audience to feel that they can reach out and actually touch the image.  In the shoe image below, We used lighting to draw attention to the important selling features of the product, the micro-perforated dry-tech material, and the special ventilation on the bottom. The photographer wants the audience to see the texture of the materials, the fashionable design, and the metallic membrane on the shoe's bottom. All of this was achieved through special lighting techniques.

    Shoe Photograhed for Print Ad

    What Do You Want Your Audience To Know?

    A great commercial product photographer not only has a sense of marketing but should also spend the time to learn about your product and business.  They should be asking questions about your target market, your competitors, the benefits and features of your product.  What is the most important item that you want your target audience to know? They should also ask how the images will be displayed, web or print?  What is the mood you are looking to convey in the photograph?  The photographer needs to understand all of these pieces to create a believable and high-quality image for your business.
    The visual impact of any advertising or marketing campaign is very dependent on an attention-grabbing image.  Make sure your advertising photographs and images support the messages that your business is trying to convey and promote the results you are trying to achieve. The art of creating those images is what a commercial product photographer is all about.

    Five Day Food Photography Challenge

    Want to take your food photography up a notch?

    I’ve been photographing food for years and have learned some tricks of the trade. Join me on this 5-day challenge where you’ll learn how to master the art of food photography, one bite at a time. You’ll be amazed by what you can do with just a few simple tips. You will learn how to make your photos pop with color, texture, and lighting. Sign up today!

    The Creative Eye: What Inspires Your Photography?

    January 2, 2012

    Soup in a cup

    Why do you take photos? What inspires you to take out your camera and capture an image? What Inspires your Photography? The answers to these questions are varied, as the answer is different for every single photographer out there.

    Soup in a cup

    Is It The Gear?

    There are a lot of theories out there about how to take really fantastic, inspired photographs. Some people think that having great gear will create fantastic photographs every time. They purchase new, top of the line cameras, lenses, flashes, tripods, camera bags… anything that they think will give them the competitive edge in taking great photographs. Many of those photographers then proceed to use automatic mode on their cameras and don’t understand why they aren’t taking great images. Is it the gear that inspires your photography?

    Is It The Technical Side of Photography?

    Others will cite technique as the main tool they use when creating fantastic photographs.  Learning how to use the technical settings in your camera like aperture, shutter speed, ISO absolutely can improve your photography. Setting your white balance manually, learning how to use your flash, learning about some of the other in-camera settings that can adjust color, saturation or contract – all of these things can help you take a fantastic photo.

    In truth, however, you don’t have to have the newest, fanciest camera and accessories to take fantastic photos. Cameras have remained pretty much the same since they were invented – they are a light proof box that lets you control how the light enters and hits your photo taking medium through a small hole. No matter how expensive – or inexpensive – your camera is, this basic fact remains the same.

    Sliced loaf of bread

    You also don’t have to have perfect mastery of technique. It is possible to take truly inspired photographs with a basic camera set on automatic. You just have to find what inspires you and use some basic tools to get the best possible image while exploring your creative process – a process that is unique to every photographer.

    The Art of Photography

    Becoming a creative, inspired photographer is about letting go of the technical aspects and exploring the creative, art side of photography. While it helps to have mastered the technical aspects first, it isn’t completely necessary. Looking at the world in a unique way, figuring out how to see and capture life through your lens, noticing what you are passionate about photographing – those aspects are what influence the creative decisions behind your best photos.

    Smoke from an incense stick

    Start With Your Favorites

    Start by sitting down with the photographs you have taken that are absolutely your favorite. Take a few moments to really study each photograph and see what it is that you love about them. Is it the subject? The light? The combination of focus and depth of field? The mood or something more intangible that you have captured in the photo?

    Compare each of your favorite photographs to the others. Do you tend to love images that have a shallow depth of field and soft lighting? Do you take a lot of them? Or maybe images with bright colors or dramatic shadows? Certain subjects you like photographing more than others? Are there common threads you can distinguish between your photographs? Noticing these common threads will help you start to identify your unique creative technique… and also help you realize what inspires you.

    Now embrace it. Take those common threads of your creativity and let them run rampant with your imagination. I bet you’ll find you are taking more interesting, inspired, creative photographs right away.

    Looking For Other Photography Tips?

    • Understanding Aperture in Photography
    • Tips For Taking Great Food Photography
    • The Cookie Stack: A Different Look and Feel

    As an Amazon Associate and member of other affiliate programs, I earn from qualifying purchases. What that means is if you click on one of our affiliate links, they may toss a few pennies our way for a commission.

    • « Go to Previous Page
    • Go to page 1
    • Interim pages omitted …
    • Go to page 14
    • Go to page 15
    • Go to page 16
    • Go to page 17
    • Go to Next Page »

    Primary Sidebar

    Hi, I'm Serena!

    Join us and you will learn all sorts of creative techniques from baking to food photography that is easy enough for a novice to recreate at home, but look and taste like they were made by a seasoned pro.

    Get Inspired, Cook Confidently, Eat Well

    More about me →

    Ice Cream Recipes

    • Scoop of chocolate mint ice cream in bowl with ice cream cone
      No Churn Chocolate Mint Ice Cream
    • Bowl of key lime pie ice cream with a spoon
      No Churn Key Lime Pie Ice Cream
    • Apple Ice Cream in a waffle cup
      Apple Ice Cream
    • Chocolate Chunk Ice Cream In A Bowl
      Chocolate Chunk Ice Cream
    • Frozen Greek Yogurt from your Instant Pot
      Instant Pot Frozen Greek Yogurt
    • Avocado Ice Cram In a serving Bowl
      Easy Avocado Ice Cream Recipe

    Popular Recipes

    • Jamaican Sweet Potato Pudding
      Jamaican Sweet Potato Pudding
    • Peanut Butter Fudge Cups
      Peanut Butter Fudge Cups
    • Samoas on a plate
      Make at Home Samoas - Homemade Samoas: Girl Scout Cookies
    • Italian Chocoalte Walnut Cake
      Italian Chocolate Walnut Cake (Torta di Noci)

    Photography Challenge

    Master The Art of Food Photography

    Footer

    ↑ back to top

    About

    • Privacy Policy

    Newsletter

    • Sign Up! for emails and updates

    Contact

    • Contact

    As an Amazon Associate, I earn from qualifying purchases.

    Copyright © 2023 Serena Lissy