• Skip to primary navigation
  • Skip to main content
  • Skip to primary sidebar
  • Home
  • Collaborate with us
  • Contact

Serena Lissy logo

  • Recipe Index
  • Privacy Policy
menu icon
go to homepage
  • Ice Cream
  • Recipes
  • Photography
  • Online Classes
  • About
    • Facebook
    • Instagram
    • Pinterest
  • search icon
    Homepage link
    • Ice Cream
    • Recipes
    • Photography
    • Online Classes
    • About
    • Facebook
    • Instagram
    • Pinterest
  • ×

    Serena Lissy » Recipes

    Blog

    15 Quick and Easy Holiday Christmas Truffles

    December 11, 2021

    Christmas Truffles

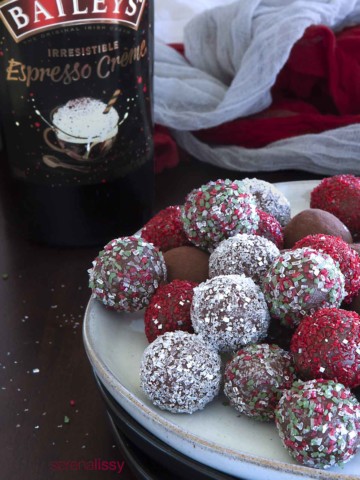
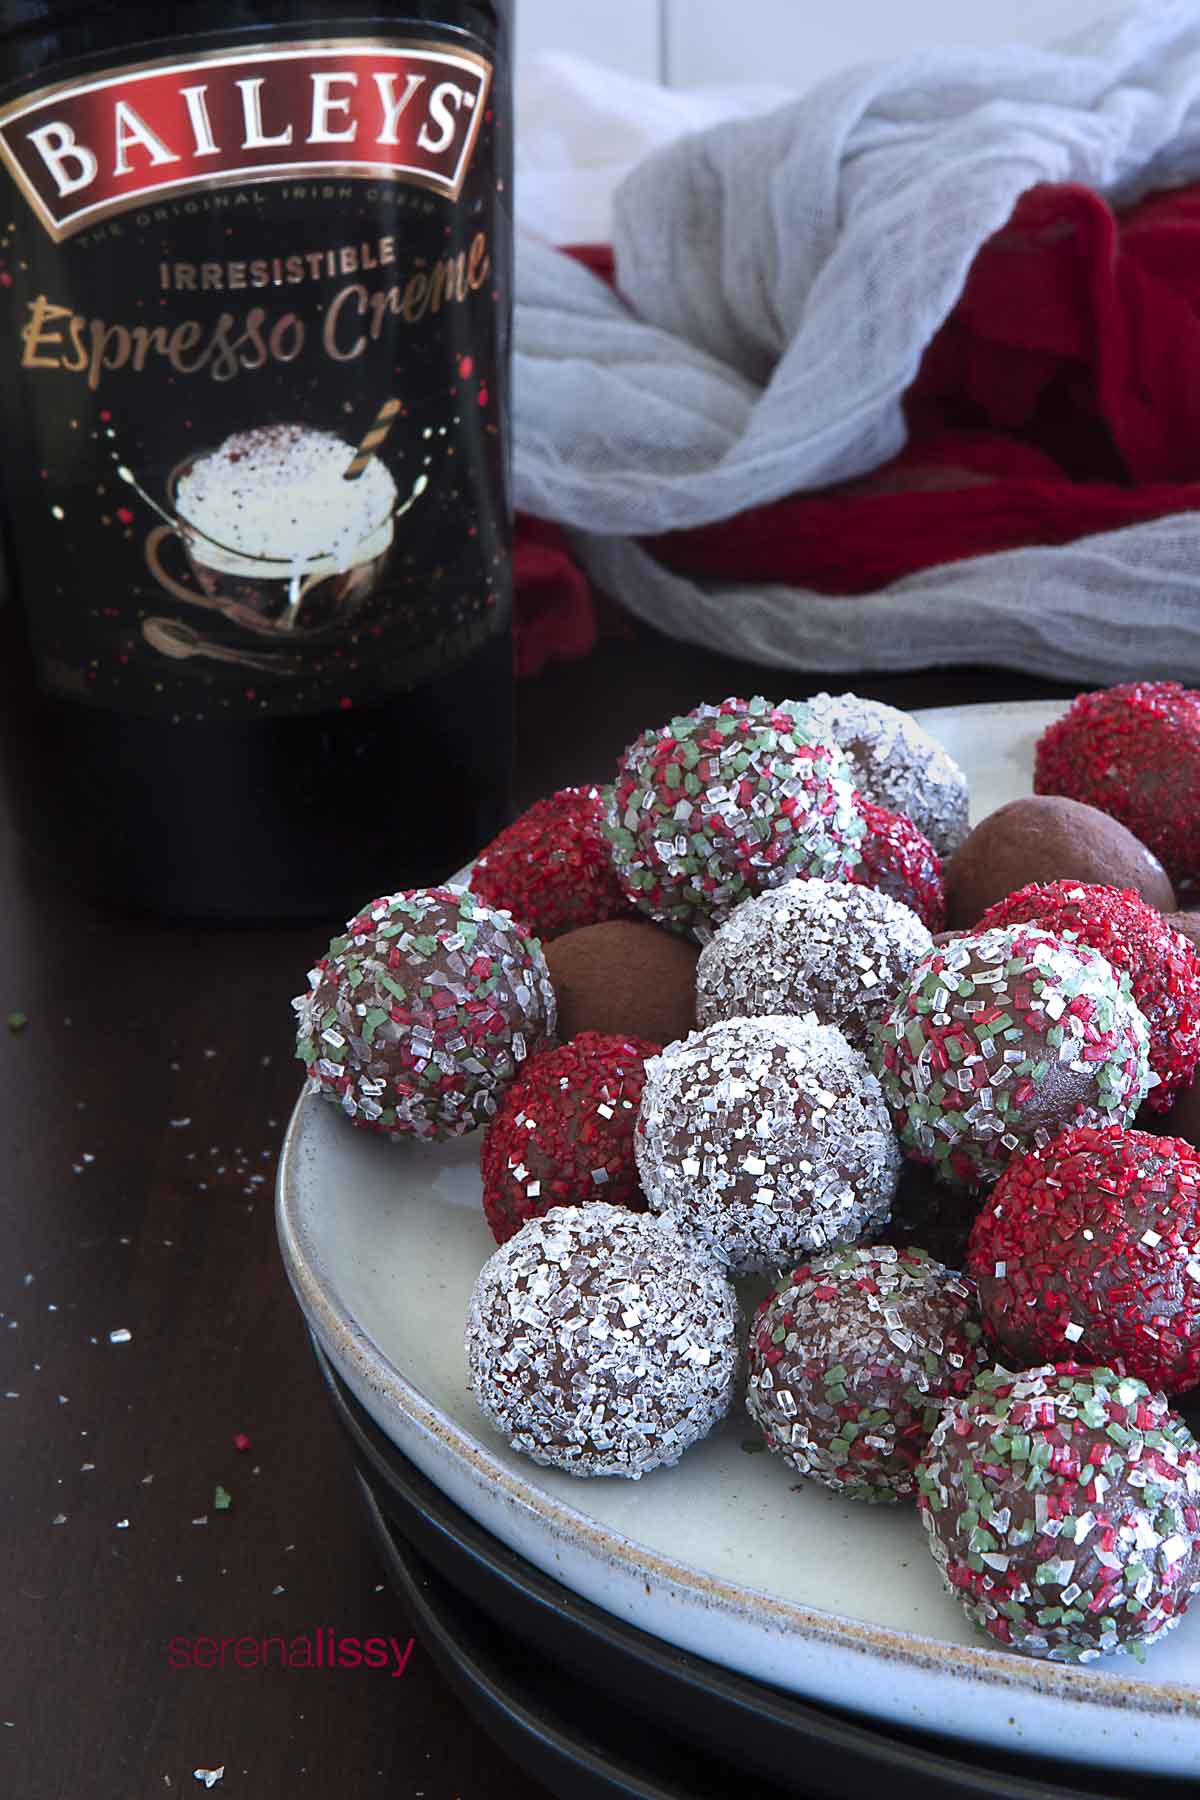
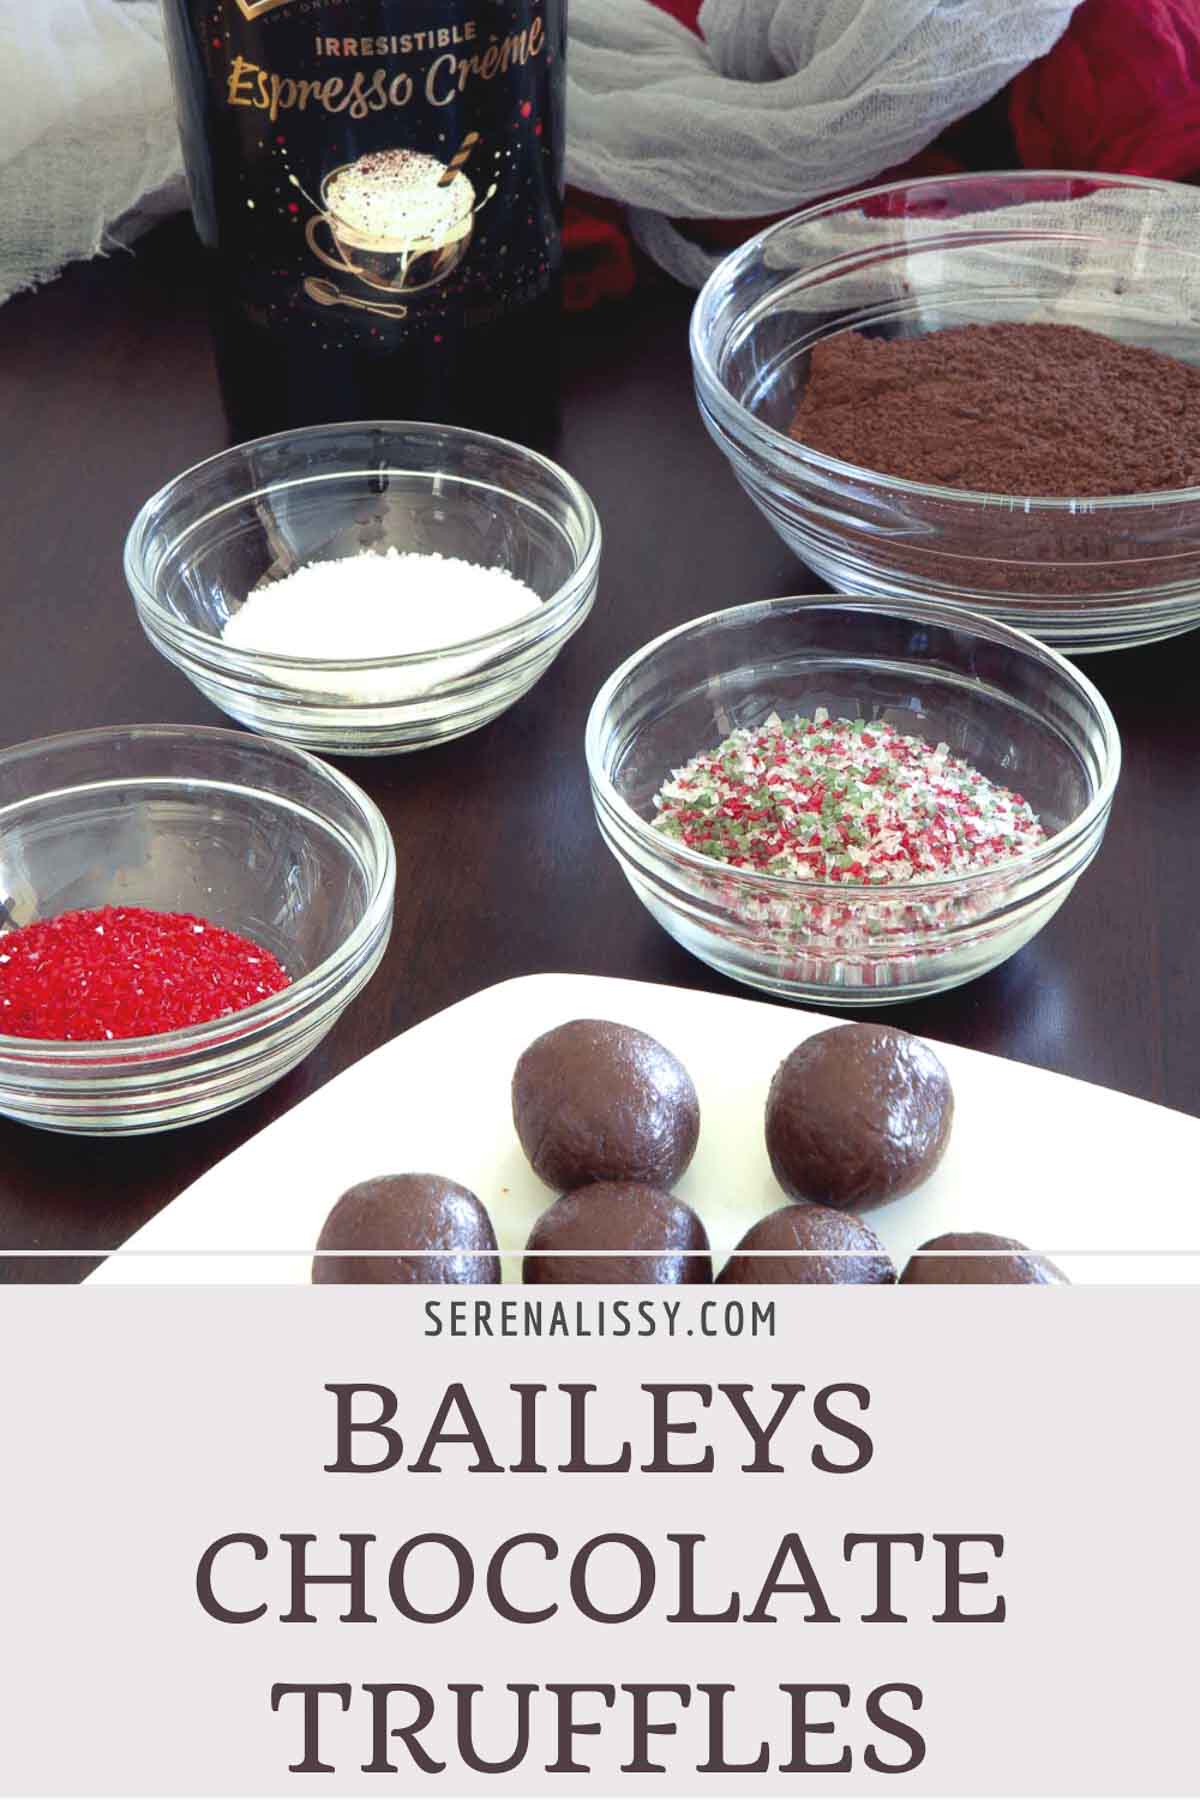
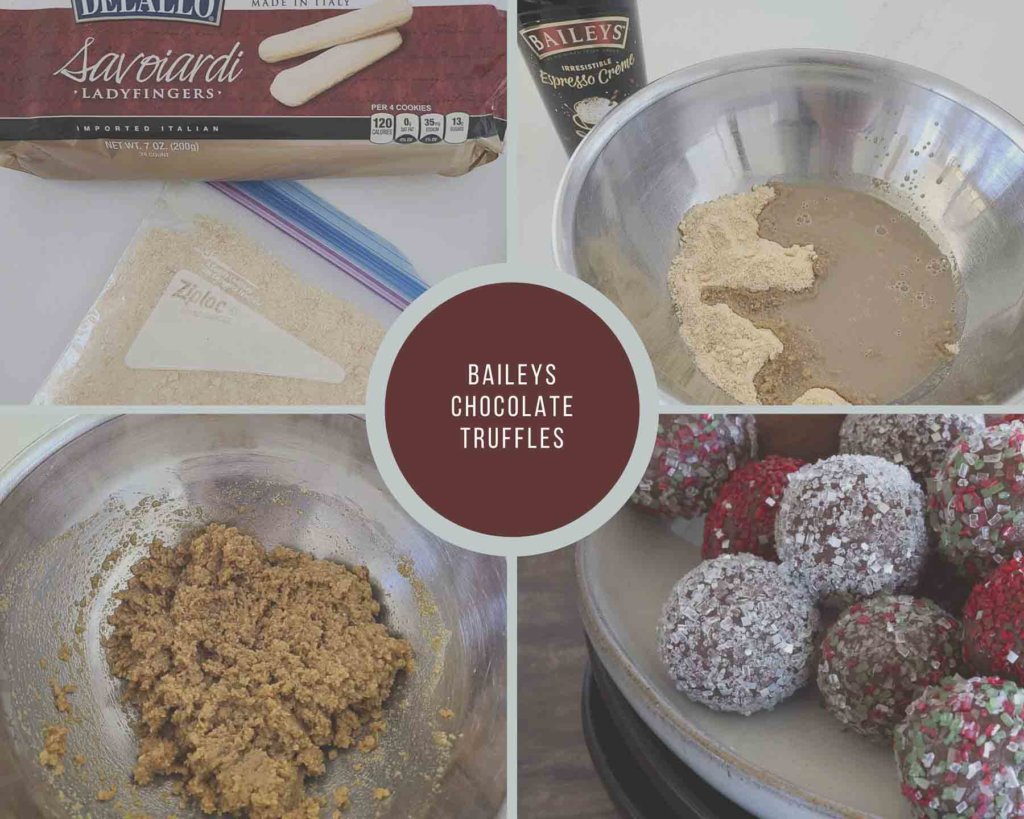
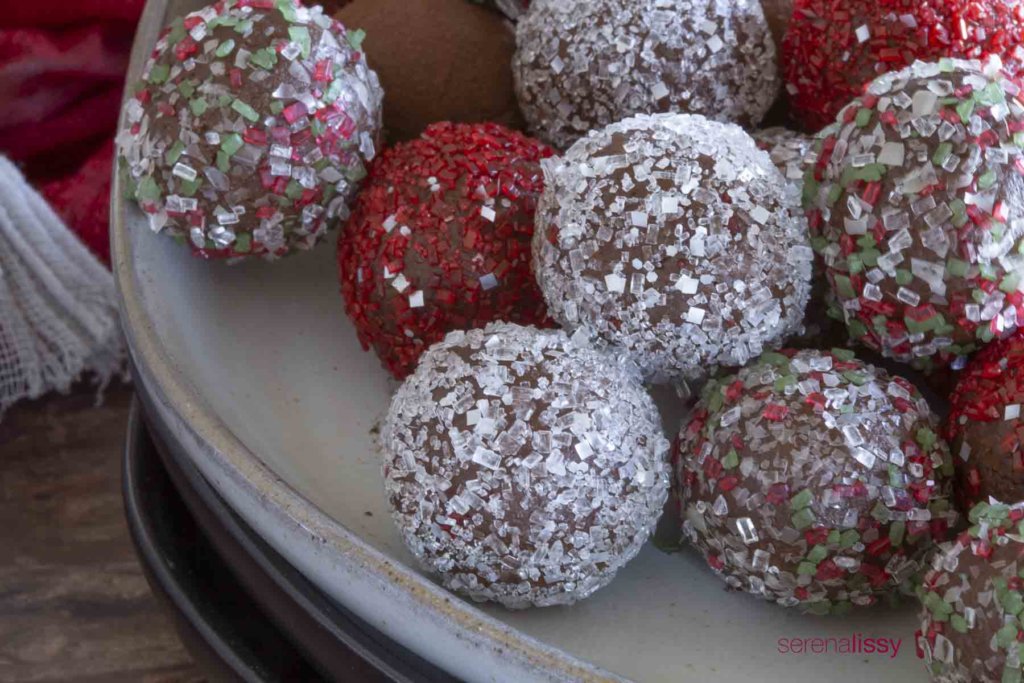
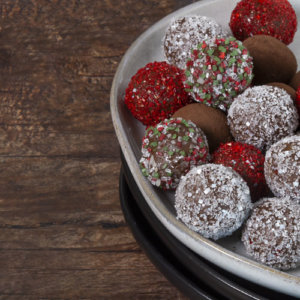
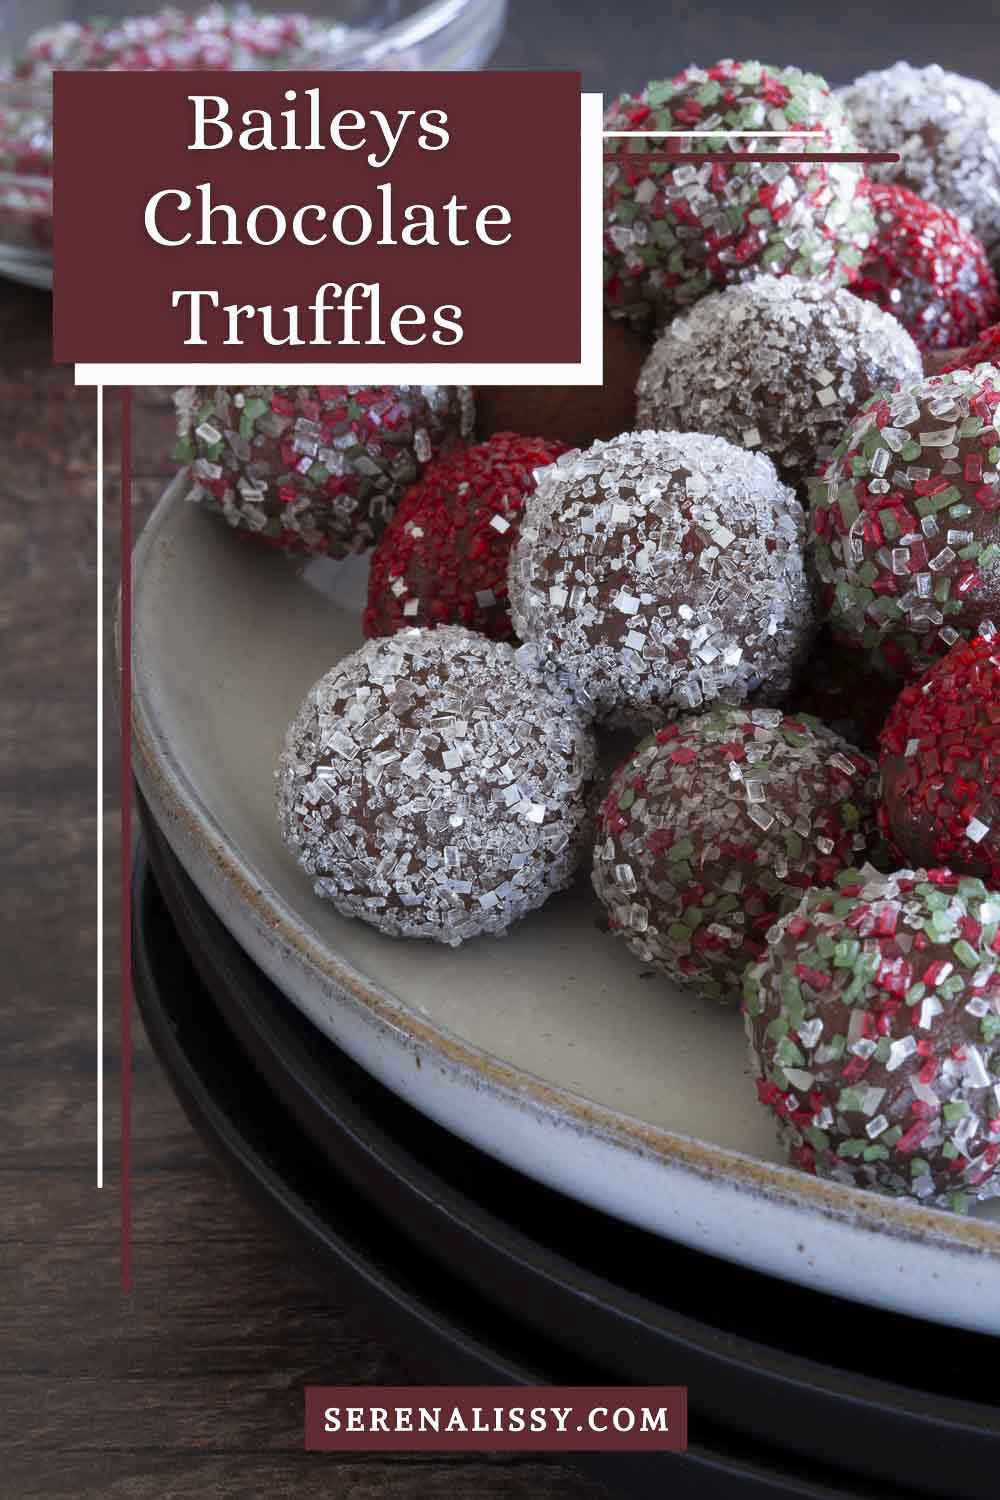
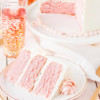
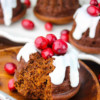
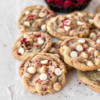
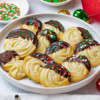
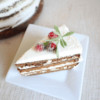
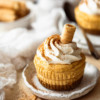
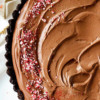
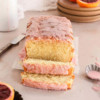
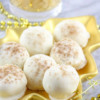
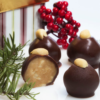
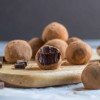
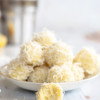
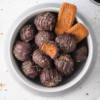
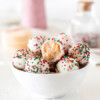
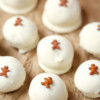
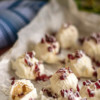
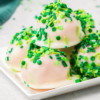
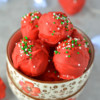
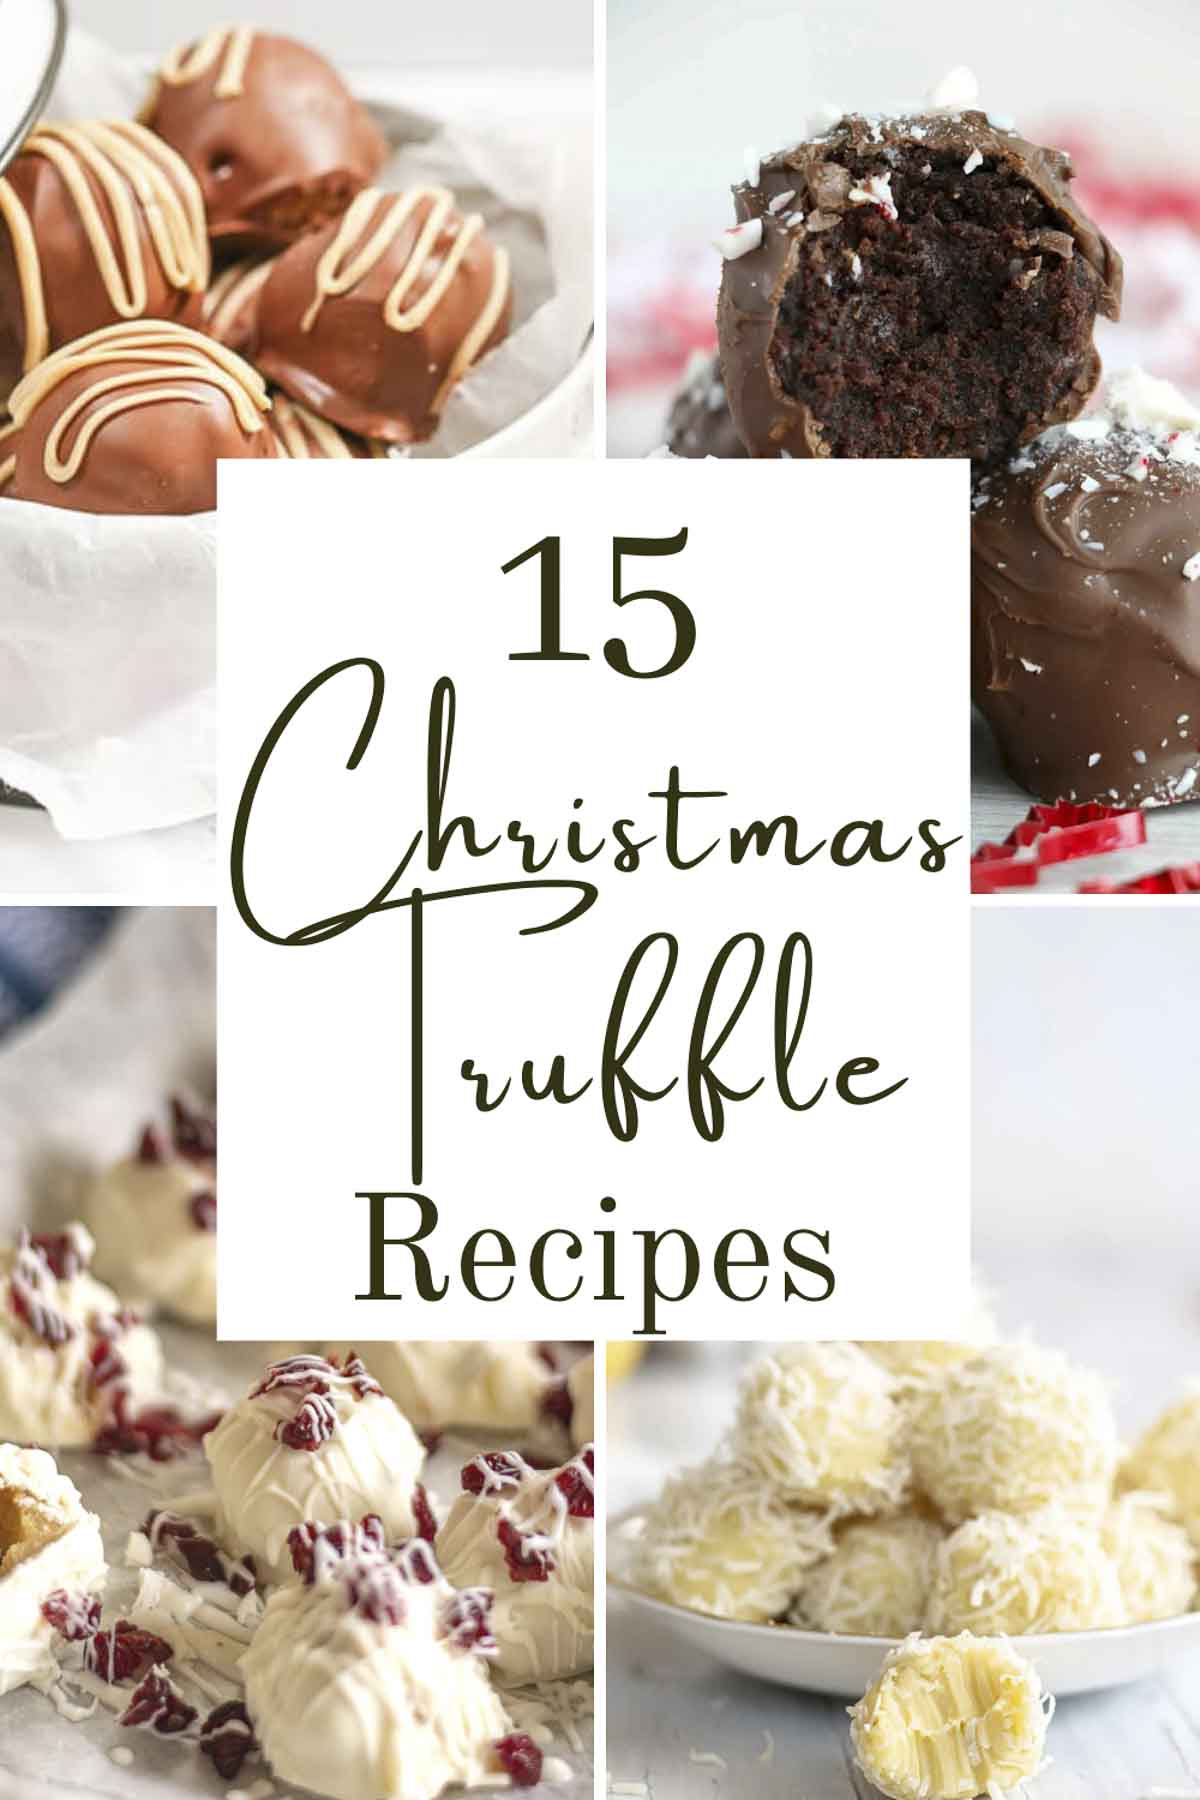
    Do you know what's even better than a yummy chocolate chip cookie? A creatively designed Holiday Christmas truffles recipe! With all sorts of different flavors, from classic Christmas treats like white chocolate, peppermint, sugar cookies to more adventurous items such as cranberry or gingerbread and everything in between, you are sure to find something that will delight any sweet tooth. So go ahead and make these delectable delights today! So when the guests arrive, they'll be greeted with a festive plate full of delicious holiday truffles. I'm sure everyone will love them and will be asking for more!

    Christmas Truffles
    Peanut Butter Truffles
    A no-bake bite-sized treat that is loaded with peanut butter flavor and a sweet chocolate coating. These easy no bake peanut butter truffles are similar to buckeyes.
    Read More
    Peanut Butter Truffles
    Amaretto Truffles
    Only 4 ingredients in these simple, rich and delicious Amaretto Truffles. An easy recipe to whip up with the flavor of Amaretto that is a perfect holiday dessert for the adult crowd to enjoy!
    Read More
    Amaretto Truffles
    White Chocolate Snowball Truffles
    These creamy, melt in your mouth white chocolate coconut snowball truffles are quick and easy to make and make a perfect Christmas gift for white chocolate fans.
    Read More
    White Chocolate Snowball Truffles
    Peppermint Oreo Truffles
    Peppermint Oreo Truffles all decked out for the holidays! Only 4 ingredients are necessary to make these no-bake oreo candy cane truffles.
    Read More
    Peppermint Oreo Truffles
    Lemon White Chocolate Truffles
    Decadent lemon white chocolate truffles made with white chocolate ganache and fresh lemon. Tossed in shredded coconut, they make the perfect edible Christmas gift.
    Read More
    Lemon White Chocolate Truffle
    Baileys Truffles
    An easy homemade Baileys chocolate truffle recipe, using only four ingredients!
    Read More
    Baileys Truffles on a white deep dish on a wooden surface
    Biscoff Truffles
    These super easy No Bake 3 Ingredients Biscoff Truffles are the most decadent and delicious bite size treat. Made from Biscoff Cookies (Speculoos), Cookie Butter Spread and Dark Chocolate, these Biscoff Balls are the perfect edible gift for the Holidays.
    Read More
    Biscoff Truffles
    Chocolate Rum Truffles
    Super simple and delicious, these rich and indulgent Chocolate Rum Truffles are a classic no bake Christmas treat! They make a fabulous gift for a dark chocolate lover.
    Read More
    Chocolate Rum Truffles
    Sugar Cookie Truffles
    Sugar cookie truffles are a three-ingredient no-bake recipe that uses sugar cookies, cream cheese and white chocolate (plus, sprinkles as an option)
    Read More
    Sugar Cookie Truffles
    Peppermint Chocolate Cake Truffles
    Peppermint chocolate cake truffles are the perfect dessert. Made with chocolate cake mix, chocolate frosting, crushed peppermint and coated in melted chocolate!
    Read More
    Peppermint Chocolate Cake Truffles
    Gingerbread Oreo Truffles
    These Gingerbread Oreo Truffles are easy holiday treats that are great for Christmas parties, cookie exchanges, and gifting!
    Read More
    Gingerbread Oreo Truffles
    Cranberry Bliss Truffles
    These 20 minute Cranberry Bliss Truffles are sweet, delicious, and so easy to make. Each batch makes 48 truffles so it’s great for feeding a crowd.
    Read More
    Cranberry Bliss Truffles
    Easy Christmas Truffles
    Here's an easy Christmas truffle recipe for you to whip up in less than an hour for the Holidays! They're peppermint flavored and made with a creamy cake-like filling, then covered in white chocolate and topped with colorful sprinkles!
    Read More
    Easy Christmas Truffles
    Christmas Coconut Flour Cookie Dough Truffles
    These Christmas Coconut Flour Cookie Dough Truffles are perfect for the holidays. They are so easy to make, and are gluten free.
    Read More
    Coconut Flour Cookie Dough Truffles
    Rudolph Truffles
    Celebrate the Christmas season with these oh-so-cute chocolate Rudolph the Red-Nosed Reindeer truffles!
    Read More
    Rudolph Truffles

    Simple No Bake Desserts

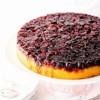
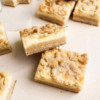
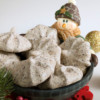
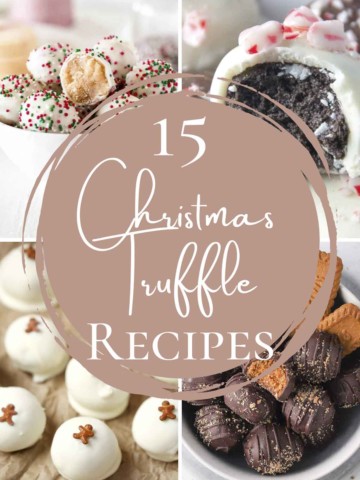
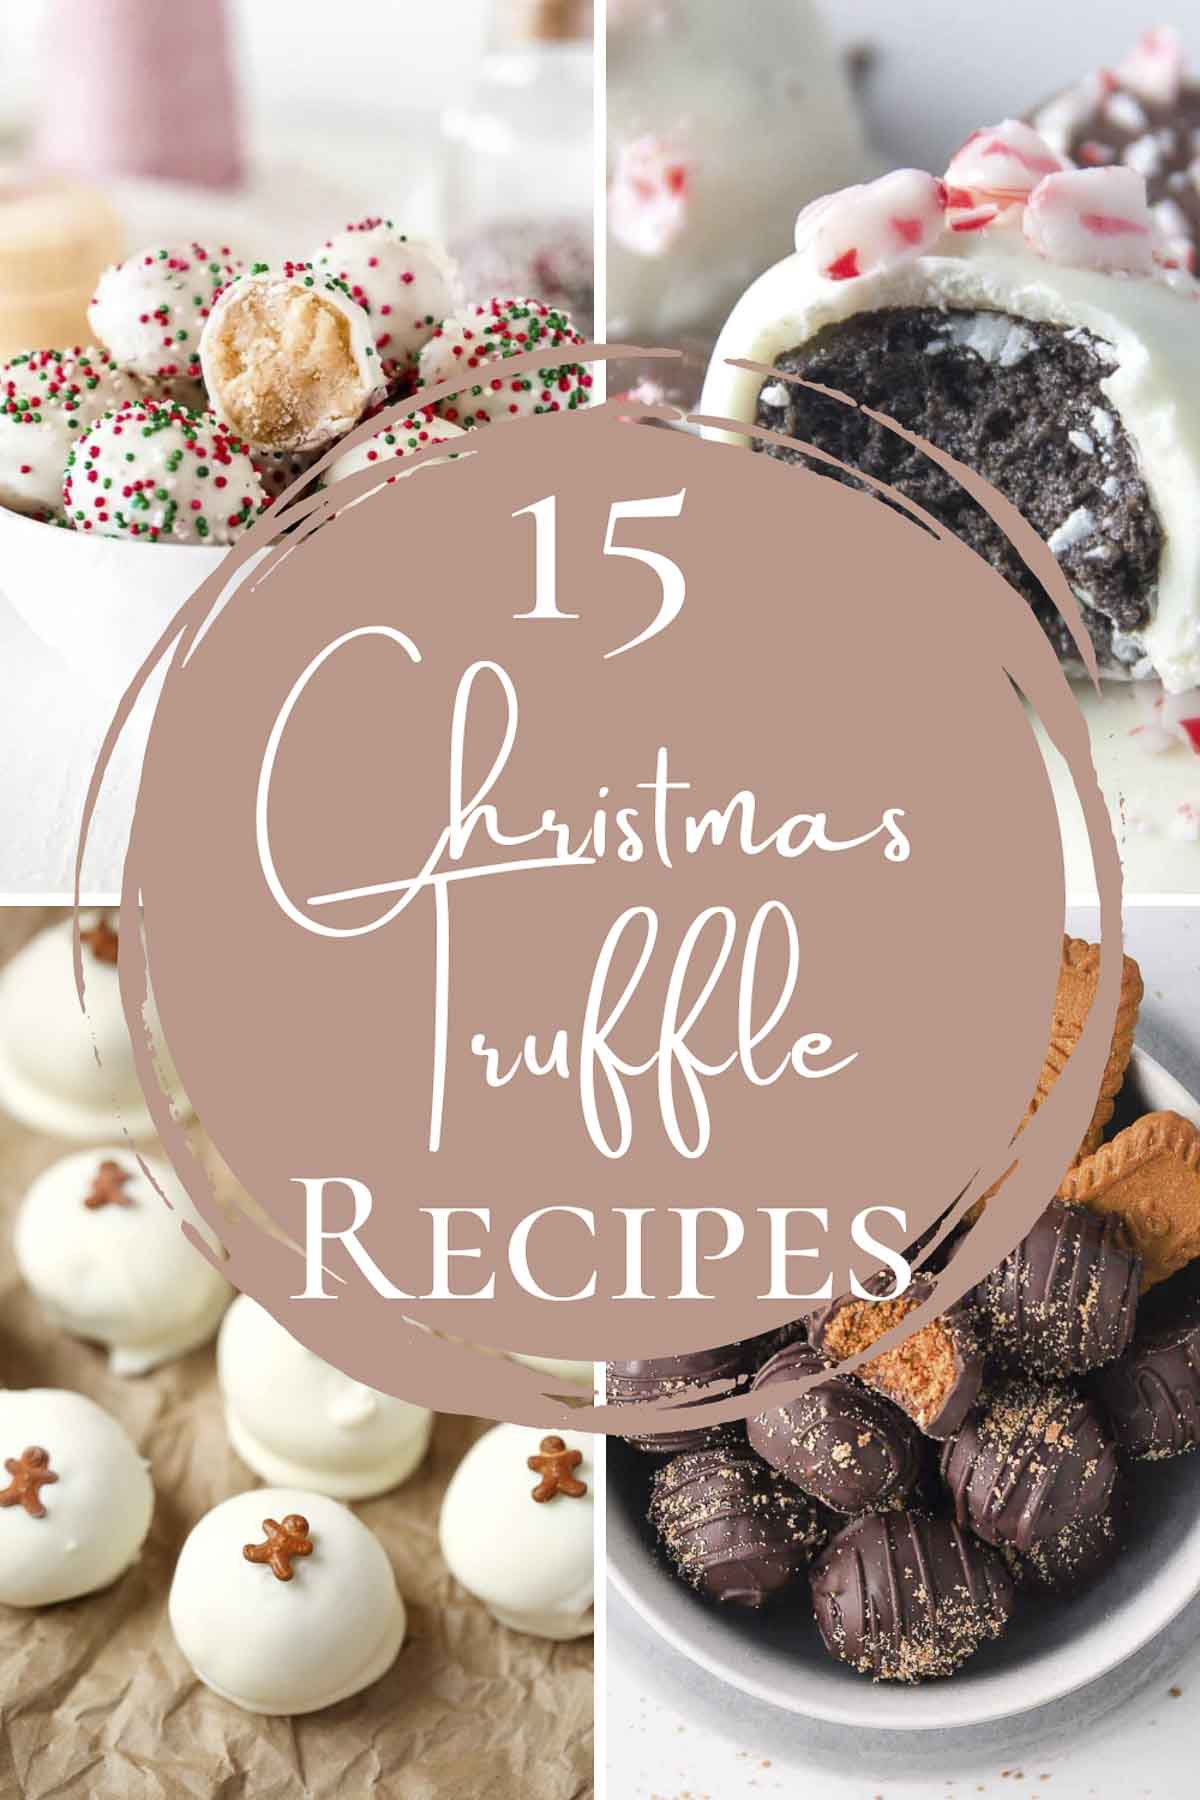
    It's that time of year again! Time to bring out the holiday spirit and cook up some delicious holiday treats. The best part about this is you don't have to be a chef to make these recipes. I've rounded up some of my favorite Christmas truffles so you can spend less time stressing over what food to serve your family or friends and more time enjoying with them over the holidays. These make great gifts and are super easy to mail. You know it's never too early to start with the holiday cheer! Happy Holidays everyone!

    More Holiday Desserts

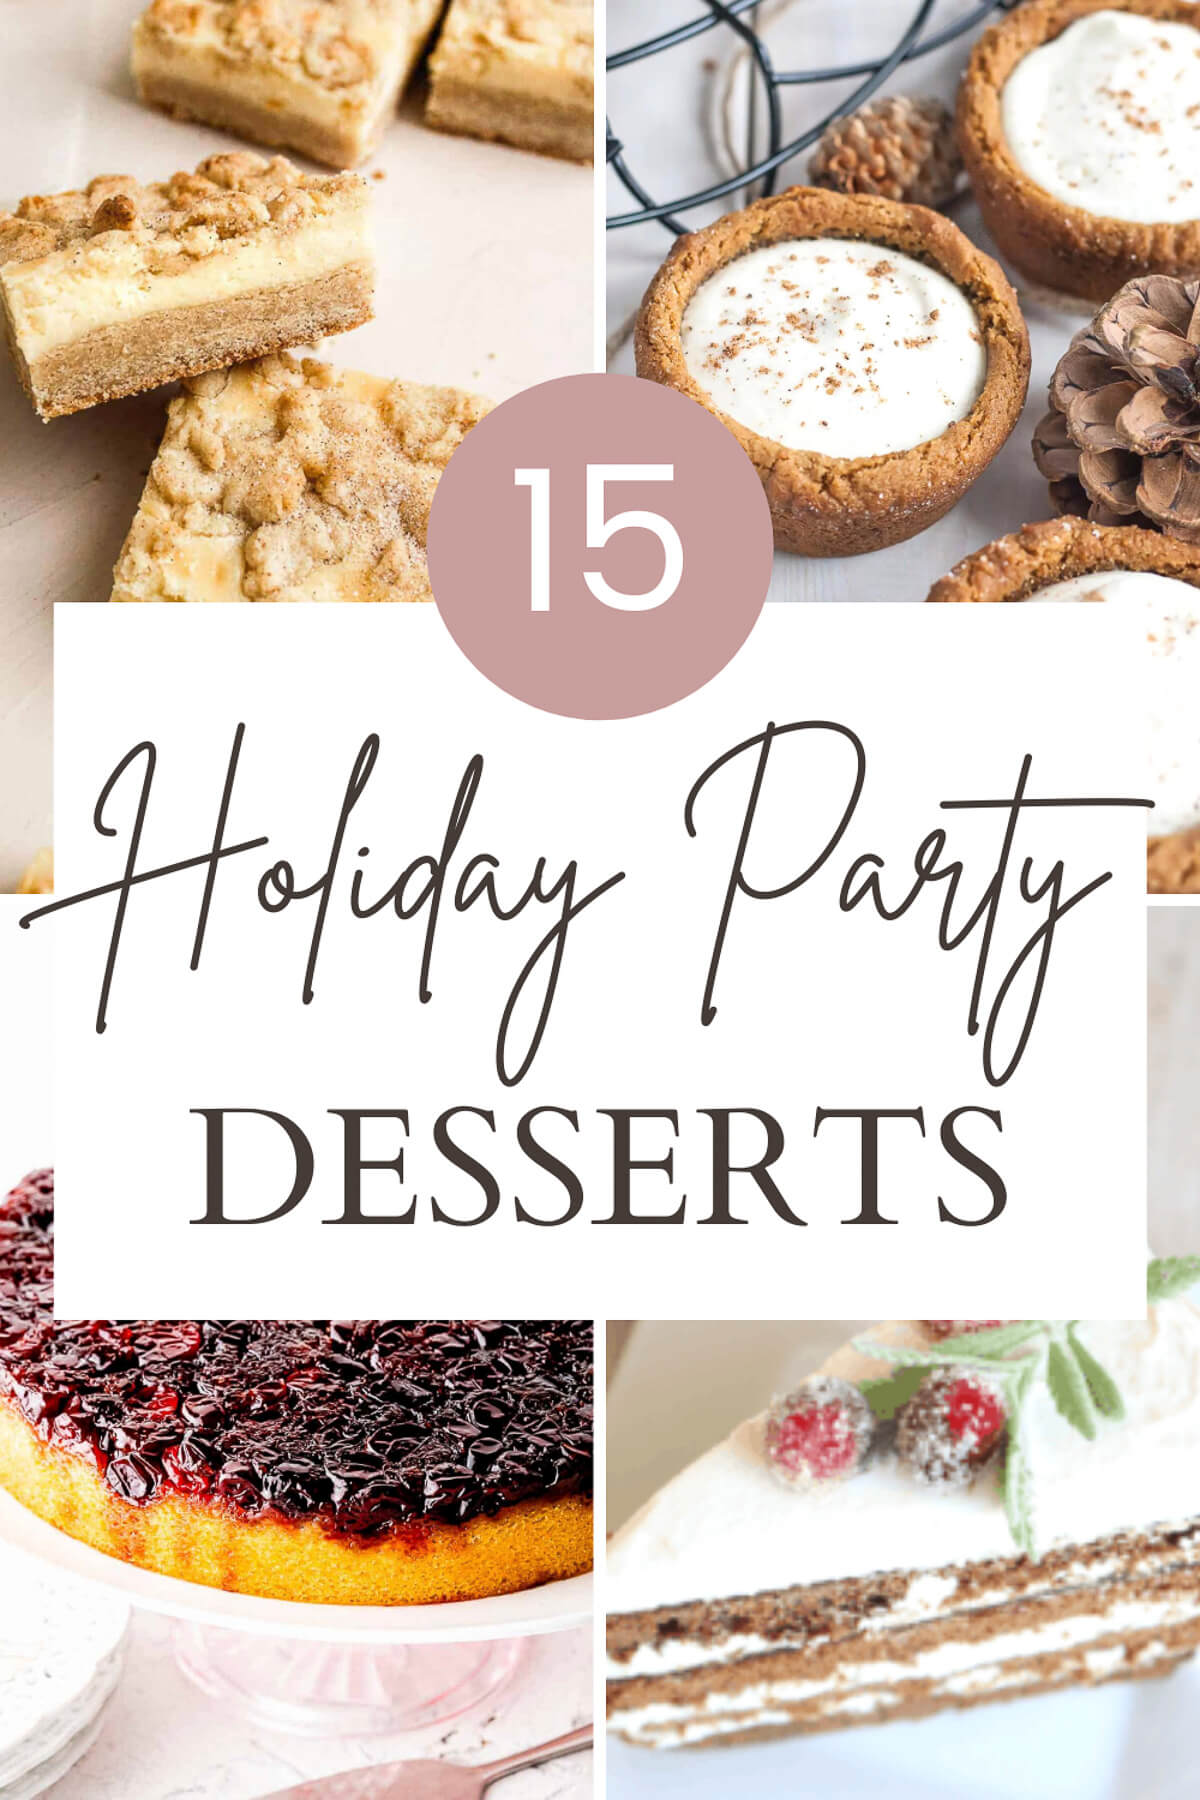
    If you find yourself needing other holiday desserts, we have an entire 12 Days of Christmas recipe series or this other great holiday dessert roundup.

    Looking For More Baking Tips & Recipes?

    Subscribe to my free newsletter to get new baking tips in your inbox monthly. Find me sharing new recipes and tips on Pinterest, Instagram, or Facebook.

    As an Amazon Associate and member of other affiliate programs, I earn from qualifying purchases. What that means is if you click on one of our affiliate links, they may toss a few pennies our way for a commission.

    Homemade Peppermint Bark

    December 6, 2021

    Peppermint Bark

    Homemade Peppermint Bark is one of the best and most enjoyable holiday treats you can't get enough of this holiday season. Smooth, decadent chocolate combines with cool peppermint to create a delightful homemade candy filled with a flavor your taste buds will love.

    Peppermint Bark

    "Never worry about the size of your Christmas tree. In the eyes of children, they are all 30 feet tall." -Larry Wilde

    Homemade Peppermint Bark Candy

    I have been addicted to Williams Sonoma peppermint bark most of my life. November and December are the most challenging months for me to go into that store. I could leave with hundreds of dollars in peppermint bark just for me. So to deal with this pricey addiction, I thought I should try and make the bark myself. This is what I did, and I love it just as much!

    When the holidays come, before I tie on my apron and get out the first bowl, I usually take time to plan out my upcoming cookie trays. Big, small, how much, too much, too little, what will be on it, how should it look? And then it goes something like this: Homemade peppermint bark...must have peppermint bark. How much peppermint bark should I put on the tray?

    I'm convinced everyone loves peppermint bark as much as I do. I wouldn't need anything else if I had an entire tray of just homemade classic peppermint bark. Instead, I take the approach that anything else on the tray is just a bonus!  I have come to realize that anything else on the tray is just a bonus in my recipient's eyes also. They are excited to get the gift, no matter what is on the tray. It doesn't matter how big or small it is. Nor does it matter what it looks like. They are like the excited child that doesn't care how big the tree is. In their eyes, all Christmas trees are 30 feet tall. It doesn't matter if there is one cookie or 100 cookies in my recipient's eager eyes, which is what I love and probably why I keep giving food gifts.

    Ingredients

    Homemade Peppermint Bark Ingredients
    • Semi-sweet Chocolate
    • White Chocolate
    • Peppermint extract
    • Peppermint candies or candy cane bits

    Chocolate for Peppermint Bark

    For this recipe, you can pretty much use your favorite chocolate and still have an outstanding product. Spending so much time with chocolate, I went a little fancy with my development this year and used high-quality chocolate. For the dark chocolate, I used Valrhona Manjari 64% , and for the white chocolate, I stayed with Valrhona. Go with your favorite, and you will end up with a fantastic bark!

    How To Make The Easy Peppermint Bark Recipe

    Peppermint Bark Process Collage

    First, line a jelly roll-sized pan with waxed or parchment paper. In a double boiler melt semisweet chocolate. Stir in a quarter teaspoon of peppermint extract. Spread chocolate over the paper in an even layer to about a quarter-inch thickness. Place the baking sheet in the refrigerator and allow the chocolate to set for 30 minutes. 

    Next, melt white chocolate in a double boiler. Stir in a quarter teaspoon of peppermint extract. Spread the white chocolate over the dark chocolate layer. Crush peppermint candies and sprinkle them over the white chocolate layer. Lightly press the crushed candy canes into the chocolate. Allow the chocolate to set fully. Once it sets, break the bark into pieces or use a sharp knife and cut pieces. Then store it in an airtight container.

    This recipe is super easy to make! This recipe makes a jelly roll pan size of bark. This big batch can easily fill up quite a few tins or cookie trays. You could also individually wrap some bark in cellophane bags and give those as holiday gifts. I usually double the recipe to keep a tray for myself for whenever I need a holiday treat. What can I say? I'm a fan of good chocolate candy.

    Peppermint Bark Tips

    How do I melt the chocolate?

    You have two options for this.
    1. The best way is to melt it in a double boiler. It's simple. You place a glass heatproof bowl on top of a small pot of simmering water and let the heat slowly melt the chocolate. Be careful and don't get any water in the bowl.
    2. Microwave. Place your chocolate in a microwave-safe bowl and cook on low heat for 30 second increments. Stir between each one. When you are stirring, make sure to get everything from the bottom of the bowl.

    How long does it take to set the peppermint bark?

    You can leave it on the counter to set and depending on room temperature you are probably looking at 30-45 minutes. If you would like to speed up the process, you can place your pan of bark in the refrigerator for 20 minutes. However, I prefer to leave it on the counter and avoid any condensation that may accumulate from the refrigerator.

    Can I skip the peppermint extract?

    This ingredient is an essential piece of the recipe. It's what gives you that great peppermint flavor. So don't skip this ingredient.

    Does Peppermint Bark go bad?

    It will keep in an airtight container for about 2 weeks on the counter.

    How do you break up peppermint candy?

    Place peppermint candies in a large resealable plastic bag. Use your rolling pin or kitchen mallet and pound until crushed coarsely. You could also process it in your food processor.

    I hope you enjoy the homemade peppermint bark recipe as much as I do and don't forget to save some for yourself.

    And if you have missed days 1 through 3 on our 12 days of Christmas baking, here is where you can find the recipes for Special K Bars, Rocky Road Bark, and Mexican Wedding Cookies.

    Peppermint Bark

    Looking For More Recipes?

    Subscribe to my free newsletter to get new baking tips in your inbox monthly. Find me sharing new recipes and tips on Pinterest, Instagram, or Facebook.

    Peppermint Bark Recipe

    Peppermint Bark

    Decadent chocolate combined with cool peppermint to create a homemade Peppermint Bark Recipe filled with flavor your taste buds will love.
    5 from 8 votes
    Print Pin Rate
    Course: Dessert
    Cuisine: American
    Prep Time: 5 minutes minutes
    Cook Time: 10 minutes minutes
    Cooling Time: 50 minutes minutes
    Total Time: 1 hour hour 5 minutes minutes
    Servings: 16 Servings
    Calories: 344kcal
    Author: Serena

    Ingredients

    • 1 pound 64% semisweet chocolate
    • 1 pound white chocolate
    • ½ teaspoon peppermint extract
    • ½ cup crushed peppermint candies

    Instructions

    • Line a jelly roll pan with waxed paper.
    • Melt semisweet chocolate in a double boiler. Stir in ¼ teaspoon peppermint extract.
    • Spread chocolate over the waxed paper to about a ¼ inch thickness.
    • Place pan in refrigerator and allow the chocolate to set for about 30 minutes.
    • Melt white chocolate in double boiler and stir in ¼ teaspoon peppermint extract.
    • Spread the white chocolate over the semisweet chocolate.
    • Sprinkle crushed peppermint candies over the white chocolate. Gently press candies into the chocolate.
    • Allow the chocolate to set fully.
    • Once set, break into pieces and store in an airtight container.

    Notes

    Recipe Source: SerenaLissy.com
    This website provides approximate nutrition information for convenience and as a courtesy only. Nutrition data is gathered primarily from the USDA Food Composition Database via Spoonacular, whenever available, or otherwise other online calculators.
    All images and content are copyright protected. Do not use our images without prior permission.

    Nutrition

    Serving: 1g | Calories: 344kcal | Carbohydrates: 39g | Protein: 3g | Fat: 20g | Saturated Fat: 12g | Polyunsaturated Fat: 1g | Monounsaturated Fat: 6g | Trans Fat: 1g | Cholesterol: 8mg | Sodium: 28mg | Potassium: 242mg | Fiber: 2g | Sugar: 32g | Vitamin A: 23IU | Vitamin C: 1mg | Calcium: 74mg | Iron: 2mg
    Tried this Recipe? Pin it Today!Mention @SerenaLissy or tag #serenalissy!

    Here are a few of our favorite peppermint recipes:

    • White Chocolate Peppermint Bark Cheesecake
    • Peppermint Meringues
    • Chocolate Peppermint Cupcakes

    As an Amazon Associate and member of other affiliate programs, I earn from qualifying purchases. What that means is if you click on one of our affiliate links, they may toss a few pennies our way for a commission.

    Original Post 12/15/2014, updated 12/06/2021

    Peanut Butter Truffles

    December 3, 2021

    Peanut Butter Truffles

    No Bake Peanut Butter Truffles are similar to Ohio's favorite candy, buckeyes. Sweet peanut butter centers are enrobed in a dark chocolate shell and topped with a peanut for a lovely holiday presentation. Everyone will love to receive a box of these Peanut Butter Chocolate Truffles this holiday season.

    No Bake Peanut Butter Truffles are a tasty holiday treat similar to Buckeyes.

    "Christmas is not as much about opening presents as opening our hearts." -Janice Maeditere

    We are up to day 11 in the 12 days of Christmas baking if you have been following along. I went with a recipe from America's Test Kitchen for these peanut butter truffles, easy peanut butter balls. If you are familiar with Ohio's favorite candy, the buckeye, you will know these are delicious and very similar. Buckeyes are made from a peanut butter fudge partially dipped in chocolate to leave a circle of peanut butter visible on the top. These truffles are fully enrobed in chocolate but could easily be mistaken for buckeye balls.

    The blend of peanut butter and confectioner's sugar dipped in melted chocolate is fabulous to begin with. Then you add in America's Test Kitchen modifications, and you have a delicious piece of candy. They add a small amount of cream cheese to give the filling a pleasant tang, yet it keeps the sweetness.

    Peanut Butter Chocolate Truffles Ingredients

    Ingredients in Peanut Butter Chocolate Truffles

    These 7-ingredient no bake peanut butter truffles easily fall into our easy recipes category, and you probably already have all the ingredients on hand.

    • Confectioner's sugar
    • Creamy peanut butter
    • Cream cheese softened
    • Salted dry-roasted peanuts
    • Vanilla extract
    • Semisweet chocolate chips
    • Vegetable oil

    We used creamy peanut butter in this recipe, but you can also go with chunky if you prefer that. I kept the creamy because we put chopped peanuts into the truffle with the peanut butter filling, and I didn't want it to be too crunchy.

    Peanut Butter Truffles Process Collage How to Make No Bake Peanut Butter Truffle Buckeyes

    How to Make No Bake Peanut Butter Truffles

    1. In a small bowl, combine the sugar, peanut butter, cream cheese, chopped peanuts, and vanilla and roll the truffle mixture into ½ inch small balls.
    2. Place on a parchment-lined plate or baking sheet and freeze for 15 minutes.
    3. Melt the chocolate as directed.
    4. Use a fork to dip the peanut butter truffles into the chocolate and place them back on the plate and top the dipped ball with a peanut. You could also top these with a bit of flaky sea salt instead of a peanut
    5. Freeze for about 10 minutes until hardened.
    6. For best results, store them in an airtight container in the refrigerator until serving time.

    The only thing I would change on this peanut butter truffles recipe is to temper the chocolate. Due to time constraints and the difficulty of tempering chocolate, they chose to keep it simple. They wanted the shine of the chocolate without the effort of tempering. They achieved this by adding a small amount of oil to the chocolate. They have you store these in the refrigerator until serving time, which we did. You can see from the images the condensation on the chocolate when you do that. Which is fine; it slowly goes away as the candy warms up. But the flavor is best when the peanut butter center is chilled. This is one of my favorite treats for holiday gift-giving.

    More Recipes You'll Love

    • Peanut Butter Fudge Cups
    • Joy The Bakers, Peanut Butter Cream Pie
    • Chocolate Butter Cookies
    • Simple & Easy Sugar Cookies

    Looking For More Recipes?

    Subscribe to my free newsletter to get new recipes in your inbox monthly. Find me sharing new recipes and tips on Pinterest, Instagram or Facebook.

    I hope you enjoy this peanut butter chocolate truffles recipe as much as we do. It's such a simple no bake recipe that everyone loves. I suppose technically, it should not be on the Christmas baking list, but hey...It's my list, and I can add it if I want to.  As always, we would love to hear how you do with the recipe and don't forget to save some for yourself.

    Peanut Butter Truffles

    Peanut Butter Truffles

    A no-bake bite-sized treat that is loaded with peanut butter flavor and a sweet chocolate coating. These easy no bake peanut butter truffles are similar to buckeyes.
    5 from 10 votes
    Print Pin Rate
    Course: Dessert
    Cuisine: American
    Prep Time: 10 minutes minutes
    Cook Time: 5 minutes minutes
    Freezing Time: 15 minutes minutes
    Total Time: 30 minutes minutes
    Servings: 12 Truffles
    Calories: 110kcal
    Author: Serena

    Ingredients

    America's Test Kitchen - Peanut Butter Truffles

    • ½ cup confectioner's sugar
    • 3 tablespoons creamy peanut butter
    • 1 ounce cream cheese softened
    • 2 tablespoons salted dry-roasted peanuts chopped coarse, plus 20 peanut halves
    • ¼ teaspoon vanilla extract
    • ⅔ cup semisweet chocolate chips
    • 1 tablespoon vegetable oil

    Instructions

    • Line a large plate with parchment paper.
    • Stir powdered sugar, peanut butter, cream cheese, chopped peanuts, and vanilla in a bowl until uniform.
    • Roll mixture into twenty ½ inch balls; space balls evenly apart on prepared plate. Freeze, uncovered, for 15 minutes.
    • Microwave chocolate and oil in a bowl, covered, at 50 percent power, stirring occasionally, until smooth, 2-4 minutes.
    • Using a fork, pick up 1 ball and dip in the chocolate to coat, letting excess chocolate drip back into bowl.
    • Return ball to plate, and immediately place peanut half on top. Repeat with remaining balls.
    • Freeze balls uncovered, until chocolate has hardened, about 10 minutes.

    Notes

    Recipe Source: SerenaLissy.com
    This website provides approximate nutrition information for convenience and as a courtesy only. Nutrition data is gathered primarily from the USDA Food Composition Database via Spoonacular, whenever available, or otherwise other online calculators.
     
    All images and content are copyright protected. Do not use our images without prior permission.

    Nutrition

    Serving: 1Truffle | Calories: 110kcal | Carbohydrates: 12g | Protein: 2g | Fat: 9g | Saturated Fat: 3g | Polyunsaturated Fat: 2g | Monounsaturated Fat: 3g | Trans Fat: 1g | Cholesterol: 3mg | Sodium: 38mg | Potassium: 97mg | Fiber: 1g | Sugar: 4g | Vitamin A: 37IU | Calcium: 11mg | Iron: 1mg
    Tried this Recipe? Pin it Today!Mention @SerenaLissy or tag #serenalissy!
    Five peanut butter truffles

    As an Amazon Associate and member of other affiliate programs, I earn from qualifying purchases. What that means is if you click on one of our affiliate links, they may toss a few pennies our way for a commission.

    Original Post 12/23/2014, updated 12/3/2021.

    Chocolate Peppermint Cupcakes

    December 2, 2021

    Chocolate Peppermint Cupcakes

    Chocolate Peppermint Cupcakes are a flavorful combination of a moist chocolate peppermint cake and sugary buttercream frosting. You will love this tasty holiday cupcake flavor.

    With Christmas just around the corner, that can only mean one thing: CHOCOLATE. I am all about this holiday, so of course, I had to share my favorite peppermint cupcakes recipe with you! These are great because they have a buttercream frosting designed to look like Santa's hat. Don't forget the sprinkles! Enjoy these tasty treats for your Christmas party or as an after-dinner dessert for your family during the holiday season.

    Chocolate Peppermint Cupcakes are one of the tastiest holiday cupcake flavors. Moist chocolate cake has a touch of peppermint and the buttercream frosting looks like a Santa hat.

    Holiday Cupcake Flavors

    I love the holiday cupcake flavors that come out at Christmas time. If you are a fan, you know the specific one I'm referring to...Peppermint! That's right, and we have whipped up these chocolate peppermint cupcakes that you are going to love.

    Of course, there is also eggnog, and chocolate everything. I can have decadent chocolate all year long, but I seem to save the peppermint and eggnog just for December. Kind of like pumpkin and only have that in November. I don't know why I seem to follow those rules, but like everyone else, I do. Darn those marketers and grocery stores!

    These festive cupcakes are pretty easy to make. I will let you know this is a pretty liquid batter. So don't be worried if it looks like you did something wrong. I'm sure everything will be fine, and you'll end up with some of the best moist chocolate cupcakes you have ever made.

    Chocolate Peppermint Cupcakes Ingredients

    Ingredients in Chocolate Peppermint Cupcakes

    • All-purpose flour
    • Sugar
    • Cocoa powder
    • Salt
    • Baking soda
    • Cultured buttermilk powder - see notes below
    • Vegetable oil
    • Water
    • Eggs
    • Peppermint extract - see notes below
    • Powdered sugar
    • Unsalted butter - room temperature
    • Milk - room temperature
    • Red food coloring - see notes below

    Ingredient Notes:

    I used ⅛ teaspoon peppermint extract. That gave these cupcakes a light peppermint flavor. Now, if you are an over-the-top peppermint lover, you could go with ¼ teaspoon peppermint extract. But I noticed that I could taste the peppermint just a tiny bit more than the day before as each day went by. So if you are a risk taker and a peppermint lover, go with ¼ teaspoon. But a safe play is ⅛ teaspoon, and decide next time if you want more when you make them again.

    It took a few drops to get the red color I was looking for the frosting. So go easy with the drops and add two at a time. Stir, see how the color looks, then add another two if it's too light or pink looking. The goal is to get the perfect color without the taste of the coloring. So, in this case, less is more!

    For the white, I left the buttercream the color that came out of the mixer. It looked perfectly fine for the needs of the decorating. I used a small star tip for the white and for the red, I used a large Wilton #12 round tip. I also grabbed some white sprinkles but forgot to put them on. (Yes, it happens to me also) I thought it would be fun to have a bit of sparkle on the top white ball. In case you are feeling ambitious 😉

    You will notice this recipe uses powdered buttermilk. I'm a big fan of powdered buttermilk. I have been using this Saco brand for a few years now and love it. We don't use buttermilk much and I'm always angry when I have to throw ½ of the container away because it expired before I got to use it. You can find it in most grocery stores, and Amazon also carries it.

    Chocolate Peppermint Cupcake Process How to Make Gourmet Cupcake Recipes

    How to Make Chocolate Mint Cupcakes

    When it comes to making gourmet cupcake recipes, the process isn't really different than standard cupcakes. However, you might look for higher-quality ingredients, and they may be decorated a bit more fancily. The addition of peppermint and the piping that looks like a Santa hat elevates these chocolate peppermint cupcakes to gourmet status.

    Now if festive chocolate cupcake recipes aren't your thing, we did a 12 days of Christmas cookie recipe marathon (at least it felt like a marathon) a couple of years back. We whipped up quite a variety of holiday recipes.

    More Holiday Recipes

    • White Chocolate Peppermint Bark Cheesecake
    • Peppermint Meringues
    • Holiday Sugar Cookies
    • Ginger Molasses Pizzelles
    • Baileys Chocolate Truffles

    Looking for More Recipes?

    Subscribe to my free newsletter to get new recipes in your inbox monthly. Find me sharing new recipes and tips on Pinterest, Instagram or Facebook.

    I hope you enjoy the chocolate peppermint cupcakes as much as I did. Please share if you end up making these holiday cupcakes or other gourmet cupcake recipes. Happy holidays!

    Chocolate Peppermint Cupcakes

    Chocolate Peppermint Cupcakes

    Using basic ingredients, these holiday cupcakes are a flavorful combination of a moist chocolate cake with a hint of peppermint and sweet buttercream frosting.
    5 from 31 votes
    Print Pin Rate
    Course: Dessert
    Cuisine: American
    Prep Time: 10 minutes minutes
    Cook Time: 20 minutes minutes
    Cooling Time: 30 minutes minutes
    Total Time: 1 hour hour
    Servings: 24 Cupcakes
    Calories: 229kcal
    Author: Serena

    Ingredients

    Cupcake

    • 297 grams AP Flour
    • 425 grams sugar
    • 65 grams cocoa powder
    • 9 grams table salt
    • 12 grams baking soda
    • 45 grams cultured buttermilk powder
    • 170 grams vegetable oil
    • 525 grams warm water
    • 80 grams eggs
    • ⅛ teaspoon peppermint extract

    Buttercream

    • 3 cups confectioners sugar
    • 8 tablespoons unsalted butter room temperature
    • 2 tablespoons milk room temperature
    • 1 teaspoon vanilla extract
    • red food coloring

    Instructions

    • Preheat oven to 350°F.
    • Line your cupcake pan with 24 cupcake liners.
    • Sift flour, sugar, cocoa powder, salt, baking soda, and buttermilk powder into the mixing bowl of a stand mixer. Or you can use a large bowl and a hand held electric mixer if you don't have a stand mixer.
    • With paddle attachment mix on low speed to combine.
    • Add oil, water, eggs, and peppermint extract one at a time to the dry ingredients and continue mixing until blended together.
    • Pour into cupcake pan and bake for 16 - 20 minutes or until cake springs back when lightly touched or toothpick inserted into the center comes out clean.
    • Remove from oven and let cool.

    Buttercream Frosting

    • In the bowl of a stand mixer with the paddle attachment, beat together the confectioners sugar, butter, milk, and vanilla on low speed until combined.
    • Stop the mixer and scrape the sides down.
    • Increase to medium speed and beat until fluffy, about 3 more minutes. (If frosting is dry, add more milk, 1 teaspoon at a time until creamy)
    • This will make 2 cups frosting.
    • Use 1 ½ cup and add a few drops of red food coloring until you have the color you are looking for.
    • Use ½ cup for the stars around the base and top.
    • Put the frosting in a large piping bag with your tip and pipe the red onto the cupcakes and add the white stars at the base and top.

    Notes

    Recipe Source: SerenaLissy.com
    This website provides approximate nutrition information for convenience and as a courtesy only. Nutrition data is gathered primarily from the USDA Food Composition Database via Spoonacular, whenever available, or otherwise other online calculators.
     
    All images and content are copyright protected. Do not use our images without prior permission.

    Nutrition

    Serving: 1Cupcake | Calories: 229kcal | Carbohydrates: 45g | Protein: 3g | Fat: 12g | Saturated Fat: 4g | Polyunsaturated Fat: 4g | Monounsaturated Fat: 3g | Trans Fat: 1g | Cholesterol: 24mg | Sodium: 300mg | Potassium: 92mg | Fiber: 1g | Sugar: 19g | Vitamin A: 140IU | Vitamin C: 1mg | Calcium: 33mg | Iron: 1mg
    Tried this Recipe? Pin it Today!Mention @SerenaLissy or tag #serenalissy!

    As an Amazon Associate and member of other affiliate programs, I earn from qualifying purchases. What that means is if you click on one of our affiliate links, they may toss a few pennies our way for a commission.

    Original post created 12/11/2017 and updated 12/2/2021.

    Chocolate Peppermint Meringues

    November 30, 2021

    Chocolate Peppermint Meringues

    Can you believe it's that time of year with Christmas being a few weeks away? There are so many holiday parties and gatherings happening. These Chocolate Peppermint Meringues would make a great holiday gift for your hostess or would be great as a dessert for your own party. Or who am I kidding, I sometimes make these for myself to have with my morning coffee. These meringues go great with coffee and will soon become one of your favorite Christmas cookie recipes. This is an easy recipe for Chocolate Peppermint Meringue Cookies with a fluffy texture and refreshing peppermint and sweet chocolate flavor.

    Chocolate Peppermint Meringues

    Chocolate Peppermint Meringues

    There is nothing hard about these meringues. I piped them with an open star tip just like this Wilton star tip to get the shape. Anything close to this will work. Use whatever you have. When I was developing the recipe, I didn't bother with the visual and just spooned the meringue out onto the pan. If that's all you can do, they still turn out beautiful and tasty. They are just a bit more rustic. My tip would be to keep them small. These aren't much larger than the size of a quarter. Meringues are crumbly, so the larger they are the messier it is to eat them. Their small size makes them the perfect bite-sized holiday dessert!

    Ingredients

    Chocolate Peppermint Meringues Ingredients
    • Eggs
    • Superfine Sugar
    • Bittersweet Chocolate
    • Peppermint Candy

    For the dark chocolate, use the best you have around. Chocolate chips won't work because you will need to use a grater and grate the chocolate into little shavings. For the peppermint, I used half of a candy cane. You could also use peppermint candies. I put the candy cane in a Ziploc bag and smashed it with a rolling pin until they were basically powder. You could also use a meat mallet if you don't have a rolling pin. Then I measured out a tablespoon for the recipe. You want the peppermint candies to almost be powder, otherwise, the chunks are too heavy for the meringue and sink to the bottom. You want the taste of the peppermint, but not the texture.

    How To Make Chocolate Peppermint Meringues

    Chocolate Peppermint Meringues Process Collage

    First, preheat the oven to 250°F. Then using a box grater, shred the chocolate. Don’t let the chocolate melt in your hand, so stop for a minute if needed. 

    In a bowl for a stand mixer with the whisk attachment, beat egg whites on low until frothy. You can use a hand held electric mixer and a medium sized mixing bowl if you don't have a stand mixer. Then increase the speed to medium-high and mix for about 5 to 7 minutes until stiff peaks form when you lift the whisk out. Turn the mixer speed on low and slowly add the sugar one tablespoon at a time. You’ll know the meringue is done when it holds onto the whisk and keeps the shape when you take it off. 

    Next, gently fold in the peppermint and chocolate using an offset spatula. Do not overmix. Use your piping tip and pipe the meringues, or drop meringues by the spoonful, onto a parchment lined baking sheet. 

    Bake for 50 minutes or until you can lift the meringues off the parchment without them sticking. Turn the oven off, keep the door closed, and allow the meringues to cool in the oven for an hour.

    Mastering the Technique For A Perfect Meringue

    Don't be intimidated by these little meringue cookies. These are simple to make and only require a handful of ingredients. The key is to make sure you whip the egg whites to stiff peaks. Once you get stiff glossy peaks, turn off your mixer. Don't overmix this. For example, if you took out the whisk from the mixer, turned it upside down, the egg whites would hold a stiff peak and would not fold over onto itself. That's how you know you've created stiff peaks.

    Baking the Meringues

    For the baking, I baked these in an extremely low-temperature oven. We cooked at 250°F for 50 minutes. Wait for the oven to reach the proper temperature before putting them in. Once the 50 minutes were up, for best results, I left them in the oven for about 60 more minutes with the oven turned off. After 1 hour, I took them out, let them cool completely, and stored them in an airtight container. They should last for about 2 weeks. A couple of strategically timed batches and they will hold you over for the entire holiday season.

    Peppermint Meringues Recipe

    If chocolate isn't your thing and you just want peppermint meringues, I can help you there. We did a 12 days of Christmas marathon a couple of years back, and this peppermint meringue recipe was included. All of our Christmas themed recipes can be found under that category if you are looking for more holiday ideas or the perfect Christmas cookie.

    Give these chocolate peppermint meringues a try. I hope you enjoy them as much as I do, they are one of my favorite cookie recipes. Happy Holidays!

    Looking For More Recipes?

    Subscribe to my free newsletter to get new baking tips in your inbox monthly. Find me sharing new recipes and tips on Pinterest, Instagram, or Facebook.

    Chocolate Peppermint Meringues in a bowl

    Chocolate Peppermint Meringues

    These meringues are a fun alternative to the usual holiday peppermint bark. They are light with refreshing peppermint flavor and sweet chocolate.
    5 from 9 votes
    Print Pin Rate
    Course: Breakfast, Dessert
    Cuisine: American
    Prep Time: 15 minutes minutes
    Cook Time: 50 minutes minutes
    Cooling Time: 1 hour hour
    Total Time: 2 hours hours 5 minutes minutes
    Servings: 16 Meringues
    Calories: 50kcal
    Author: Serena

    Ingredients

    • 2 egg whites room temperature
    • ½ cup superfine sugar
    • 2 ounces bittersweet chocolate shredded
    • 1 tablespoon peppermint candy finely crushed

    Instructions

    • Preheat the oven to 250°F.
    • Using a box grater, slice/shred the chocolate. Don't let the chocolate melt on your hand. Stop for a minute if you need to.
    • In a bowl of your stand mixer fitted with the whisk attachment, beat the egg whites on low until frothy, then increase the speed to medium high and mix until stiff peaks form when you lift out the whisk, 5-7 minutes.
    • Turn the speed to low and slowly add the sugar, 1 tablespoon at a time. You will know this is done when the meringue holds on to the whisk and keeps the shape when you take it off.
    • Gently fold in the chocolate and crushed candy canes using a rubber spatula. Do not overmix.
    • Pipe the meringues, or drop by spoonful, onto a parchment paper lined baking sheet.
    • Bake for 50 minutes or until you can lift the meringues off the parchment without them sticking. Turn the oven off, keep the door closed, and allow the meringues to cool in the oven for an hour.

    Notes

    Recipe Source: SerenaLissy.com
    This website provides approximate nutrition information for convenience and as a courtesy only. Nutrition data is gathered primarily from the USDA Food Composition Database via Spoonacular, whenever available, or otherwise other online calculators.
    All images and content are copyright protected. Do not use our images without prior permission.

    Nutrition

    Serving: 1Meringue | Calories: 50kcal | Carbohydrates: 9g | Protein: 1g | Fat: 1g | Saturated Fat: 1g | Polyunsaturated Fat: 1g | Monounsaturated Fat: 1g | Trans Fat: 1g | Cholesterol: 1mg | Sodium: 7mg | Potassium: 26mg | Fiber: 1g | Sugar: 8g | Vitamin A: 2IU | Calcium: 3mg | Iron: 1mg
    Tried this Recipe? Pin it Today!Mention @SerenaLissy or tag #serenalissy!

    Here are a few of our favorite peppermint recipes:

    • Peppermint Meringues
    • Peppermint Bark
    • White Chocolate Peppermint Bark Cheesecake

    As an Amazon Associate and member of other affiliate programs, I earn from qualifying purchases. What that means is if you click on one of our affiliate links, they may toss a few pennies our way for a commission.

    Baileys Chocolate Truffles

    November 9, 2021

    Baileys Truffles On A Plate


    This Baileys Chocolate Truffle recipe is another one of my favorite holiday desserts. Baileys truffles are perfect for gifting to friends and family! This easy homemade Baileys recipe uses only four ingredients and is an adult spin on a chocolate treat! Mix up the flavor of Baileys you use for these homemade truffles, depending on what type of mood you want to create this season!

    These decadent treats are perfect for the holidays, but tuck into them any time you need a little Baileys-flavored pick-me-up, like after a long day at work.

    Baileys Truffles On A Plate

    Homemade Baileys Truffles

    Once the holidays roll around, I love sharing chocolates or other sweet treats with friends and families. But, I love to also give a homemade gift to office mates and neighbors all year long for any special occasion. These Baileys truffles are seriously easy to make, don't require special equipment or specialty ingredients.

    What is a Chocolate Truffle?

    The chocolate truffle is a classic, and many people know the traditional recipe. The ganache mixture of heavy cream and bittersweet chocolate has been used for years in this dessert favorite!

    An experimenter on flavors might add vanilla extract or other spices like ground cinnamon or cayenne pepper to change their taste experience while still keeping it accurate to tradition. I'd recommend that each person try this delicious treat at least once to find out what allurements await them inside every bite.

    As you can see, there is no ganache in this truffle we are making. This is where the experimenter comes into play. Tiramisu was our inspiration for this delicious truffle.

    Truffles ready to roll in sugar

    Ingredient Notes for the Chocolate Baileys Truffles

    • I don't know how many times I say this in a week, but it feels like a lot. When the main ingredient in your recipe is chocolate, go with the best your budget will allow! For this recipe, I used a Cacao Barry 41% chocolate, Alunga. For the best results, I'd recommend any quality brand you love from the market. You can go with bars and just cut them up into pieces once ready to melt. I would not recommend chocolate chips for this.
    • I used Baileys Espresso Creme for this recipe, but you could use any flavor Baileys you have or love.
    • For the ladyfingers, I used what I could find at the market. Go with your favorite brand if you have one you love.
    • The cocoa powder is pretty bitter for most people. I'd recommend you try one of the truffles dipped and rolled in the cocoa powder first. If you like it, then continue. If not, just go with sprinkles or colored sugars to roll the truffles in. You could also mix powdered sugar into the cocoa powder to help sweeten it up and reduce the bitter flavor. I'd go with ½ of the amount you used of cocoa powder. Just mix the two together, then roll the truffles into the mixture to coat them.
    Process Collage To Make Truffles

    How To Make The Homemade Chocolate Truffles

    This is seriously one of the easiest desserts you can make. There are three main ingredients in this easy recipe.

    • The first step is to crush the ladyfingers. I used a Ziploc bag and my rolling pin. You could also put the cookies into your food processor to grind them up into crumbs.
    • The next step is to combine the Baileys with the crushed ladyfingers. Use a wire whisk or spatula to mix the two together. I let it sit at room temperature for about 30 minutes for the ladyfingers to absorb all the liquid.
    • Now you are going to melt the chocolate using a double boiler process. Place your chocolate into a medium-sized heatproof bowl, then place that over a water bath on low heat. Once the chocolate is melted, let it cool for about 5 minutes.
    • Add the melted chocolate to the ladyfingers and stir. Cover with cling film and place in the refrigerator to cool for about an hour.
    • Once cooled, the easiest way to make the truffle ball is to weigh out the chocolate, then just roll it into a ball. My truffles were 12 grams each. If you don't have a scale, you could easily use a melon baller or cookie scoop. Roll the chocolate into small balls. You want to keep these small, because the liquor flavor comes through quite a bit, and sometimes just a bite or two is needed.
    • Place your colored sugars, sprinkles, or cocoa powder into shallow bowls. It's a good idea to use gloves for this process. The chocolate mixture could melt some while you are rolling through the sugars just from the heat of your hands.
    Truffles On A plate

    How To Store The Chocolate Truffles

    I keep these in the refrigerator in an airtight container, for up to ten days. When you are ready to eat, pull them out about 10-15 minutes before you want to enjoy them.

    Baileys Truffles on a white deep dish on a wooden surface

    Baileys Truffles

    An easy homemade Baileys chocolate truffle recipe, using only four ingredients!
    5 from 12 votes
    Print Pin Rate
    Course: Dessert
    Cuisine: American
    Prep Time: 30 minutes minutes
    Chilling: 2 hours hours
    Total Time: 2 hours hours 30 minutes minutes
    Servings: 30 Truffles
    Calories: 49kcal
    Author: Serena

    Ingredients

    • 12 pieces Ladyfingers (100 grams)
    • ⅔ cup Baileys Espresso Creme (150 mL)
    • 1 cup Milk Chocolate (150 grams)
    • ⅓ cup Unsweetened Cocoa Powder for dusting (40 grams)

    Instructions

    • Crush the ladyfingers in a Ziploc bag using a rolling pin. Place the crumbs in a bowl and add in the Baileys Espresso Creme. Let sit for 30 minutes.
    • Chop your chocolate into small pieces. We are going with a double boiler melting process. You could melt in the microwave if you desire, but be careful not to burn the chocolate. Place the chocolate in a medium heatproof bowl over a water bath, over low heat and allow to melt. Stirring once in a while.
    • Once chocolate has cooled down a bit, add it to the ladyfingers. Stir to combine.
    • Cover your bowl with plastic wrap and place in the refrigerator to cool for about an hour.
    • Once cool, roll the chocolate mix into small balls and coat them with the cocoa powder, or sprinkles, or any decorative topping you would like.

    Notes

    Recipe Source: SerenaLissy.com
    This website provides approximate nutrition information for convenience and as a courtesy only. Nutrition data is gathered primarily from the USDA Food Composition Database via Spoonacular API, whenever available, or otherwise other online calculators. While this information can be helpful in estimating the nutritional information of a recipe, it is by no means accurate or official and is not evaluated by the Food and Drug Administration.
     
    All images and content are copyright protected. Do not use our images without prior permission.

    Nutrition

    Serving: 1Truffle | Calories: 49kcal | Carbohydrates: 4g | Protein: 1g | Fat: 2g | Saturated Fat: 1g | Polyunsaturated Fat: 1g | Monounsaturated Fat: 1g | Cholesterol: 1mg | Sodium: 2mg | Potassium: 32mg | Fiber: 1g | Sugar: 3g | Vitamin A: 2IU | Calcium: 3mg | Iron: 1mg
    Tried this Recipe? Pin it Today!Mention @SerenaLissy or tag #serenalissy!

    A Festive And Delicious Treat

    If you're looking for a festive and delicious treat to make this holiday season, these Baileys Chocolate Truffles are the perfect solution. This easy homemade Baileys recipe is so simple that anyone can pull it off with just a few ingredients and no baking required! The best part? It's an adult spin on a chocolate treat, so we know they'll be a hit at any party or family gathering. If you are looking for something a bit different for the holidays, head on over to our 12 Days of Christmas baking list.

    Looking For More Recipes And Baking Tips?

    Subscribe to my free newsletter to get new baking tips in your inbox monthly. Find me sharing new recipes and tips on Pinterest, Instagram, or Facebook.

    As an Amazon Associate and member of other affiliate programs, I earn from qualifying purchases. What that means is if you click on one of our affiliate links, they may toss a few pennies our way for a commission.

    Baileys Truffles

    15 Gifts For The Bakers In Your Life

    November 8, 2021

    Gift Ideas For Bakers

    Today, we’re taking a look at 15 gifts for the bakers in your life that will offer them real value and joy. And if you also happen to be a baker, there’s no shame in grabbing one of these for yourself, too.

    There are very few of us who don’t love baked goods. And even fewer of us who don’t know at least one person in our lives who makes simply the best and most decadent cake, pie, or cookie batch. 

    Yet it can be hard to pick practical gifts for the baker in your life this time of year. A Kitchenaid mixer or sheet pans sound like great ideas, but can actually end up creating more clutter if you’re unsure if your friend has a use for them.

    Gift Ideas For Bakers

    The Mighty Gift Card

    I promise we’ll get into slightly more fun gifts in a moment! But a gift card gift is easily overlooked as an ideal choice for a busy baker in mind. It's one of the first things I think of when needing useful gifts. While baking appliances are often a personal choice, every delicious bite has to have a bit of flour, sugar, and egg behind it.

    In 2015, the top baking supplies purchased in the US were baking chocolate and croutons. Americans spent about $150 million on each of these products, with the 3rd item, cocoa, coming in at $50.6 million in sales.

    One of the most expensive parts of baking as a business and as a hobby is testing new recipes that come out a bit off or need many tries before becoming perfect. Do a bit of snooping or invite your friend on a grocery store trip to figure out where they purchase the best chocolate or most reactive yeast. Then grab them a gift card to help with some of their ingredients for baking needs. Win!

    Baking Subscription Boxes

    In contrast to the experienced serious bakers who probably would prefer a gift card to you guessing their ingredients, baking subscription boxes are great for newer or younger bakers in your life. The Baketivity Baking Kit is recommended for kids ages 3-10. Alternatively, the Red Velvet NYC subscription features two dessert kits per month with pre-measured ingredients for recipes like Butterscotch Pudding and Earl Grey Tea Cake. This is a fun gift for your baker friends that have a small space to work in. This gives them measured ingredients so they aren't having to find pantry space to store leftover ingredients.

    Reusable Silicone Muffin Liners

    It’s hard to go wrong with reusable liners! Muffin liners are an easy go-to gift and come in a variety of different colors, too. This set from Amazon is food safe and can be safely used in freezers, microwaves, ovens, and dishwashers. 

    Cupcake Scoop

    Silicone liners are extremely helpful but might sound a bit too simple. But have you heard of a cupcake scoop? These little devices have one specific but useful function: holding the perfect amount of batter for a cupcake and pushing it into your pan without dripping. Grab one of these for the busy baker in your life. Now I'm not usually a fan of one-use-only gadgets, so if you are the same, a three-piece ice cream scoop will do the same task. This can scoop ice cream, measure cookie dough, and be used for cupcakes. This is one of the most useful tools that are probably on your bakers list of must-haves.

    15 GIft Ideas For Bakers

    Split-Decision Pie Pan

    What’s better than a pie pan? Two pie pans! Okay, but that can be a lot of work. This split-decision pie pan allows bakers to test two recipes at once with half of the ingredients. This is a great way to save on ingredients and perhaps save your taste testers from eating too much pie over one weekend or day.

    Marble Rolling Pin

    While every baker has their favorite rolling pin, there are multiple uses for different materials. Grab your favorite baker a marble rolling pin that has extra weight for easier dough control. This has natural nonstick properties and the wood handles make it comfortable to use. Rolling dough is hard work and a great rolling pin is one of my favorite things to have.

    Embossed Rolling Pins

    In opposition to rolling pins that simply let you flatten and even out dough quickly, embossed rolling pins press designs directly into your dough. This is a great and easy way to create unique batches of cookies for holidays or fun. This design on Amazon features gorgeous winter patterns.

    Airtight Containers

    It’s hard to go wrong with airtight containers! Even for the most experienced bakers in your life, additional airtight containers give them the flexibility to store more dry ingredients or pre-measure more for large bakes.

    Bamboo Cutting Boards

    Bamboo cutting boards are terrific for their knife-friendly surface that doesn’t dull knives and feels easy to cut on. This set also features grooves to catch any runaway flour and for easier cleanup. These are a must-have for any baker's kitchen.

    Pastry Dough Bench Scraper

    The best kind of baking gift is one that makes the process of baking easier! You can get away with making delicious pastry dough without a dough scraper, but having one will make the process that much easier.

    A scraper often doubles as a dough cutter and can help you scrape leftover dough or stuck dough off your baking surface. It definitely saves a lot of time in the clean-up process.

    Baker’s Silicone Mat with Measurements

    Ever wondered whether your dough should be the size of your fist or your finger tip? If your special baker is an avid baker, knowing measurements and dealing with different sizes is part of their regular routine. This silicone pastry mat takes the guesswork out of dough making with measurements for your dough and it provides a non-stick surface.

    Baker Gifts

    Bread Warmer

    Sometimes, all you want is a fresh-out-of-the-oven loaf of bread. And for bakers, it can take a lot of experimenting to make the perfect loaf. A bread warmer basket is made of insulated interiors that can keep bread, rolls, bagels, biscuits, and more, hot for an hour or more. This is a perfect gift for an experimenting bread baker or home cooks who love to bring a freshly baked good directly after baking.

    “Cheat Sheet” Measurement Apron

    A necessary evil when it comes to baking is ingredient conversions. This apron gives the baker in your life an easy “cheat sheet” with conversions from cups to ounces, tablespoons to teaspoons, and more without having to pull out their cell phones and do the math. These are listed upside down and perfect for you to view in the middle of mixing and baking. It's a useful gift and also a unique gift.

    True Cookie Mugs

    Baking can be very fun and rewarding, but we all also look forward to eating time. “Cookie” mugs feature slots or cutouts right in the mug at just the right size to hold a few cookies. Your baker friend will love this easy way to enjoy milk or coffee and cookies. And I will say this also makes a great Christmas gift to go along with a batch of cookies as part of an edible gift.

    Breathtaking Cookie Jars

    Still on the cookie trend? Cookie jars come in more than clear or simple white varieties! This Danmu glass storage jar is ideal for cookies, hard candies, or even jewelry. Grab one to awe the baker in your life with an easy and beautiful cookie jar or prop piece.

    Gift Ideas for Bakers

    We hope that this list of 15 practical gifts for bakers in your life has given you some ideas on how to show someone who loves baking just how much they are appreciated. A lot of these would also be great for any food photographers in your life. These are great for their props. We have a pretty thorough list of gifts for photographers if you are looking for other items. If you have any other suggestions, we’d love to hear them!

    No matter the gift you decide to grab for your baking friend this holiday season, they’ll be grateful for tools that make their craft a bit easier or more fun. Ready to invest in baking tools that every baker needs? Read more on our blog today.

    Looking For More Baking Tips & Recipes?

    Subscribe to my free newsletter to get new baking tips in your inbox monthly. Find me sharing new recipes and tips on Pinterest, Instagram, or Facebook.

    As an Amazon Associate and member of other affiliate programs, I earn from qualifying purchases. What that means is if you click on one of our affiliate links, they may toss a few pennies our way for a commission.

    Jamaican Sweet Potato Pudding

    November 7, 2021

    Jamaican Sweet Potato Pudding

    If you're looking for a new and exciting dessert recipe to try, Jamaican sweet potato pudding is a great option! This Jamaican sweet potato pudding recipe features seasonings like cinnamon, nutmeg, ginger, and allspice. It's very moist and rich with an indulgent taste that will have your mouth watering in seconds. Serve it up for breakfast with coffee or tea for a delicious treat in the morning, or enjoy it after your favorite dinner for dessert! The combination of sweet potato and coconut makes this Caribbean dessert one you will want to eat often.

    Jamaican Sweet Potato Pudding

    Jamaican Sweet Potato Pudding

    If you have ever traveled to Jamaica, I'm sure you are familiar with the wonderful dessert. It's a Jamaican classic. However, if this is your first time trying this Jamaican pudding, I have no doubt you are going to love it. It's an easy Jamaican dessert, and it comes together quickly.

    Today, we are making a few adjustments to the traditional way customarily used to make this. The version of sweet potatoes readily available in the US is quite different from the sweet potatoes available throughout the Caribbean. So I have modified the sweet potato pudding recipe to use rose-skinned sweet potatoes with orange flesh, which are easily found at your local market. This recipe also uses a yam. The American Sweet Potato organization does a great job of explaining the differences between Yams and Sweet Potatoes.

    The traditional, more authentic method of baking this Jamaican pudding was to bake on hot coals outdoors. The pudding was cooked using charcoals above and below the dutch oven. They would cover the pan and place the hot coals on the lid to get heat all around. We are going the easy way and using our oven for baking this recipe for Jamaican sweet potato pudding.

    Ingredients list

    Ingredient Notes

    • The ingredients in this recipe are pretty straight forward. The biggest challenge is understanding the differences between sweet potatoes and yams, and are they American sweet potatoes or Jamaican sweet potatoes.
    • There is one ingredient I left out, which was the raisins. I'm not a raisin lover, but this ingredient is usually in the Jamaican potato pudding. I would recommend golden raisins soaked in dark rum. Now if you don't have dark rum, go with light. Don't make a special trip to the store to grab a different kind of rum. If you like raisins, you are going to soak them in three tablespoons of rum overnight, then drain them when ready to use. If you don't like raisins, skip them and the rum.
    • Full fat coconut milk is used in this recipe. I have not tried it with low fat coconut milk.
    • I grated my potatoes and ginger with a box grater. I'll say it was time consuming and slightly dangerous if you don't pay attention and run your fingers over those grates. Be careful, if this is how you plan to grate the potatoes. If you would rather, you could cut the potatoes into very small pieces, then combine them in your food processor with some of the coconut milk. It's a workout for the food processor, but does work.

    Differences Between Jamaican Sweet Potatoes and American Sweet Potatoes

    • The Jamaican sweet potato is white flesh with red skin. The American sweet potato is orange flesh with reddish/brown/rose skin.
    • The American sweet potato is softer once cooked.
    • The Jamaican sweet potato is starchier.
    Jamaican potato pudding process collage

    How To Make Jamaican Sweet Potato Pudding

    • Grate your yam, sweet potatoes and ginger. Once you finish grating the yam and sweet potatoes, the recipe goes really quick.
    • Bring a cup of water to a boil, add the spices then continue boiling for two minutes.
    • Add the spice mixture, butter, and coconut milk to the sweet potato mixture.
    • Combine the remaining dry ingredients in a separate bowl, and slowly add them to the sweet potato mixture.
    • Pour into the springform pan, and bake.
    slices of sweet potato pudding

    FAQ

    How do I store leftover Jamaican potato pudding?

    I store it in an airtight container in the refrigerator for 2-3 days.

    Can I freeze sweet potato pudding?

    Yes, again, keep in an airtight container, and freeze for up to 1 month. Then, remove from the freezer and thaw in the refrigerator.

    Is batata the same as a sweet potato?

    Batata is a sweet potato with white flesh.

    Jamaican Sweet Potato Pudding

    Jamaican Sweet Potato Pudding

    Looking for a delicious way to enjoy sweet potatoes? This Jamaican sweet potato pudding recipe is a great option! It's super moist and rich with an indulgent taste.
    5 from 18 votes
    Print Pin Rate
    Course: Dessert
    Cuisine: American
    Prep Time: 30 minutes minutes
    Cook Time: 1 hour hour 15 minutes minutes
    Total Time: 1 hour hour 45 minutes minutes
    Servings: 12 Servings
    Calories: 384kcal
    Author: Serena

    Ingredients

    • ½ cup Unsweetened Desiccated Coconut (43 grams)
    • 1 ½ pounds Sweet Potato (680 grams)
    • ½ pound Yam (250 grams)
    • 3 tablespoon Freshly Grated Ginger (16 grams)
    • 1 teaspoon Ground Allspice (2.75 grams)
    • 1 teaspoon Ground Nutmeg (3.35 grams)
    • 1 tablespoon Ground Cinnamon (10 grams)
    • 2 tablespoon Vanilla Extract (28 grams)
    • 2 cups Coconut Milk (480 mL)
    • ¼ cup Melted Unsalted Butter (60 mL)
    • ¼ cup Cornmeal (45 grams)
    • ⅓ cup AP Flour (45 grams)
    • 1½ cup Sugar (300 grams)
    • 2 teaspoon Salt (13 grams)
    • ½ cup Golden Raisins soaked in 3 tablespoon dark rum overnight (Optional)

    Topping:

    • 1 teaspoon Ground Cinnamon (3.12 grams)
    • ½ teaspoon Ground Nutmeg (2 grams)
    • ½ tablespoon Vanilla Extract (7 grams)
    • 2 tablespoon Sugar (25 grams)
    • ½ cup Coconut Milk (120 mL)

    Instructions

    • Preheat oven to 350°F. Grease a 10" Springform Pan.
    • Rehydrate your coconut. Soak in hot water for 15 - 20 minutes to rehydrate, then squeeze out all the water.
    • Peel all the yams, sweet potatoes, and ginger. Set a box grater, zester side up, into a large mixing bowl. Grate the sweet potatoes, yam, and ginger using the zester. This is labor intensive, but gives the pudding a great texture.
    • Bring a cup of water to a boil in a small pot on medium high heat. Add in the allspice, nutmeg, cinnamon, and vanilla and let boil for 2 minutes. Once this is done, pour the spice mixture into the sweet potato mixture along with the coconut milk and melted butter.
    • Using an electric hand mixer, combine until homogenous.
    • In a medium bowl, combine the rehydrated coconut, cornmeal, flour, sugar, and salt. Then slowly add to the wet mixture, continuing to use the electric mixer at medium speed until combined. (Drain the raisins and stir them in if you are using raisins)
    • Pour the mixture into the prepared pan and bake for one hour in the preheated oven. Remove from oven after one hour of baking time, add the topping, and then continue to cook for 15 more minutes.
    • A wooden skewer inserted into the center should come out clean. You will see caramelization around the edges of the baking pan, but this will not be set like a cake. The consistency will be similar to that of pumpkin pie with a stiff filling.
    • Let cool for 30 minutes. Use a knife around the edge of the pan and gently remove the side ring. Continue to let cool at room temperature on a wire rack for 2 hours or more, until cool completely. Gently remove the bottom of the springform pan.

    Topping

    • In a small saucepan boil your spice mixture. Combine all ingredients on medium high heat and bring to a boil. Continue to boil until reduced by half. (About 10 minutes). Remove from heat and let cool.

    Notes

    Recipe Source: SerenaLissy.com
    This website provides approximate nutrition information for convenience and as a courtesy only. Nutrition data is gathered primarily from the USDA Food Composition Database via Spoonacular API, whenever available, or otherwise other online calculators. While this information can be helpful in estimating the nutritional information of a recipe, it is by no means accurate or official and is not evaluated by the Food and Drug Administration.
     
    All images and content are copyright protected. Do not use our images without prior permission.

    Nutrition

    Serving: 1Serving | Calories: 384kcal | Carbohydrates: 57g | Protein: 3g | Fat: 17g | Saturated Fat: 14g | Polyunsaturated Fat: 1g | Monounsaturated Fat: 2g | Trans Fat: 1g | Cholesterol: 10mg | Sodium: 430mg | Potassium: 549mg | Fiber: 4g | Sugar: 34g | Vitamin A: 8192IU | Vitamin C: 6mg | Calcium: 46mg | Iron: 3mg
    Tried this Recipe? Pin it Today!Mention @SerenaLissy or tag #serenalissy!

    Looking for other easy fall desserts?

    I hope you enjoyed this Jamaican sweet potato pudding recipe. If you're looking for more delicious recipes like this one, be sure to check out all of our other creative dessert ideas!

    • Sweet Potato Cake
    • Sweet Potato Bundt Cake
    • Pecan Pie Bread Pudding
    • Apple Crumble Cheesecake

    Looking For More Baking Tips And Recipes?

    Subscribe to my free newsletter to get new baking tips in your inbox monthly. Find me sharing new recipes and tips on Pinterest, Instagram, or Facebook.

    As an Amazon Associate and member of other affiliate programs, I earn from qualifying purchases. What that means is if you click on one of our affiliate links, they may toss a few pennies our way for a commission.

    Sweet Potato Pudding

    10 Perfect Gifts for Food Photographers Under $50

    November 6, 2021

    Gift Ideas For Food Photographers

    No matter the hobby or passion, it can be easy to get overwhelmed with the high costs of improving your craft. Yet there are affordable ways to learn new skills and gift new skills, too! Today, we're taking a look at 10 perfect gifts for food photographers under $50. From gorgeous props to creative shooting gear, you might end up picking up a few of these for yourself, too. I know a few of these are on my wish list!

    Gift Ideas For Food Photographers

    Marble Vinyl Background

    Besides the food, the most essential part of food photography is the backdrop. This marble vinyl background is a classic background for food photography and any product photography.

    This background is sized at two by three feet and is large enough for a handful of plates or even a large cake stand. Better yet, it is a reusable backdrop and comes in a roll to prevent wrinkles. When in doubt, simple and elegant is the way to go. The compact size, ease of use, and reasonable price make this an excellent resource for any food photographer.

    Elegant Napkins

    Napkins are a great option to add texture and depth to photos when it comes to food photography. Linen napkins, in particular, go with almost every food dish well. Fold them into fine dining decor or lay them casually over the side of a table for a casual feel.

    Polyester cloth napkins are classics for a mix between usability and sheen, and satin napkins offer shiny edges and softness that can be felt through a photo. Match the texture of your pastries and meals to your napkins, and you're in for a complete meal through the lens.

    Some options we've found include these classic polyester damask napkins and these satin napkins appropriate for beautiful meals at home or even wedding receptions. They come in a variety of colors and are perfect for practicing food styling techniques.

    Cutting Boards

    Is there anything more beautiful than a rustic wooden cutting board? Cutting boards are lovely gifts for food photographers, the chef, or food bloggers since they are functional and beautiful.

    You can often find unique cutting boards at your local thrift shop, something we recommend in our article on How to Find the Perfect Props for Your Food Photography. However, you can also find gems on Amazon, such as this gorgeous Cutting Board for $49. 

    Cake Stands

    Cake Stands

    Who says you can have too many cake stands? Cake stands are a classic for bakers, but almost any dish can look extra delicious when on a vintage or stone stand. This marble cake stand offers an elegant look, while this three-piece set cake stand is perfect for small cookies or a variety of finger sandwiches. 

    Unique Silverware

    Silverware is an often overlooked prop when it comes to food photography. Yet, sometimes the cutest, most unique piece of silverware can truly make a fudgy cake look more inviting or a crispy salad fresher.

    If you're looking for excellent gifts for a food photographers, think of your favorite silverware set! Does it make you happy at first glance? Or is it perhaps a vintage piece with a unique design?

    Grab a similar one for your food photographer friend to see their salivating photos come to life. I love the unique shape of this cutlery set available on Amazon. It's also a good idea to use Etsy. It's a great place for unique silverware. And most of the time, you can grab a piece or two instead of an entire set.

    SD Memory Cards For Food Photographers

    Memory cards are always great choices for most creative endeavors, particularly digital photography and videography. However, while a 128 GB SD memory card goes for about $35, it can be hard to convince yourself to buy an extra when one works just fine.

    That's what makes an SD card the perfect gift for a food photographer friend! Additional ones are not necessarily essential to operate but can genuinely make the shooting and editing process smoother. No more emptying cards in the middle of shoots or worrying about doing so when doing back-to-back shoots. Your favorite photographer will think they are just perfect for tossing into a camera bag and always have easy access while making their job just a tiny bit more efficient.

    Gifts For Food Photographers

    Camera Cleaning Kit

    Most of us have used microfiber cloths to clean glasses, phone screens, and camera lenses. Yet these get lost easily, and nothing is more annoying than missing a photo because of a smudged or dirty screen.

    This 8 in 1 cleaning kit includes a microfiber cleaning cloth alongside unique "pens" with soft material tips appropriate for cleaning lenses and other surfaces with precision. In particular, this is extremely convenient for photographer friends who need to clean tiny viewfinders or small lenses at the source. This kit is great for your standard DSLR camera or mirrorless cameras.

    These pens are assembled in clean rooms free of unwanted substances and undergo testing using microscopic photography to ensure that the device is safe for use on optical lenses and more. The benefits of these are endless, and at just about $35 per kit, you might even consider grabbing one for yourself, too! It is one of the best gifts on this list because it's pretty common to neglect the cleaning duties of our camera.

    Food Stylist Handbook

    Food Stylist Handbook by Denise Vivaldo and Cindi Flannigan is perfect for any food blogger or food photographer to understand how to set up their image to tell their food story. This is a great resource for any serious photographer or content creator to start to learn food styling.

    Light Reflector For Food Photography

    Lighting is crucial for all types of photography. Yet, a full lighting setup can be both expensive and esoteric. In addition, buying a light, no matter how professional, for a friend can often be more inconvenient than helpful.

    Instead, consider buying a light reflector disc for your food photographer friend. These can be used to reflect both natural and artificial light and help to brighten food photos without additional power and less effort. These come in two different sizes, 24" or 43". Keep that in mind when you are deciding the perfect size. Does the photographer have a small working space or a bit of a larger space?

    10 Gift Ideas For Food Photographers

    Double-Sided and Gaffer Tape

    There are very few things tape can't fix! So consider grabbing your food photographer friend a roll or two of double-sided and gaffer tape. Double-sided tape is handy for food photography and can be used to hold down a napkin's folds or a fork in just the right position.

    Gaffer tape is a special kind of tape designed not to leave any adhesive residue when removed. This is useful for props as well as light reflectors and even cables that you need to keep in place.

    The Best Food Photographer Gifts Under $50

    You’ve done it! The struggle is over. It doesn’t have to be hard to find Christmas gifts for food photographers. As a photographer myself, I know how tough it can be when you are stuck with gift-giving decisions. This guide should help you get started thinking about what your loved ones might enjoy after scrolling through this list of fun ideas that are perfect for the foodie in your life!

    A lot of these items would also be great gifts for the bakers in your life. In addition to these, we also have a list of 15 gifts for the bakers in your life. You can also read more about Food Photography and Styling on a Budget here on SerenaLissy.com.

    Looking For More Baking Tips & Recipes?

    Subscribe to my free newsletter to get new baking tips in your inbox monthly. Find me sharing new recipes and tips on Pinterest, Instagram, or Facebook.

    As an Amazon Associate and member of other affiliate programs, I earn from qualifying purchases. What that means is if you click on one of our affiliate links, they may toss a few pennies our way for a commission.

    Tips To Mail Cookies and Other Baked Goods

    November 5, 2021

    Cookies in a box for shipping

    There's something incredibly satisfying about getting food delivered to your home after a stressful day at work or when celebrating a lazy Sunday. The restaurant market share of online food delivery has only grown with the rise of the COVID-19 pandemic, with an estimated increase in market share from 9 to 21 percent by 2025.

    And while you might not be delivering full, hot meals to your friends and family daily, the pandemic has made it hard to share our love for food and baking with others. So today, we're taking a look at some top tips to mail cookies and other baked goods. We all need a bit of comfort and love these days. Sending a loved one a batch of your favorite cookies is sure to send the message this holiday season.

    Cookies in a box for shipping

    The Best Baked Goods to Send via Mail

    Almost every cookie can be shipped successfully with enough planning. But there's no denying that some cookie types are sturdier than others. Here are a few types of cookies that are great options for packaging and shipping.

    • Dense, Chewy Cookies

    Dense baked goods are sturdier than their flaky counterparts and just as delicious. Sugar cookies, chocolate chip cookies, and oatmeal cookies come to mind as delicious good choices for sturdy cookies. These will dry out if not eaten quickly. So it's best to let your loved one know that they should consume these within a week if possible. And be sure to use air-tight containers or cookie tins to keep the moisture in and the air out.

    • Cupcakes and Dense Cake

    Cupcakes (preferably without frosting) and dense cakes like pound cakes or other loaf cakes are also ideal for shipment. Either inside their original baking tray or packed closely together. Cupcake boxes with inserts can also offer additional security to your goods.

    • Yeast Breads and Cheesecakes Are a No-Go

    In most cases, it isn't worth trying to send more easily spoiled or delicate baked goods in the mail. Yeast breads spoil more quickly than denser loaves like pumpkin bread. Cheesecakes, and any baked good with large quantities of milk or cheese, can spoil within 8 hours outside of a fridge. So unless you're willing to invest in more robust packing options, it's best to stick to other baked goods and non-perishable items for mailing.

    Cookies in a box for mailing

    Packing Baked Goods for the Mail

    When packing your baked goods for transit, keep in mind that travel is, well, rough. Pack cookies tightly side by side in a sealed container, then place that container in a larger box for shipping. If there's a significant size difference between your containers, try to cushion your package inside its shipping box. Use cushioning or padding or any other packing materials you might have.

    If you're a perpetual baker like us, you might want to grab a roll of "perishable" and/or "fragile" shipping stickers for any baked goods you intend to mail. While these may mean the same thing to a delivery person, the "perishable" sticker is especially helpful for your recipient. It lets them know their sweet treats have arrived, and it's a good idea to open the box right away.

    I love to hoard packages during the gift-giving season. But a perishable sticker is an immediate call out to open something right away. Hopefully that will save anyone from sadly perished cookies.

    Packing Cookies vs. Cakes and Loaves

    No matter the baked goods you pack, it's essential to eliminate any space that can cause movement. Movement will just cause breakage in transit. However, cookies, cakes, and loaves should also be packaged differently right after cooling down.

    Cookies and brownies are best packed in stacks with little to no room in between them. Breads and cakes can instead be left in disposable aluminum pans. I usually then put the aluminum baking pan into Ziploc bags. Baking a loaf inside a disposable pan can keep you from worrying about shipping an expensive pan. It will also give your baked good more structure and integrity in transit.

    Freezing Baked Goods for Shipment

    Even if your baked goods aren't naturally stiff or dense, there's another way to protect them from the inside out. Consider freezing your baked goods before shipping. This will keep them fresh and secure before handing them off to the post office.

    Depending on the shape of your treat, you can wrap your goods in plastic wrap or a Ziploc bag before freezing. It might seem a bit abnormal, but there's no need to pack the goods with an ice pack: let them defrost as they travel to your loved one.

    When it comes to homemade cookies, freezing them ahead of time can give you more creative control over your cookie presentation. Place cookies as you would on a plate or tray. Then freeze them to the plate and cover tightly with plastic wrap.

    In transit, your cookies will slowly defrost but remain in place. This will allow your cookies to be just about table-ready once they arrive, without having too much moisture being released to cause leakage.

    Baked Goods Shipping Options

    If you're based in the United States, you'll most likely have to choose between USPS, UPS, and FedEx when shipping your baked goods. Each shipping service has pros and cons, with USPS typically beating out its competition for its affordability for smaller packages. In addition, its priority mail services have historically been a safe bet. However, now with the upcoming changes by the postal service for shipping times, this year is going to be an actual test for your cookie care package. This makes me a wee bit nervous, and I may seek out one of the other vendors this season until I am comfortable with USPS shipping changes.

    However, the slightly more expensive UPS has guaranteed express shipping and is relatively affordable for bigger shipments. FedEx is also great for its offer of Saturday deliveries, as well as reliable tracking.

    If you're aiming to send smaller treats to many of your friends and family members, USPS will be your best bet without breaking the bank. But if you're looking to recreate a large family gathering's amount of baked goods, it might be worth investing in a pricier but more reliable service.

    When using any of these carriers, you must use a sturdy cardboard box, packing tape, and I'd recommend shipping it to arrive in the shortest amount of business days your budget will allow.

    cookies & boxes for mailing

    Mailing Cookies and Other Baked Goods

    Mailing cookies and other baked goods can be a scary challenge. But like most things when it comes to baking, practice and the right tools can truly make a difference to ensure your edible gifts arrive edible. So first, consider the type of baked goods you want to transport, and start with sturdier options if you haven't shipped things like this before.

    Are you ready to perfect your cookie baking techniques to gift your friends a delicious treat? Take a look at my article on the Ten Best Cookie Baking Tools that can make your cookie baking easier, more efficient, and enjoyable, too.

    If you are looking for more holiday cookie ideas to make for shipping we have you covered. Take a look at our 12 Days of Christmas Cookie Series.

    Looking For More Recipes & Baking Tips

    Subscribe to my free newsletter to get new baking tips in your inbox monthly. Find me sharing new recipes and tips on Pinterest, Instagram, or Facebook.

    As an Amazon Associate and member of other affiliate programs, I earn from qualifying purchases. What that means is if you click on one of our affiliate links, they may toss a few pennies our way for a commission.

    15 Quick and Easy Holiday Party Desserts

    November 4, 2021

    Holiday Party Dessert Collage

    You can't have a holiday party without desserts! There are so many different options for the perfect holiday dessert. Whether you're hosting and in charge of making them all or just bringing one dish, there's something here that will satisfy any sweet tooth imaginable.

    Traditional favorites like eggnog, gingerbread cookies (my personal favorite), apple, pumpkin and cranberry…the list goes on. Pick whichever recipe looks most amazing AND watch your friends and family come back for more and more!

    Holiday Party Dessert Collage
    Triple Chocolate Cheesecake
    This triple chocolate cheesecake is rich, creamy, and guaranteed to make anyone happy this holiday season!
    Read More
    Slice of Triple Chocolate Cheesecake
    Pink Champagne Cake
    This Pink Champagne Cake is the perfect way to celebrate the holidays! A champagne-infused cake with a classic vanilla buttercream.
    Read More
    Pink Champagne Cake
    Mini Gingerbread Bundt Cake
    Flavored with robust molasses and warm winter spices, this moist and fluffy Gingerbread Bundt Cake recipe will rule your heart for ages!
    Read More
    Mini Gingerbread Bundt Cake
    Apple Crisp Cupcakes
    These apple crisp cupcakes are made up of a fluffy vanilla cupcake, apple pie filling, a caramel cream cheese frosting, and a buttery, cinnamon crumble on top.
    Read More
    Apple Crisp Cupcake
    White Chocolate And Raspberry Cookies
    These white chocolate and raspberry cookies are buttery, chewy, and stuffed with sweet freeze-dried raspberries and silky white chocolate. They are the perfect easy treat that you can make in under 30 minutes!
    Read More
    White Chocolate Raspberry Cookies
    Christmas Butter Cookies
    These easy Christmas butter cookies are dipped in chocolate and decorated with sprinkles! It’s made with an easy, no chill cookie dough that makes them ready in only 20 minutes!
    Read More
    Christmas Butter Cookies
    Gingerbread Spice Cake
    This gingerbread spice cake with mascarpone frosting makes a wonderful dessert for any holiday gathering - and it's easier than it looks!
    Read More
    Gingerbread Spice Cake
    Mini No Bake Pumpkin Cheesecake
    These mini pumpkin cheesecakes are perfect for the holidays - they come in individual portions and they’re gluten-free friendly. Plus, they only take about 30 minutes to prep!
    Read More
    Pumpkin Cheesecake
    Chocolate Mint Mousse Tart
    Chocolate and mint are the perfect pair for holiday desserts. Smooth and insanely creamy, this mousse tart has a chocolate cookie crust which makes it easy to put together.
    Read More
    Chocolate Mint Mousse Tart
    Chocolate Peppermint Christmas Cookies
    These Chocolate Peppermint Christmas Cookies are the easiest way to bring the look, taste, and smell of the Holidays into your home. They're crunchy on the edges, chewy in the center, full of chocolate and peppermint flavor, and fun to decorate!
    Read More
    Chocolate Peppermint Christmas Cookies
    Blood Orange Pound Cake
    This Blood Orange Almond Pound cake is tender, buttery, and super flavorful. It's bursting with almond and zesty orange, topped with a bright pink blood orange glaze.
    Read More
    Blood Orange Pound Cake
    Cranberry Upside Down Cake
    This cranberry upside down cake is a fun twist on the classic pineapple upside down cake! The cranberries add a tart contrast to the brown sugar syrup and buttery cake.
    Read More
    Cranberry Upside Down Cake
    Snickerdoodle Cheesecake Bars
    Snickerdoodle Cheesecake Bars are the best of both worlds- soft and chewy snickerdoodle cookie dough layered with a creamy, rich layer of cheesecake, and then topped again with more cookie dough.
    Read More
    Snickerdoodle Cheesecake Bars
    Eggnog Truffles
    These eggnog truffles are so yummy and perfect for Christmas! Give them as a gift or serve at your holiday party.
    Read More
    Eggnog Truffles
    Chocolate Peppermint Meringues
    These meringues are a fun alternative to the usual holiday peppermint bark. They are light with refreshing peppermint flavor and sweet chocolate.
    Read More
    Chocolate Peppermint Meringues in a bowl
    Holiday Party Dessert Collage

    More Easy Holiday Desserts

    No matter what type of holiday dessert you're craving, there's something here that will satisfy your sweet tooth. For those who are looking to host the perfect party with a variety of desserts for all their guests (or just want to bring one dish), this list goes on and on with delicious treats like eggnog pie, gingerbread cookies, apple cake, pumpkin cheesecake or cranberry scones. And if none of these sound appealing enough? Head over to our blog for even more ideas! The possibilities are endless when it comes to finding the perfect holiday treats- so why not try them all?!

    Looking For More Baking Tips & Recipes?

    Subscribe to my free newsletter to get new baking tips in your inbox monthly. Find me sharing new recipes and tips on Pinterest, Instagram, or Facebook.

    As an Amazon Associate and member of other affiliate programs, I earn from qualifying purchases. What that means is if you click on one of our affiliate links, they may toss a few pennies our way for a commission.

    Chewy Vegan Ginger Cookies

    October 27, 2021

    Vegan Ginger Cookies on marble top

    What would a holiday season be without cookies? It's the time of year when we gather with family and friends to make memories, decorate gingerbread houses, and give each other thoughtful gifts. Vegan or not, you're going to need some delicious holiday cookie recipes in your life! Here is one for chewy vegan ginger spice cookies that will bring warmth into your home this winter.

    Vegan Ginger Cookies on marble top

    Best Vegan Holiday Cookies

    Spice cookies are one of my favorites and I tend to eat them all year long. This is the first year we have gone Vegan. But no worries, if you aren't ready for Vegan, I'll walk you through how to make the needed changes. (It's so easy)

    This cookie is thin like ginger snap cookies, but soft and chewy like a cookie should be with crispier edges. They’re full of molasses, brown sugar, and delicious holiday spices like ginger, cinnamon, and nutmeg. I’m sure you are going to LOVE them. And the best part, no decorating like gingerbread cookies or sugar cookies!

    Ingredients Illustration

    Ingredients & Notes

    This recipe is delicious and simple if you go vegan or non-vegan. All it takes is two ingredients to make the switch, Earth Balance Vegan Butter for those who want their butter animal free, but you can use regular unsalted butter if going with non-vegan. And you will need to do a nut milk replacement with an egg in place of a nut milk product. And that's it. Simple changes for your easy vegan or non-vegan Christmas cookies.

    I used almond milk in my cookies, but any nut variety milk that you have will work perfectly fine for the recipe.

    Vegan Ginger Cookies

    Steps to Make the Vegan Molasses Cookies

    • Preheat the oven to 350°F. Line two baking sheets with parchment. In a medium sized bowl combine the following: flour, crystallized ginger, ground ginger, cinnamon, baking soda, nutmeg, cloves, pepper, and salt.
    • In a mixing bowl of a stand mixer combine butter, brown sugar, white sugar, and fresh ginger. You can also use a hand mixer and a separate bowl if you don't have a stand mixer. Slowly drizzle in the molasses until fully incorporated.
    • Add the dry ingredients in two additions to the wet ingredients, alternating between the dry ingredients and the milk. Once combined, chill the dough for 30 minutes.
    • Roll dough and coat dough balls with sugar. Place 10 cookies on a cookie sheet and bake.
    Process Collage

    FAQ & Pro Tips For Vegan Cookies

    Can I make these ginger molasses cookies crispier?

    Yes! These cookies are designed to have a chewy texture, but to change you would simply roll the dough smaller, use about 1.5 tablespoons of dough instead of 2. Then bake for a minute or two longer. This will definitely firm up the center if that is what you are looking for.

    Do I need to chill the vegan cookie dough?

    I'd go with yes. Not so much to prevent spreading, but more so to prevent it from sticking to your hands when rolling it. The dough is very soft, so I would recommend the chill.

    My cookies are a bit puffy and not flat, what should I do?

    When you remove the cookies from the oven, gently tap the baking sheet on the counter. That will immediately reduce the puffiness.

    How do I store the vegan ginger cookies?

    Keep the cookies in an airtight container on the counter for up to 5 days.

    Can I freeze these cookies?

    Yes, definitely. Place them in a ziploc freezer bag and keep them in the freezer for up to 60 days. Let thaw at room temperature when ready to eat.

    Vegan Ginger Cookies
    Vegan Ginger Cookies

    Chewy Vegan Ginger Cookies

    Chewy ginger spice cookies are always a hit at holiday time, especially when they’re vegan! These vegan ginger cookies are chewy, soft and full of holiday spice.
    5 from 8 votes
    Print Pin Rate
    Course: Dessert
    Cuisine: American
    Prep Time: 15 minutes minutes
    Cook Time: 12 minutes minutes
    Servings: 20 Cookies
    Calories: 143kcal
    Author: Serena

    Ingredients

    • 2 cups AP Flour (240 grams)
    • 3 tablespoons Crystallized Ginger, Finely Chopped (36 grams)
    • 1 teaspoon Ground Ginger (2.25 grams)
    • 1 teaspoon Ground Cinnamon (2.5 grams)
    • 1 teaspoon Baking Soda (6.75 grams)
    • ½ teaspoon Ground Nutmeg (2 grams)
    • ¼ teaspoon Salt (1.5 grams)
    • ¼ teaspoon Ground Cloves (.85 grams)
    • ¼ teaspoon White Pepper (.6 grams)
    • ½ cup Earth Balance or Other Vegan Butter (115 grams)
    • ½ cup Light Brown Sugar (106 grams)
    • ½ cup Granulated Sugar Plus More for rolling (100 grams)
    • 1 Tablespoon Fresh Minced Ginger (18.5 grams)
    • ¼ cup Molasses (85 grams)
    • ¼ cup Non Dairy Milk (60 mL)

    Instructions

    • Preheat oven to 350°F and line 2 baking sheets with parchment paper.
    • In a medium bowl, mix flour, crystallized ginger, ground ginger, cinnamon, baking soda, nutmeg, salt, cloves, and pepper.
    • In the bowl of your stand mixer with the paddle attachment, or use a handheld electric mixer, beat together butter, brown sugar, white sugar, and fresh minced ginger.
    • Drizzle molasses into the mixer bowl while mixing until the dough is fully incorporated. Be sure to scrape down the sides of the bowl.
    • Add the dry ingredients in two additions. Pour the milk in between each addition of dry ingredients and mix the batter until just combined. The dough will be quite soft. Cover and place in the refrigerator for 30 minutes.
    • Put the additional sugar (about ½ cup) into a small bowl. Using about a tablespoon of cookie dough, roll the dough into balls and roll around in the sugar to coat all sides. My cookies were 38.5 grams of dough per ball.
    • Place the cookie dough on the prepared baking sheets. Make sure to leave about 3 - 4 inches between each cookie to give them room to spread. Bake for 10-12 minutes. The edges should look set and the top should have a bit of crinkle.
    • Remove cookies from the oven. As they bake, they will puff up and then flatten. If they puffed up in the oven but didn't flatten as much as you want, it helps to gently tap the baking sheet on the countertop. Let cookies cool for 5 minutes on the baking sheet then transfer to a wire rack to cool completely.

    Notes

    Recipe Source: SerenaLissy.com
    This website provides approximate nutrition information for convenience and as a courtesy only. Nutrition data is gathered primarily from the USDA Food Composition Database via Spoonacular API, whenever available, or otherwise other online calculators. While this information can be helpful in estimating the nutritional information of a recipe, it is by no means accurate or official and is not evaluated by the Food and Drug Administration.
     
    All images and content are copyright protected. Do not use our images without prior permission.

    Nutrition

    Calories: 143kcal | Carbohydrates: 25g | Protein: 1g | Fat: 4g | Saturated Fat: 1g | Polyunsaturated Fat: 1g | Monounsaturated Fat: 2g | Trans Fat: 1g | Sodium: 124mg | Potassium: 91mg | Fiber: 1g | Sugar: 15g | Vitamin A: 12IU | Vitamin C: 1mg | Calcium: 21mg | Iron: 1mg
    Tried this Recipe? Pin it Today!Mention @SerenaLissy or tag #serenalissy!

    This recipe for chewy vegan ginger cookies brings the warmth of winter into your home. It's an easy vegan Christmas cookie perfect for holiday cookie exchanges, or edible gifts. If you’re not a vegan, or don't want to make these yourself, we have plenty more recipes on our blog that will be sure to satisfy your sweet tooth this holiday season! What are some of your favorite cookie recipes? Comment below and let us know!

    • Peppermint Meringues
    • Peanut Butter Truffles
    • Triple Chocolate Cheesecake

    Looking For More Recipes & Baking Tips?

    Subscribe to my free newsletter to get new baking tips in your inbox monthly. Find me sharing new recipes and tips on Pinterest, Instagram, or Facebook.

    As an Amazon Associate and member of other affiliate programs, I earn from qualifying purchases. What that means is if you click on one of our affiliate links, they may toss a few pennies our way for a commission.

    Vegan Ginger Cookie Stack
    • « Go to Previous Page
    • Go to page 1
    • Go to page 2
    • Go to page 3
    • Go to page 4
    • Interim pages omitted …
    • Go to page 17
    • Go to Next Page »

    Primary Sidebar

    Hi, I'm Serena!

    Join us and you will learn all sorts of creative techniques from baking to food photography that is easy enough for a novice to recreate at home, but look and taste like they were made by a seasoned pro.

    Get Inspired, Cook Confidently, Eat Well

    More about me →

    Ice Cream Recipes

    • Scoop of chocolate mint ice cream in bowl with ice cream cone
      No Churn Chocolate Mint Ice Cream
    • Bowl of key lime pie ice cream with a spoon
      No Churn Key Lime Pie Ice Cream
    • Apple Ice Cream in a waffle cup
      Apple Ice Cream
    • Chocolate Chunk Ice Cream In A Bowl
      Chocolate Chunk Ice Cream
    • Frozen Greek Yogurt from your Instant Pot
      Instant Pot Frozen Greek Yogurt
    • Avocado Ice Cram In a serving Bowl
      Easy Avocado Ice Cream Recipe

    Popular Recipes

    • Jamaican Sweet Potato Pudding
      Jamaican Sweet Potato Pudding
    • Peanut Butter Fudge Cups
      Peanut Butter Fudge Cups
    • Samoas on a plate
      Make at Home Samoas - Homemade Samoas: Girl Scout Cookies
    • Italian Chocoalte Walnut Cake
      Italian Chocolate Walnut Cake (Torta di Noci)

    Photography Challenge

    Master The Art of Food Photography

    Footer

    ↑ back to top

    About

    • Privacy Policy

    Newsletter

    • Sign Up! for emails and updates

    Contact

    • Contact

    As an Amazon Associate, I earn from qualifying purchases.

    Copyright © 2022 Serena Lissy