• Skip to primary navigation
  • Skip to main content
  • Skip to primary sidebar
  • Home
  • Collaborate with us
  • Contact

Serena Lissy logo

  • Recipe Index
  • Privacy Policy
menu icon
go to homepage
  • Christmas
  • Recipes
  • Photography
  • About
    • Facebook
    • Instagram
    • Pinterest
  • search icon
    Homepage link
    • Christmas
    • Recipes
    • Photography
    • About
    • Facebook
    • Instagram
    • Pinterest
  • ×

    Serena Lissy » Recipes

    Blog

    Types Of Yeast And When To Use Them In Baking

    August 23, 2021

    Stack of Yeast Breads

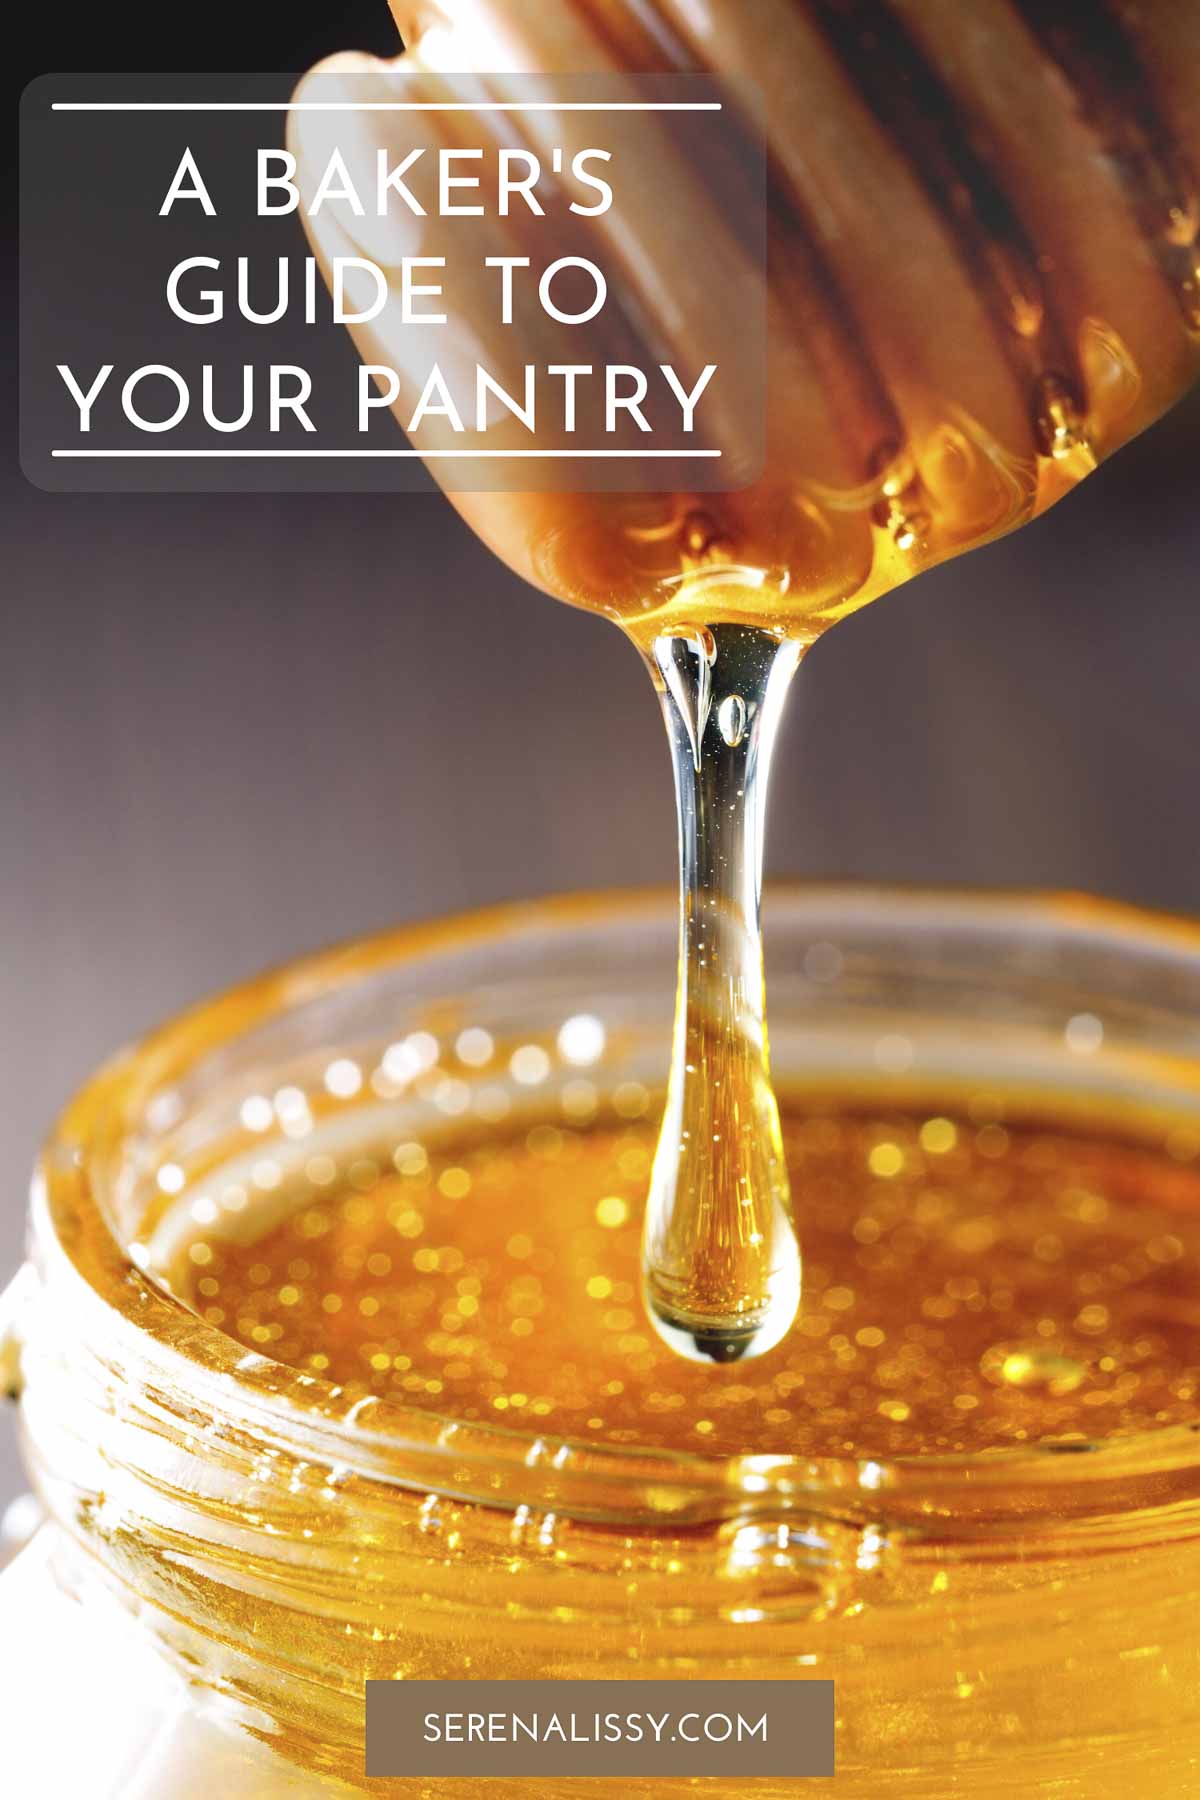
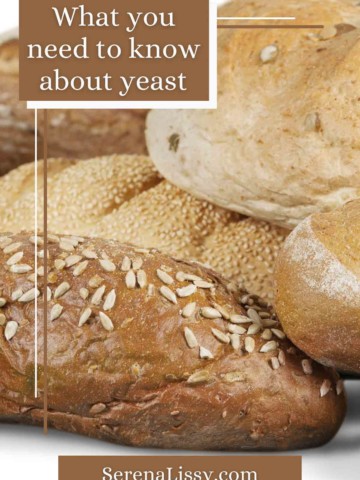
    Yeast is an essential ingredient for any baker. That crunchy bite of a baguette paired with a soft inside would be impossible without yeast. Interestingly enough, Egyptians used wild yeast to make bread some 4,000 years ago. William Sitwell’s “A History of Food in 100 Recipes,” interpreted from Egyptian hieroglyphs that the people had found that yeast spores helped result in fluffier bread loaves.

     In 2021, we know a bit more about how these single-celled microorganisms operate. By feeding on sugars, yeast generates carbon dioxide that creates airy structures and a rise in your bakes.

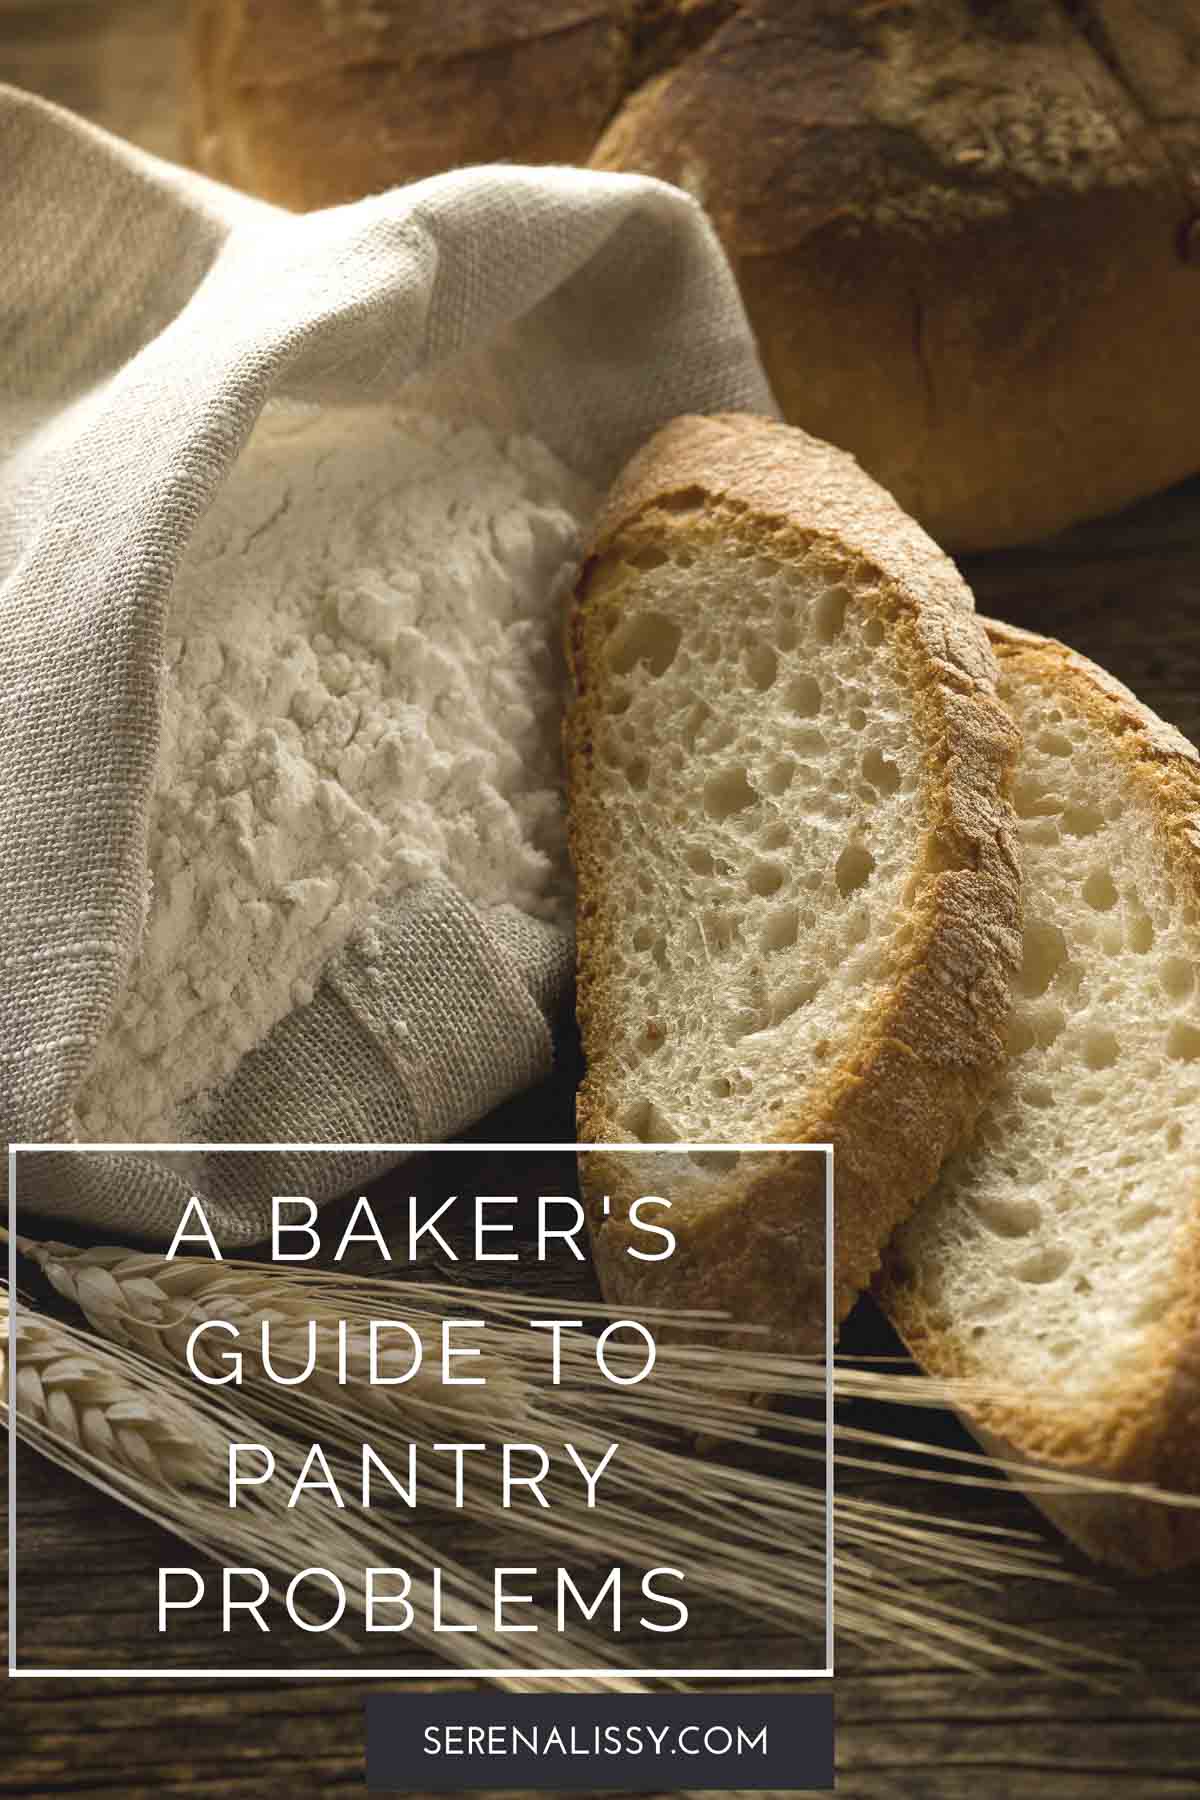
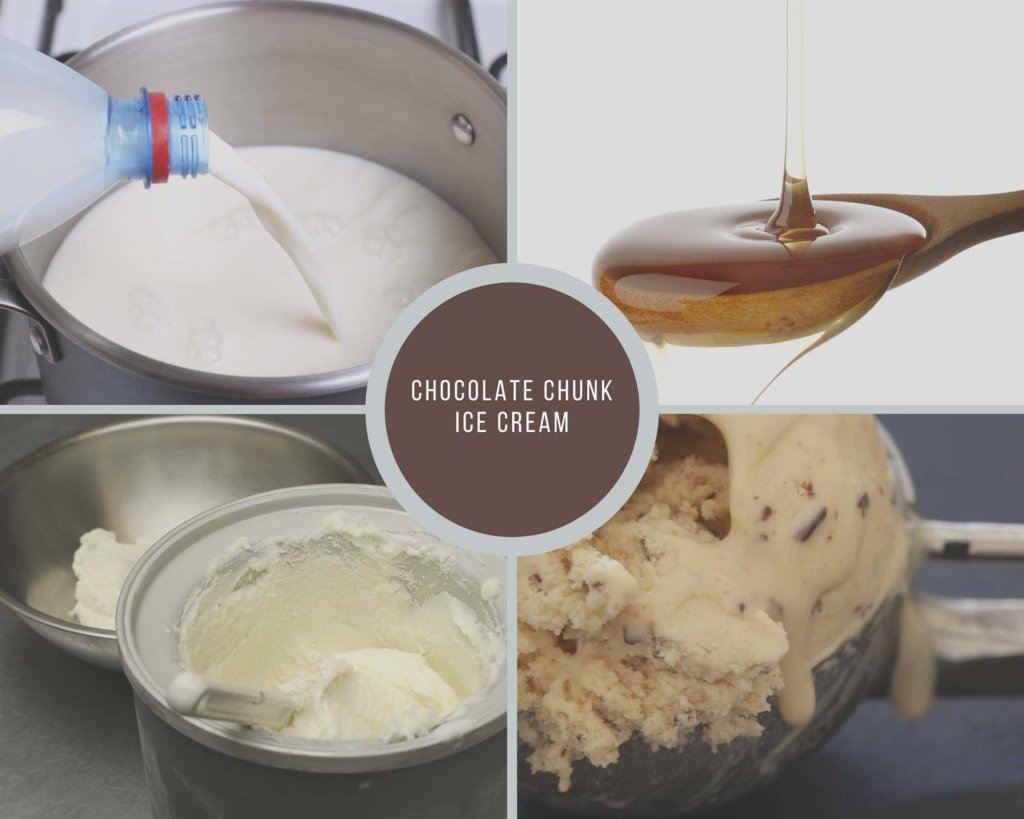
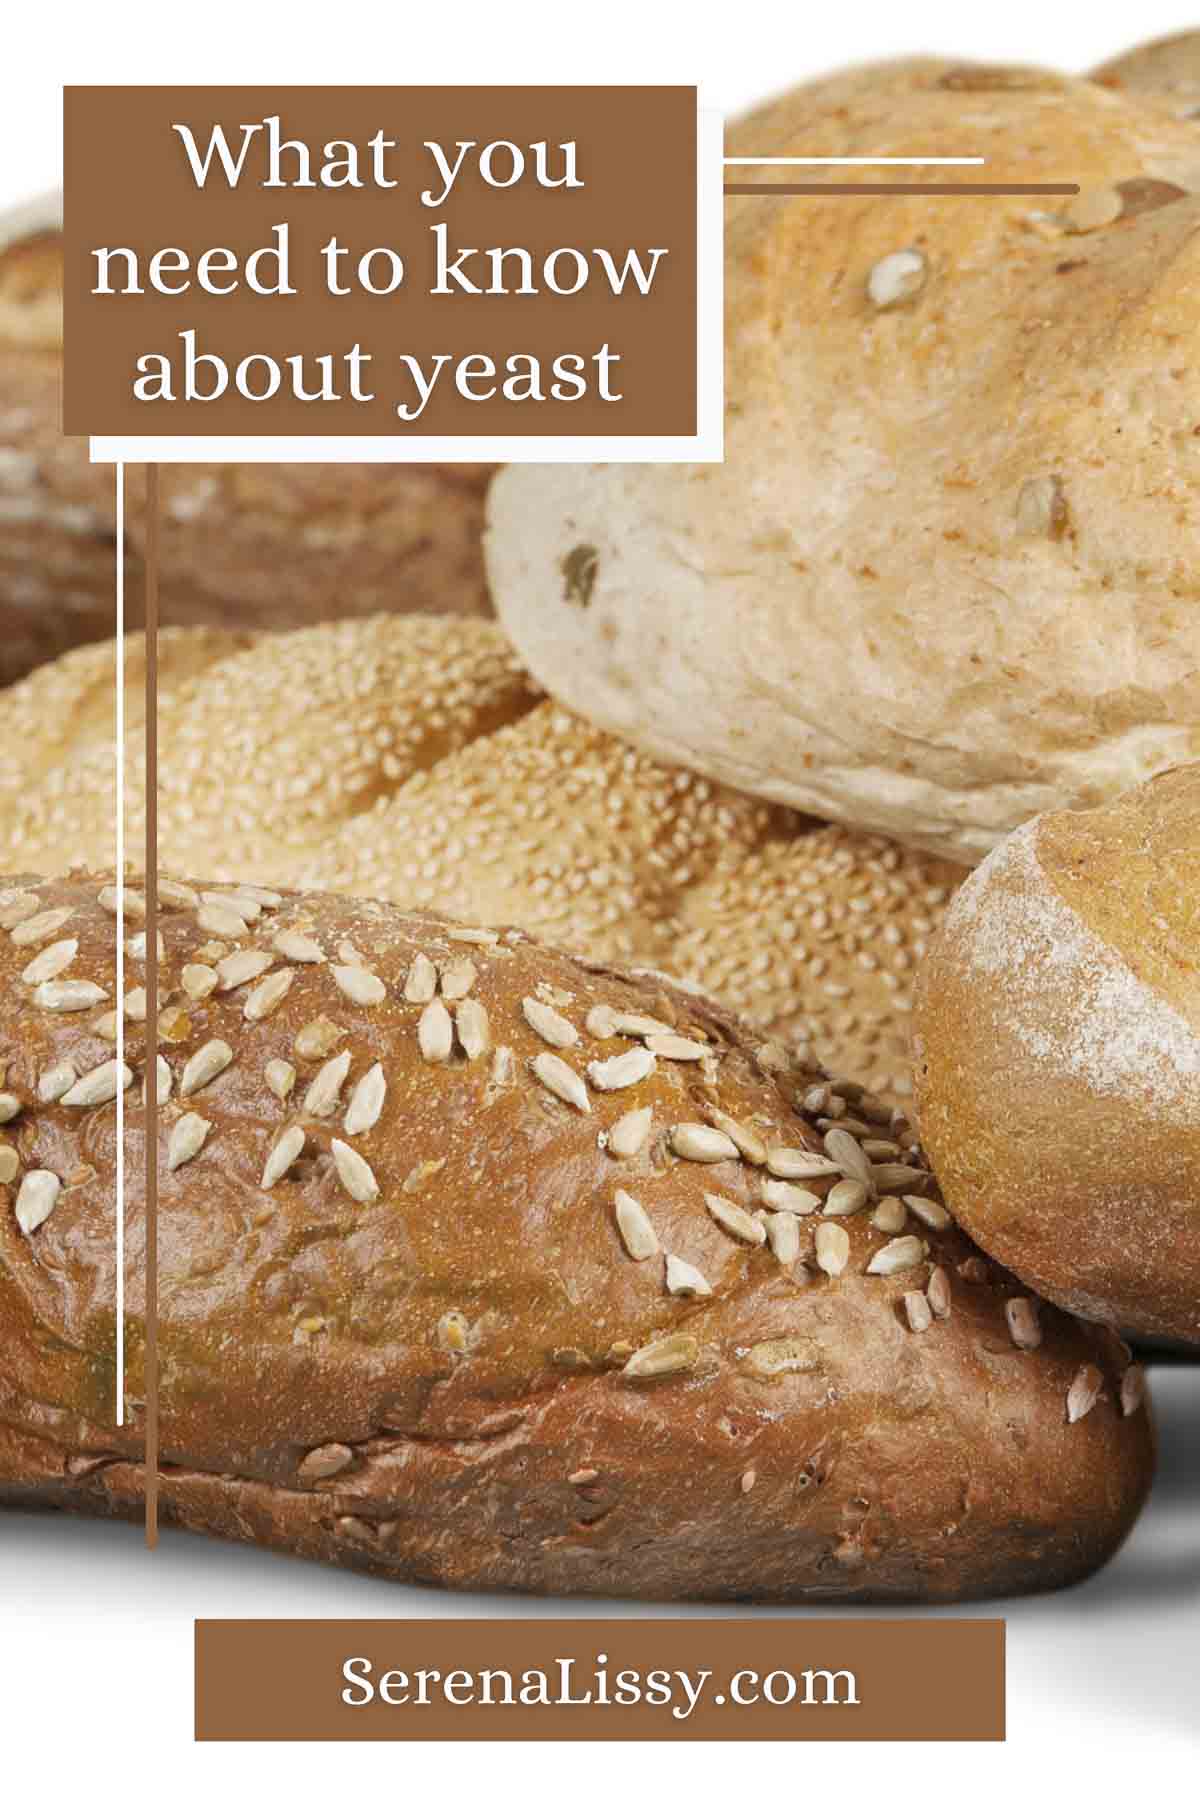
    Today, we are going to talk about the different types of yeast and when to use them. Yeast is in most bread recipes and using the right type will help you have a great loaf. There are 4 types we will look into and each one is just a little different.

    Stack of Yeast Breads

    Different Types Of Yeast

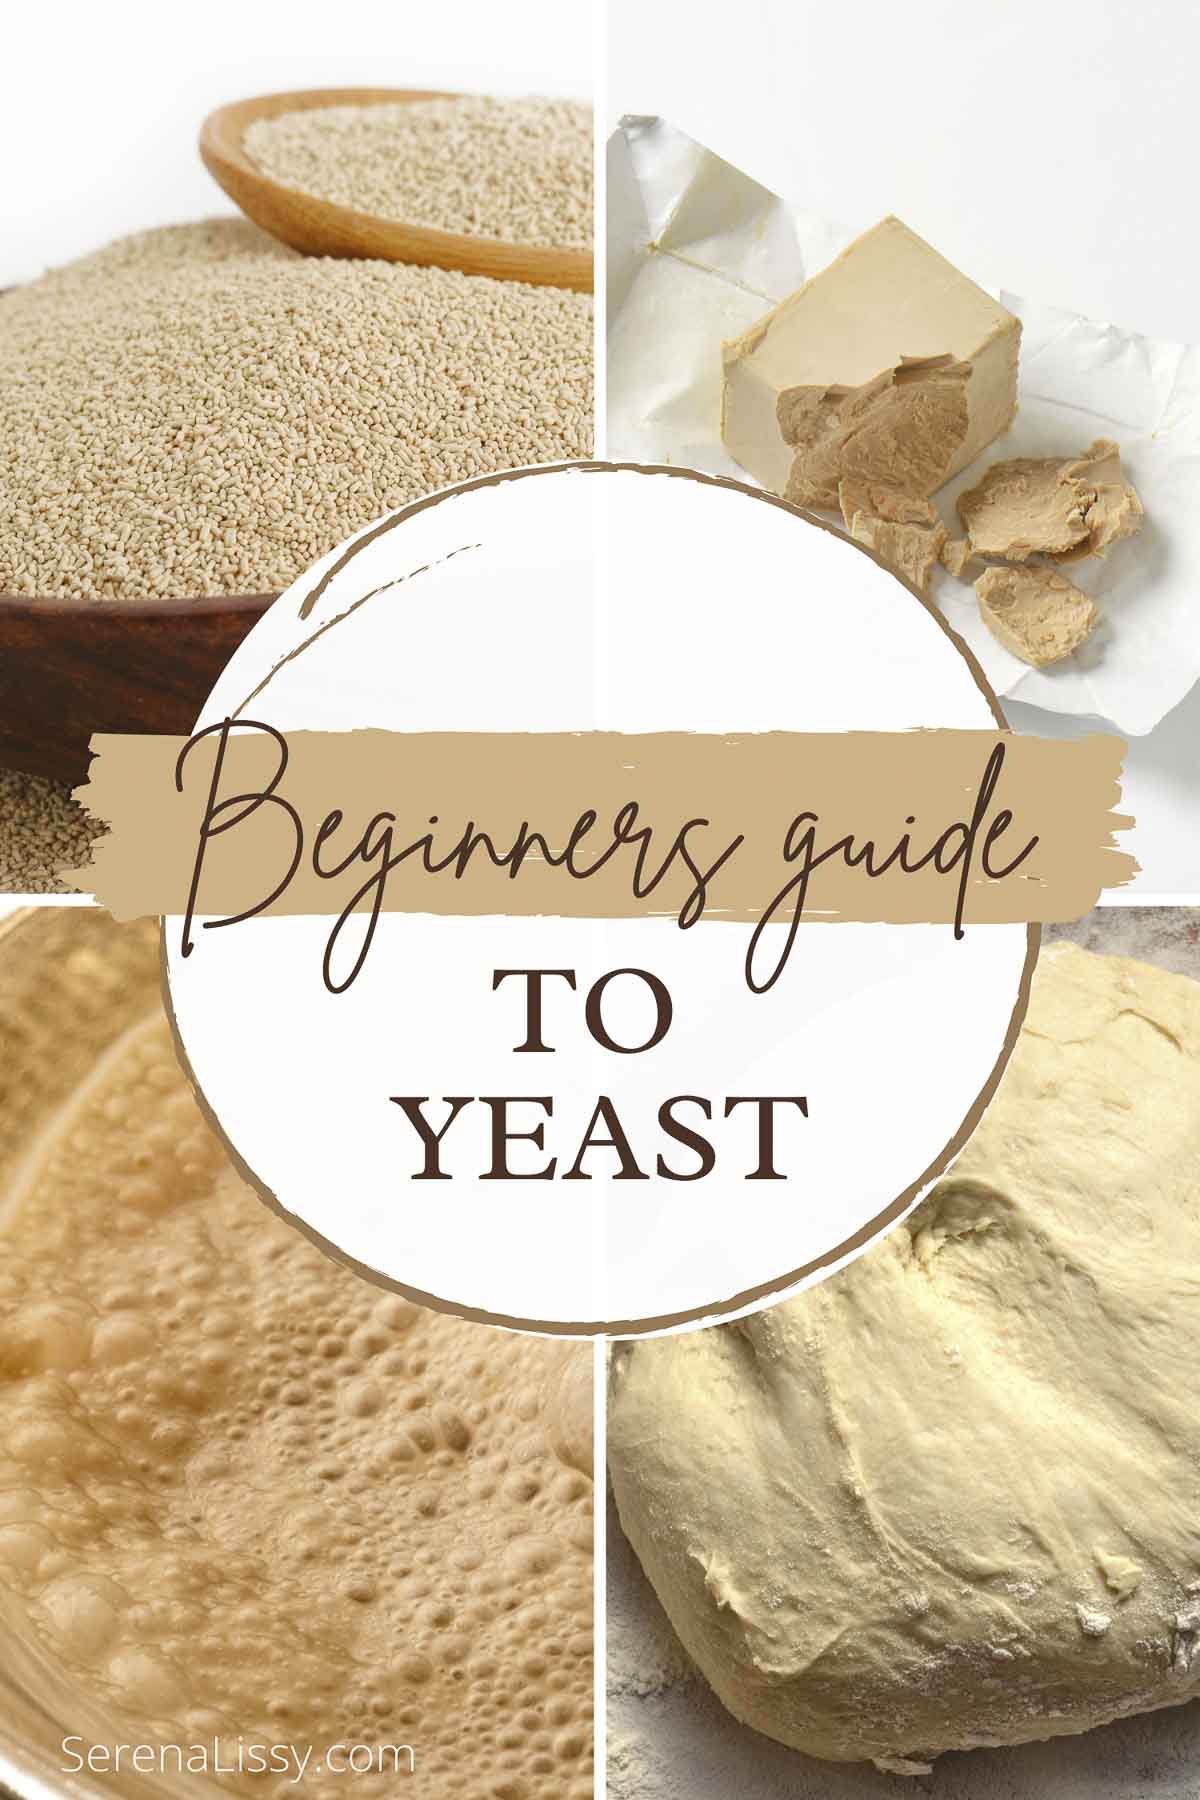
    Baking is an important part of any kitchen, and understanding the different types of yeast that we use in our bread recipes can help you work towards a better loaf. Today I want to take a look at four common baker's yeasts: active dry yeast, instant yeast, fresh cake, or compressed fresh dough leavening agent as well as Rapid Rise yeast. The first thing to remember about these is they all have their own properties. Like how quickly it works or if it needs water added before baking. When choosing what kind for your recipe make sure you know which one will best suit your recipe. Remember, not every type is made equal. There could be differences in taste and texture depending on what the recipe calls for.

    Active Dry Yeast

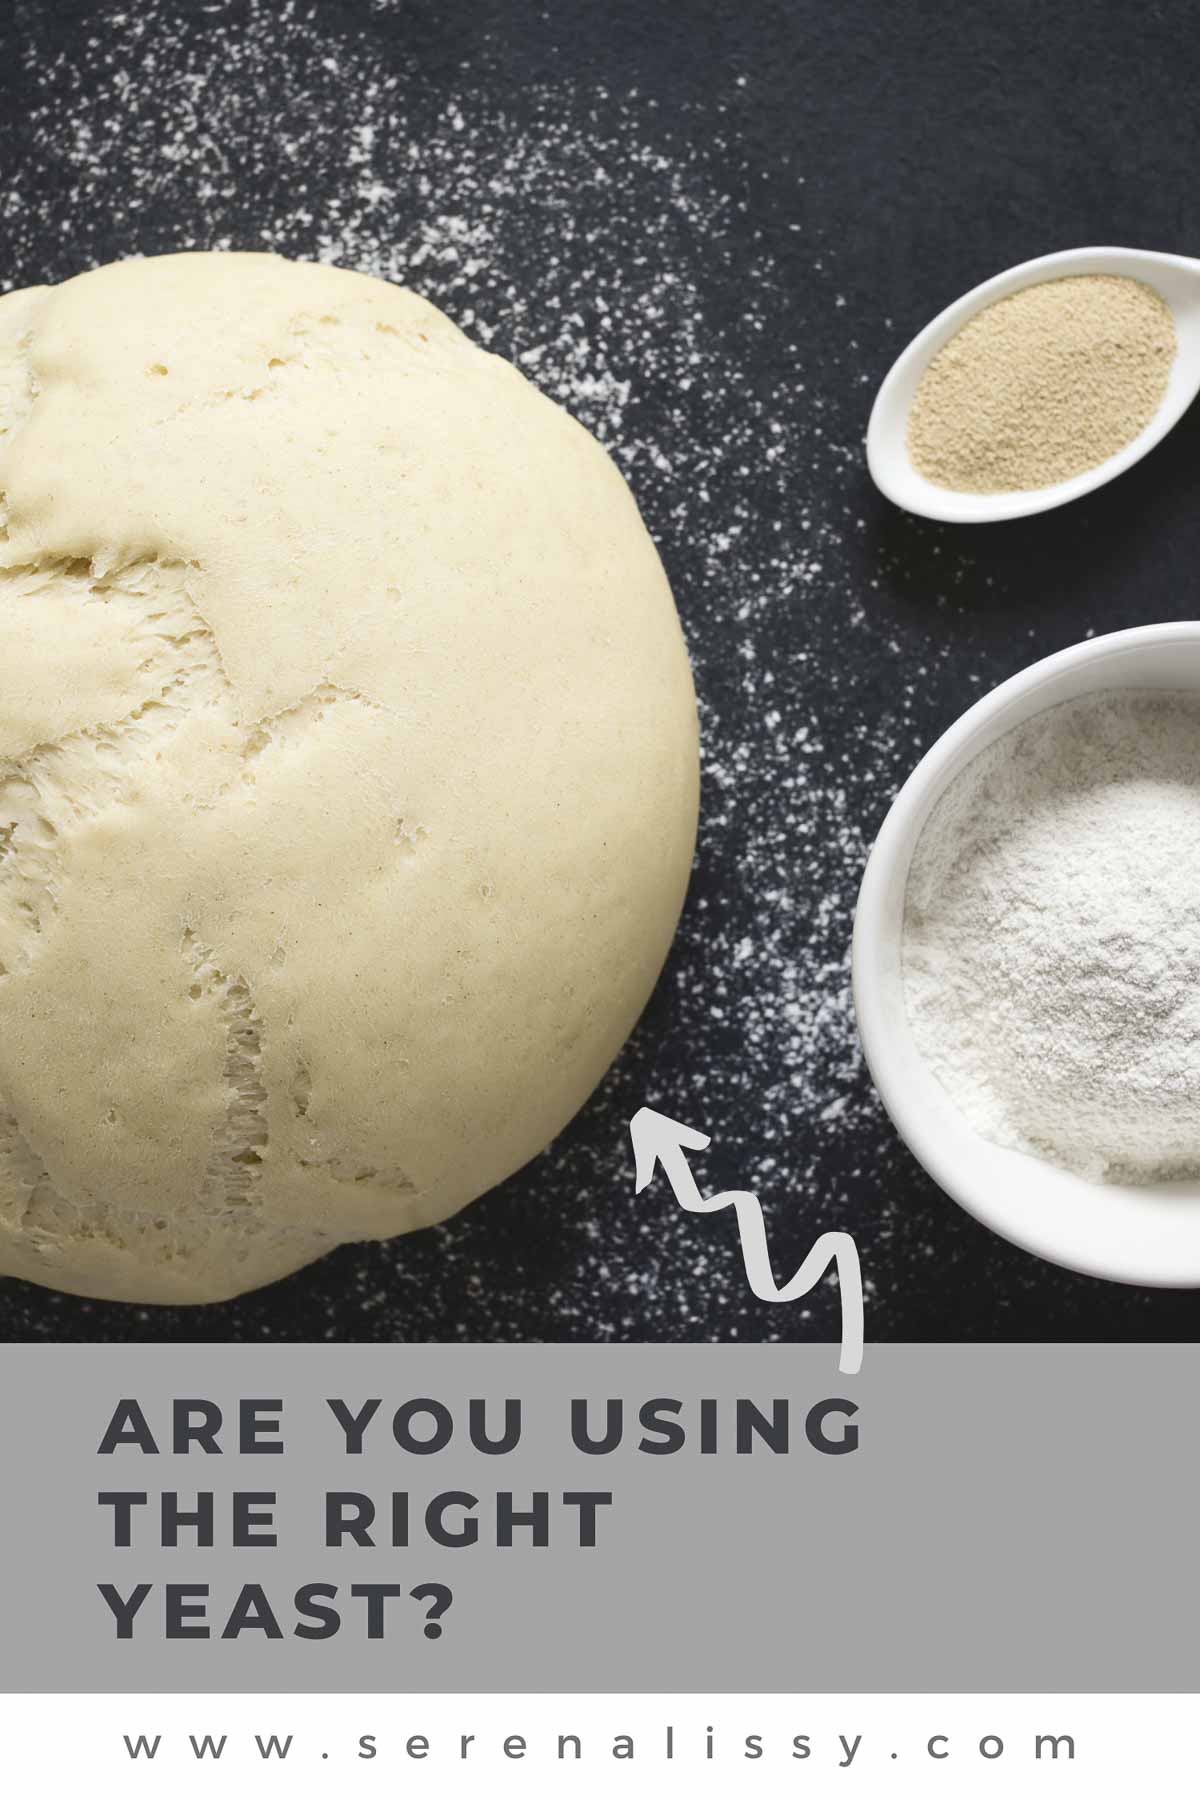
    Active dry yeast is the most common type of yeast. If you grab the first packet or container of yeast you see in a grocery store, it’s probably active dry yeast! Many recipes will call for active dry yeast. Think of your favorite cinnamon rolls, sweet dough, or your favorite yeast breads. They use active dry yeast most of the time. So for me, it’s a good rule of thumb to have some on-hand if you’re a lover of baked goods like me.

    Active dry yeast potency does vary over time and can be damaged by high temperatures. You will want to keep liquids below 115℉ before you even get to baking.

    This yeast is easily activated with a bit of water and sugar. This process is referred to as yeast proofing. Yeast proofing is the process of “waking up” or “activating” your yeast so that it can do its job in your final bake.

    But do you actually have to proof your yeast before using it in a bake? Some argue that proofing active dry yeast is unnecessary, while others swear by it. Most agree that active dry yeast needs to be proofed before use, while instant yeast does not need to be proofed ahead of time. We’ll get to instant yeast in a moment.

    To proof active dry yeast, mix 1 packet of yeast, 1 teaspoon of sugar with ¼ cup of warm water. Let stand for 5-10 minutes at room temperature and witness the mixture beginning to froth or bubble up. This process of fermentation is the direct result of your yeast molecules consuming the sugar and releasing carbon dioxide gas.

    Reduce the amount of water in your recipe by ¼ cup and you’ll be ready to go when it’s time to add in your active yeast!

    Different types of yeast

    Instant Yeast And When To Use It

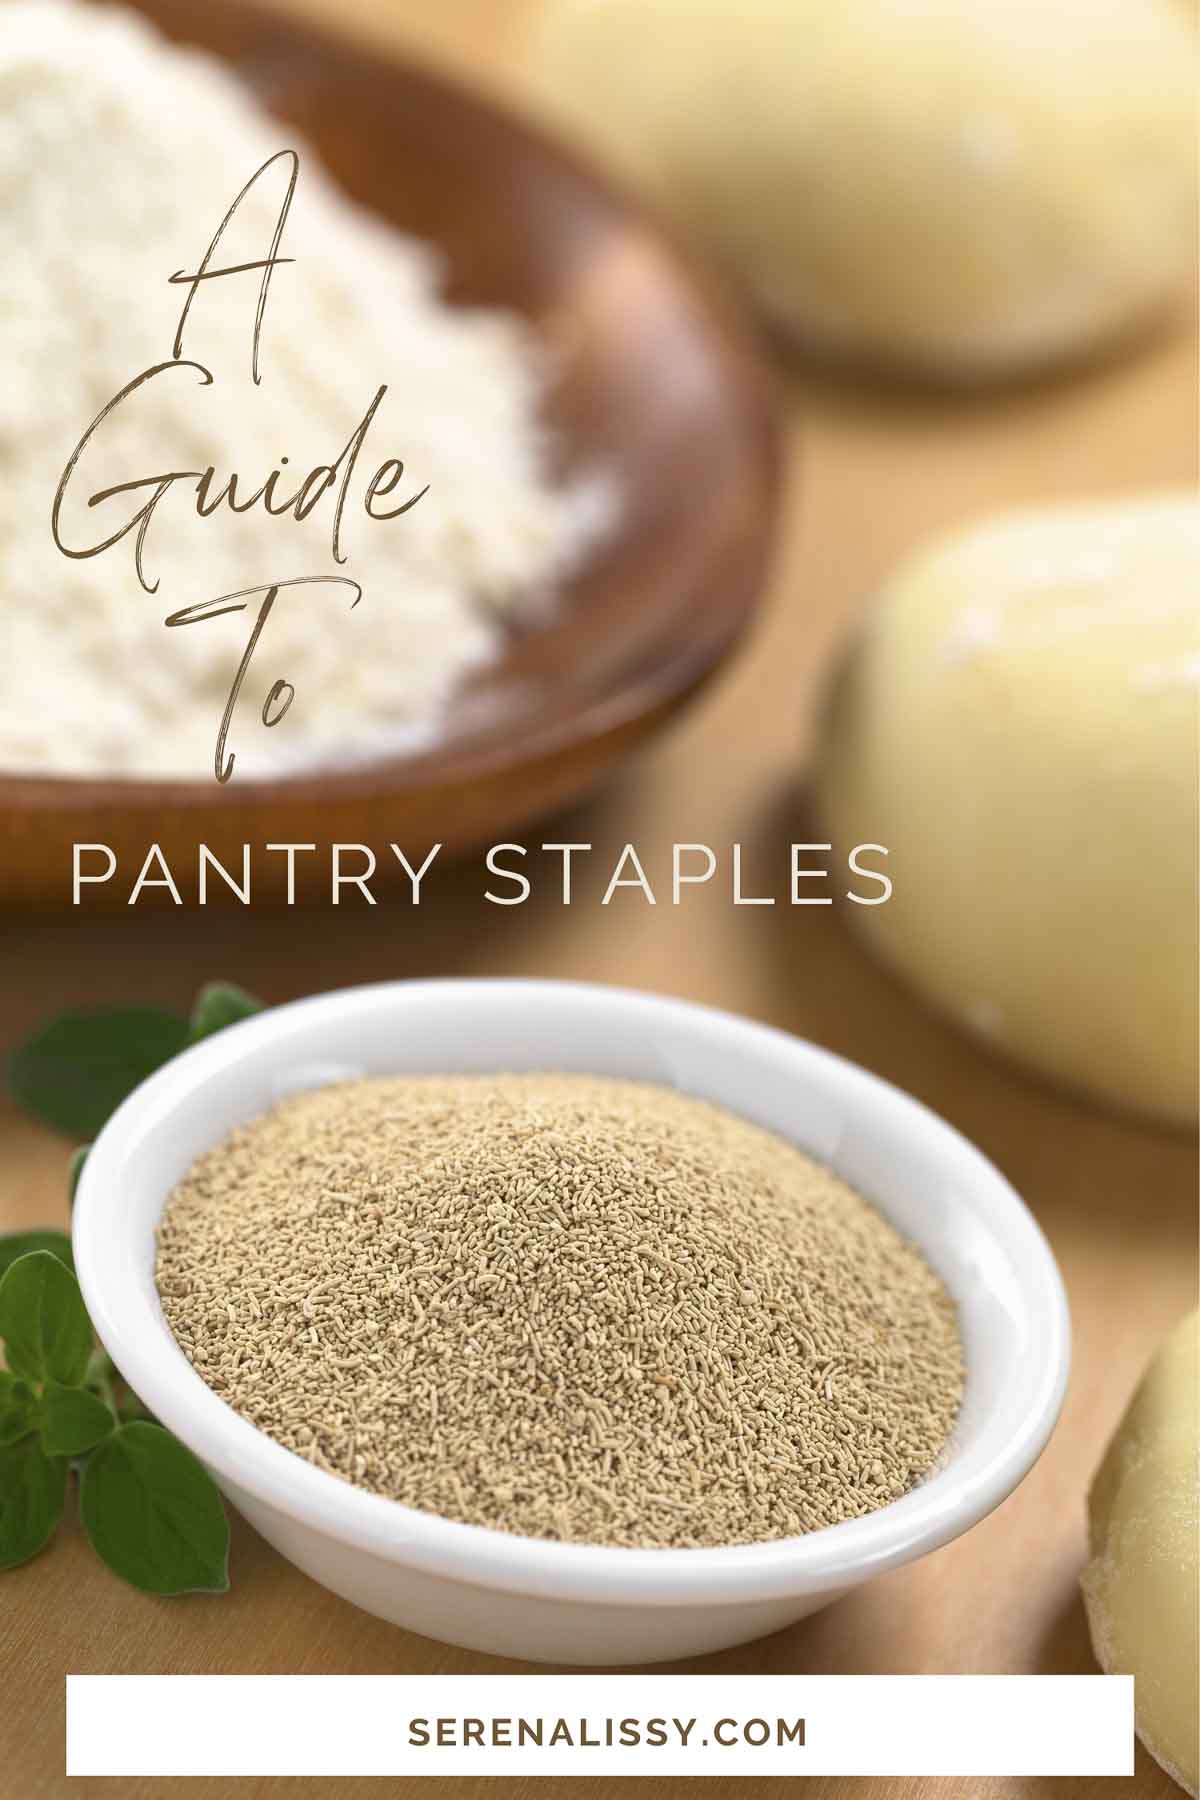
    Instant yeast is also referred to as bread machine yeast. This yeast will last longer when stored compared to active dry yeast. It is also ground into smaller particles compared to active dry yeast. It dissolves more quickly into your mixtures and doughs as well. Common brands of instant yeast include SAF instant yeast and Dr. Oetker.

    Because of this, instant yeast is also known as the type of dry yeast that does not need to be proofed or reactivated before use. You can use instant yeast directly in your dough mixture dry ingredients without setting it aside to proof first.

    Instant yeast has an additional major benefit when compared to active dry yeast. It is infinitely more stable than active dry yeast, and can even be frozen for years before use. Instant yeast is ground and packaged in a way that allows the yeast to remain stable and active longer on the shelf. It is also tolerant of water temperatures up to 130℉.

    Instant yeast does produce a slightly different flavor when compared to active dry yeast, but in most cases, either can be used. Stick to whichever yeast is easier for you to buy, and consider trying the other for a slightly different flavor or to save time.

    Fast-Acting Instant Yeast Also Known As Rapid Rise Yeast

    Alright, the names will get a bit confusing now, but stick with me! Fast-acting instant yeast is a subcategory of instant yeast. Common brands include RapidRise or Quick-Rise. Depending on where you live or shop, you’ll be surprised to find that only one of either instant yeast or fast-acting instant yeast is available.

    Essentially, this quick-acting yeast product was designed to allow you to bake on a time crunch. This makes fast-acting instant yeast a horrible choice when recipes call for bakes that require a long first rise or a second rise period.

    However, fast-acting instant yeast is extremely common and nothing to fear. Use fast-acting yeast directly in doughy mixtures without proofing. You’ll be on the road to perfected one-rise bakes in no time!

    Fresh Yeast

    Fresh yeast was the original yeast product, and yet it is used the least often in today’s kitchens. It is also referred to as compressed or cake yeast and has a 70% water content. It is a crumbly substance that requires no proofing and produces the most carbon dioxide of all other yeast forms.

    Of course, there are drawbacks and reasons as to why you won’t find fresh yeast in most kitchens! It is highly perishable and needs to stay refrigerated. As most of us use smaller amounts of yeast at a time, these drawbacks are enough for most to choose a drier type of yeast to store.

    Storing The Yeast

    We want to keep the yeast organisms alive as long as possible! Only take out what you need from the individual packets before placing them into an airtight container. Or alternatively, store your unused package of yeast in sealed bags or plastic wrap in a dry place. Just make sure they're wrapped tightly so that no moisture can get inside.

    Remember though: Different types of yeasts will have different shelf lives which depend on factors such for example how dry it is where it's being kept. Don't forget about refrigerating any opened packages if you don't plan on using all their contents right away. This way they'll stay fresh for a longer time. And always pay attention to the expiration date. Anytime your yeast is questionable, be sure to test it with some sugar and warm water to make sure it still bubbles and froths up before using it. There is nothing worse than your bread dough not rising due to old yeast that is beyond its shelf life.

    Bread dough

    Baking with Yeast and Yeast Substitutions

    Even with fresh yeast off the table, it can be overwhelming to choose which types of yeast to stock and which to pass on including in your pantry. Thankfully, there are a few common substitutions that you can rely on in a pinch.

    You can use 25% more active dry yeast in place of instant yeast, as long as you still have time to proof the yeast. This works since active dry yeast granules are larger than instant yeast granules, and are therefore less reactive. The increase in active dry yeast makes up for this difference.

    Substituting instant or fast-acting instant yeast for active dry yeast is the same conversion backward. Use 25% less instant or fast-acting instant yeast when replacing active dry yeast.

    Finally, if you need to replace active dry yeast with fresh yeast, you’ll need to use about 2x as much fresh yeast to accomplish the same result. No matter the bake you’re trying to accomplish, there’s a yeast solution even if you don’t have the ideal yeast on hand. 

    Here at SerenaLissy.com, we explore delicious recipes and the science behind baking, too. Explore our recipes, including this Raspberry Mousse Chocolate Cheesecake recipe, or give our article on Flour 101 – The Different Types of Flour and When to Use Them a read today. And if you are ready to start making bread, check out our Bread Baking Tips For Beginners.

    Looking For More Baking Tips?

    Subscribe to my free newsletter to get new baking tips in your inbox monthly. Find me sharing new recipes and tips on Pinterest, Instagram, or Facebook.

    As an Amazon Associate and member of other affiliate programs, I earn from qualifying purchases. What that means is if you click on one of our affiliate links, they may toss a few pennies our way for a commission.

    Italian Chocolate Walnut Cake (Torta di Noci)

    August 13, 2021

    Italian Chocoalte Walnut Cake

    I am sharing one of my favorite traditional desserts from Italy, the Torta di Noci, a walnut cake from Calabria in southern Italy. This is an Italian dessert that has been around for generations, and I can't resist it when it comes to making it at home. It's got all of the ingredients everyone loves: chocolate, walnuts, eggs, and sugar. So, if you are looking for a perfectly moist cake for any occasion, this Italian Chocolate Walnut Cake (Torta di Noci) will be the answer. The recipe is easy to follow. It's also pretty darn tasty, so your guests will enjoy it!

    Italian Chocolate Walnut Cake on Cake Stand

    Italian Chocolate Cake

    There is nothing quite like a sweet dessert, and this recipe does not disappoint. Roasting the walnuts first will bring out their flavor, but it's not required to make the cake taste great! Next, mix all of your ingredients until they are well combined- try combining gently yet firmly, as that can be tricky sometimes. You'll have a dry, crumbly, coarse meal batter on hand, which definitely doesn't look anything close to cake…..until you fold whipped egg whites into it slowly without deflating them too much at once so your eggs won't lose volume. That's when the magic happens; the batter will be thick but spreadable. And at this stage, you are so close to an authentic Italian Chocolate Walnut Cake. You just need to bake!

    Ingredient Illustration for Cake

    Main Ingredients in the Torta di Noci

    • Large Eggs at room temperature
    • Sugar
    • Sunflower Oil - You could also use Canola Oil if you don't have Sunflower Oil
    • Dark Chocolate - I used Valrhona Manjari 64% Chocolate - If you can't find this, pick your favorite dark chocolate bar, or even go with dark chocolate chips. Remember, this is a chocolate cake, go with the best chocolate you can find.
    • Instant Espresso Powder
    • AP Flour - Remember to weigh your flour, I used King Arthur AP Flour. Too much flour will make your cake dry. If you still aren't convinced about weighing your ingredients you can read a great article about how using a scale will change your life!.
    • Baking Powder
    • Salt
    • Walnuts - I toasted mine, but you don't need to.
    • Dark Chocolate Chips - I used Guittard Extra Dark Chocolate Baking Chips
    Process Collage for Recipe Steps

    How To Make An Authentic Italian Chocolate Walnut Cake

    Chocolate cakes are one of my all-time favorites. This is a straightforward recipe that results in a delicious cake. One of the most important things in this cake making process is getting the texture of the nuts correct. Don't let the nuts turn into a paste in the food processor.

    You will combine the egg yolks and sugar and mix until they turn a pale yellow and slightly fluffy. Then add the sunflower oil, melted chocolate, and espresso powder. Stir to combine.

    In a separate bowl, combine flour, salt, baking powder. Then add this dry mixture to the batter and mix at low speed to combine. Finally, add the walnuts and chocolate chips. You can see from above; the batter is looking a bit crumbly. That's what you want.

    In a clean bowl, whip egg whites until stiff peaks form. Then slowly, bit by bit, add the egg whites to the batter. Don't overmix. You don't want to deflate the egg whites. The batter will now be thick but spreadable.

    Transfer to pan and bake! Let cool, remove from pan, sprinkle with powdered sugar, and enjoy this walnut chocolate cake.

    Slice of Italian Chocolate Walnut Cake

    Pro Tips & FAQ

    Do I have to toast the walnuts before baking?

    No, you don't, but you get much more flavor by toasting them.

    How do I toast walnuts in the oven?

    Preheat your oven to 350°F. Sprinkle walnuts onto a parchment-lined baking sheet. Toast until brown and fragrant, about 7-10 minutes, stirring once. Remove from oven when done.

    How do I grind walnuts?

    Place your walnuts into a food processor and pulse until they reach the texture of sand. These go quickly in the food processor, so don't walk away. You don't want to end up with a walnut paste.

    Can I grind walnuts in a blender?

    Yes, definitely! Again, keep an eye on it; you don't want to end up with a walnut paste.

    How do I store an Italian Chocolate Walnut Cake?

    If you have a cake carrier, then go ahead and use that. Keep it covered in the airtight container. You can also use plastic wrap and cover the cake with that.

    What other nut can I use for an Italian Chocolate Cake?

    I'd use hazelnuts. In the US, that makes this a bit more expensive. But if you love hazelnuts, go ahead and switch.

    slice of chocolate cake on plate

    Italian Chocolate Walnut Cake (Torta di Noci)

    This chocolate walnut cake is a decadent and easy to make dessert that will satisfy the sweet tooth of any Italian food lover.
    5 from 12 votes
    Print Pin Rate
    Course: Dessert
    Cuisine: Italian
    Prep Time: 15 minutes minutes
    Cook Time: 25 minutes minutes
    Total Time: 40 minutes minutes
    Servings: 8 Servings
    Calories: 515kcal
    Author: Serena

    Ingredients

    • 3 Large Room Temperature Eggs (Separate egg yolks from egg whites)
    • ¾ cup Sugar (150 grams)
    • ½ cup Sunflower Oil (100 grams)
    • ⅔ cup Dark Chocolate Chopped and Melted (113 grams)
    • 1 teaspoon Instant Espresso Powder (3 grams)
    • ¾ cup All Purpose Flour (90 grams)
    • ¼ teaspoon Salt (2 grams)
    • 1 ¾ teaspoon Baking Powder (7 grams)
    • ⅓ cup Dark Chocolate Chips (65 grams)
    • 1 ⅓ cup Toasted Walnuts - Ground (140 grams)

    Instructions

    • Preheat the oven to 350°F and line a 9 inch springform pan with parchment paper.
    • Chop your walnuts using a food processor until you have the texture of sand. You are looking for walnuts with a coarser look, not pasty. We are not looking for it to be as fine as almond flour. (See image in post)
    • Over a bain marie or in the microwave with low heat, melt the ⅔ cup dark chocolate, and let cool until slightly warm to the touch.
    • In a large mixing bowl, combine the egg yolks and sugar. Whip egg yolks and sugar with the paddle attachment of your stand mixer at high speed for a few minutes. The mixture should turn a paler yellow by then.
    • Add the sunflower seed oil and the lukewarm melted dark chocolate as well as the espresso powder, mix again at medium speed for a few moments just until combined.
    • Combine flour, salt, and baking powder in a separate bowl. Add the dry mix to the batter and whisk until a homogeneous mixture is obtained. Finally, add the ground walnuts and chocolate chips. (I saved a few of these chocolate chips to sprinkle on the top of the cake right before putting it in the oven.) The batter will look a bit dry and crumbly now. Don't worry. It’ll come together.
    • In a cold bowl, whip the 3 egg whites until stiff peaks form, incorporate the whipped egg whites into the chocolate batter a little at a time with a rubber spatula and stir gently but determined. The mix will lighten up now. Make sure there are no clumps of batter sticking to the bottom of the bowl. Mix until the mixture is looking almost smooth. The batter will be thick, but spreadable.
    • Transfer the mix to the prepared pan (if you saved some chocolate chips, sprinkle them on now) and bake for 22 - 30 minutes or until golden brown on top and a skewer inserted comes out clean. Start checking for doneness at 20 minutes with a wooden toothpick. Remember all ovens are different. It could take you a bit longer than 30 minutes.
    • Let the cake cool for 30 minutes in the pan on a cooling rack. Remove from pan after 30 minutes.
    • Serve dusted with confectioners' sugar.

    Notes

    Recipe Source: SerenaLissy.com
    This website provides approximate nutrition information for convenience and as a courtesy only. Nutrition data is gathered primarily from the USDA Food Composition Database via Spoonacular API, whenever available, or otherwise other online calculators. While this information can be helpful in estimating the nutritional information of a recipe, it is by no means accurate or official and is not evaluated by the Food and Drug Administration.
     
    All images and content are copyright protected. Do not use our images without prior permission.

    Nutrition

    Serving: 1Serving | Calories: 515kcal | Carbohydrates: 42g | Protein: 8g | Fat: 37g | Saturated Fat: 9g | Polyunsaturated Fat: 10g | Monounsaturated Fat: 16g | Trans Fat: 1g | Cholesterol: 62mg | Sodium: 201mg | Potassium: 278mg | Fiber: 3g | Sugar: 25g | Vitamin A: 99IU | Vitamin C: 1mg | Calcium: 115mg | Iron: 3mg
    Tried this Recipe? Pin it Today!Mention @SerenaLissy or tag #serenalissy!
    Slice of Chocolate Walnut Cake

    More Desserts With Chocolate

    • Raspberry Mouse Chocolate Cheesecake
    • Gluten-free Chocolate Cake
    • White Chocolate Peppermint Bark Cheesecake
    • Best Homemade Brownies
    • White Chocolate Raspberry Blondies

    More Italian Desserts

    • Apple Crostata
    • Cherry Semifreddo Popsicle

    Looking For More Recipes & Baking Tips?

    Subscribe to my free newsletter to get new baking tips in your inbox monthly. Find me sharing new recipes and tips on Pinterest, Instagram, or Facebook.

    As an Amazon Associate and member of other affiliate programs, I earn from qualifying purchases. What that means is if you click on one of our affiliate links, they may toss a few pennies our way for a commission.

    A Baker's Guide To Pantry Problems

    August 11, 2021

    Bread and flour on table

    One of the most prevalent pantry problems in baking is remembering whether or not our baking ingredients have gone bad. Why? Because in most cases, basic baking ingredients that can be stored in the pantry are technically good for 1-2 years according to the best-buy date on the box.

    But that date doesn’t consider what each of our ingredients is meant to do in a bake. Or even how long it’s been since the ingredient’s container was first opened.

    On average, the primary grocery shopped in U.S. households makes 1.6 shopping trips per week as of 2019. That’s over 6 grocery shop visits a month! And while baking supplies aren’t the only thing you’ll be looking for on a grocery trip, you definitely don’t need another reason to make a last-minute trip for one ingredient in the baking aisle.

    Today, we’re bringing you a baker's guide to pantry problems. These tips and tricks will help you save ingredients for longer and avoid the last-minute panic of having only an expired product on hand when baking.

    Bread and flour on table

    How To Test If Baking Soda Is Expired

    Baking soda and powder are two of the most important things to keep on-hand and in usable condition for baking. After all, these ingredients are heavily responsible for the leavening of dough and the successful texture of many bakes. 

    To test if your baking soda is still active enough to use, you’ll need some vinegar for a quick at-home test. Baking soda reacts with vinegar to create a chemical reaction resulting in carbon dioxide gas. This is more commonly recognized as foam accompanied by a fizzing sound.

    Some recommend simply throwing a pinch of baking soda onto a spoonful of vinegar. But others prefer to mix the teaspoon into half a cup of hot water first. Give whichever method seems easiest for you a try! If the baking soda fizzes, then it’s still active enough to act as a leavener in your bakes.

    yeast in abowl on table

    How To Tell If Dry Yeast Is Good

    Don’t remember when the last time you bought dry yeast was? Unopened dry yeast packets and containers typically have a “best by” date that ends two years after being packaged. However, once your yeast has been opened and exposed to air (and re-packaged not as tightly,) dry yeast typically can last only three to four months in a refrigerator.

    That being said, even yeast that is older than three to four months may still be good to use. If you have the time, testing your yeast is the best way to ensure that you don’t waste perfectly good dry yeast.

    Testing your yeast is often also called “proofing” your yeast. Tested yeast can be used in your recipe right away as long as the recipe calls for ¼ to ½ cup of water. To proof or test your yeast, you’ll need 1 teaspoon of granulated sugar and ¼ cup of warm water.

    Dissolve the sugar into the cup of water, then add a ¼ oz. packet or 2 ¼ teaspoon of dry yeast to the mixture. In about 10 minutes, the mixture should bubble and rise, creating a rounded top of a creamy beige color. It should also smell strongly of yeast. Surprise!

    If this occurs, it means that your yeast is still active and ready to use efficiently in recipes. You can use this very proofed yeast mixture in your recipe as long as you remember to remove however much water that was included from the rest of your water in the recipe.

    The sugar originally added to test the yeast is inconsequential. The yeast molecules feasted upon them to produce that bubbly effect. After all, yeast is made of living organisms that give off carbon dioxide after feasting. This gives the rise that is necessary for many bread and baked products.

    How To Fix Crystallized Honey

    Besides its sweetness and delicious taste, one of the best things about honey is that it doesn’t expire. As long as your honey is stored in a sealed container, it can remain stable for weeks, months, and even years.

    However, most people assume a maximum of two years of lifespan for honey since it remains susceptible to physical and chemical changes. These changes, over time, can lessen the honey’s flavor, change its color and result in crystallization.

    Have you ever gone to open a jar of honey only to find it crystallized shut? That doesn’t mean that it’s spoiled, but its changed physical state can be confusing and even rage-inducing.

    Thankfully, you can quickly revitalize crystallized honey by microwaving it for 30 seconds or heating it over simmering water. Depending on how often you use honey, the process of heating it may be worth avoiding wasting more money on additional jars.

    But if you use larger amounts of honey for your daily cup of tea or your favorite honey cake, you’ll probably end up using the entire jar before your honey gets a chance to crystalize.

    Honey jar

    How Can I Tell If My Flour Has Gone Bad?

    Flour might be the hardest item to remember to replace when it comes to a baker’s pantry. Why? Because we tend to buy bags of flour in very large sizes when we’re avid bakers! Who knows how many batches of cookies, cakes, and loaves this bag has seen by now?

    Smelling your flour is one of the best and only ways to test whether or not your flour has gone bad. Whole grain flour will go bad more quickly than intact grains because it lacks its original protective bran layer.

    Fresh flour has a very mute, neutral odor, while spoiled flour may smell musty or sour. In addition, it might appear discolored and is prone to forming clumps of mold if stored in a moist place.

    Self-rising flour contains baking powder, which can lose its potency more quickly than flour alone. Therefore, self-rising flour should be replaced every six months.

    A Baker’s Pantry Problems

    Managing a pantry is often the last thing we want to do when it comes to being a baker. After all, it’d be much more fun to bake with a set-up and clean-up crew ready to go! But with some simple tips and tricks, you’ll be able to better preserve and test your basic ingredients for the long run.

    Ready to learn more about the storage and science of baking? Give our article on Flour 101, The Different Types of Flour and When to Use Them a read to set yourself up for baking success no matter if it comes to breads, cakes, cookies, or all of the above.

    Looking For More Recipes And Baking Tips

    Subscribe to my free newsletter to get new baking tips in your inbox monthly. Find me sharing new recipes and tips on Pinterest, Instagram, or Facebook.

    As an Amazon Associate and member of other affiliate programs, I earn from qualifying purchases. What that means is if you click on one of our affiliate links, they may toss a few pennies our way for a commission.

    Fresh Cranberry Apple Crostata

    August 9, 2021

    Fresh Cran Apple Crostata

    This rustic cranberry apple crostata, also known as a cranberry apple galette, is easy to make and will make a lovely addition to your holiday table.

    Fresh Cran Apple Crostata is rustic, open faced tart you could serve at breakfast, mid day bunch or for after dinner dessert.

    Cranberry Apple Crostata is An Easy Christmas Recipe

    With Thanksgiving being over and the abundance of fruits from our Farmhouse delivery, we were left with no choice. In case you didn't notice, I'm attempting to justify one more dessert during the holidays. We didn't want anything to go to waste, so what's one more...right? Or maybe I'm just planning for easy Christmas dessert recipes 🙂

    I'm telling you, it doesn't get much easier than cran apple crostata! Sweet apples, tart cranberries, and a delicious galette dough. The homemade pie dough is super simple; there is no sense in buying a pre-made pie crust dough; it wouldn't really be a benefit. Plus, the homemade crust tastes better! And the simple fruit filling is apples, cranberries, flour, sugar, and cinnamon. Cranberry Apple Crostata is simple, rustic, and a completely lovely Christmas recipe.

    Cran Apple Crostata Ingredients

    Ingredients in Apple Cranberry Crostata

    • All purpose flour
    • Sugar
    • Salt
    • Cold unsalted butter
    • Ice Water
    • Cinnamon
    • Apple slices
    • Tart cranberries
    • Egg yolk
    • Cream
    • Coarse Sugar
    How to make cranberry apple crostata

    How To Make Cran Apple Crostata

    1. Mix the dough and refrigerate for at least 1 hour.
    2. Roll the dough into a 13" large circle and sprinkle with flour – leave a 2-inch border.
    3. Arrange the cranberries and apples onto the crust and sprinkle with the cinnamon-sugar mixture.
    4. Fold the edges and brush on the egg wash and sprinkle with sugar.
    5. Bake on a pizza stone until brown and bubbling.

    This recipe made one large crostata, but you could easily split the dough into two and make two smaller apple cranberry galettes.

    Temperature is key when mixing the dough. Don't let the butter get too hot when you are mixing the dough. If you have to stop the mixing for a bit and put it in the fridge to keep it cold, that's ok. If you don't have a food processor and are mixing the good old fashion way, a pastry cutter is a great tool for making the crust, but if you don't have one, use your fingertips to mix in the butter pieces.

    I baked this on a pizza stone. You could use a large baking sheet if you don't have a stone. I like the texture of the crust when it is baked on the stone. It takes a bit longer because of the time it takes to heat the stone in the oven, but well worth it in my mind.

    Can I Freeze Unbaked Crostata?

    When I was in culinary school, I worked at a teashop, and they sold individual crostatas daily. We would make these, and instead of baking them right away, we froze them. Then the morning baker could take it out from the freezer and bake fresh. I haven't tried to freeze this particular recipe, but I believe it would work fine. I'm just questioning if the apples would become a bit browner than you want from the air, but there should be no change in the taste.

    What Type of Apples Are Best in Crostata?

    I used honey crisp apples. You could use whatever ones you have. Granny Smith, Pippin, or your favorite variety will work for this recipe. For the cranberries, I saved a half cup of cranberries from my bag of fresh ones because I knew I wouldn't use an entire bag of cranberries for the Thanksgiving day cranberry sauce.

    What Is The Difference Between a Galette And a Crostata?

    You can call this a Cranberry Apple Galette or a Cranberry Apple Crostata. They are basically the same thing. A Galette is French, and a Crostata is Italian. Both are free form and rustic, with the crust folded up around the filling.

    More Fall Desserts You'll Love

    • Chocolate Cranberry Scones
    • Apple Cinnamon Muffins
    • Caramel Apple Chocolate Mousse Cake
    • Cranberry Pear Spice Crisp

    This rustic, open-faced tart is one of those recipes you could serve at breakfast, mid-day bunch, or for an after-dinner delicious dessert. It's a great blend of tart and sweet with a flaky, tender, buttery crust. The dessert is pretty perfect as it is, but you could also add a little vanilla ice cream or whipped cream.

    I hope you enjoy the recipe as much as we did. Please share if you end up making it.

    Looking for more recipes?

    Subscribe to my free newsletter to get new recipes in your inbox monthly. Find me sharing new recipes and tips on Pinterest, Instagram or Facebook.

    Cran Apple Crostata Recipe

    Fresh Cranberry Apple Crostata (Galette)

    Loaded with apples and cranberries this rustic dessert is the perfect balance of tart and sweet with a flaky and tender crust.
    5 from 6 votes
    Print Pin Rate
    Course: Dessert
    Cuisine: American
    Prep Time: 15 minutes minutes
    Cook Time: 45 minutes minutes
    Cooling Time: 45 minutes minutes
    Total Time: 1 hour hour 45 minutes minutes
    Servings: 5 Servings
    Calories: 298kcal
    Author: Serena

    Ingredients

    Crust

    • 1 ½ cup AP Flour
    • 4 ½ teaspoons sugar
    • 1 teaspoon salt
    • 1 stick cold cubed butter (½ cup)
    • 3 tablespoon plus 1 ½ teaspoon ice water

    Filling

    • ¼ cup sugar
    • ¾ teaspoon cinnamon
    • 4 teaspoons AP flour - plus more for the work surface
    • 4 medium apples peeled, quartered, cored and thinly sliced
    • ½ cup fresh cranberries
    • 1 egg yolk beaten with 1 tablespoon heavy cream for egg wash
    • 1 tablespoon turbinando or any coarse sugar

    Instructions

    • Combine flour, sugar and salt in a food processor and pulse to blend. Add the butter and pulse until it forms coarse crumbs.
    • Add water and pulse until dough forms.
    • Shape the dough into a 1" thick round. Wrap in plastic wrap and refrigerate for at least an hour.
    • Place a pizza stone or sheet pan in the oven and preheat oven to 400°F for 45 minutes.
    • Remove the dough from the refrigerator about 15 minutes before using a rolling pin to slightly soften it.
    • Place the dough round between two sheets of lightly floured parchment paper and roll dough into a 13" round circle. Remove the top sheet of parchment.
    • Sprinkle the 4 teaspoons AP flour onto the dough, leaving a 2" border.
    • In a small bowl, combine the sugar and cinnamon for the filling.
    • Place apples and cranberries on top of the dough, and then sprinkle the sugar and cinnamon mixture on top.
    • Fold the border up and over the apples to make a rim. Tightly crimping every 2 inches or so.
    • Use a pastry brush and brush pastry with the egg wash over the border.
    • Sprinkle turbinando sugar on top of that.
    • Transfer the crostata, still with the parchment underneath, to the oven, sliding it, with the paper, directly onto the stone.
    • Bake until the crust is golden brown and the apples are bubbling. About 35 - 40 minutes.
    • Serve warm.
    • Note: This can be made hours ahead before serving and just reheated before serving.

    Notes

    Recipe Source: SerenaLissy.com
    This website provides approximate nutrition information for convenience and as a courtesy only. Nutrition data is gathered primarily from the USDA Food Composition Database via Spoonacular API, whenever available, or otherwise other online calculators. While this information can be helpful in estimating the nutritional information of a recipe, it is by no means accurate or official and is not evaluated by the Food and Drug Administration.
     
    All images and content are copyright protected. Do not use our images without prior permission.

    Nutrition

    Serving: 1Serving | Calories: 298kcal | Carbohydrates: 68g | Protein: 5g | Fat: 2g | Saturated Fat: 1g | Polyunsaturated Fat: 1g | Monounsaturated Fat: 1g | Trans Fat: 1g | Cholesterol: 39mg | Sodium: 471mg | Potassium: 212mg | Fiber: 5g | Sugar: 32g | Vitamin A: 142IU | Vitamin C: 8mg | Calcium: 24mg | Iron: 2mg
    Tried this Recipe? Pin it Today!Mention @SerenaLissy or tag #serenalissy!

    As an Amazon Associate and member of other affiliate programs, I earn from qualifying purchases. What that means is if you click on one of our affiliate links, they may toss a few pennies our way for a commission.

    Red Wine Chocolate Cupcakes

    August 6, 2021

    Red Wine Chocolate Cupcakes

    What's better than wine and chocolate? Well, wine-infused chocolate cupcakes! These delicious red wine chocolate cupcakes have a light wine flavor that goes well with the rich red wine buttercream frosting. The recipe for these delightful treats is quick and easy to make, combines a couple of my favorite things, and they are perfect for any celebration or occasion!

    Red Wine Chocolate Cupcakes are infused with a red wine reductions for a rich and flavorful cupcake that's perfect for any celebration.

    Ringing In The New Year Or A Special Occasion

    Now that Christmas is over I'm attempting to wean myself from so many peppermint pastries. It was good while it lasted (sooooo good) but moving onto New Years' celebrations. These red wine chocolate cupcakes are just the thing I need for my New Year's Eve party. It's been years since I've gone out on the town for New Year's. I just can't make myself fight the crowds and pay the inflated prices for every venue in the city. A small get-together at the house is much more my speed lately.

    You know what I'm talking about. A few close friends, a few great bottles of wine or bubbly, some awesome appetizers, the NY times square ball drop in the background on the TV, all paired with some gourmet chocolate cupcakes like these chocolate cupcakes infused with red wine. You're going to love the deep and delicious flavor that's perfect for welcoming the New Year or any other special occasion you may have.

    Using Red Wine In Dessert Recipes

    Red wine makes a flavorful addition to many desserts. In cupcakes, it creates a moist texture and combines with chocolate for a richness that is unforgettable so you want to choose a red wine that you love. I'd stick with a cabernet sauvignon, zinfandel, pinot noir, or just one of your favorite dry red wines.

    I was up in Northern California for a conference a while back and we went on a wine tour and did a few wine tastings. I loved this wine from Boeger winery up in Eldorado County. As many times as I have been wine tasting in California, I had never ventured to El Dorado County. It was a diverse place with stunning beauty. There was a great blend of gorgeous scenery, colorful history, and fun outdoor adventures. You can get the wine from the winemaker, or if you have your own favorite go ahead and use it.

    Red Wine Chocolate Cupcakes Ingredients

    Ingredients In Red Wine Chocolate Cupcakes

    The Boeger red wine made a great addition to the cupcake. I used it to create a wine syrup reduction and mix it with the buttercream to give the red wine frosting just a tiny bit of wine deliciousness. Now if you think you just want to go with plain buttercream, you don't need to add the wine. But if you like the color just add a few drops of gel food coloring to get the red frosting.

    • Red Wine
    • Sugar
    • All-purpose flour
    • Cocoa powder
    • Salt
    • Baking soda
    • Cultured buttermilk powder
    • Vegetable oil
    • Water
    • Eggs
    • Confectioner's sugar
    • Unsalted butter
    • Milk
    • Vanilla extract
    Red Wine Chocolate Cupcake Process Collage

    How to Make Chocolate Red Wine Cupcakes

    For this recipe, I used the red wine reduction in the batter while baking, and I also used it once done baking.

    1. Boil red wine and sugar until reduced by half in a small saucepan.
    2. Combine the cupcake ingredients and bake 16-20 minutes until a toothpick inserted in the center comes out clean.
    3. Once cooled, use a wooden skewer to poke a few holes in the top of each cupcake and drizzled some of the wine reduction into the holes and let the cupcake soak it up. (Just a tiny bit here. A little goes a long way. You could skip this part if you wanted. It depends on how much red wine flavor you like.)
    4. Make the buttercream frosting.
    5. Frost the cupcakes and enjoy!

    These cupcakes are the definition of a good dessert. They're rich and chocolatey with just enough red wine to make them interesting. As always we hope you enjoy these red wine cupcakes as much as we do. Please share if you end up making them, we always love to hear how it goes. If you find you are still longing for the peppermint like I am, these little chocolate peppermint meringues make great party food or even peppermint bark. Cheers to a Happy New Year!

    Red Wine Cupcakes on cake stand

    More Cupcake Recipes You'll Love

    • Chocolate Peppermint Cupcakes
    • Chocolate Pudding Cupcakes
    • Chocolate Pumpkin Stout Cupcakes

    Looking For More Recipes?

    Subscribe to my free newsletter to get new baking tips in your inbox monthly. Find me sharing new recipes and tips on Pinterest, Instagram, or Facebook.

    Red Wine Chocolate Cupcakes on cake plate

    Red Wine Chocolate Cupcakes

    A red wine reduction is used to infuse chocolate cupcakes with a rich flavor.
    5 from 6 votes
    Print Pin Rate
    Course: Dessert
    Cuisine: American
    Prep Time: 15 minutes minutes
    Cook Time: 35 minutes minutes
    Cooling Time: 30 minutes minutes
    Total Time: 1 hour hour 20 minutes minutes
    Servings: 24 Cupcakes
    Calories: 301kcal
    Author: Serena

    Ingredients

    Cupcake

    • 297 grams AP Flour
    • 425 grams sugar
    • 65 grams cocoa powder
    • 1.5 teaspoon salt
    • 12 grams baking soda
    • 45 grams cultured buttermilk powder
    • 170 grams vegetable oil
    • 470 grams boiling water
    • ¼ cup red wine syrup
    • 80 grams eggs

    Red Wine Syrup

    • 1 cup red wine (Your favorite type of red wine)
    • 1 Tablespoon sugar

    Buttercream

    • 3 cups powdered sugar
    • 8 tablespoons unsalted room temperature butter
    • 2 tablespoons milk room temperature
    • 1 teaspoon vanilla extract
    • ⅛ cup wine syrup

    Instructions

    • Preheat oven to 350°F.
    • Line your cupcake pan with 24 cupcake liners.

    Wine Syrup

    • Boil red wine and the tablespoon of sugar in a small saucepan until it reduces to half (about 10-15 minutes on medium low heat)

    Cupcakes

    • Sift flour, sugar, cocoa powder, salt, baking soda, and buttermilk powder into a mixing bowl of a stand mixer.
    • With paddle attachment mix on low speed to combine.
    • Add oil, water, eggs, and ¼ cup wine syrup one at a time to the flour mixture and continue mixing until blended together. Use a rubber spatula to scrape down the sides of the bowl and the bottom of the bowl.
    • Scoop the cupcake batter out with a cookie scoop and place into cupcake pan and bake for 16 - 20 minutes or until cake springs back when lightly touched or toothpick inserted into center comes out clean.
    • Remove from oven and let cool.
    • If you want more wine flavor, use a skewer and poke holes in top of cupcakes, use ⅛ cup of wine syrup and drizzle over tops of cupcake.

    Buttercream Frosting

    • In the bowl of an electric mixer with a paddle attachment, beat together the confectioners sugar, butter, milk, and vanilla on low speed until combined.
    • Stop the mixer and scrape the sides down.
    • Increase the speed to medium and beat until fluffy, about 3 more minutes. (If frosting is dry, add more milk, 1 teaspoon at a time until creamy)
    • Stir in the remaining ⅛ cup wine syrup
    • This will make 2 cups of frosting. Use a piping bag to frost cupcakes.

    Notes

    Recipe Source: SerenaLissy.com
    This website provides approximate nutrition information for convenience and as a courtesy only. Nutrition data is gathered primarily from the USDA Food Composition Database via Spoonacular API, whenever available, or otherwise other online calculators. While this information can be helpful in estimating the nutritional information of a recipe, it is by no means accurate or official and is not evaluated by the Food and Drug Administration.
     
    All images and content are copyright protected. Do not use our images without prior permission.

    Nutrition

    Serving: 1Cupcake | Calories: 301kcal | Carbohydrates: 46g | Protein: 3g | Fat: 12g | Saturated Fat: 4g | Polyunsaturated Fat: 4g | Monounsaturated Fat: 3g | Trans Fat: 1g | Cholesterol: 24mg | Sodium: 300mg | Potassium: 110mg | Fiber: 1g | Sugar: 34g | Vitamin A: 140IU | Vitamin C: 1mg | Calcium: 34mg | Iron: 1mg
    Tried this Recipe? Pin it Today!Mention @SerenaLissy or tag #serenalissy!
    Red Wine Chocolate Cupcakes on Cake Stand

    As an Amazon Associate and member of other affiliate programs, I earn from qualifying purchases. What that means is if you click on one of our affiliate links, they may toss a few pennies our way for a commission.

    Tips For Baking At High Altitude

    August 5, 2021

    puff pastry on plate showing high altitude baking

    It’s not every day that we think about mountains and altitude when it comes to baking. But most baking recipes are actually created as a sea-level recipe, despite many cities and locations around the world sitting at 2,000 feet above sea level or higher.

    Higher altitudes can affect any and everything in your bake, from consistency to texture and even causing rupture of certain ingredients. So how do you ensure that you can bake delicious cookies, cakes, biscuits, and more even if you live in a high-altitude location like certain areas in Colorado and Alaska?

    Today, we’re looking at a few needed tips for baking at a high altitude. Usually at 3000 feet of elevation and higher. Learning how each ingredient in your bakes reacts to higher altitudes is key to slowly transitioning your favorite recipes to work well at higher elevations. It's also a good idea to start with high altitude-specific recipes to ensure that your first bake is delicious.

    puff pastry on plate showing high altitude baking

    The Science of High Altitude Baking

    So what makes baking at a high elevation so different from baking at sea level? First, consider how you feel when taking an airline flight. The pressure you feel as the plane takes off into the air and the semi-relief you might feel when landing is related to measurable air pressure.

    At higher altitudes, air pressure is not as strong. Also known as low air pressure. This can cause your ears to pop. To help with this plane cabins must be mechanically pressured to ensure that everyone can breathe without worry. It’s also why you might find yourself breathing more heavily when at the top of a mountain after a long hike. Oxygen is more spread out in the air at higher altitudes.

    When it comes to baking, this means that leavening agents have less resistance at higher altitudes. So bakes that may come out perfectly at sea level may suddenly over-rise or over-perform at high altitudes.

    Leavening Agents in Baking at High Altitudes

    According to the Exploratorium laboratory in San Francisco, most recipes are originally designed to be baked at sea level. When measuring altitude levels, sea level is recognized as 0 feet. While high altitude locations are often at 3,000 feet above sea level or higher.

    If you live somewhere at a higher altitude, such as Denver or Calgary, batters may overflow, and cakes will literally fall without an altered recipe.

    Leavening agents such as baking soda and baking powder have less resistance in terms of air weight at higher altitudes. This means that your baked goods will rise more easily, and is why many altered recipes have significantly less leavening agent included.

    Rising more easily doesn’t necessarily sound like a bad thing. We all love it when your cakes rise into tall, fluffy cakes, after all! But often, at high altitudes, leavening occurs so quickly that gas bubbles create large, irregular pockets in coarse cakes. Liquids also evaporate more quickly, leaving a dry, pocket-filled mess.

    And if you’re super unlucky, pressure can rise so quickly inside your batter that your bake stretches until it bursts.

    Croissants on serving tray

    Reducing Baking Soda and Powder

    Reducing the amount of baking soda or powder you use in a typical recipe is a must when baking at higher altitudes. For example, in cake recipes, you can decrease baking powder or soda by ⅛-½ teaspoon for every teaspoon in the original recipe.

    However, you might have to learn by trial and error. The reduction you make will depend on the type of bake and other ingredients. For example, cakes tend to need this reduction to avoid bursting and air pockets. While cookies and muffin recipes are more resilient because of their stronger internal cell structure.

    Parchment Paper or Wax Paper

    At higher altitudes, bakes are unfortunately more likely to stick to their pans and baking sheets. While a typical greased cake pan may do the trick at sea level, parchment paper or wax paper is often necessary at higher altitudes.

    Line your cake pan or baking sheet with parchment paper or wax paper, then grease the paper. Adding extra flour on top can also help to prevent sticks and ruined bakes. Remember that your bake at a higher altitude will also need to cook faster, at a higher temperature. This makes separating bake and baking sheets even more difficult and necessary to support with extra steps.

    Baking Temperature and Baking Time

    Another way to prevent a loss of structure in your bakes is to increase the oven temperature by 15-25℉ when baking at higher altitudes. This will help your bake set and form its rough final shape more quickly. But remember, changing bake time and bake temperature can really change the texture of your baked goods. I'd leave this tip to the end. Continue cooking at the lower temperature until this is the very last change I can make in the baking process.

    Higher altitudes cause quicker evaporation with your liquids due to the dryness. This increase in temperature will help make sure that your bake’s proper shape is formed before all of the moisture dries out. A shortened baking time by 20-30% is also recommended since, of course, your baked goods will be receiving more heat! Try to keep these adjustments on the smaller side when you’re first changing a recipe.

    While you’ll find that more adjustments are needed for the perfect bake, small moves toward the perfectly baked cake or cookie are always preferable to completely overbaked products.

    Pastries on a picnic blanket with mountains in background

    Learning to Bake at High Altitude with Altered Recipes

    One of the best ways to learn baking at a high altitude is to use good recipes specifically tailored to higher altitudes. While trying to recreate your favorite cookies or sponge cake at a higher altitude can be enticing, there’s a high likelihood that it will take a few batches before they come out correctly as you learn the different adjustments that might be needed. I also only recommend changing one thing at a time instead of making changes to everything at once. One change at a time, that follows the general rules of high altitude baking, will help you master your recipe in a shorter amount of time.

    Instead, look for a few recipes that are already created with high altitudes in mind. For example, this High Altitude Vanilla Cake with Vanilla Buttercream recipe and this Ultimate High Altitude Chocolate Chip Cookie recipe would serve as wonderful entries to high-altitude baking. You can also start to read patterns in these recipes and use this information to alter your own later on. What's that old saying...Success leaves clues! Go with what you know works, study it, and figure out the patterns of why it's working. Then you can start to model your recipes.

    Ready to continue learning about how to create the most delicious bakes? Give our articles on Top 10 Baking Tips and The Function of Sugar In Baking a read today.

    Looking For More Recipes?

    Subscribe to my free newsletter to get new baking tips in your inbox monthly. Find me sharing new recipes and tips on Pinterest, Instagram, or Facebook.

    As an Amazon Associate and member of other affiliate programs, I earn from qualifying purchases. What that means is if you click on one of our affiliate links, they may toss a few pennies our way for a commission.

    Gluten-Free White Chocolate Raspberry Blondies (Small Batch)

    August 2, 2021

    White Chocolate and Raspberry Blondie Slices on Table

    Gluten-free white chocolate raspberry blondies? Yes please! These sweet treats are perfect for any occasion, whether it be a birthday or as an afternoon pick-me-up. These small batch blondies are easily made so you can whip up a batch whenever the craving strikes. White chocolate provides rich flavor while the raspberries give these bars a bit of tartness that works well with the sweetness from the chocolate, making these gluten-free blondies irresistible!

    Loaf pan size of raspberry blondie

    What are blondies and why should I make them?

    These blondies are cookie bars of white chocolate and raspberry with the texture of a brownie and the flavors of vanilla and brown sugar. This is an easy recipe and the kind of dessert you just keep craving. According to The Food Timeline, blondies were originally known as vanilla brownies. Blondies predate chocolate brownies by about 10 years. Over time many recipes and names were developed; butterscotch brownies, butterscotch squares, white chocolate brownies, blonde brownies, and they were finally called blondies during the 1980s.

    Benefits of Making Small Batch Desserts

    This recipe is for small batch raspberry blondies which means there's just one small pan to wash up! The benefit of small batch recipes is that you can make just what you need for a certain occasion and have the perfect amount available, plus they are super easy to whip up whenever the urge strikes. It's hard not to love them!

    An easy dessert with minimal ingredients. These white chocolate raspberry blondies take about 45 minutes from start to finish and yield one small loaf pan for your enjoyment which will last around five to six days in an airtight container at room temperature.

    If like me, you enjoy having a variety when it comes to food then these gluten-free raspberry and white chocolate blondies may be right up your alley too. They're versatile enough that you could also include macadamia nuts or even lemon zest for an added citrus flavor, etc., so get creative!

    White Chocolate and Raspberry Blondie Slices on Table

    What's The Difference Between Browned Butter And Regular Butter?

    We used browned butter in this recipe. You could easily use either browned butter or regular melted butter. Brown butter, or beurre noisette, is basically butter melted on the stovetop, cooked until it browns, and develops a delicious nutty smell and flavor. It takes about 5 minutes from start to finish to make browned butter for this recipe. This little step helps make the butter a shining star in your blondies and gives it a flavorful nutty note.

    How To Brown Butter For Your Blondies

    If you are choosing to go with browned butter in the recipe you just need to follow a few simple steps. The recipe calls for six tablespoons of butter. Because we are going to cook the butter we lose most of the water content of the butter, so we have to start with a bit more butter to account for that. Use 8 tablespoons of butter (½ cup). Cut the room temperature softened butter up into 8 pieces and place in a light-colored pan. The light-colored pan helps you to see when the butter has turned brown. Turn on medium heat and let the butter start to melt. Stir once in a while to prevent burning. Once the butter melts it will begin to sizzle and bubble around the edges. After about 5 minutes from when you started the butter will turn golden brown. The foam will start to subside and the milk solids at the bottom of the pan will brown and become toasty with a buttery, nutty smell. At this time, your butter is done. You will need to pour it out of the pan immediately to prevent it from cooking longer and burning.

    Illustration of Ingredients for Blondies

    Ingredients

    • Unsalted Butter
    • Light Brown Sugar
    • Granulated White Sugar
    • Egg - Room Temperature
    • Pure Vanilla Extract
    • Gluten-Free Flour - We used Bobs Red Mill One To One Baking Flour (I used this because it already has xanthan gum in the mix. If you are using a gluten-free flour without xanthan gum you are going to need to add ⅛ teaspoon xanthan gum to your flour)
    • Baking Soda
    • Corn Starch
    • Salt
    • White Chocolate Chips - We used Ghirardelli White Chocolate Baking Chips (Also if you are able to access Hershey Chipits Sea Salt Caramel Chips, those make a great replacement for the white chocolate chips. They are hard to find in the US where I live, but can be found if looking.)
    • Raspberries - We used fresh raspberries, you could use frozen raspberries, but I recommend fresh just so you don't have to deal with the moisture of the frozen berry
    Two slices of Raspberry Blondies stacked on top of each other

    How To Make The Raspberry and White Chocolate Blondies

    Preheat your oven to 350°F, and prepare a 9x5 loaf pan with parchment paper for ease of getting the blondies out of the loaf pan. If you are just going with regular butter and not browned butter, (although I really recommend the browned butter for the fabulous flavor) you just melt the butter and pour over the brown and white sugar, letting the mixture cool for about 10 minutes. If you are using browned butter, this is the step that you would pour the hot browned butter onto the sugars and let cool for 10 minutes.

    With your handheld mixer, mix cooled melted butter and sugars until combined thoroughly. Add in your egg and vanilla and mix until combined.

    In a second bowl, combine your dry ingredients; gluten-free flour, baking soda, corn starch, and salt. Stir this dry mix into the wet ingredients with a rubber spatula. Towards the end fold in your white chocolate chips. Do not overmix.

    Pour batter into your loaf pan, spreading the mixture all the way to the edges. Top with your raspberries, pushing them into the batter a bit. Sprinkle on a few more chocolate chips and bake. I let this mixture sit about 10 minutes before I bake. It gives the gluten-free flour a few minutes of time to absorb moisture and helps reduce any potential grittiness from the flour.

    Let cool for about 20 minutes and remove from the pan. I like to drizzle melted white chocolate on my raspberry blondies, but they are great without the drizzle as well.

    Process Collage to Make Blondies

    Troubleshooting Your Raspberry Blondies

    • My blondies are more like cake and aren't fudgy and moist in the middle. What went wrong? The main cause of this is overcooking your raspberry blondies. Was your oven too hot? Are you using a thermometer to confirm the temperature in the oven? Overbaking them just means they have less moisture. They still have great flavor, just not that moist blondie texture.
    • My blondies are very wet in the middle instead of a fudgy gooey center. What went wrong? If you haven't baked them long enough, the center will be wet and nothing close to the fudgy texture in a blondie. When you take the blondies out of the oven, they will still be a bit moist and the center will have a slight wobble. A skewer or toothpick inserted in the center will have a few moist crumbs, but after cooling they should be the perfect texture. If your toothpick inserted still has blondie batter on it, you need to continue to bake. Keep in mind, it's a matter of minutes for your perfect texture blondies to go from the gooey delicious center, to dry, so keep an eye closely on the blondies during the last few minutes of baking.
    • If this is your first time making gluten-free baked goods, we have some great tips on the website in our post about 10 Tips For Gluten Free Baking.
    Blondie slices on a table

    Tips & FAQ

    Should I Use Fresh Or Frozen Raspberries?

    You can use either. I prefer to use fresh juicy raspberries instead of frozen berries. The frozen berries incorporate some moisture into the recipe and it's not needed. If all you have is frozen, then go ahead and use it.

    What's The Difference Between a Blondie And a Brownie?

    Throughout the history of baking, brownies and blondies have been debated about which are better. While most people agree that they're both delicious in their own way, there's one element that differentiates them: chocolate! In order to make a true blonde (brownie), you must take out any traces of cocoa powder from your recipe--and this is why many recipes call for butterscotch as an added flavor instead. Brown butter and brown sugar are two ingredients in most recipes that help give a blondie its distinctive caramel-y taste!

    How Do I Store My Blondies?

    These blondies will last on the counter for five to six days in an airtight container.

    Can I Freeze My Blondies?

    Yes, definitely. I like to cut them and freeze them so I can easily grab one at a time when I'm ready. They will last in the freezer for up to three months. When ready to eat, take out and set on the counter to thaw.

    White Chocolate Raspberry Blondies on table

    Gluten Free White Chocolate Raspberry Blondies

    These small batch, gluten free, white chocolate raspberry blondies are easily made so you can whip up a batch whenever the craving strikes.
    5 from 10 votes
    Print Pin Rate
    Course: Dessert
    Cuisine: American
    Prep Time: 15 minutes minutes
    Cook Time: 30 minutes minutes
    Total Time: 45 minutes minutes
    Servings: 6 Blondies
    Calories: 325kcal
    Author: Serena

    Ingredients

    • 6 tablespoon Unsalted Butter 84.75 grams
    • ⅓ cup Light Brown sugar 71 grams
    • ¼ cup Granulated White Sugar 50 grams
    • 1 Large Egg - Room Temperature
    • 1 teaspoon Vanilla Extract 8 grams
    • ¾ cup Bobs Red Mill gluten- Free 1 to 1 Baking Flour 111 grams
    • ⅛ teaspoon Baking Soda .75 gram
    • ¾ teaspoon Corn Starch 3 grams
    • ¼ teaspoon Salt 1.85 grams
    • ½ cup White Chocolate Chips (split between baking and topping) 80 grams
    • 8 Fresh Raspberries - Cut in half lengthwise

    Instructions

    • Preheat your oven to 350°F and prepare a loaf pan with non-stick baking paper. Melt the butter in a small saucepan (these are especially good if using browned butter, see note in the post) and pour over the brown and white sugar and let cool for about 10 minutes. 
    • With your handheld mixer, mix cooled melted butter and sugars until properly combined and you no longer see the yellow of the liquid butter. It needs to be all smooth. Add in your egg and vanilla extract and mix just until combined.
    • Combine gluten-free flour, baking soda, corn starch, and salt in a separate bowl. Stir the dry mixture into the wet ingredients mixture and bring everything together with a rubber spatula or on low speed using a handheld mixer until just combined. The mixture will be smooth without any visible flour or lumps. Towards the end, fold in 60 grams of your white chocolate chips.
    • Spoon the mixture into your loaf pan, spreading the mixture all the way to the edges so it's nice and even. Sprinkle the remaining 20 grams of white chocolate chips on top and top with raspberries, pushing them into the batter a bit. Let rest for 10 minutes.
    • Bake in the oven for 27-30 minutes. The top will look crinkly, the very center should still seem a bit wobbly, but the outer edges should be browned a bit and look fairly baked. A toothpick inserted in the center should come out mostly clean with just a few moist crumbs attached.
    • Remove blondies from the oven and allow them to cool in the loaf pan before cutting. Once cooled, remove blondies from the pan and slice.

    Notes

    Recipe Source: SerenaLissy.com
    This website provides approximate nutrition information for convenience and as a courtesy only. Nutrition data is gathered primarily from the USDA Food Composition Database via Spoonacular API, whenever available, or otherwise other online calculators. While this information can be helpful in estimating the nutritional information of a recipe, it is by no means accurate or official and is not evaluated by the Food and Drug Administration.
     
    All images and content are copyright protected. Do not use our images without prior permission.

    Nutrition

    Serving: 1Blondie | Calories: 325kcal | Carbohydrates: 41g | Protein: 3g | Fat: 17g | Saturated Fat: 10g | Polyunsaturated Fat: 1g | Monounsaturated Fat: 5g | Trans Fat: 1g | Cholesterol: 61mg | Sodium: 149mg | Potassium: 78mg | Fiber: 2g | Sugar: 30g | Vitamin A: 395IU | Vitamin C: 1mg | Calcium: 58mg | Iron: 1mg
    Tried this Recipe? Pin it Today!Mention @SerenaLissy or tag #serenalissy!

    More Desserts You Might Enjoy

    • Raspberry Mousse Chocolate Cheesecake
    • Gluten-Free Chocolate Cake
    • White Chocolate Peppermint Bark Cheesecake
    • Best Homemade Brownies

    Looking For More Recipes & Tips

    Subscribe to my free newsletter to get new baking tips in your inbox monthly. Find me sharing new recipes and tips on Pinterest, Instagram, or Facebook.

    As an Amazon Associate and member of other affiliate programs, I earn from qualifying purchases. What that means is if you click on one of our affiliate links, they may toss a few pennies our way for a commission.

    Five Steps to Becoming A Great Food Photographer

    July 29, 2021

    coffee and chocolate on table

    You might have heard that it takes 10,000 hours of practice to truly become a master at any given skill. Is this true on your journey toward becoming a great food photographer?

    Malcolm Gladwell popularized the 10,000-hour rule in his 2008 New York Times bestseller, Outliers. Gladwell explains that the idea was based on Anders Ericsson's research and claimed that becoming an extremely proficient outlier in a skill requires 10,000 hours of practice.

    Surprisingly, Ericsson has since stated that his research doesn’t stand to say that 10,000 hours of practice is some magic number. Instead, it was the average time that experts and elites across different skills have recorded spending to become experts in their field.

    So what does this mean for you and your goal toward becoming a successful food photographer? Well, the good news is that working and practicing smarter, not just harder and longer, can help you capture delicious plates of food. Here are five steps to becoming a great food photographer in both an efficient and enjoyable way.

    dslr camera taking image of food on table

    Finding and Refinding Your Inspiration

    The only true way to becoming a great food photographer (or great at anything in general) is to find and keep an interest in it! After all, quitting at the starting line will only leave you wondering what could have been.

    What excites you about capturing food digitally or on large photography prints when it comes to food photography? Why is food photography important to you? Does food mean delicious adventures of taste, or does it represent abundance and family? The best photographers can easily explain why food photography is important to them. They can also tell you how they developed their food look.

    What kind of feelings do you experience when viewing pictures of food? What is it that makes you want to gift your photography to others? Find your “why” and hold it close as you pursue your goal.

    Practicing Your Food Photography 

    Experts aren't created overnight. And while some of us learn more quickly than others, there are few things in life that we can't become skilled at over time. When it comes to food photography, practice is essential! Remember what you love about food and food images that look delicious enough to eat.

    Keep a portfolio of examples of food styling and photography. Perhaps start your own online photo gallery, or use your Instagram account to document your progress. This can be a great way to store memories and provide yourself with a tangible look-back at your photo practices.

    coffee and chocolate on table

    Learning New Skills

    One problem with “practice makes perfect” is the boredom that can take over if you don’t keep your practice prompts fresh. If you're finding these exercises tedious, seek out new ways to make your food photography interesting again. What about photographing a new dish? Or taking photos in a new location, like a local park or cafe? Possibly photographing with a different camera angle or experimenting with overhead shots. What about something even more unique, like combining a parfait with a lawn chair or a car dash? Go ahead and experiment with how to style your food and the use of props.

    Challenging yourself with new photography prompts is a great way to increase your practice time and increase motivation. 

    You’ll be able to build new subsets of skills in your food photography journey by exploring new settings, foods, and even methods of shooting. Keep your photography plans interesting, and you'll soon find your photos to be improving compared to photos from months or years ago.

    If you’re unsure where to start with new photography skills, check out our Beginner’s Guide to Camera Settings. Simply playing with new camera settings can be a great way to learn new skills. Or only shooting in manual mode during your practice times. Even something as simple as experimenting with shallow depth of field can easily give your photos a new feel and really develop your photography skill sets.

    Knowing & Improving Your Gear

    In 2016, Ask Your Target Market conducted research on hobby-related purchases and found that 80% of respondents reported buying purchases related to their hobbies either often or at least sometimes. This statistic comes from a group of respondents, of which 56% have multiple hobbies, and 24% claimed to have one main hobby.

    While spending thousands of dollars on your digital camera or shooting area can be enticing and fun, investing in your food photography skill (whether it's a hobby or career) doesn’t have to be extremely costly. Spend time instead on learning the ins and outs of the camera you do have and the photo editing software you do have access to. Then, practice with natural light; it's free. There are countless ways to create amazing food photography and styling on a budget.

    Often, learning the nuances of your current gear (and practicing) can offer you better results than only buying the fanciest equipment. If you’ve already thrown away that user manual, no need to fear! Many user manuals are available online alongside user-generated tutorials.

    When you’re ready to invest in newer or additional gear, focus on what may give you the most tangible level-up to your current set-up. For example, buying affordable lighting equipment, like a lightbox or even a simple deck of color checker cards, might quicken and increase the quality of your photos without breaking the bank.

    dslr camera taking image of avocado toast

    Seeking Feedback On Your Food Photography

    One of the best ways to quickly improve any skill is to ask for feedback and implement it. Find someone who shares your love for food photography, and ask them to give you constructive criticism on your work.

    It can be helpful to ask a friend who has a similar taste in photography, but if they’re not available, having different opinions are alright, too! For example, try editing your photos in black and white for a friend who likes a more vintage look. Or, try adding more fantastical props with a friend with love for the unknown in mind. This is also a great way to expand your communication skills when discussing photography with others.

    At the end of the day, you can always prioritize the food photo and styling you prefer. But expanding your experience to other areas and attempting edits and shoots based on other’s feedback will help you consider new solutions and creations in the future, too.

    Becoming a Great Food Photographer

    Whether it takes you exactly 10,000 hours to become a great food photographer or not, your food photos will only start making people feel loved, warm, and excited when you keep creating. The important steps are finding and refinding your inspiration and investing in new gear when you can.

    Most importantly, keep practicing your photography and try different views from friends to expand your artist’s palette. 

    Ready to get started today, no matter the gear or time on-hand? Read our article on 7 Tips For Beautiful Food Photography With Your Phone next.

    Food Photography Challenge

    Join Our Five Day Food Photography Challenge

    Do you often find yourself wondering how to become a food photographer? Is your goal to make delicious shots of all the fantastic foods that come in and out of your kitchen? If so, congratulations! You are on the right track.

    Want to take your food photography up a notch?

    I’ve been photographing food for years and have learned some tricks of the trade. Join me on this 5-day challenge where you’ll learn how to master the art of food photography, one bite at a time. You’ll be amazed by what you can do with just a few simple tips. You will learn how to make your photos pop with color, texture, and lighting. Sign up today!

    Looking For Recipes?

    Subscribe to my free newsletter to get new baking tips in your inbox monthly. Find me sharing new recipes and tips on Pinterest, Instagram, or Facebook.

    Make at Home Samoas - Homemade Samoas: Girl Scout Cookies

    July 27, 2021

    Samoas on a plate

    The Girl Scouts Cookie season is over, but that doesn't mean you can't make your own Samoas! This recipe will teach you how to make your very own Homemade Samoas with coconut, caramel, chocolate, and all the things you love about the beloved Girl Scout Cookies. These homemade versions are so much better than store bought because they're loaded with even more delicious ingredients. No matter what time of year it is, make these for a special treat!

    Easy Homemade Samoas are a buttery shortbread cookie topped with toasted caramel and coconut creation with a chocolate drizzle. This recipe is a lot easier than you might think and it uses basic pantry ingredients.

    Homemade Samoas

    The time has finally come. I can no longer justify $5 - $6 for a box of Girl Scout cookies when the amount in the box keeps getting smaller and smaller. So this year, I am determined to learn how to make all my favorites. Then I can have copycat Girl Scout Cookies all year round. Although I know moderation is key...right?!?  I've been testing Homemade Samoas all week long. I've tried to restrain, but even on the recipes that didn't make the final cut, they were still pretty good. It's really hard to go wrong with coconut, caramel, and chocolate. Oh and a cookie! Samoas quickly became my favorite girl scout cookie and have been ever since they came out. Although thin mints are a close second. What is your favorite Girl Scout cookie?

    My challenge with these was that I have access to some pretty high quality products. So I did do a batch of gourmet Samoas. I used a caramel recipe from my chocolate shop and dipped the cookies in Valrhona chocolates. But I figured since most people don't have access to those ingredients, I would go with basic grocery store items that everyone should be able to acquire. I will say there is a difference in taste. But as one would expect, I don't think most people expect an artisan bonbon to taste like something from Hershey's. I'm sure you know what I mean and I am certain you will love these easy homemade Samoas. But I will say those gourmet Samoas are the real deal! If you have access to higher quality ingredients, by all means, I'd say use them.

    Samoas Ingredients

    Graphic with Ingredients to make easy homemade samoas.

    This is basically a buttery shortbread cookie topped with toasted caramel and coconut creation with a chocolate drizzle. This recipe is a lot easier than you might think and it uses basic pantry ingredients.

    • Butter
    • Sugar
    • All-purpose flour
    • Baking powder
    • Salt
    • Milk
    • Vanilla extract
    • Shredded sweetened coconut
    • Caramel (store-bought) - Or you could make your own chewy caramel
    • Dark chocolate - make sure to use your favorite delicious chocolate

    How to Make Homemade Samoas

    Process Shot of the homemade Samoas girl scout cookies

    The homemade samoas cookies are super simple. It's your basic cookie, a lot of butter mixed with flour and sugar type of cookie. The key to this is to not overcook the cookies. When I say pale golden brown, that's what I mean. Any longer and you just get a crunchy crumbly cookie that can work, but isn't the best choice.

    The coconut layer is quite easy. The key here is to not burn the coconut when toasting it. Shredded coconut is one of those things that goes from perfect to burnt in a matter of seconds. In my oven I cooked the coconut for 15 minutes and stirred it every 3 minutes. Everyone's oven is different. So keep an eye on it. Your coconut may be done in 10 minutes instead of 15. You are looking for that golden browned color. Not burnt.

    Now for the dark chocolate. Here is where you don't want to skimp. You only need 12 ounces, so get the best you can afford to get. Dark chocolate chips will work, but so will a couple of bars of your favorite artisan chocolate at your grocery store.

    Tips for Samoas Success

    • Use whole milk in the recipe.
    • Keep an eye on the coconut, it goes from golden brown to burnt in seconds.
    • Make sure the cookie is chilled before attempting the dip in the chocolate. The chocolate will set up on a cold cookie much quicker.
    • Store in an airtight container to maintain freshness.

    So if you loved our recipe, or find that Homemade Samoas are not your cookie of choice, you might want to try these other recipes:

    • Banana Napoleon with Coconut Snow
    • Dulce De Leche Cookies
    • Simple & Easy Sugar Cookies
    • Caramel Apple Chocolate Mousse Cake
    • Ovenly's Spicy Bacon Caramel Corn

    I hope you enjoy these Easy Homemade Samoas as much as I do, they are quickly becoming my new favorite recipe. Please let us know how the recipe worked out for you.

    Samoa Cookies

    Make at Home Samoas

    Easy Homemade Samoas are a buttery shortbread cookie topped with toasted caramel and coconut creation with a chocolate drizzle. This classic girl scout cookie is a lot easier than you might think and it uses basic pantry ingredients.
    5 from 66 votes
    Print Pin Rate
    Course: Dessert
    Cuisine: American
    Prep Time: 15 minutes minutes
    Cook Time: 30 minutes minutes
    Cooling Time: 1 hour hour
    Servings: 48 2" cookies
    Calories: 154kcal
    Author: Serena

    Ingredients

    Cookies

      Recipe adapted from Instructables.

      • 2 sticks unsalted butter (1 cup) at room temperature
      • ½ cup sugar
      • 2 cups all purpose flour
      • ¼ teaspoon baking powder
      • ½ teaspoon salt
      • 2 tablespoons milk
      • ½ teaspoon vanilla extract

      Coconut Topping

      • 3 cups shredded sweetened coconut
      • 20 ounces store bought caramel
      • 4 tablespoons milk
      • 12 ounces dark chocolate

      Instructions

      Make the cookies

      • Preheat the oven to 350° F
      • In the bowl of a stand mixer with a paddle attachment, cream the butter and sugar until light and fluffy
      • In a separate bowl, whisk together the flour, baking powder and salt. Slowly add the flour mixture to the creamed butter, mixing between each addition and being sure to scrape down the sides of the bowl as needed.
      • Add the milk and vanilla and blend together to combine.
      • Once combined, remove dough from mixer and separate dough in half. Press each half into a disk and wrap in plastic wrap. Refrigerate for about an hour.
      • Once the dough has chilled, roll out each disk on a lightly floured surface until it is about ⅛" thick. Cut out as many cookies as possible with a doughnut cutter or use two cookie cutters of different sizes to get the hole in the middle. Place the cookies on a baking sheet lined with parchment paper.
      • Bake the cookies for 10 - 15 minutes until they are pale golden brown. Transfer cookies onto a wire rack to cool.

      Coconut topping

      • Spread the coconut onto a baking sheet lined with parchment paper. Bake the coconut for 10 - 15 minutes in a 350° oven until toasted. Stir frequently to make sure the coconut does not burn.
      • Once done, remove from oven to cool.
      • Melt the caramels and milk in a double boiler over medium-low heat. Stir until fully melted. Remove from heat and combine ½ of the melted caramel with the toasted coconut in a large bowl. Stir until mixed.
      • Use the remaining caramel to spread a thin layer onto the cookies. You will want to move quickly through this step so the caramel does not cool. Use your hands, and press the coconut mixture onto the caramel. And remember you are looking for the perfect ratio of cookie to toppings, so don't overdo it with the caramel and coconut.
      • Let the cookie cool.
      • Melt the dark chocolate in a double boiler. Once melted dip the bottom of the cookie into the chocolate and place them on a wax paper lined baking sheet. Use a piping bag (if you don’t have one, a ziploc bag will work with a corner cut off) to drizzle the remaining chocolate on the top of the cookies.
      • Let the cookies sit until the chocolate hardens.

      Notes

      Recipe Source: SerenaLissy.com
      This website provides approximate nutrition information for convenience and as a courtesy only. Nutrition data is gathered primarily from the USDA Food Composition Database via Spoonacular API, whenever available, or otherwise other online calculators. While this information can be helpful in estimating the nutritional information of a recipe, it is by no means accurate or official and is not evaluated by the Food and Drug Administration.
       
      All images and content are copyright protected. Do not use our images without prior permission.

      Nutrition

      Serving: 1Cookie | Calories: 154kcal | Carbohydrates: 20g | Protein: 2g | Fat: 8g | Saturated Fat: 5g | Polyunsaturated Fat: 1g | Monounsaturated Fat: 1g | Trans Fat: 1g | Cholesterol: 1mg | Sodium: 60mg | Potassium: 116mg | Fiber: 2g | Sugar: 12g | Vitamin A: 12IU | Vitamin C: 1mg | Calcium: 27mg | Iron: 1mg
      Tried this Recipe? Pin it Today!Mention @SerenaLissy or tag #serenalissy!
      Finished homemade Samoas copycat girl scout cookies on a tray.

      As an Amazon Associate and member of other affiliate programs, I earn from qualifying purchases. What that means is if you click on one of our affiliate links, they may toss a few pennies our way for a commission.

      Homemade Salted Caramel Sauce

      July 23, 2021

      Salted Caramel Sauce in jar with brioche bites

      Do you love salted caramel sauce? If so, this recipe is perfect for you! Salted caramel sauces are all the rage and can be found in many coffee and ice cream shops. But why buy them when it's so easy to make at home? This recipe will teach you how to make salted caramel sauce with just 4 ingredients. You'll have a jar ready in no time! It's perfect for cakes, ice cream, cheesecake, and a spoonful in your morning coffee and with these cinnamon brioche bites.

      This salted caramel is the easiest caramel recipe and only requires 4 simple ingredients. It tastes phenomenal on anything it touches, and readers often ask me how to make this delicious treat themselves!

      Salted Caramel Sauce in jar with brioche bites

      Salted Caramel Sauce

      This refreshingly easy-to-make dessert has a melt-in-your-mouth texture that leaves you craving more with each bite. The sugar coats every inch of the surface area while salt brings out just enough salty flavors for balance between salty or sweet lovers alike. With such few ingredients needed, there’s no question why we continue to fall in love with salted caramel over time—it truly never gets old!

      Caramel sauce is intimidating, but the more you make it, the more you have a feel for what to look and smell for.

      The process of making caramel sauce can seem daunting at first since there are so many things that could go wrong when cooking sugar over the heat or getting the mixture just right to avoid crystallization. But with practice comes confidence!

      Ingredients

      Illustration of salted caramel ingredients
      • Sugar
      • Cream
      • Unsalted Butter
      • Salt

      How To Make Homemade Caramel Sauce

      The recipe is below, but here is the basic process. Place sugar and water in a heavy bottom medium-sized saucepan, and continue to cook over medium heat until you reach 350° F. Be sure to use a candy thermometer or an instant-read thermometer to determine the temperature. Do not stir the caramel sauce; you will cause sugar crystals to form on the sides of the pan, and they will eventually fall back into your sauce, causing crystallization of your caramel. And no one wants a grainy caramel.

      Once you are at 350° you are going to slowly (be very careful here; a lot of bubbles and splashes are about to happen) stream in your warmed-up cream. Did I mention, be careful and pay close attention to this step! Hot sugar will cause serious burns. Stir until smooth, then add in the butter and salt. Stir until combined and smooth. Let sit for a minute or two and pour into your heatproof container. I like to use small mason jars for this.

      Process Collage How to make caramel

      The Difference Between The Wet And Dry Method

      The difference is straightforward and exactly as it sounds. The wet method combines the sugar with water at the beginning of the cooking. The dry method is just sugar in the pan without water. Both create a very flavorful caramel. I like to think of the wet method as a bit more forgiving. It allows you to add the butter and cream without the entire mixture seizing up because the butter and cream are cooler than the sugar. So we are going to go the easy route with this caramel and use the wet method.

      FAQ

      What is the texture of the salted caramel?

      Once the caramel is finished cooking, it is a liquid. As the caramel cools, you can see that it starts to solidify into a chewy texture.

      How to store salted caramel?

      Once you let the caramel cool for a bit, you will pour it into a jar. You will need to keep it in the refrigerator due to the cream. It will thicken up in the refrigerator, so when you are ready to have some, heat it for a few seconds in the microwave to get it back to a sauce texture.

      Do I have to use a thermometer?

      No, you don't. I just highly recommend it. We use an instant-read Thermapen. You could make the caramel based strictly on color instead of temperature. If this is your very first attempt at making caramel, I wouldn't recommend that. But if you are experienced with caramel, I'm sure you already know what color is best for the caramel sauce and can get away without using a thermometer. I'm just going to remind you that sugar burns quickly. You don't want a burnt taste in your sauce. 350°F is what we are looking for.

      How do I make the cinnamon brioche bites?

      Grab a loaf of brioche. Remove crust and cut into 2" cubes. Brush on the egg and milk mixture (2 eggs and 4 tablespoon milk mixed in a bowl). Then dip brioche into the cinnamon-sugar mixture. (300 grams sugar and 1 tablespoon cinnamon combined in a bowl). Then place on a sheet pan that is lined with parchment paper. Bake 7-10 minutes in 425°F oven. Let cool and enjoy with the caramel sauce.

      Can I make caramel apples with this sauce?

      Nope. This sauce is too thin to make caramel apples. But it is great for a dipping sauce for apple slices.

      Salted Caramel Sauce in jar
      salted caramel in jar

      Homemade Salted Caramel Sauce

      Don't buy salted caramel sauce when you can make it yourself! This delicious caramel sauce recipe is super easy.
      5 from 13 votes
      Print Pin Rate
      Course: Breakfast, Dessert
      Cuisine: American
      Prep Time: 10 minutes minutes
      Cook Time: 15 minutes minutes
      Total Time: 25 minutes minutes
      Servings: 16 Servings
      Calories: 87kcal
      Author: Serena

      Ingredients

      • 1 cup Sugar (200 grams)
      • ½ cup Heavy Whipping Cream (120 mL)
      • 2 tablespoon Unsalted Room Temperature Butter (28.375 grams)
      • ¾ teaspoon Kosher Salt (2.67 grams)

      Instructions

      • Heat sugar and ¼ cup cold water (60 mL) in a heavy bottomed, medium sized sauce pan on medium high heat. Do not stir.
      • Warm up the heavy whipping cream in a small saucepan. Just to barely a simmer.
      • Once the sugar has reached 350°F and is a dark amber color, immediately stir in the cream. The caramel will bubble and rise at this moment, be very careful not to get any of it on yourself. Stir until smooth.
      • Once smooth, remove from heat and add the butter and the salt. Stir until smooth. Cool for a couple of minutes and then pour into your heatproof glass jar. Let sit until cool.
      • Cover tightly in an airtight container and store for up to two weeks in the refrigerator.

      Notes

      Recipe Source: SerenaLissy.com
      This website provides approximate nutrition information for convenience and as a courtesy only. Nutrition data is gathered primarily from the USDA Food Composition Database via Spoonacular API, whenever available, or otherwise other online calculators. While this information can be helpful in estimating the nutritional information of a recipe, it is by no means accurate or official and is not evaluated by the Food and Drug Administration.
      All images and content are copyright protected. Do not use our images without prior permission.

      Nutrition

      Serving: 1Serving | Calories: 87kcal | Carbohydrates: 13g | Protein: 1g | Fat: 4g | Saturated Fat: 3g | Polyunsaturated Fat: 1g | Monounsaturated Fat: 1g | Trans Fat: 1g | Cholesterol: 14mg | Sodium: 112mg | Potassium: 6mg | Sugar: 12g | Vitamin A: 153IU | Vitamin C: 1mg | Calcium: 5mg | Iron: 1mg
      Tried this Recipe? Pin it Today!Mention @SerenaLissy or tag #serenalissy!
      Salted Caramel with brioche bites on cutting board

      Looking For More Recipes?

      Subscribe to my free newsletter to get new baking tips in your inbox monthly. Find me sharing new recipes and tips on Pinterest, Instagram, or Facebook.

      As an Amazon Associate and member of other affiliate programs, I earn from qualifying purchases. What that means is if you click on one of our affiliate links, they may toss a few pennies our way for a commission.

      10 Tips for Gluten-Free Baking For Beginners

      July 22, 2021

      Gluten free flours on wooden spoons

      Gluten-free means trouble for many bakers. As a vitally important protein in creating bonds within many textures of breads and cakes, baking without gluten can be quite a feat.

      Thankfully, living and baking gluten-free are becoming more and more common, and alternative flours are easily accessible. As a result, the gluten-free global market is expected to grow in value from $5.6 billion in 2020 to $8.3 billion in 2025.

      And how does this translate to the world of baked goods? In 2018, 27 percent of all global gluten-free food sales were baked products. For many of us, baking is a way to share love and exercise an art. But for many others, baked goods are an easy trip to an upset stomach from gluten intolerance or allergic reactions, like celiac disease.

      If you’re interested in learning gluten-free baking for your business, friends, or personal preference, you’re in the right place! Here are our 10 tips for gluten-free baking for beginners.

      Gluten free flours on cabinet

      Start with Simple Gluten-Free Baking At Home

      There’s no shame in starting with basic recipes when creating gluten-free bakes for the first time! Gluten is responsible for many traditional chemical reactions in bakes. However, learning to bake without gluten can result in a wide variety of different textures, tastes, and baking times.

      Don’t be afraid to focus on simpler recipes when you’re first experimenting without gluten. Simpler dishes like cookies and pancakes are delicious and a great first step to gluten-free foods.

      Identify Which Bakes Traditionally Need Gluten

      A key step to understanding and baking without gluten is spending the time to identify why gluten is traditionally helpful. We explored a wide variety of flour types in our article on Flour 101 – The Different Types of Flour and When to Use Them.

      From all-purpose flour to bread and cake flour, the amount of protein in a flour mix is directly correlated to gluten in a mix. Gluten is the protein most responsible for the stretch and chewiness of bread. 

      A smaller amount of gluten allows cakes to be more tender than bread. And pie crusts can remain crumbly thanks to minimal amounts of gluten in their mix. When it comes to gluten-free products, you’ll need to pay careful attention to bread mixtures to achieve anything close to a bake with gluten traditionally used.

      Use Containers with Walls for Baking Structure

      Speaking of gluten-free bread, most of its structure and ability to rise effectively comes from gluten protein. When baking with gluten-free bread dough, using a baking container with walls for support can help keep its integrity.

      Crackers and bread on table

      Mix Gluten-Free Doughs More Slowly

      Gluten-free batters are thinner than traditional batters and doughs. As a result, you’ll find that there is less snap-back and pull in gluten-free recipes. As a general rule, mixing your yeast breads and other things like cake batter more slowly is more beneficial.

      This can encourage your mix to come together for a cohesive bake. On the other hand, if you mix too quickly, your batter or dough may fail to stick together, and you might find your already-thin mix a liquid mess.

      Finding the Right Gluten-Free Flour

      Unfortunately, swapping all-purpose flour for gluten-free flour is not a simple matter! Most of the time, to properly emulate all-purpose flour, a gluten-free flour blend is needed.

      King Arthur’s Gluten-Free All-Purpose Flour is a popular choice that includes a blend of white rice flour, whole grain brown rice flour, and starch. The tapioca starch and potato starch in the mix do a wonderful job of lending structure to bakes that typically rely on gluten. There are such a variety of gluten-free flours on the grocery store shelves. This is one of the key reasons we recommend simple recipes to start with. It takes a bit of experimenting to learn which gluten-free flour is best for baking. Experiment to learn which flours do you like the taste of. People ask all the time does gluten-free taste the same. And my response is always no, it doesn't, but it can be pretty close to the traditional recipes. But you need to understand which flours work for your recipes and which you like the taste of.

      Baking at a Lower Temperature

      As if mixing and preparing a gluten-free recipe wasn’t hard enough, choosing a temperature and timing for your gluten-free bake requires more care and alterations. Gluten-free bakes often perform better at lower temperatures for longer periods of time.

      This is because of the increased amount of moisture in gluten-free mixes, which need to be coaxed out slowly.

      Replacing Gluten with Other Thickeners

      Since gluten is such a vital ingredient for structures of bakes, many gluten-free recipes call for alternative thickeners like xanthum gum, arrowroot, and guar gum. Starting your gluten-free baking experience with specifically gluten-free recipes is a great way to test the waters!

      But we don’t recommend skipping the thickener if the recipe calls for it. Don’t worry; many thickeners are repeated in other recipes, too!

      Test Baking Times to Avoid Gumminess

      Unfortunately, baking with gluten can also be a trial and error experience to avoid gumminess. Freshly-baked goods hold a fair amount of steam inside. This is especially true of baked goods that contain starch and xanthan gum which hold onto moisture well.

      To prevent this extra moisture from turning your bakes gummy, be sure to let your bakes cool outside of their original baking pan on a wire rack. Some bakes even require extra baking time if they contain these thickeners.

      The baking toothpick test is a great test for traditional bake readiness; some gluten-free bakes need to be baked beyond this point.

      glass jars of gluten free flour

      Keep the Milk & Eggs When Possible

      While creating delicious bakes without eggs is far from impossible, haphazardly replacing eggs with flax eggs or other alternatives can ruin a bake. This is especially true for gluten-free recipes.

      Eggs provide structure and lift to many baked goods and many gluten-free mixtures; therefore, they rely on eggs to provide support in a complete bake. Instead of replacing eggs, milk, or other traditional ingredients when trying a gluten-free bake, look for a specifically designed recipe without these in mind.

      Make Enough for Leftovers!

      Gluten-free baked goods are not unheard of but are significantly harder to find in stores compared to traditional gluten counterparts. Gluten-free options are also typically more expensive at the time of purchase.

      Once you’ve aced a gluten-free recipe, make sure to make enough to have leftovers for a snack later. Use your freezer to store delicious cookies and even a loaf of bread to save you when a craving strikes! This is so much better than running to the health food stores every time you get a craving for a snack.

      Gluten-Free Baking Tips

      When it comes to delicious baked goods, everyone should be able to indulge and enjoy! By starting your gluten-free baking journey with a few tried and true recipes, you can quickly learn how to make accessible treats for everyone as you slowly work your way up to creating your own blend of gluten-free flour mix for future bakes.

      Don’t forget to save a few batches for later! Get started today with one of our favorite cake recipes, our Easy Gluten Free Chocolate Cake, here on SerenaLissy.com.

      Looking For More Recipes?

      Subscribe to my free newsletter to get new baking tips in your inbox monthly. Find me sharing new recipes and tips on Pinterest, Instagram, or Facebook.

      As an Amazon Associate and member of other affiliate programs, I earn from qualifying purchases. What that means is if you click on one of our affiliate links, they may toss a few pennies our way for a commission.

      Chocolate Chunk Ice Cream

      July 19, 2021

      Chocolate Chunk Ice Cream In A Bowl

      This rich and creamy homemade chocolate chunk ice cream is surprisingly simple, and filled with almond, honey and bittersweet chocolate throughout. It's a sinfully sweet indulgence that will have you coming back for more time after time!

      Homemade Chocolate Chunk Ice Cream is made with honey, almond butter and dark chocolate for a tasty twist on a classic summer treat.

      Honey in Ice Cream?

      I've always been fascinated by bees, and after my Costa Rica vacation this year, I learned so much more about bees after doing some tours. There was no way I was going to pass up an event held by the National Honey Board to hear more about bees. There were a few beekeepers I got to chat with, lots of food all made with honey. Mary Helen Leonard was demonstrating how to make honey body scrubs. And of course honey sampling done by Marie Simmons, author of Taste of Honey.

      After leaving the event with a full belly and carrying out a bag of SWAG, I decided to make use of the free cookbook from Marie Simmons. What a great book! It has almost 200 pages of cooking with honey. Breakfast, main dishes, salad and vegetable sides, and of course sweets! I decided to try my hand at a modified version of her honey and almond butter ice cream.

      Ingredients in Chocolate Chunk Ice Cream

      Chocolate Chunk Ice Cream Ingredients

      It seems like I don't do much of anything without chocolate being part of the mix. So I figured why not. Seems like this would be great with chocolate. I also added just a little bit of orange zest to the ingredients for a tiny bit of citrus.

      • Whole milk
      • Heavy cream
      • Egg yolks
      • Orange zest
      • Wildflower honey
      • Almond butter
      • Almond extract
      • Dark chocolate (do not use chocolate chips)

      How to Make Homemade Chocolate Chunk Ice Cream

      Chocolate Chunk Ice Cream Process Collage How to Make Homemade Chocolate Chunk Ice Cream
      1. Heat milk, cream and orange zest until simmering.
      2. Remove from the heat and let stand for 3 minutes. Strain the mixture to remove the zest.
      3. Add the milk and cream mixture back to the pan and whisk in the yolks over low heat until the mixture coats the back of a spoon.
      4. Add the honey, almond butter, and almond extract and stir until thoroughly blended. Refrigerate, uncovered, until chilled.
      5. Pour into an ice cream maker and process according to the manufacturer's instructions.
      6. Halfway through the freezing process drizzle in the cooled, melted chocolate.

      This ice cream has a rich almond flavor. I used smooth almond butter, but you could also use chunky if you prefer. The chocolate chunks gave the ice cream a much-needed crunch that I was looking for. And since we are going a little bit decadent, I decided these would be best served in a brownie bowl. Why not, right?!?

      To make the brownie bowl, just grab a box of your favorite brownie mix, prepare according to instructions and cook in a muffin tin. Once you remove from the oven, take a second tin of the same size, spray the bottom of the pan with Pam, and place it on top of the hot one you just removed from the oven. (Be careful here; remember your first pan is fresh out of the oven and really hot!) Push down and you will see the brownies in the hot pan begin to form cups. Keep the second pan on until the brownies have cooled.

      Chocolate Chunk Ice Cream in an Ice Cream Scooper

      More Recipes You'll Love

      • Mocha Ice Cream Sandwich
      • Instant Pot Frozen Greek Yogurt
      • Cherry Semifreddo Popsicle

      We hope you love this somewhat unique twist on a popular ice cream flavor. Homemade Chocolate Chunk Ice Cream made with honey sure is a sweet treat.

      Looking For More Recipes?

      Subscribe to my free newsletter to get new recipes in your inbox monthly. Find me sharing new recipes and tips on Pinterest, Instagram or Facebook.

      Chocolate Chunk Ice Cream

      Simple and tasty chocolate chunk ice cream is made with an unexpected ingredient – honey!
      5 from 5 votes
      Print Pin Rate
      Course: Dessert
      Cuisine: American
      Prep Time: 10 minutes minutes
      Cook Time: 15 minutes minutes
      Churn Time: 20 minutes minutes
      Total Time: 45 minutes minutes
      Servings: 8 Servings
      Calories: 374kcal
      Author: Serena

      Ingredients

      Adapted from Taste of Honey

      • 1 ½ cups whole milk
      • 1 cup heavy cream
      • 4 egg yolks
      • ⅛ teaspoon orange zest
      • ⅔ cup wildflower honey
      • ½ cup almond butter
      • ⅛ teaspoon almond extract
      • ¼ cup dark chocolate do not use chocolate chips

      Instructions

      • Place milk, cream and zest in a heavy saucepan. Cook over low heat until simmering. Remove from heat and let rest for 3 minutes.
      • Strain the ingredients out to remove the zest.
      • Place milk, cream and egg yolks in a heavy saucepan. Slowly whisk to combine. Cook over low heat, stirring gently for 5-7 minutes, or until the milk is hot and it begins to coat the back of a spoon. Remove from heat.
      • Add the honey, almond butter, and almond extract and stir until thoroughly blended. Refrigerate, uncovered, until chilled.
      • Melt chocolate using a double boiler.
      • Process the chilled custard in an ice cream maker. When ice cream is about half way done, start drizzling the melted chocolate into the maker with the ice cream. Once completed per the manufacturers instructions, scoop the ice cream into a freezer container and freeze until ready to serve. It will keep for at least 2 weeks.

      Notes

      Recipe Source: SerenaLissy.com
      This website provides approximate nutrition information for convenience and as a courtesy only. Nutrition data is gathered primarily from the USDA Food Composition Database via Spoonacular API, whenever available, or otherwise other online calculators. While this information can be helpful in estimating the nutritional information of a recipe, it is by no means accurate or official and is not evaluated by the Food and Drug Administration.
       
      All images and content are copyright protected. Do not use our images without prior permission.

      Nutrition

      Serving: 1Serving | Calories: 374kcal | Carbohydrates: 32g | Protein: 7g | Fat: 26g | Saturated Fat: 11g | Polyunsaturated Fat: 3g | Monounsaturated Fat: 10g | Trans Fat: 1g | Cholesterol: 143mg | Sodium: 39mg | Potassium: 263mg | Fiber: 2g | Sugar: 28g | Vitamin A: 644IU | Vitamin C: 1mg | Calcium: 143mg | Iron: 2mg
      Tried this Recipe? Pin it Today!Mention @SerenaLissy or tag #serenalissy!

      As an Amazon Associate and member of other affiliate programs, I earn from qualifying purchases. What that means is if you click on one of our affiliate links, they may toss a few pennies our way for a commission.

      • « Go to Previous Page
      • Go to page 1
      • Go to page 2
      • Go to page 3
      • Go to page 4
      • Go to page 5
      • Go to page 6
      • Interim pages omitted …
      • Go to page 17
      • Go to Next Page »

      Primary Sidebar

      Hi, I'm Serena!

      Join us and you will learn all sorts of creative techniques from baking to food photography that is easy enough for a novice to recreate at home, but look and taste like they were made by a seasoned pro.

      Get Inspired, Cook Confidently, Eat Well

      More about me →

      Ice Cream Recipes

      • Scoop of chocolate mint ice cream in bowl with ice cream cone
        No Churn Chocolate Mint Ice Cream
      • Bowl of key lime pie ice cream with a spoon
        No Churn Key Lime Pie Ice Cream
      • Apple Ice Cream in a waffle cup
        Apple Ice Cream
      • Chocolate Chunk Ice Cream In A Bowl
        Chocolate Chunk Ice Cream
      • Frozen Greek Yogurt from your Instant Pot
        Instant Pot Frozen Greek Yogurt
      • Avocado Ice Cram In a serving Bowl
        Easy Avocado Ice Cream Recipe

      Popular Recipes

      • Jamaican Sweet Potato Pudding
        Jamaican Sweet Potato Pudding
      • Peanut Butter Fudge Cups
        Peanut Butter Fudge Cups
      • Samoas on a plate
        Make at Home Samoas - Homemade Samoas: Girl Scout Cookies
      • Italian Chocoalte Walnut Cake
        Italian Chocolate Walnut Cake (Torta di Noci)

      Photography Challenge

      Master The Art of Food Photography

      Footer

      ↑ back to top

      About

      • Privacy Policy

      Newsletter

      • Sign Up! for emails and updates

      Contact

      • Contact

      As an Amazon Associate, I earn from qualifying purchases.

      Copyright © 2023 Serena Lissy