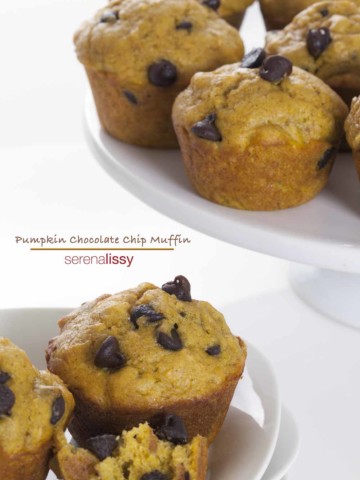
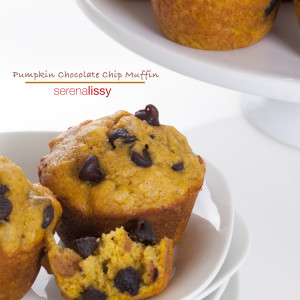
Today I’m sharing a simple recipe for easy pumpkin chocolate chip muffins. You can have this recipe whipped up and in the oven in less than ten minutes! The end result is warm, moist muffins full of pumpkin flavor with chocolate chips and walnuts throughout.

Pumpkin Chocolate Chip Muffins
It's that time of year! Hard to believe my favorite quarter of the year is now almost ⅔ gone. Not many things better than back to back months of holidays. Starting with Halloween, although that isn't really a holiday. But it sure is a reason to whip up some really fun candy. In my world, that's almost a holiday. Then we have Thanksgiving and onto Christmas and New Years. 90 days of feasting and spending quality time with loved ones. And now that we are ⅔ into this, I hope you are spending some time for yourself today amid all the preparations for tomorrow's feast
I try to prepare as much in advance as I can, but even with doing that one can still have a lot of work to be done on the big day. And it's usually a full house on Thanksgiving, so not only are you foraging ahead, you now have an audience. So before the plane lands, and the taxi unloads family and friends at my door, I like to have some me, myself and I time today. Nothing better than an afternoon coffee and a simple muffin to kick start me into the cooking chaos known as Thanksgiving.
Pumpkin chocolate chip muffins are an easy treat that people can pair with their morning coffee or enjoy mid-afternoon when they need a snack. With ingredients you likely have on hand, except maybe the pumpkin, you can have these muffins ready before the first round of family or friends enter your door this holiday season. Not expecting a large crowd? These muffins also freeze well if you need to set some aside for another time.
Pumpkin Recipes
I had an extra can of pumpkin from the Pumpkin Stout Cupcake recipe that I made a month or so back, and figured why not use it up. I pulled out a Pumpkin book that I picked up at the local grocery store in the checkout line. You know the book I'm talking about. The little 5x7 theme book that contain the basic brands recipes. A company called Favorite Brand Name Recipes published this book. They had a nice little pumpkin chocolate chip muffin recipe that looked appealing.
I made a few minor modifications to the recipe to get what I was looking for. The original recipe also called for ½ cup chopped walnuts. Since I'm not a big walnut lover, that was a little much for me. You could easily omit this, or even go with ¼ cup instead to reduce the amount of walnuts. And of course, if I'm reducing walnuts, I'm adding to the chocolate chips by that amount.
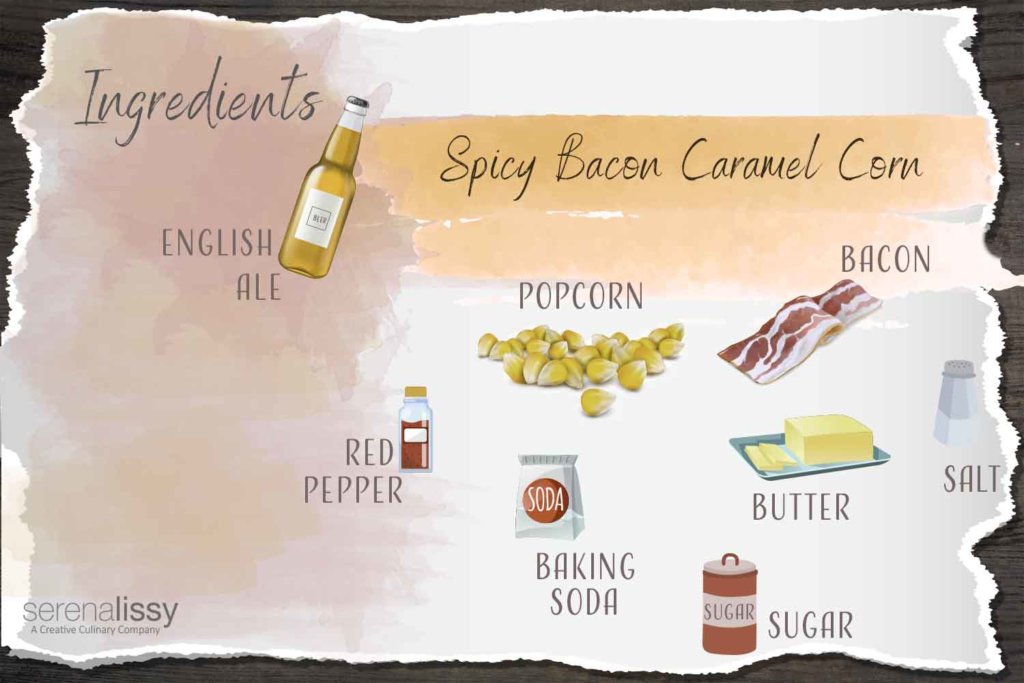
Ingredients
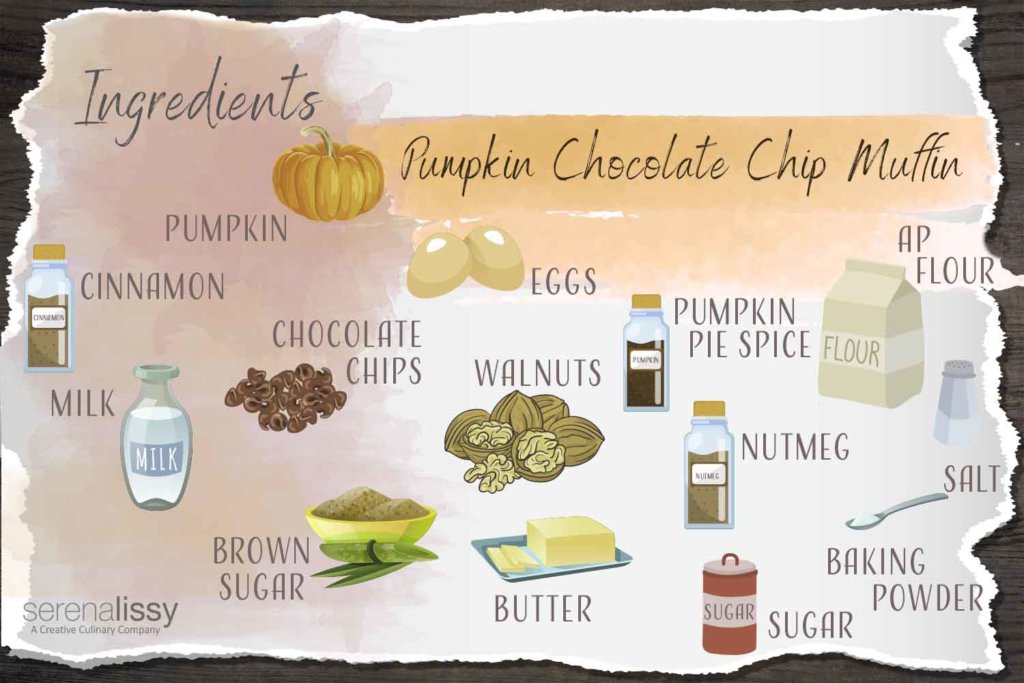
- All Purpose Flour
- Baking Powder
- Pumpkin Pie Spice
- Cinnamon
- Nutmeg
- Salt
- Pumpkin Puree
- Brown Sugar
- Whole Milk
- Unsalted Butter Melted
- Eggs
- Semisweet Chocolate Chips
- Walnuts
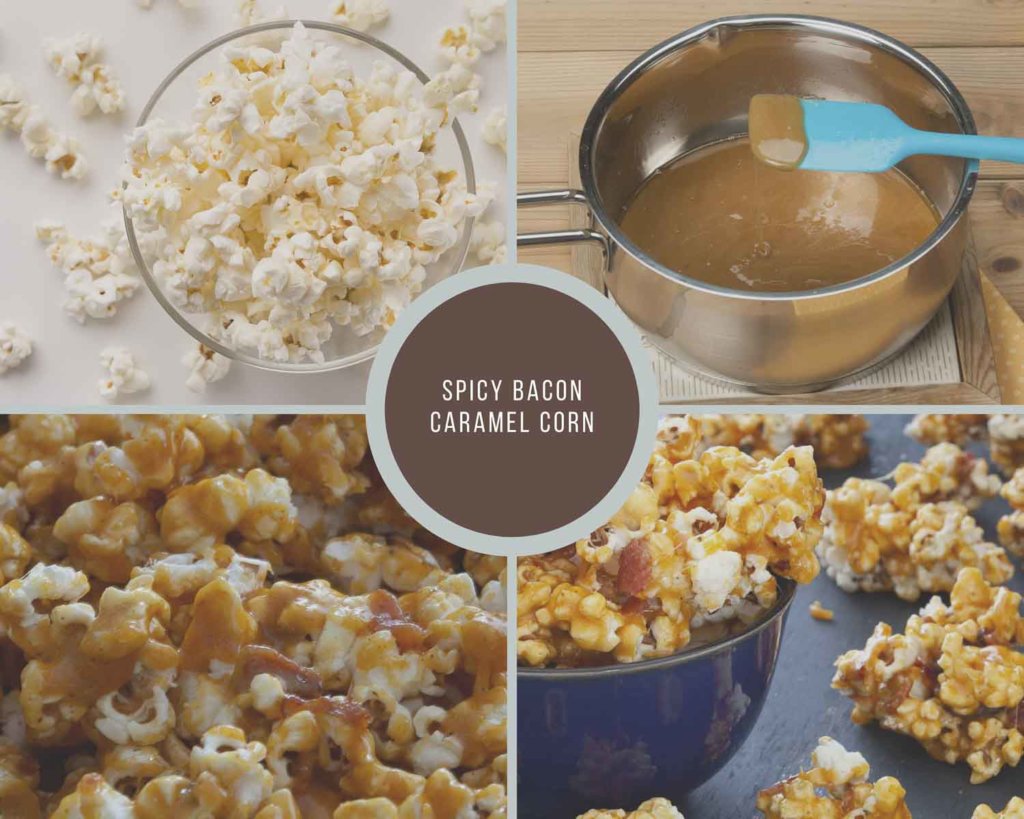
How to Make Pumpkin Chocolate Chips Muffins
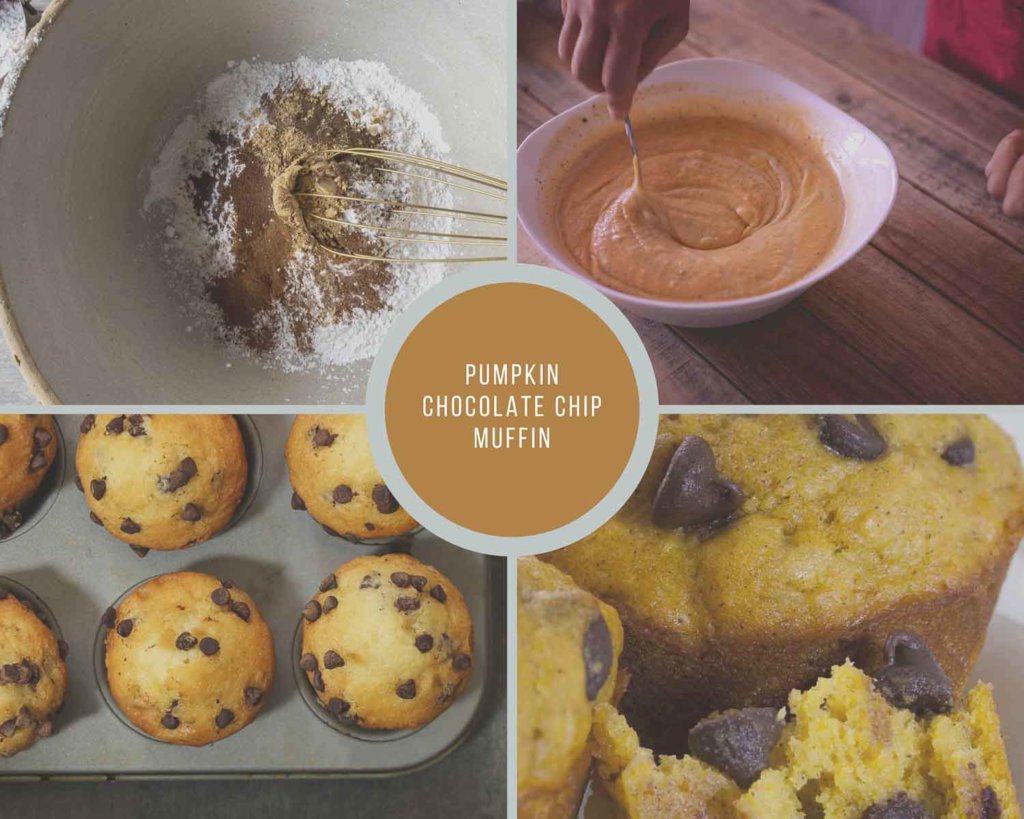
While your oven is preheating to 400 F, line your muffin baking tray with paper liners or spray with nonstick cooking spray. In a large mixing bowl combine the flour, baking powder, pumpkin pie spice, cinnamon, nutmeg, and salt. In a medium bowl beat pumpkin, brown sugar, milk, butter, and eggs until well blended. Add the pumpkin mixture to the flour mixture and stir together. Then add your mix-ins: chocolate chips and walnuts. Mix until just moistened.
Spoon evenly into your muffin cups filling paper liners about ⅔ or ¾ full of batter. Bake for 15-17 minutes or until a toothpick comes out clean from the center. Let muffins cools for 10 minutes before removing from the pan to cool completely on a wire rack.
Tips For Pumpkin Muffins
- You can use either semisweet or milk chocolate chips.
- You can use either paper liners or spray your muffin pan with nonstick spray and skip the liners.
- If you don't have pumpkin pie spice, you can easily make your own. You can use 1 teaspoon cinnamon with ¼ teaspoon of ginger and ¼ teaspoon nutmeg mixed in.
- I like to sprinkle extra chocolate chips on top of the pumpkin muffins before baking. There are plenty in the batter, but why not give it just that little extra love.
- If you don't want chocolate chips in your pumpkin muffins you can leave them out. (But I'm not sure why you would?)
- These freeze really well. Place them in an airtight plastic bag and freeze for up to 3 months. When ready to use, take out from freezer and let thaw at room temperature.
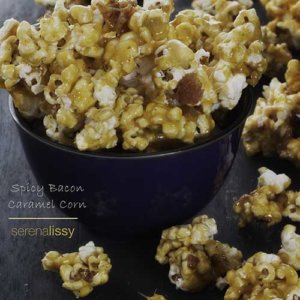
It's a simple recipe, with a short 10 minute preparation time and a baking time of 15 minutes. They are best enjoyed warm, but will easily hold for a few days.
Enjoy the recipe, and have a wonderful Thanksgiving.

Looking For More Recipes?
Subscribe to my free newsletter to get new baking tips in your inbox monthly. Find me sharing new recipes and tips on Pinterest, Instagram, or Facebook.
Easy Pumpkin Chocolate Chip Muffins
Ingredients
- 2 ½ cups all purpose flour
- 1 tablespoon baking powder
- 1 ½ teaspoon pumpkin pie spice
- ¼ teaspoon ground cinnamon
- ¼ teaspoon ground nutmeg
- ½ teaspoon salt
- 1 cup solid pack pumpkin puree
- 1 cup packed brown sugar
- ¾ cup whole milk
- 6 tablespoons unsalted butter melted
- 2 eggs
- 1 ¼ cup semisweet chocolate chips
- ¼ cup chopped walnuts
Instructions
- Preheat oven to 400°F.
- Line 2 ½ inch muffin cups with paper baking cups or spray pan with nonstick cooking spray.
- Combine flour, baking powder, pumpkin pie spice, cinnamon, nutmeg, and salt in a large bowl.
- Beat pumpkin, brown sugar, milk, butter and eggs in medium bowl until well blended.
- Add pumpkin mixture, chocolate chips and walnuts to flour mixture and stir until just moistened.
- Spoon evenly into prepared muffin cups.
- Bake 15-17 minutes or until toothpick inserted into centers comes out clean.
- Cool in pan on wire rack for 10 minutes.
- Remove muffins from pan and put onto wire racks to cool completely.
Notes
Nutrition
Here are a few of our favorite pumpkin recipes:
As an Amazon Associate and member of other affiliate programs, I earn from qualifying purchases. What that means is if you click on one of our affiliate links they may toss a few pennies our way for a commission.