• Skip to primary navigation
  • Skip to main content
  • Skip to primary sidebar
  • Home
  • Collaborate with us
  • Contact

Serena Lissy logo

  • Recipe Index
  • Privacy Policy
menu icon
go to homepage
  • Christmas
  • Recipes
  • Photography
  • About
    • Facebook
    • Instagram
    • Pinterest
  • search icon
    Homepage link
    • Christmas
    • Recipes
    • Photography
    • About
    • Facebook
    • Instagram
    • Pinterest
  • ×

    Serena Lissy » Recipes

    Blog

    Ten Best Cookie Baking Tools

    March 29, 2021

    Cookie Baking Essentials

    We absolutely love cookies here. You can explore a variety of recipes on our site, from Chocolate Butter Cookies to Red Velvet Cookies and more. And we’re not alone!

    Did you know that the average American eats about 300 cookies a year? As a whole, Americans consume over 2 billion cookies every 365 days. Sounds a bit overwhelming...and delicious.

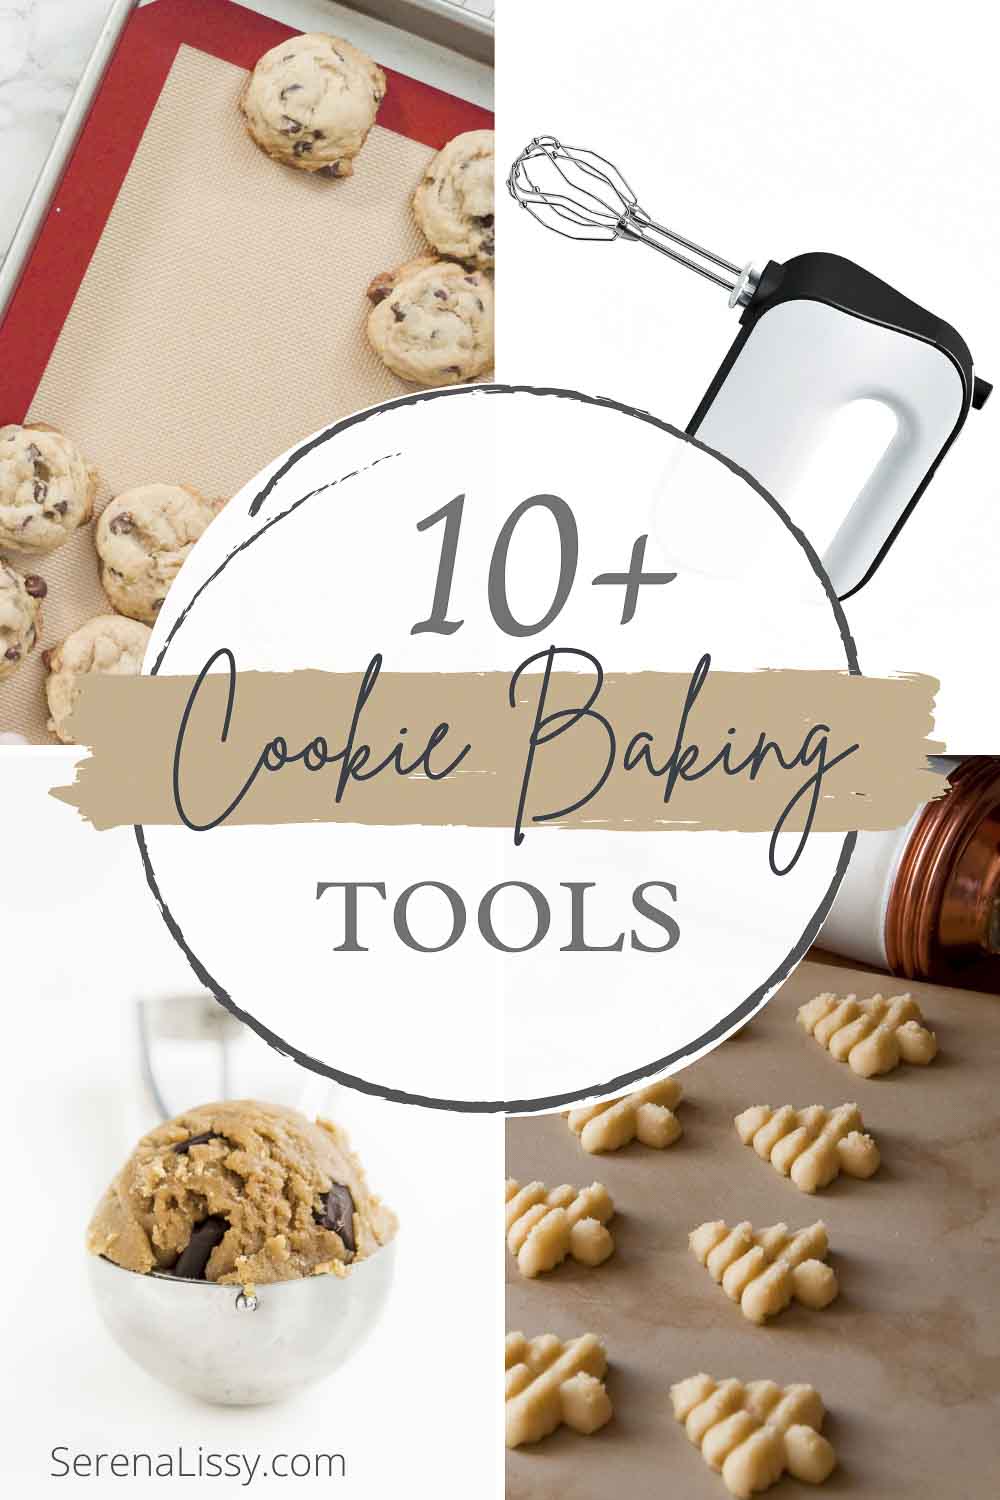
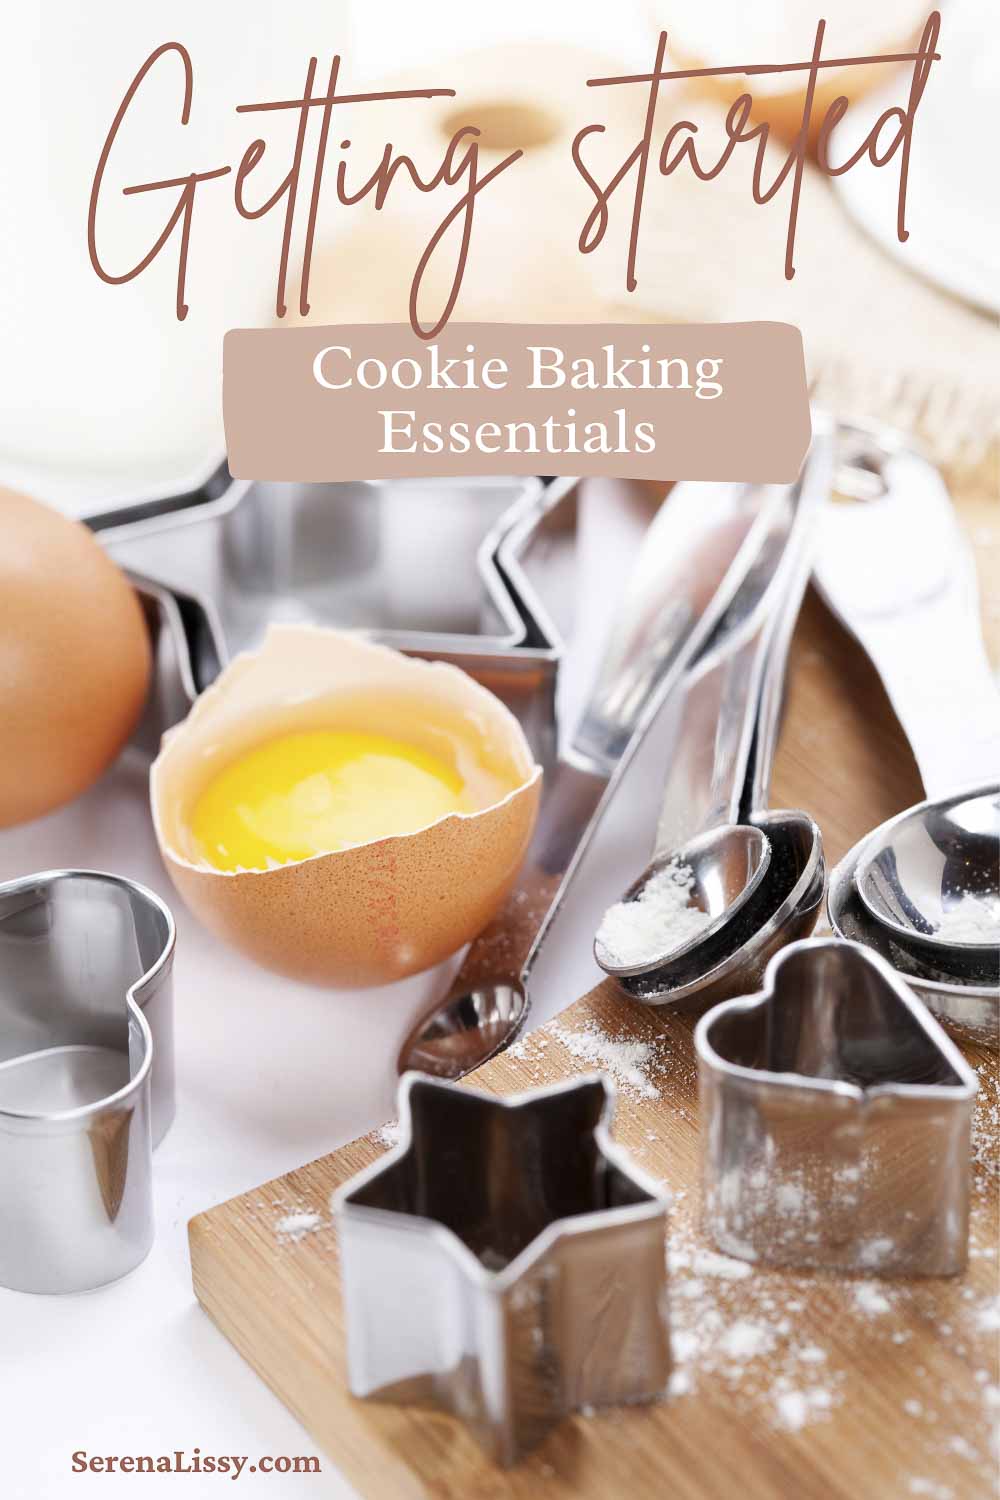
    Even if your favorite cookie is not the same as mine, some cookie baking tools always make making cookies easier and more enjoyable. Here are our 10 best cookie baking tools and recommendations for any beginning baker that needs the basic tools. 

    Cookie Baking Tools

    1. Cookie Scoops

    We’re starting our list with cookie scoops, a tool that is often overlooked as an unneeded one that’s nice to have but not essential.

    This cookie scoop set from Fayomir comes with three different sized scoops ranging from 1 tablespoon to 3 tablespoons in size. While you can get away with using a generic tablespoon for cookie scooping, exact measurements are important when you’re looking for the perfect bake across batches. Think oatmeal cookies or chocolate chip cookies, these stainless steel cookie scoops are an essential tool to ensure you have the exact same size and amount for the perfect bake. Did I mention these also make great ice cream scoops. I love when one tool can easily become your best, or in my case, favorite tool. Who doesn't love a perfect scoop of ice cream?
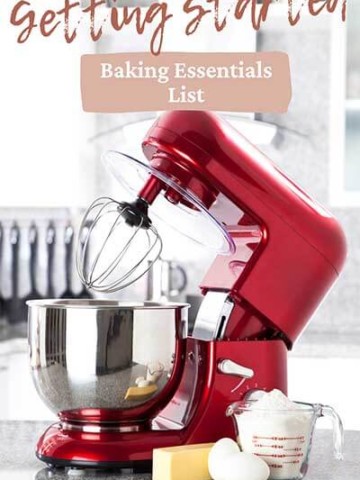
    2. Hand Mixer

    This must-have cookie baking tool will come as no surprise. A hand mixer offers you all the control of mixing by hand with added power and consistency. Sure, you don’t need one for a once-a-year cookie batch, but if you’re interested in more frequent treats and testing different dough recipes, this is a must-have. (If you are baking weekly, you might want to look into a KitchenAid stand mixer as part of your essential baking tools.)

    Look for an electric mixer with multiple paddle attachments and make sure you have storage space for it. The last thing you’ll want to do is spend money on many different attachments only to find half of each pair missing! 

    3. Rolling Pin With Thickness Rings

    Uniform cookies require cookie dough that is rolled to an even thickness at all ends. But let’s face it- we can only get so close with sight alone. Thankfully, rolling pins with thickness rings can take the guesswork out.

    These rolling pins look like regular pins but come with thickness rings that are slid onto each side of the pin. These are often secured with silicone inner rings or pieces.

    Choose a rolling pin with a variety of thickness rings, typically between 2 and 9 mm. Now you’re set to bake anything from thick chewy delicious cookies to thin sugar cookies, or even make pie dough.

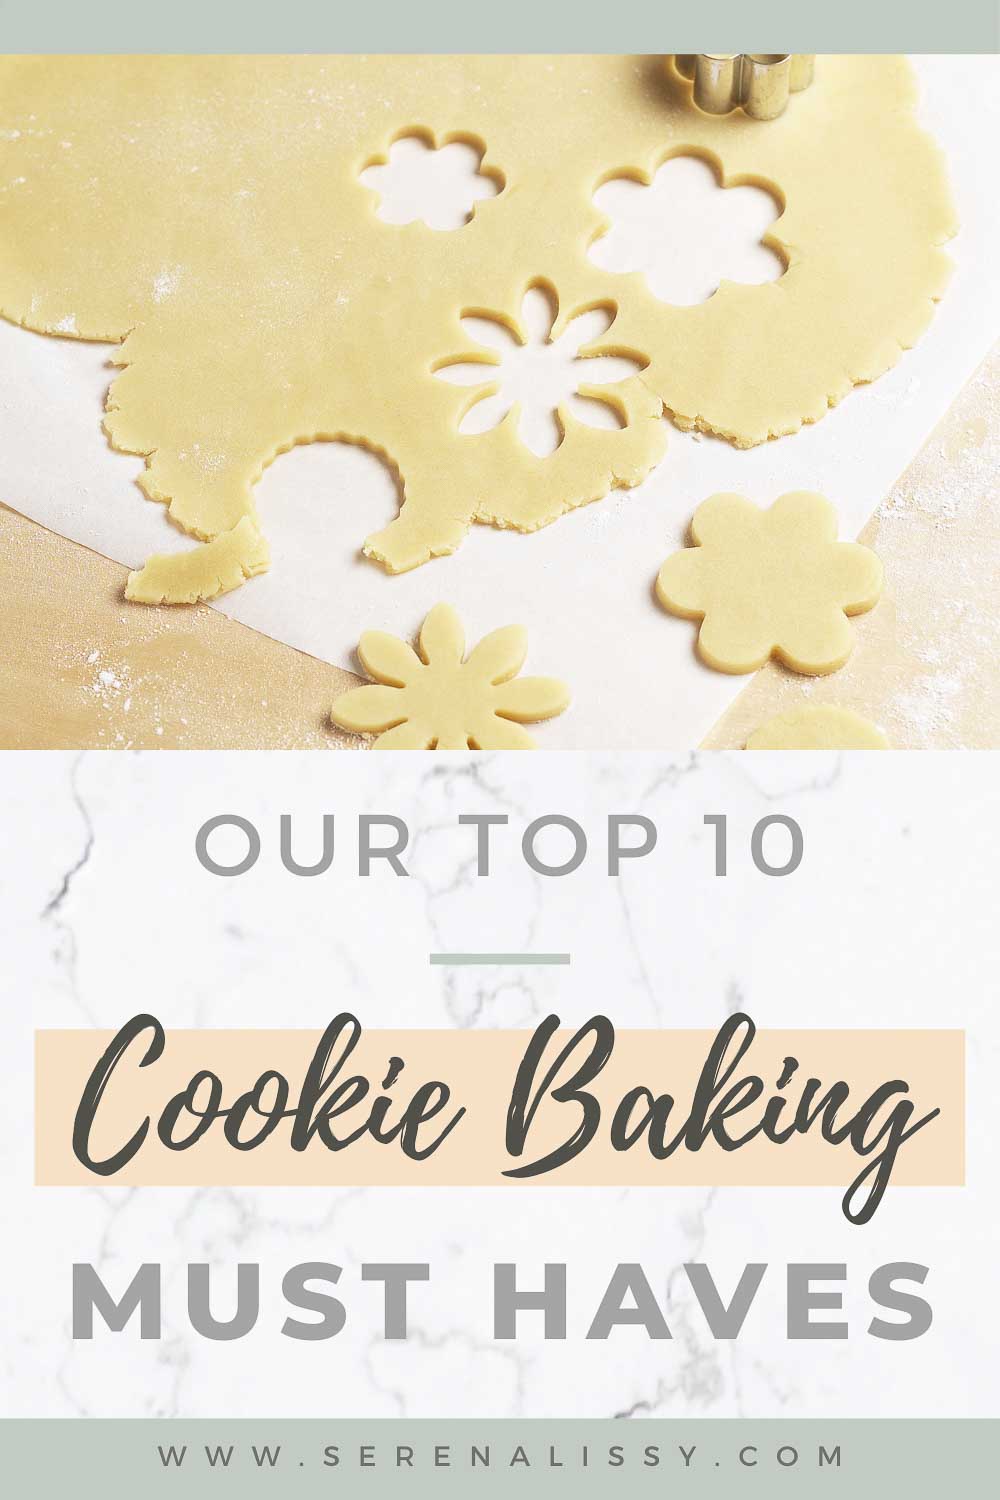
    4. Fun Cookie Cutters

    Sometimes, a sugar cookie in a silly shape is all we need to fix a bad day. Plastic cookie cutters won’t be the fanciest or most expensive tools in your kitchen, but they can still provide shape consistency and lots of fun.

    Consider grabbing these if you often bake cookies as a gift! You want to make sure they come with sharp edges so they cut the dough easily. Brainstorming which new or classically quirky cookie cutter is best for each friend adds joy and personality to a delicious present.

    5. Elegant Cookie Press

    For more elegant cookie shapes, a cookie press is a must. Cookie presses hold cookie dough in a plastic or glass canister. You then load the press with a metallic disk that is precut in cookie designs.

    Applying pressure then pushes dough through the disk onto your baking tray. Common shapes that are created in this way include stars, various flowers, suns, and letters. This also cuts out the middle step of rerolling dough when using traditional cookie cutters! And when you are making a lot of cookies that all need to be the perfect size, every step counts!

    Cookie Baking Essentials

    6. Silicone, Non-Stick, Baking Mats

    Many individuals who bake only on rare occasions butter their cookie sheets or use parchment paper to prevent sticking to the sheet pans. But for those of us with a more permanent sweet tooth, these steps easily become an expensive hassle.

    Silicone baking mats are one of the best cookie baking tools as they act like parchment paper without the repeated cost. Yum! And no more messy buttered pans. That's a win for me.

    7. Cookie Icing Decorating Tools

    What’s better than a delicious textured sugar cookie? One that also features beautiful and scrumptious icing! Cookie decorating tools often feature small metal etching tools, scrapers, and combs to create delicate designs.

    This set in particular is made for royal icing designs including feathering, marbling, and anything else your mind can come up with. That scribe, or also known as the boo boo stick, is a life saver when the holiday season comes and you are making 10 dozen cookies for all your loved ones. It's the right baking tool to get your royal icing right up to the edges.

    8. Reusable Silicone Piping Bags

    Following the decoration trend, piping bags are a must-have for fluffier frostings like buttercream. However, using one-time bags is wasteful and messy. Silicone reusable piping bags are ideal cookie baking tools and they come in different sizes.

    Some worry that piping bags with tips are prone to be messy as the tips pop off with too much pressure. However, with proper couplers, this shouldn’t be a problem. If you aren't ready to go with reusable, Ateco makes a compostable pastry bags. Any baking supplies I can get to help with keeping plastic out of the landfills is worth looking into.

    9. Pastry Brushes

    Pastry brushes being on a top 10 cookie baking tools list may surprise you. While they are not absolutely necessary for cookie baking, they can save you time and energy when keeping your baking area and cookies clean.

    Use a pastry brush to remove excess flour from your cookie dough, or to apply a sugar glaze to finished batches. This set is made from silicone and also appropriate for egg washes and even barbeque events. It works well on wet ingredients and also dry ingredients.

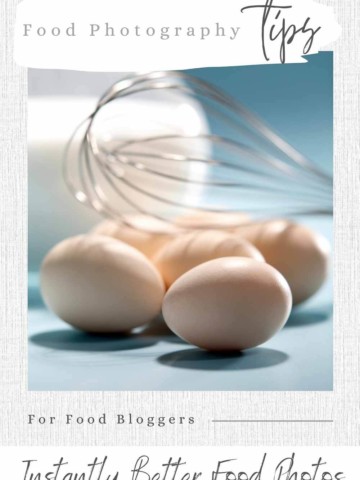
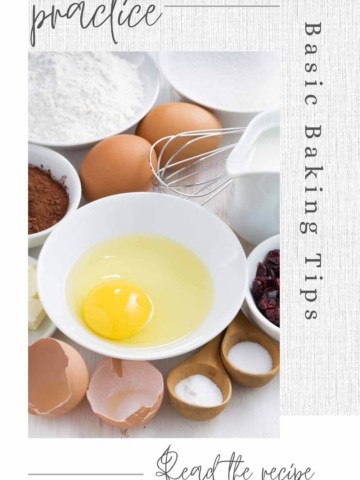
    10. Camera For Cookie Testing

    Our last best cookie baking tool is a bit different. After all, a camera is not an absolute essential when it comes to creating cookie dough or perfect bakes! However, you’ll need a camera to capture your best cookie creations.

    Perhaps more relevant to your baking skill is a camera’s ability to capture exactly what color, texture, size, and even weight your cookies feature. This is essential information when you are pursuing a particular cookie perfection.

    Give our post on Tips For Taking Great Food Photos a read to learn how to take salivating cookie photos!

    Best Cookie Baking Tools for Your Kitchen

    The best cookie baking tools will be durable, make your cookie-making process easier, and are applicable for many different recipes. After all, even a cute gingerbread man cookie cutter isn’t worth the money if you hate gingerbread!

    Investing in a cookie press will allow you to try new shapes of cookies with only a new metallic disk moving forward. Cookie scoops are invaluable for almost any dough that holds shape, and pastry brushes can apply a plethora of cookie decorations but also be useful for cooking in the kitchen.

    Ready to try a new dose of cookie sweetness? Give my cookie recipes a read today for a scrumptious treat.

    As an Amazon Associate and member of other affiliate programs, I earn from qualifying purchases. What that means is if you click on one of our affiliate links, they may toss a few pennies our way for a commission.

    Top 10 Cookie Baking Must Haves

    Looking For More Recipes?

    Subscribe to my free newsletter to get new baking tips in your inbox monthly. Find me sharing new recipes and tips on Pinterest, Instagram, or Facebook.

    The Best Lemon Cheesecake Recipe

    March 15, 2021

    Upclose image of lemon cheesecake

    The Best Lemon Cheesecake Recipe is perfect for a spring or summer afternoon with friends. With its sweet, tangy flavor and creamy texture, it's sure to be a crowd pleaser! This decadent dessert will have everyone asking for seconds! With notes of citrus in every bite, it has the perfect balance between sweet and tart.

    Lemon Cheesecake Bites on plate

    Cheesecake Bites or 9" Cheesecake

    The recipe is designed to make 24 cheesecake bites, or also called mini cheesecakes. If you don't need 24 of these, although I'm just going to say they freeze well and there is something so right about having one of these whenever you want, you could easily cut the cheesecake bites recipe in half and go with 12. Or if you want a good old fashioned 9" cheesecake you could make that instead.

    How to Use a Water Bath for Your Cheesecake Baking

    • One of the tricky parts of a water bath is to avoid leaks in the springform pan. Now if you are making mini cheesecakes this leaking problem is no longer a problem.
    • If you are making the 9" cheesecake, you will want to wrap your springform pan tightly with aluminum foil. You don't want any water seeping into your cheesecake from the bottom of the pan.
    • For the 9" cheesecake you will need a baking dish or roasting pan that is large enough to hold your springform pan and deep enough to hold a couple of inches of water. For the cheesecake mini's you just need a baking dish that you can put on your bottom rack to hold water.
    • I would recommend placing your 9" springform pan into the baking dish, then adding the boiling water. You don't want to have to worry about carrying or moving a baking dish with boiling water in it.
    • Now if you are making mini cheesecakes, you will place your cupcake pan on the rack in the center of the oven and the baking dish with boiling water is on the lower rack. Pour your boiling water into the baking dish, then place your cupcake pan on the center rack.
    • Don't open your oven door once you have everything in the oven. The goal of the water is to create moisture and opening the oven door just lets it all out.

    Tools to Make the Lemon Cheesecake

    • You need a food processor to make the crust and it's also great when mixing the lemon with sugar.
    • Stand mixer or hand held mixer for the filling. Although you could use the food processor for this as well.
    • 9" springform pan or a cupcake pan to bake the cheesecake in.

    How to Tell When Your Lemon Cheesecake is Done

    The easiest way to tell if your cheesecake is done is to gently shake the pan. The edges will be lightly browned and the center just a bit jiggly. If you are making the 9" cheesecake, the jiggly center will be 3-4 inches in diameter and still pretty bright and shiny. Don't worry about the jiggly center, it will firm up as it cools. If you are making the minis, the same concept still applies. Except the center jiggle will be much smaller.

    Decorating your Cheesecake

    We topped our cheesecake with our handmade Lemon Curd and then topped that with Chantilly Cream and a small shaving of lemon zest. You could skip both of these if you wanted and just go with the lemon cheesecake. It's delicious all by itself.

    You could even make a blueberry topping to go with this. Blueberries, sugar and lemon juice all cooked down to a thick sauce. Put a little bit of this on the top of the cheesecake it's so good! After all lemon and blueberry go together like peanut butter and jelly, bacon and eggs, burger and fries, you get the idea. Match made in heaven.

    Lemon Cheesecake Ingredients

    Lemon Cheesecake Ingredients
    • Lemon juice and zest: I can't say this enough, go with fresh! Don't use the lemon juice you can buy from a store in the bottle. You want the lemon flavor from the fresh lemons. I also usually use organic since zest is an ingredient. If that is a budget bust just be sure to wash your lemons really well.
    • Sugar: just the sweetener in the cheesecake.
    • Heavy whipping cream: I chose to make this cheesecake recipe without sour cream. I like the flavor of the whipping cream instead of the tanginess of the sour cream. The dairy also helps with the texture of the cheesecake.
    • Cream Cheese: You want to use softened cream cheese. Let it sit at room temperature for at least an hour. I always go with Philadelphia Cream Cheese. I like the taste and texture of this brand.
    • Eggs: Eggs do a whole lot for the cheesecake. The protein in the eggs help provide structure in the cheesecake. Because there is no flour to provide structure, think of eggs as the framing of your cheesecake, like a house needs framing to hold up the walls. A general rule for cheesecakes is that for each package of cream cheese, I use one whole egg. Now that extra yolk I added in just makes it more rich and creamy for my taste buds. I also use room temperature for my eggs. This allows the yolks to mix more evenly with the whites and other ingredients. Cold eggs could reharden the fat resulting in a lumpy batter, and no one wants that.
    • Vanilla: This is added strictly to enhance the flavor. You could easily skip it if you like.
    • Almond Cookie Crust: I chose Archway Windmill cookies for this recipe. I felt the lemon flavor in the recipe tasted better with an almond cookie crust rather than a graham cracker crust. If you want a graham cracker crust, just use the same amount of graham cracker crumbs.

    How to Make the Lemon Cheesecake

    Lemon Cheesecake Process Steps

    My goal was to make the best lemon cheesecake recipe I could, and perfect cheesecake is just one of those things that are so simple to make. In a stand mixer or your food processor, add the cream cheese, lemon zest and sugar to combine. Then you will add in the eggs one at a time. Be sure to scrape down the sides of your bowl so everything mixes. Add the vanilla, lemon juice and the heavy cream.

    The goal is to not over mix these ingredients. Overmixing affects the texture of the cheesecake. Everyone wants a creamy cheesecake, so will you. So work in short 30 second bursts to ensure that you aren't overmixing.

    Baking time for me was 20 minutes. But start taking a look at about 15 minutes. We all don't have the same oven or live at the same elevation. Oven temperatures will vary, hopefully not by much.

    How to Freeze Cheesecake

    Cheesecake is very easy to freeze. It holds up well and you can freeze it for about 2 months. If you made the 9" version and want to freeze the entire cheesecake, you will need to let the cheesecake cool for about 4 hours, then remove the springform pan ring. Wrap your cheesecake with plastic wrap, then wrap again in foil. When you are ready to have the cheesecake, just take it out of the freezer the night before and let it thaw in your refrigerator. Make the lemon curd and chantilly cream when you are ready to use the cheesecake. Prior planning really does help when you need a lemon dessert later on.

    If I am just using the cheesecake for dessert at home, I will cut the cheesecake into individual pieces and freeze them like that. It's great for grab and go and also it helps with dessert rationing so I just eat a little bit at a time.

    If you made the mini lemon cheesecakes, then just place them in a freezer safe ziploc bag and freeze. Do the same process to thaw the cheesecake.

    Lemon Cheesecake on Plate

    Looking For More Recipes?

    Subscribe to my free newsletter to get new baking tips in your inbox monthly. Find me sharing new recipes and tips on Pinterest, Instagram, or Facebook.

    Lemon Cheesecake on Plate

    The Best Lemon Cheesecake Recipe

    This sweet and tart Lemon Cheesecake is the best recipe to serve your favorite lemon lover. With an almond cookie crust and topped with Lemon Curd and Chantilly Cream this will soon be your favorite Lemon Cheesecake recipe.
    5 from 3 votes
    Print Pin Rate
    Course: Dessert
    Cuisine: American
    Prep Time: 20 minutes minutes
    Cook Time: 20 minutes minutes
    Chill time: 2 hours hours
    Total Time: 2 hours hours 40 minutes minutes
    Servings: 24 cheesecake bites
    Calories: 216kcal
    Author: Serena

    Ingredients

    Crust

    • 2 cups Cookies - Archway Windmill Cookies or any Almond flavored cookie (240 grams)
    • 3 tablespoon Sugar (48 grams)
    • 6 tablespoon Unsalted Butter, melted (85 grams)

    Cheesecake

    • 1 cup Sugar (219 grams)
    • 2 Lemons - zested
    • 3 - 8 ounce packages of Cream Cheese, Room temperature (678 grams)
    • 3 Large Eggs, Room temperature
    • 1 Egg Yolk, Room temperature
    • 2 teaspoon Vanilla (8 grams)
    • ¼ cup Lemon Juice (60 mL)
    • ½ cup Heavy Whipping Cream (120 mL)

    Chantilly Cream

    • 1 cup Heavy Whipping Cream - Well Chilled (240 mL)
    • ½ cup Powdered Sugar (80 grams)

    Instructions

    • Preheat oven to 350­° F. Line two 12 count muffin pan with liners.

    Make the Crust

    • Combine all ingredients in your food processor and pulse until they are combined. The mixture will be sandy.
    • Spoon a heaping tablespoon of mix into the liners and press into the bottom of the pan.
    • Bake crust in preheated oven for 5 minutes. Remove pan and place on a cooling rack.

    Make the Filling

    • Bring a kettle of water to a boil for the water batch.
    • In a medium bowl mix the sugar and lemon zest until the sugar is fragrant.
    • In a food processor or bowl of your stand mixer fitted with the paddle attachment, beat the cream cheese and lemon sugar for about a minute or two. Scrape down the sides of the bowl.
    • Mix for a few more seconds, add in eggs one at a time. After adding all the eggs, scrape down the sides of the mixing bowl and mix again for about 30 seconds.
    • Add in vanilla, lemon juice and heavy cream. Mix for an additional 30 seconds.
    • Pour the cheesecake filling over the crusts.
    • Place a baking dish or sheet pan on your bottom oven rack and pour the boiling water into the pan. (If you are making the 9", put your cheesecake into the water bath. )
    • Place your mini cheesecakes into the oven on your center rack. Bake 18-20 minutes. The edges will be set and the center slightly jiggly.
    • Place the pan on a wire rack and allow the cheesecakes to cool for about 30 minutes. Transfer to the refrigerator and chill for at least 2 hours up to 8 hours. If chilling longer than 2 hours, loosely cover the cheesecakes with plastic wrap. This keeps them from drying out.

    Make the Chantilly Cream

    • Pour the whipping cream into a chilled bowl.
    • Mix the cream with an electric mixer on low speed for a minute. Increase speed to medium and whip for another minute.
    • Increase the speed to high and slowly sprinkle in the powdered sugar. Continue whipping until soft peaks form. Another 2-3 minutes. Place cream into a piping bag and pipe onto the cold cheesecake.

    Notes

    Recipe Source: SerenaLissy.com
    This website provides approximate nutrition information for convenience and as a courtesy only. Nutrition data is gathered primarily from the USDA Food Composition Database via Spoonacular API, whenever available, or otherwise other online calculators. While this information can be helpful in estimating the nutritional information of a recipe, it is by no means accurate or official and is not evaluated by the Food and Drug Administration.
    All images and content are copyright protected. Do not use our images without prior permission.

    Nutrition

    Serving: 1Serving | Calories: 216kcal | Carbohydrates: 16g | Protein: 6g | Fat: 9g | Saturated Fat: 6g | Polyunsaturated Fat: 1g | Monounsaturated Fat: 3g | Trans Fat: 1g | Cholesterol: 60mg | Sodium: 213mg | Potassium: 115mg | Fiber: 1g | Sugar: 14g | Vitamin A: 364IU | Vitamin C: 6mg | Calcium: 116mg | Iron: 1mg
    Tried this Recipe? Pin it Today!Mention @SerenaLissy or tag #serenalissy!

    Here Are a Few Of Our Best Cheesecakes If You Are Looking For More.

    • Instant Pot Triple Chocolate Cheesecake
    • Raspberry Mousse Chocolate Cheesecake
    • White Chocolate Peppermint Bark Cheesecake
    • Instant Pot Pumpkin Cheesecake

    As an Amazon Associate and member of other affiliate programs, I earn from qualifying purchases. What that means is if you click on one of our affiliate links, they may toss a few pennies our way for a commission.

    Friday Food Reads - 100 Cookies

    March 12, 2021

    100 Cookies Cover Image

    Anyone that spent years embarking on cookie making as a teenager is ok in my book and I want to hear what they have to say and know. Welcome to another week of Friday Food Reads. This week we have the pleasure of reading 100 Cookies by Sarah Kieffer.

    Friday Food Reads Cover Image

    About the Author

    Sarah Kieffer has had a love for cookies since her teenage years. Daily after school, she would come home, head to the kitchen, and start working her way through her family's three cookbooks. Daily she tried recipes, experimented, and made dubious notes on the outcome and processes. Life finally got in the way, aka... needed a job to pay for college, and she eventually stopped baking.

    During college Sarah found herself working in a coffee house as a barista. Over time the owners taught her to make cookies and bars, coffee cakes, scones, and muffins. This definitely developed her baking skills, but more importantly her confidence. And that passion in her heart for baking was once again awoken.

    Recipe For Success

    The book does a great job of giving you an overview of ingredients, techniques, and equipment that are important for successful baking. One of my favorites is general baking advice:

    • Read the recipe - First and foremost, it is vital to read the entire recipe before beginning.
    • Mise en place - Have everything ready and measured out before starting the baking.
    • Use your senses - Your eyes, nose, hands and palate are all important tools in the kitchen.

    How The Book is Broken Down

    100 Cookies starts out with general baking advice and works its way through the importance of measuring by weight. General cookie baking tips and a complete section regarding ingredients and equipment. The chapters are broken out by cookie type. For instance the classics, brownies & blondies, fruit extravaganza, and her well known pan banging technique.

    100 Cookies Rocky Road Cookies

    I made two recipes from this book. I caught a great sale on almonds at the market, so my main goal of the cookie was that it had to have almonds. This Rocky Road Cookie was the first recipe I made.

    Rocky Road Cookies

    I was curious about her pan banging technique and it fit the bill for having almonds. What I loved about these cookies was the crisp outer edge and the center remained soft and full of chocolate. When I read the recipe, my first thought was good grief...high maintenance cookies. Basically what happens is that every few minutes you need to open the oven door, lift the side of the pan and let it drop back on the rack. That drop is what forms the ridge on the outer edges of the cookies. I'll say I wasn't excited about the extra work, but once the cookie cooled and I tried it, I loved the texture and the mix of crisp and soft all-in-one cookie.

    After some more research, it seems I'm not the only one that is a fan of this. Just check out a few hashtags on social media to see the craze of #panbanging or #bangonapan.

    Orange Almond Shortbread Cookies on Plate

    Orange Almond Shortbread Cookies

    Now there is much debate about how to mix the dough for shortbread. The first method is to cream the butter and sugar, then incorporate the remaining ingredients. The second method is to mix the butter into the flour towards the end of the mixing. This recipe is created by utilizing the second method, but she says either way could work.

    This cookie was simple, but bursting with orange flavor. It was a crisp and golden cookie. I will say with this one, use your senses and check for doneness a bit before the recipe states. There is nothing good about overcooked shortbread.

    The recipe uses orange liqueur as an orange flavor enhancer. It was a nice add-in and really helped with the orange flavor shining through.

    Should You Buy 100 Cookies?

    So with all that, should you buy the book? I'd say yes, it was a great read. Lots of tips to ensure success. I love the way she guides you through each recipe step by step. The recipes are reliable and crave-worthy. Her love for a cookie is clearly felt throughout the entire book. And I have to say, I'm really looking forward to trying her chocolate chip cookies that sparked the pan banging craze.

    Hardcover Cook Box

    Hardcover Cook

    I came upon this book from a cookbook club that I thought I would give a try. The club is called Hardcover Cook. It's a quarterly cookbook subscription, but what I love is that in addition to the book they also select ingredients to include in the packages. You can see from the image above what I got included in the shipment. Great things like cinnamon, dried fruits, cacao nibs, cacao powder. And there was a great writeup included to help you decide which recipes to use these ingredients in. (I wish I kept the box this came in for you to see as well, it's really well designed and a great package that would make an awesome gift for someone)

    Not only do they do a baking theme, they also have an omnivore box, a vegetarian box, and an essentials box. I know I should give the vegetarian box a try, but the omnivore box is calling my name. If you signup with this link, you save five dollars on your subscription box and so do I. That's a win-win in my book.

    Other Friday Food Reads

    We do Friday Food Reads two times a month. If you liked this one, here are a few others you may also like on our website.

    • The Good Book of Southern Baking
    • Now For Something Sweet
    • Homemade Decadence
    • Dessert Person - A Cookbook Review

    As an Amazon Associate and member of other affiliate programs, I earn from qualifying purchases. What that means is if you click on one of our affiliate links, they may toss a few pennies our way for a commission.

    How To Make Lemon Curd

    March 10, 2021

    Lemon Curd Cover image

    The best lemon curd is the one you make yourself. It's sweet and tart all at the same time. I love it on toast, scones, pancakes, quick breads, cupcakes, ice cream or many of my other favorite desserts. I'm excited to show you how to make lemon curd. This easy recipe is made with just five ingredients and about 15 minutes of time.

    Lemon Curd in a jar

    I guarantee that once you make this homemade lemon curd you won't be tempted to pick up a jar at the store again because it's so easy and tastes even better! You only need five simple ingredients: Fresh lemons, lemon zest, butter, sugar, egg yolks. It’s smooth, creamy in texture with a bright, sweet flavor perfect for using in desserts or simply spreading on a biscuit for breakfast.

    What Is Lemon Curd?

    Lemon curd is a sweet and tangy spread. It's the perfect addition to any dessert, but it can also be used as a topping for toast or even in yogurt! The main ingredient of this lemon curd recipe is lemons, which are mixed with butter, sugar, lemon zest, and egg yolks. Then cook until thick enough. This dessert is best served chilled from the fridge.

    If you are like me, you've been waiting all day for that dessert and now it's time to enjoy. You dish out a bowl of creamy, sweet goodness with just the right amount of tartness from your favorite lemons. I am such a lemon lover and this curd is just a perfect snack for me. The butter, sugar and egg yolks make this tangy treat even more perfect as they melt on your tongue.

    What Do You Need To Make This Recipe?

    Ingredients for Lemon Curd

    Lemons - Use good quality, fresh lemons. No bottled lemon juice for this recipe. Since we are using the zest I usually go with organic. If that's a budget bust, just be sure to wash the lemon well.

    Egg Yolks - These are used to thicken the curd. Once you separate the eggs, you can freeze the whites and use later for other recipes.

    Butter - This also helps to thicken the curd. It gives it a great texture and loads of flavor.

    Sugar - Only use white granulated sugar. Anything else will not give you the desired outcome.

    How to Make The Lemon Curd

    Process Collage for steps to make lemon curd
    • In a small to medium saucepan add ½ butter, ½ sugar, lemon juice and zest. Bring to a light boil over medium low heat, you want it to just start bubbling.
    • In a second bowl mix ½ sugar and egg yolks.
    • We are going to temper the eggs. Tempering eggs is simply a process of slowly warming the eggs before introducing them to your recipe so they mix smoothly. Pour ⅓ of the saucepan ingredients into the egg yolk and sugar combination. Whisk until incorporated.
    • Pour all that back into the saucepan. Bring to a light boil again. When the curd is thick enough you should be able to run your finger down the back of a spoon and it holds.
    • Add the remaining ½ butter and stir.
    • Strain through a fine-mesh strainer.
    • Cover with plastic wrap and cool in the refrigerator.
    Tempering the Eggs

    Steps to Tempering Eggs

    Tempering eggs is very easy and with just a tiny bit of work you will have the perfect base for your curd. The goal of this is to slowly bring up the temperature of the eggs without scrambling them.

    • Bring your liquid to a boil
    • Whisk the eggs and sugar in a second bowl
    • Slowly add the hot liquid to the eggs a little bit at a time and whisk consistently
    Pot of Lemon Curd with Whisk

    Pro Tips For Making the Lemon Curd

    • Always strain your lemon curd.
    • Because we are not using a double boiler for the recipe keep the heat low and be patient. You don't want to scramble the eggs.
    • Don't stop whisking until you take it off the heat.
    • Once you transfer the lemon curd to a bowl, place a sheet of plastic wrap directly on top of the curd. This keeps a skin from forming.
    • Don't use bottled lemon juice. It will just ruin the tangy citrus flavors.
    • Egg yolks are what gives the curd richness, skip the whites.
    Lemon Curd on a plate

    Lemon Facts

    Did you know that California and Arizona produces most of the United States lemon crops. When I lived in California I had 4 lemon trees. My neighbors loved me!

    The most common types of lemons are the Meyer lemons, Eureka lemons, and Lisbon lemons.

    You can find more lemon facts from That's It Fruit. I love knowing this kind of information about my favorite foods.

    FAQ

    My curd didn't set, what happened?

    Did you cook it long enough? It should come to a boil, coat the back of a spoon and thicken. Then let it cool, it will thicken up more in the cooling process.

    How do you store it?

    Store in an airtight container in the refrigerator. This will last for almost two weeks.

    Can you freeze lemon curd?

    Yes you can, lemon curd freezes! I freeze it in an airtight container like a plastic jar and when I'm ready to use it, it take it out and put in the refrigerator over night. You can keep this in the freezer for up to three months.

    How do I fix my lemon curd if it didn't thicken?

    This is an easy fix. Once you have let it cool and determined it is still too thin, warm it back up over low heat and add a small amount of cornstarch slurry. (Cornstarch and cold water mixed together) Continue cooking until it thickens up.

    Looking For More Recipes?

    Subscribe to my free newsletter to get new baking tips in your inbox monthly. Find me sharing new recipes and tips on Pinterest, Instagram, or Facebook.

    Lemon Curd Recipe Card

    How To Make Lemon Curd

    Lemon curd is a sweet and tangy spread that is made with only five ingredients and a bold burst of lemon flavor. It's the perfect addition to any dessert.
    5 from 5 votes
    Print Pin Rate
    Course: Breakfast, Dessert
    Cuisine: American
    Prep Time: 5 minutes minutes
    Cook Time: 10 minutes minutes
    Total Time: 15 minutes minutes
    Servings: 16 Servings
    Calories: 126kcal
    Author: Serena

    Ingredients

    • 149 grams Unsalted Butter
    • 128 grams Sugar
    • 135 mL Lemon Juice
    • 9 grams Lemon Zest
    • 128 grams Egg Yolks (About 7 eggs)

    Instructions

    • Combine 75 grams of the butter, 64 grams of the sugar, the lemon zest and lemon juice in a small saucepan and bring to a boil over medium heat. Stir gently to dissolve the sugar.
    • In a bowl combine egg yolks with the remaining sugar. Temper by slowly adding about ⅓ of the lemon juice mixture. Stirring constantly with a whisk. Return the tempered egg mixture back to the saucepan. Continue cooking, whisking constantly until mixture returns to a boil.
    • Stir in the remaining butter until the butter melts.
    • Strain the curd through a fine-mesh strainer. Cover with plastic wrap placed directly on the surface of the curd.
    • Store the curd, covered in the refrigerator.

    Notes

    Recipe Source: SerenaLissy.com 
    This website provides approximate nutrition information for convenience and as a courtesy only. Nutrition data is gathered primarily from the USDA Food Composition Database via Spoonacular API, whenever available, or otherwise other online calculators. While this information can be helpful in estimating the nutritional information of a recipe, it is by no means accurate or official and is not evaluated by the Food and Drug Administration.
    All images and content are copyright protected. Do not use our images without prior permission.

    Nutrition

    Serving: 1Serving | Calories: 126kcal | Carbohydrates: 9g | Protein: 1g | Fat: 10g | Saturated Fat: 6g | Polyunsaturated Fat: 1g | Monounsaturated Fat: 3g | Trans Fat: 1g | Cholesterol: 107mg | Sodium: 5mg | Potassium: 21mg | Fiber: 1g | Sugar: 8g | Vitamin A: 349IU | Vitamin C: 4mg | Calcium: 14mg | Iron: 1mg
    Tried this Recipe? Pin it Today!Mention @SerenaLissy or tag #serenalissy!

    As an Amazon Associate and member of other affiliate programs, I earn from qualifying purchases. What that means is if you click on one of our affiliate links, they may toss a few pennies our way for a commission.

    Top 10 Baking Tips for the Perfect Cake

    March 8, 2021

    Baking Tips for the Perfect Cake

    The smell of freshly baked cakes baking in the oven is a treat for your senses. Baking can be both an enjoyable and relaxing hobby, but it doesn't have to be difficult or complicated. Follow these top ten baking tips to help you bake that perfect cake every time!

    Baking Ingredients

    1. Read the Recipe

    I can't say this enough. Read the recipe. This is my number one baking tip for the perfect cake. You should read the recipe and make sure nothing seems wrong with it. Also you want to make sure you have a general idea of what you should be doing before you start baking. Sometimes things are time sensitive and if you don't know what you need to do next, you could easily make a mistake. For best results, I take the approach that I always follow the recipe on the first time. The following times, I feel a little bit freer to make adjustments.

    Baking Tip #1 For the Perfect Cake, Lady reading a recipe

    2. Allow Your Oven to Fully Preheat

    Your cake needs to bake at the correct temperature for the correct amount of time to ensure success. Also, don't open the oven door while baking. This lets cool air in and could drastically change the oven temperature. I recommend owning an oven thermometer. Just because your oven says it's 350° doesn't mean it always is. It's best to be proactive and just keep an oven thermometer on the rack and you will always know your oven temperature. Also set a timer for your bake time so you know a general idea of the time it should be done. Remember this is just a guide, always check your cake 5-10 minutes before it should be done, just incase your oven temperature is not cooperating.

    3. Measure Properly

    Baking Tip #3 for the perfect Cake, Kitchen Scale

    Baking is not very forgiving. If there was ever a time in your life when accurate measurements were super important it's when you are baking a cake. I am suggesting you have and use a kitchen scale. Dry ingredients, flour specifically, tops the list for one of the most common incorrectly measured ingredients for many people due to the way we scoop out flour. When you use a scale and know exactly how many grams or ounces you need, it doesn't matter if your cup of flour is big or small. If your cake comes out dry, it's likely because there was too much flour in the recipe.

    4. Room Temperature Ingredients

    The perfect mixture of ingredients can be difficult to achieve. The temperature of the ingredients is one thing that we often forget about when making a dish, but it is an important step in ensuring the end product turns out great. If a recipe calls for room temperature ingredients be sure to use those. This will usually apply to ingredients like eggs, sour cream, butter, or dairy. Room temperature ingredients bond together easier, helping to prevent you from overmixing. Butter should sit on the counter for 2 hours before using it to get it to room temperature.

    5. Use the Correct Flour

    Not all flours are created equally. Go with what the recipe calls for. Once you become a bit more acquainted with what each flour does and their purposes then you could start making changes. We use a lot of AP flour and also cake flour. But you have to take into account the other ingredients when determining which to use. Swans Down is one of my favorite cake flours. It's a low protein flour and that soft tender texture rolls right into your cake. My favorite all purpose flour will always be King Arthur AP flour. Their product is great, and I love all the things the company does.

    6. Don't Overmix Your Batter

    This is a really important tip for baking the perfect cake. When you make a cake, it’s important to mix the batter just until all of the ingredients are combined. If you over-mix the batter, your cake will be tough and chewy because you deflate all the air and overdevelop the gluten. It doesn't matter how many other things you did correctly, if your batter is overmixed, you will know.

    7. Line Your Pans With Parchment Paper

    Trace the bottom of your cake pan onto parchment paper and cut it out. Lightly grease your pan and place the parchment paper in the pan. Then grease the parchment round as well. This should ensure that you are able to get your cake out of the pan once it's done. If you don't want to go through the effort of tracing and cutting, it's a good idea to pickup precut parchment rounds. Be sure to use the size of cake pans that the recipe is calling for. Sometimes you can get away with using smaller pans, just be sure to not overfill them.

    Yellow Bundt Cake

    8. Testing Your Cake For Doneness

    One of the easiest ways to test if your cake is done, is by using a toothpick. Stick a toothpick in the center of the cake, and if it comes out clean - then you know that your cake's done. Another option would be to press down lightly on it with your hand - if it bounces back when you let go; then you know that it's done. If you have left a tiny finger mark, there's still some time left before its ready!

    9. How to Cool Your Cake

    After smelling your cake baking for the entire time and you are now hungry, I'm sure you are wondering how long does it take for a cake to cool? Once your cake is done baking you need to allow for proper cool down time. I usually remove it from the pan about 30 minutes after baking and put it on a cooling rack. Then I let it sit until it is cool, which makes it more workable when you are ready to decorate. It does no good to rush it and attempt to decorate the cake. You will just melt your frosting or you will have messy crumbs all over the place.

    10. How Long Does Cake Last?

    Most cakes will stay fresh for three to four days before the moisture starts to get drawn out and it starts to dry out. A cake can last a little longer in the refrigerator if it is covered with frosting. That helps keep the moisture in. So the last thing on the list, but certainly not the least important is regarding storing your cake. Most cakes taste best at room temperature. If you make your cake ahead of time, bake it, cool it, then cover and store tightly at room temperature on your counter. I like to put the frosting on the day I am eating it. Now if your find that doesn't work with your schedule, go ahead and frost it.

    Baking Tips for Cake

    More Baking Tips

    If you would like to read about other baking tips we have quite a few writeups on the website to help you get that perfect cake.

    • Top 10 Baking Tips
    • Essential Baking Tools Every Baker Needs
    • A Baker's Guide to Chocolate
    • Best Essential Baking Pans to Stock In Your Kitchen

    As an Amazon Associate and member of other affiliate programs, I earn from qualifying purchases. What that means is if you click on one of our affiliate links, they may toss a few pennies our way for a commission.

    Friday Food Reads - The Good Book of Southern Baking

    February 26, 2021

    Good Book of Southern Baking Illustration

    Let me just start with...That biscuit on the cover... I think I missed a winner and will definitely be going back to that recipe. Welcome to another week of Friday Food Reads. This week we have the pleasure of reading The Good Book of Southern Baking by Kelly Fields.

    Friday Food Reads Cover Image

    About the Author

    Kelly Fields grew up in South Carolina with a long line of baking in her family. It seems everyone in town knew of the baking skills this family possessed and stopped by frequently for fresh baked goods. She worked in many bakeries before deciding it was time to go to culinary school after a restaurant she had been working at closed.

    Kelly's time in pastry school gave her a taste of the world outside Louisiana. But it was Hurricane Katrina that made her want to take advantage of every travel opportunity she could. The book only scratches the surface on Kelly's travels, but I'd love to see all those stamps in her passport.

    Travel and Food

    Her travels allowed her to learn hands on about seasonings and spices and different flavors that she would have never learned if she stayed home. There is something to be said for experiencing other flavors and how things are done compared to home. Now if you know any chefs, you know we can not live without our notebooks. Those little gold mines hold all our ideas and our recipes. Kelly lost all of hers in Hurricane Katrina. She slowly started to rebuild from memory but now has a new updated one with all her travel changes in it. This combination of old recipes with modern international twists is what made me want to read The Good Book of Southern Baking.

    Recipe for Success

    The book does a great job of giving you an overview of ingredients, techniques and equipment that are important for successful baking. One of my favorites is:

    "Delicious butter imparts a delicious butter flavor"

    I don't know how many times a day I say this, bake with ingredients you really want to eat.

    How the Book is Broken Down

    The chapters are broken down into categories. For instance, quick breads, cookies and bars, puddings and custards, cakes. You get the idea. There is also lots of photography which I'm a fan of. I always like to know what I'm striving for in the end.

    Banana Bread on Cutting Board

    Good Book of Southern Baking Banana Bread

    I made two recipes from the book. We always go with two, just in case we hate one, I try to be fair. The first recipe was Banana Bread. Now this is where I got to a part of the book I hated. I know Kelly is a chef and has worked in multiple restaurants and is a culinary school grad. So why in the heck would she write a book without actually weighing the ingredients, which I know is what she does every day of her life. I'm preaching to the choir here, but all cups are not created equal. So once I climbed off my podium, I setout to start baking.

    The banana bread made two loaves. Or you could have done one loaf and a dozen muffins. She stressed multiple times the need to have room temperature ingredients to prevent the batter from breaking. All in all it was a nice banana bread with a shelf life of about 7 days, even though she said 4. I also believe it would have frozen well, although she didn't mention that in the recipe.

    Krinkle Cookies on cutting board

    Dark Chocolate Espresso Crinkle Cookies

    The second recipe we tried was the Dark Chocolate Espresso Crinkle Cookies. Now I'm not going to lie, I have a serious love for Crinkle Cookies. When I worked at America's Test Kitchen I was there for the development of their Crinkle Cookies. It took about a month of daily Crinkle Cookie tests. Yes...every darn day. One would think I'd be over those cookies, but I just love them more and more. So my expectations are high when I see a recipe for these cookies.

    Now I'll just hop back on my podium for one more minute to talk about weighing ingredients. How many of you have a ⅓ teaspoon at home? Well I don't either. But the recipe calls for ⅔ teaspoon baking powder.

    I'm also going to say, this recipe is "high maintenance." But the final product was worth it. I'll just tell you it involved multiple steps in the fridge/freezer over a few days before being able to bake. I do love that this dough is freezable. Because just before writing this post, I pulled out a log of dough and baked up my last dozen of these little beauties.

    The recipe called for 2 tablespoons of espresso, but with using such a dark chocolate in the recipe, you really don't get the espresso flavor. I think that was a missed opportunity.

    Should You Buy the Good Book of Southern Baking?

    So with all that, would I continue to use The Good Book of Southern Baking? Yes, most definitely. I would just advise you that a few of the ingredients are not always easy to find. And be prepared for multiple steps or even days to complete some things. But I have to say, I'm really looking forward to trying the biscuits. And if you want to know more about Kelly or her restaurant you can find her website here.

    Other Friday Food Reads

    Now if you are looking for other Friday Food Reads you can find a few here. We do two of these a month so the list is always being updated.

    Now for Something Sweet

    Homemade Decadence

    Ovenly

    As an Amazon Associate and member of other affiliate programs, I earn from qualifying purchases. What that means is if you click on one of our affiliate links they may toss a few pennies our way for a commission.

    Understanding Aperture in Photography

    February 24, 2021

    Aperture example of donuts and flowers in background

    What is Aperture?

    Aperture is the round opening in your camera lens that you make larger or smaller to control how much light you want to let enter your camera. Clear as mud, right? Basically, make it larger and you will let more light in. This results in a brighter image. Make it smaller, and you will let in less light, making the image darker.

    Aperture example of donuts and flowers in background

    What is an F Stop?

    The size of the aperture is measured with F numbers, for F Stops. Different lenses will have different ranges. What is confusing with this is the higher the number, the smaller opening in your lens. The lower the number, the larger opening of the lens. I'm sure it made sense to someone at some time.

    We should think of this like the pupil in your eye. When our eyes need more light, our pupils open up. When there is too much light, our pupils get smaller to reduce the amount of light.

    How is Aperture Measured?

    • Aperture is measured by the size of the hole opening in the lens
    • It is measured in F Stops
    • The size of the hole will tell you the F Stop
    • The bigger the hole, the more light comes in, resulting in a smaller F Stop
    • The smaller the hole, the less light comes in, resulting in a larger F Stop
    F Stops of Camera Lens

    What's the Point of Aperture?

    • The primary use of aperture is to control the depth of field. How much of your image do you want to be in focus. This opens up a ton of creative possibilities.
    • By controlling the amount of light, you also control the amount of items in focus.
    • When you are photographing with a deep (wide) depth of field, this means a greater amount of the image will be in focus.
    • A shallow depth of field, on the other hand, is when only a part of your image is in focus. Backgrounds and often foregrounds appear as a soft blur.

    Example of Aperture Controlling your Depth of Field

    Example of F1.4 - F6.3 F Stops

    You can see with the F1.4 image, the flowers are completely blurry in the background. As we start to work our way up through the F stops the flowers start to become more in focus.

    F10 - F16 Example of F Stops

    By the time we get to F16, everything in the image is in focus.

    The Beauty of the Blur

    F1.4 Example

    In this image, the F stop is 1.4. By choosing a low number (a wide aperture) this enables us to focus on one element in the image. The donuts. They are the hero so why not give them some love. This blur allows us to create beautiful, dreamy images. It also helps make things seem less cluttered, by drawing the viewers attention straight to the donut.

    The Power of the Details

    F16 Example of Donuts and flowers in focus

    We took this image with an F Stop of 16. By choosing the higher F number (a narrow aperture) you keep more details in focus in the image. This is great to use if every item in the image has a specific purpose.

    Mastering the Fundamentals

    Now go shoot something. Take some time and have some fun experimenting. You have the creative control, you just need to practice using it. Slowly build your understanding by practice. I'm challenging you to try this every day. With something simple, like a piece of fruit. Be creative and try to think about what your camera sees. Spend some time studying the results and what can you do differently tomorrow?

    Five Day Food Photography Challenge

    Want to take your food photography up a notch?

    I’ve been photographing food for years and have learned some tricks of the trade. Join me on this 5-day challenge where you’ll learn how to master the art of food photography, one bite at a time. You’ll be amazed by what you can do with just a few simple tips. You will learn how to make your photos pop with color, texture, and lighting. Sign up today!

    Canon also has a basic write-up about Aperture if you are seeking out more information. And if you are looking for more basic information about photography you can find quite a few on our site and on our social media.

    • Do your images have traction with your target?
    • The Cookie Stack: A Different Look and Feel
    • Food Styling: Making it Real

    Tips For Taking Great Food Photos

    February 17, 2021

    Photograph of eggs, a whisk and some milk

    So you are a foodie and love to take pictures of what you eat. Food can be finicky, difficult to capture in all its glory -- the colors, the smells, the textures, and tastes. Do your pictures always end up looking a little bland? Don't worry; you don't need years of practice to perfect your food photography skills to get stunning shots. There are all sorts of secrets to take stunning food photos, and I'll share some of my favorite tips for taking great food photos.

    Photograph of eggs, a whisk and some milk

    Tips For Taking Better Food Photos

    Food photography is all about the light! Learn about the light, and you will learn how to take better food photos. There is nothing else as important. First, one must learn and become aware of where the light is coming from, how intense it is, and how it hits the food. Then once you know that, the trick is to work with it and know how to make it work for you.

    • Start with natural light. I always have everyone learn with natural light first. Turn off your overhead lights, that ceiling bulb is a much different temperature than your window light. Don't use the flash in your camera, ever.
    • Find your best light source. Just because you cook in the kitchen doesn't mean you have to photograph there. Learn where your light comes in at your house. As food bloggers many times we are chasing light all through the house. I have a wall of glass at my house that faces east. In the morning with some diffusion it is gorgeous once the sun gets over that wall. But by the afternoon, it's a pretty flat image. I have a large south facing window upstairs that works really well.

    Pick Pretty Food to Photograph

    Not all food and photographs are created equal. I can't believe I'm saying this, but yes, some food is plain ugly. Not only is it ugly, but it's also hard to photograph. So when first starting out, I recommend staying away from the tricky stuff. You know what I mean, brown gravy, a roast, curries.

    Food with color and vibrancy is great to use when starting out. Think of something as simple as fruit. You get oranges, yellows, reds, pinks, and they have so much texture.

    Lamb Tagine in a bowl

    Start with White

    I always recommend starting with white. A great food blogger can work with just a white plate and make that meal look gorgeous. Starting with white lets you focus on the food without the distraction of colors and props. Eventually, you can work your way up to different color palettes and adding props.

    Empty White Plates with White Background

    Color Matters

    I think the second-best tip for taking better food photos is to learn to use a color wheel. Adobe has a great free color wheel system. Once you know how to work with complementary colors, your life will change. We use the color wheel to decide simple things like what to put on our plates. You could use it even when you try to choose props that go on the table to be included in the photograph. It's a great practice to get into the habit of using your color wheel.

    Color Wheel

    Other Photography Equipment

    Reflectors and Diffusers:

    I mostly use inexpensive foam boards to bounce light back onto the plate. We use the white ones to bounce light back and reduce shadows. We use the black ones to bring out more shadows. You can buy these most anyplace nowadays. All craft stores will have them and even the larger shopping chains like Target. I always buy the large ones then cut a few down to smaller sizes. Sometimes the large size works perfectly. Other times you may be in tight places and have a smaller working space.

    To diffuse some window light, you can easily use a sheer white curtain to cover the window. You could also use an inexpensive shower curtain. Or go to your favorite fabric store and have them cut a few yards for you of sheer white fabric. I tape these over the window when the light is harsh.

    Tripod:

    I know...I know... Tripods get a bad rap. I, like others, love the freedom of movement with hand holding my camera. But I've learned that my tripod gives me much greater control over my settings. And let's talk about tack sharp versus a tiny bit of blur. No one wants a blurry anything after all the effort you put into getting the photograph all set up. I'm a fan of Manfrotto. I've had my Manfrotto for over 10 years. A good one is an investment, but given the life of it, I've easily gotten my money's worth.

    We also like to do a lot of overhead shots. Where are my flat lay people? You know who you are. For this setup, you are going to need an arm for the tripod. We also use Manfrotto for this. I love shooting overhead, and this setup works well.

    Well, there you have it, our basic tips for taking great food photos. If you have gotten a great image or learned a few new things, please share on Instagram and tag us #SerenasSweetAcademy. I'm always excited to see what you are doing.

    Five Day Food Photography Challenge

    Want to take your food photography up a notch?

    I’ve been photographing food for years and have learned some tricks of the trade. Join me on this 5-day challenge where you’ll learn how to master the art of food photography, one bite at a time. You’ll be amazed by what you can do with just a few simple tips. You will learn how to make your photos pop with color, texture, and lighting. Sign up today!

    If you are looking for other photo or baking tips, please take a look through our website. We have plenty.

    • Understanding Aperture in Photography
    • Food Styling: Making it Real
    • Food Photography: 5 Ways to Create Texture

    As an Amazon Associate and member of other affiliate programs, I earn from qualifying purchases. What that means is if you click on one of our affiliate links, they may toss a few pennies our way for a commission.

    Top 10 Baking Tips

    February 15, 2021

    Baking Ingredient tips

    We all love a good slice of cake, but have you ever wondered how it's made? Well, it's time to dust off your mixing bowls and start baking in your kitchen. I want to teach you what I've learned from my years as a baker. These top 10 baking tips are designed to help you become a better and more confident baker.

    Baking Ingredient tips

    Top 10 Baking Tips

    • Confidence is key! Stop saying "Oh I can't bake." Well of course you can't with that attitude! It's time to show your mixer who is boss. My pastry instructor at Le Cordon Bleu use to tell me "You are in charge of the rolling pin!" Now get back to it, and go make that rectangle of dough! I listed this as number one of the top 10 baking tips for a reason. Confidence is so important, not only for professional bakers, but for the home baker as well.
    • Read the recipe. This is such an important step. Before you even start grabbing things or getting stuff from the cupboard, read the recipe and make sure you have the ingredients the recipe calls for. People make mistakes, sometimes ingredients are missing in the instructions, etc. Make sure you know what you are doing before jumping into the recipe. If you are a beginner baker this is especially important since you don't have much experience to draw from.
    • Do the research. This is so important now a days. There are so many recipes on the internet, and I'd like to say all of them are great, but that's not always the case. Read the reviews, lots of times people have great baking tips or other great options if they find something didn't work.
    • Use top quality ingredients and mise en place. You can't expect a great product by using bad ingredients. We use chocolate A LOT. And we almost 100% of the time use Valrhona. Yes, it's expensive, but it's damn good and always yields a great tasting product. Next, use a kitchen scale and weigh all your ingredients. Have them out and ready to use before starting any baking process.
    • Make accurate measurements. What's that old saying? Measure twice, cut once! The same thing goes for baking. If you want a moist cake don't guess how much flour, get out your scale and weigh it. Baking is a science, and for the best results, accuracy is key.
    • Ensure you have correct oven temperature. Always have an oven thermometer in your oven. You want to ensure the oven temperature shown on the oven dial is the same as the temperature on the thermometer. Calibrate your oven if they are always off. I listed this in the top 10 baking tips because even if you do everything else correctly, if your temperature is off, your creation is doomed to fail.
    • Preheat the oven. Unless otherwise instructed always preheat your oven and make sure it is at the proper temperature before using it.
    • Use correct pan sizes. Try to always use the type of pan specified in the recipe. Recipes are usually created to yield a specific amount and changing cake pan sizes will alter the baking time and temperature needed. And place your pans in the center of the oven when cooking.
    • Have a do it right attitude & practice. Always remember, how you do things some of the time, is how you do things all the time. Baking requires accuracy. Use your practice and time to build great baking habits. Put in the hard work up front and you will enjoy years of baking.
    • Have fun! Continue to practice as often as you can. "Learn from your mistakes! Be fearless and above all, have fun." ~Julia Child
    Basic Baking Tips to use an oven

    Other Baking Resources

    If you are looking for more top baking tips and resources you can find a few here. We have a great list of essential baking tools to get you started. Also we have a bakers guide to chocolate if you have any ingredients questions. We are continuing to add to our baking resources weekly, so keep checking if you don't see what you are looking for. Or even better, ask the question in the comments.

    As an Amazon Associate and member of other affiliate programs, I earn from qualifying purchases. What that means is if you click on one of our affiliate links, they may toss a few pennies our way for a commission.

    Lemon Poppy Seed Bundt Cake

    February 13, 2021

    Lemon Poppy Seed Bundt Cake Completed on Plate

    If you are looking for a quick dessert that is "bright and sunny," this Lemon Poppy Seed Bundt Cake is a great way to brighten up someone's day. This recipe calls for fresh lemon juice and zest because it makes such a difference in the flavor.

    Lemon Poppy Seed Bundt Cake Completed on Plate

    Lemon Poppy Seed Bundt Cake

    This cake is pretty much a coffee cake, just cooked in a Bundt pan. It's not your typical coffee cake, it has a wonderfully tart flavor thanks to being moistened with a lemon simple syrup to enhance the flavor of the lemons. The glaze also includes lemon juice, which makes it even more flavorful. It sweetens it up with its citrusy tanginess that complements most everything. You may wish to leave off the glaze if you want a different taste but I find that adding this extra pop is well worth it.

    Recipe Ingredients

    Ingredients for Lemon Poppy Seed Bundt Cake
    • Butter - Helps make the cake fluffy
    • Sugar - Sweetens the batter
    • Vanilla Extract - Use the best you have, gives the cake a nice flavor
    • Eggs - Use these at room temperature in the recipe
    • Lemon Juice & Zest - I recommend using fresh squeezed juice for this, and since you are using zest, I'd also recommend organic lemons
    • Sour Cream - If you don't have this, you could substitute with plain Greek yogurt
    • AP Flour (King Arthur) - We love this brand and use it all the time. I wrote the recipes out in grams, but this would be the equivalent of 4 cups of flour
    • Baking Soda & Powder - Helps the cake rise
    • Poppy Seeds - You can leave these out if you don't have, you could also substitute in chia, hemp or flax seeds for these.

    How to Make Lemon Poppy Seed Bundt Cake

    Mixing Wet Ingredients in Kitchen Aid

    It's not always easy to make a cake. In fact, some say it can be downright tricky. The art of making the perfect cake starts with the mixing process and that is where so many go wrong. Overmixing can lead to the cake being dense and tough instead of light and fluffy.

    We are going to use the creaming method to minimize the gluten development. It's a simple approach to mixing cake ingredients.

    First we combine the butter and sugar in the mixing bowl. With the paddle attachment we mix until fluffy on medium speed. We then add the eggs one at a time. Once fully incorporated, we add the remaining liquid ingredients and mix until smooth.

    Mixing Dry Ingredients in Kitchen Aid

    Next we combine all the dry ingredients into one bowl, and slowly add that to the mixer bowl until combined. Don't over mix. It's at this point once the flour gets wet we start activating the gluten.

    How to Tell When it's Done

    Lemon Poppy Seed Batter in Pan

    Every oven works differently. My 350 degrees may not be the same as your 350 degrees, although it should be close. Toothpicks definitely make telling if this Bundt cake is done a whole lot easier. Use a clean toothpick and poke it in as far as you can in the fattest part of the cake. If it comes out clean, your cake is done. If it comes out with some batter still on it, you need to keep cooking for a little while longer. At this point I start checking about every 2 minutes until the toothpick comes out clean.

    Tips for Making the Best Lemon Poppy Seed Bundt Cake

    Lemon Poppy Seed Bundt Cake On Plate with lemons
    • Don't overmix your batter.
    • Make sure your Bundt pan is sprayed with cooking oil. Don't miss the crevices or you will struggle getting your cake out.
    • The recipe should only fill about ⅔ of the pan. Otherwise the cake will rise and cook with rounded edges and will sit uneven once you remove it.
    • If you notice cake is starting to brown in the oven, loosely tent foil over it to prevent more browning than necessary.
    • Give your cake time to cool before removing from the pan, at least 10 minutes. As the cake cools it slowly releases itself from the sides of the pan.
    • Before glazing, put a piece of parchment paper or foil underneath to catch the drips so you don't have a mess once done.
    • Don't store this in the refrigerator, it just dries it out. Keep it in a covered cake plate on the counter.
    • If you want to freeze it, go ahead, but do it without the glaze. Then when you are ready to eat it, just make a batch of the glaze.

    This Bundt cake is a delightfully refreshing treat that will instantly brighten up your day. The moist, rich and buttery flavor of the cake combined with the tartness of lemon juice in both the syrup and glaze work together to create an unforgettable taste sensation. If you love Bundt cakes we have a few options you could try on the site, but one of my favorites is this Sweet Potato Bundt Cake.

    Looking For More Recipes?

    Subscribe to my free newsletter to get new baking tips in your inbox monthly. Find me sharing new recipes and tips on Pinterest, Instagram, or Facebook.

    Lemon Poppy Seed Bundt Cake

    Lemon Poppy Seed Bundt Cake

    The moist, rich and buttery flavor of this cake combined with the tartness of the lemon juice in both the syrup and glaze work together to create an unforgettable taste sensation that you won't want to stop eating!
    5 from 5 votes
    Print Pin Rate
    Course: Breakfast, Dessert
    Cuisine: American
    Prep Time: 12 minutes minutes
    Cook Time: 50 minutes minutes
    Total Time: 1 hour hour 2 minutes minutes
    Servings: 8 Servings
    Calories: 853kcal
    Author: Serena

    Ingredients

    • 226 grams Unsalted Butter (1 cup)
    • 250 grams Sugar (1 ¼ cup)
    • 7 milliliter Vanilla Extract (1 teaspoon)
    • 3 eggs Large Eggs Room Temperature
    • 70 milliliter Lemon Juice (⅓ cup)
    • 220 grams Sour Cream (¾ cup)
    • 480 grams AP Flour - King Arthur (4 cups)
    • 8 grams Baking Soda (1 ¼ teaspoon)
    • 5 grams Baking Powder (1 ¼ teaspoon)
    • 24 grams Poppy Seeds (2 tablespoons)
    • 6 grams Lemon Zest (3 tablespoons)

    Simple Syrup

    • 100 grams Sugar (½ cup)
    • 100 milliliter Lemon Juice (½ cup)

    Lemon Glaze

    • 114 grams Powdered Sugar (1 cup)
    • 26 milliliter Lemon Juice (2 tablespoons)

    Instructions

    • Preheat oven to 350 Fahrenheit. Prepare a standard size Bundt pan by spraying with non-stick cooking spray.
    • Cream the butter and sugar in a large mixing bowl. Add the eggs one at a time and mix. Then the vanilla, lemon juice, and sour cream and mix until smooth.
    • Combine the flour, baking soda, baking powder, poppy seeds and lemon zest in a separate bowl. Add dry ingredients slowly to the wet ingredients and mix until smooth.
    • Transfer the cake batter into the prepared Bundt pan. Place it in the preheated oven for 40 - 50 minutes or until golden brown on top and a toothpick inserted into the center comes out clean.
    • Once removed from oven, cool for 10 - 15 minutes in pan then flip out onto a wire rack to cool the rest of the way.

    Simple Syrup

    • Combine the sugar and lemon juice in a small sauce pan and heat until the sugar has dissolved. Remove from heat and let cool a bit
    • Use a pastry brush and brush on the syrup onto the cake and let finish cooling

    Lemon Glaze

    • Combine the powdered sugar and lemon juice in a small bowl. Mix until combined and drizzle onto the bundt cake right before serving.

    Notes

    Recipe Source: SerenaLissy.com
    This website provides approximate nutrition information for convenience and as a courtesy only. Nutrition data is gathered primarily from the USDA Food Composition Database via Spoonacular API, whenever available, or otherwise other online calculators. While this information can be helpful in estimating the nutritional information of a recipe, it is by no means accurate or official and is not evaluated by the Food and Drug Administration.
     
    All images and content are copyright protected. Do not use our images without prior permission.

    Nutrition

    Serving: 1Serving | Calories: 853kcal | Carbohydrates: 108g | Protein: 19g | Fat: 39g | Saturated Fat: 21g | Polyunsaturated Fat: 4g | Monounsaturated Fat: 11g | Trans Fat: 1g | Cholesterol: 414mg | Sodium: 497mg | Potassium: 286mg | Fiber: 2g | Sugar: 60g | Vitamin A: 1371IU | Vitamin C: 11mg | Calcium: 180mg | Iron: 5mg
    Tried this Recipe? Pin it Today!Mention @SerenaLissy or tag #serenalissy!

    As an Amazon Associate and member of other affiliate programs, I earn from qualifying purchases. What that means is if you click on one of our affiliate links they may toss a few pennies our way for a commission.

    Lemon Poppy Seed Bundt Cake


    Lemon Poppy Seed Bundt Cake


    Friday Food Reads - Now For Something Sweet

    February 12, 2021

    Friday Food Reads Cover

    Now for Something Sweet is the result of an intensive search to uncover, curate and celebrate the very best, most cherished sweet recipes perfected from Jewish homes across Australia and the world. The book will both entertain you day after day with its tasty recipes and make you feel good inside when reading their heartwarming stories.

    This is the fourth book for the Monday Morning Cookbook Club for these ladies. The other three are best sellers and I have no doubt this one will add to the the list and probably make quite a few best baking cookbooks for 2020 lists. In addition to being a hit among their readers; it's already received rave reviews from other avid bakers across the country who were lucky enough to grab a copy of the book. It's undeniable that cooking for many is a passionate endeavor, and this book will be an invaluable resource in the kitchen. Whether you're looking to create something new or want some guidance on your next big dinner party, this book has got you covered!

    From the book:

    "We are always dreaming of soft, airy, pale chiffon cake. Thinking about chocolate swirled, glossy yeasted babke. Imagining flaky, chew, jammy strudel. Baking almond studded, citrus glazed Dutch buns. Frying golden, syrup drenched coiled fishuelas. Biting into hot, sugared jam filled donuts. Eating crisp shelled, marshmallowy vanilla flecked meringues. Feasting on sticky, steaming, sweet butterscotch pudding and sharing it all with abundance and love." - Monday Morning Cooking Club

    Brownies on a plate

    The range of recipes in this book goes from straightforward and simple to a bit more elaborate. Simply stated, it will be easy for you to find something that suits your taste. I tested two recipes from this book, and LOVED both of them and I can't wait to try others. The first was a flourless brownie. Now I'm going to start with GLUTEN FREE FOR THE WIN! I almost never make gluten free items, but now I know these are one of my favorites so they are worth the tiny bit of extra effort.

    They utilized potato flour and almond meal in this recipe. The brownie turned out moist and fudgy not cakey, which is a result of using superfine sugar instead of granulated. The granulated sugar doesn't dissolve completely like superfine sugar. So if you are looking for a new brownie recipe to love, this might be it! And again, did I mention one of the best baking cookbooks of 2020? This book has a lot to offer in that category.

    Baking tips:

    • Superfine sugar leads to moist and fudgy brownies.
    • Use the best chocolate you can afford to use. We used Valrhona chocolate in our brownies.
    • Carefully monitor your baking time. Nothing good about a burnt brownie.
    • Almond meal is not the same thing as almond flour (but it's easy to make at home)

    The second recipe we made was the Almond Buttercrunch. When the recipe developer states that she gave up sweets during the entire pregnancy of her child and this is the first thing she wanted right after the birth. You know it's going to be good. And boy oh boy is it!

    Almond buttercrunch on plate on table

    This recipe was so simple to make and you probably already have all the ingredients in your pantry. I don't think it took more than 30 minutes from start to finish. The biggest challenge was waiting two hours for it to firm and set once done cooking. And if I were misbehaving and just eating all I wanted to, I could have polished off the entire amount in 30 minutes!

    Reasons I love the book:

    All recipes in this book were easy to follow and clearly written. They have lots of tips throughout the book to help you along. Things like "How to Sugar" that walked you through the complete caramel making process. Caramel can be scary and intimidating, and I always love it when the books provide a little bit of support and help before you start. This reason alone, is one of the main reasons so many books don't make it to best baking cookbook category for me. It's a simple piece to add into the book, but so many don't do it.

    If you find yourself picking up a copy of the book, please share and let us know what you are baking! If you would like to read other Friday Food Reads you can find our writeup on Ovenly, Homemade Decadence and 100 Cookies, all were great books.

    Disclaimer: this post contains affiliate links, which means that if you purchase an item after clicking on the link, Amazon will toss a few pennies my way. This is at no extra cost to you, and as always, all opinions and recommendations are my own.


    Now For Something Sweet Cookbook Review


    Essential Baking Tools Every Baker Needs

    February 4, 2021

    KitchenAid Stand Mixer on Counter

    If you are new to the world of baking, it can be a bit overwhelming. Maybe you want to learn how to bake cookies or make a chocolate cake for an upcoming birthday. You might not know where to start, but don't worry! Baking is easier than you think, and we have put together some basic baking essentials and tools that will help you get started and be on your way to becoming a better baker.

    Kitchen aid stand mixer on counter with butter and eggs

    My love of baking goes back most of my life, or at least I should say as long as I can remember. But as the years go by, there are more and more gadgets and baking tools. Some people think they might need every single cooking utensil, but all you really need are a few key items like measuring cups, mixing bowls, and spatulas, for starters. And while it's nice to have some variety with your pans, you don't always need them. The most important thing is finding what works best for you and not spending all your time looking around for other options when you already know what works for you. So with that being said, I understand which kitchen tools bakers need to really make life easier and which they can do without.

    Kitchen tools for baking

    1.Oven Thermometer

    What I use: Taylor Oven Thermometer I love to cook, but it can be a real pain when the oven turns out too cool or too hot. I've had many brand new ovens in my life, and not one has had a perfect temperature. And I'm betting more times than not; your oven temperature is slightly off as well. It's just the nature of the beast. My last oven from the factory was off by 50 degrees once installed at my house. Even after calibration, it is consistently 10 degrees different than what it should be. Let me just say there is nothing worse for baking than having an unreliable heat source. So always remember, the perfect oven is a myth. We put a lot of time into the prep of the recipe and money into the ingredients, and to have it ruined by incorrect temps is a very frustrating experience. This is a relatively inexpensive tool but worth its weight in gold!

    2. Kitchen Scale

    What I use: Amazon Basics Stainless Steel Kitchen Scale We use this because, in baking, precision is everything! I prefer to use grams instead of empirical measurements. Why? The reason for this is that a gram is always a gram, while a cup will vary. Think about all the ways you grab a cup of flour. Did you scoop and then use a straight edge to level the flour? Did you fluff the flour first, or was it packed down? Remember, precision is everything, which means that if you are off by just ⅛th of a cup or half a teaspoon of vanilla extract, it could spell disaster. And for even the tiniest of measurements, I will use this mini pocket scale. This is great for that pinch of something because sometimes the small quantity of powders doesn't even register on a regular kitchen scale. So we have both baking tools in our kitchen.

    3. Sheet Pans

    What I use: Nordic Ware Commercial Baker's Half Sheet Pan I can not even begin to count how many of these I have on hand. I love them and use them almost daily. This is the 12 x 17 inch size that should fit perfectly into your oven. I also have these lids designed just for the sheet pans. Now the lids aren't a necessity, just a luxury item. But one that is so worth investing in. Not only will these be your baking go-to pan, but they are great for cooking meats, fish, and vegetables.

    4. Cooling Racks

    What I use: Bakers Secret Cooling Rack Cookies and cakes deserve the best care possible. The bottom of your baked goods needs air to cool evenly and stop the cooking process. If you've ever left cookies or cakes on the sheet pan too long, and they got icky brown bottoms, that was probably because the bottom of your baking pan wasn't getting any air, resulting in overcooked baked goods or soggy bottoms. And no one wants that!

    5. Rolling Pin

    What I use: Wood Rolling Pin I will say rolling pins are a necessity. This is definitely one of those items that style will be a personal preference. I am a fan of using rolling pins that do not have handles. There are also many out there that are wood, marble, stainless and other materials. Again, personal preference. I know a rolling pin is an essential baking tool; how it looks is up to you.

    6. Whisks & Spatulas

    What I use: Oxo Whisks & Silicone Spatulas Many different kitchen utensils can be used for baking, but a spatula is one of the most versatile. It's useful for tasks as mundane as stirring and mixing to more advanced tasks like spreading frosting or even scraping down the sides of your mixing bowl. I think spatulas are one of those things that you will use every single time you bake something. Now for the whisks, I'm suggesting the OXO brand of whisks. They have multiple sizes, which makes it nice as you advance in the baking world. For just getting started, this size is perfect and will be a go-to for quite some time.

    7. Measuring Cups & Spoons

    What I use: OXO Measuring Cup and Spoon set is a great set to have. This set holds up well and gives you all the tools you need for your dry goods. I'd also have at least one liquid measuring cup. One will hold you over for quite a while, but sometimes it's nice to have larger sizes. One that holds up to a quart of liquid is definitely a luxury item but nice to have.

    8. Cookie Scoops

    What I use: OXO Good Grips Cookie Scoop This is another one of those multi-purpose tools for baking. This set comes in three sizes, and you will definitely use all three sizes. Think cookies, muffins, truffles... ice cream! Now the ice cream is where I mostly use the large scoop, and it's definitely a guilty pleasure.

    9. Hand Mixer

    What I use: KitchenAid 5-Speed Hand Mixer I got my first stand mixer many years ago as a gift to myself. I was really excited, and then I realized it's not the most useful tool in the kitchen when you are cooking for one or even two people. But, when making something small, or if you need to mix something for a minute, this is where the hand mixer reigns. It has become such an important part of my baking routine. Now, if you have it in the budget, I'd definitely say grab both. But if not, start with the hand mixer.

    10. Mixing Bowls

    What I use: Stackable Glass Mixing Bowls When I first started out, I got a set of metal mixing bowls. Which are still great to have, but I soon realized I couldn't put them in the microwave if I need to melt something quickly. So I added these glass mixing bowls to my collection. This is a great 10 piece set that gives you many options to work with in your day to day baking. You pretty much can't go wrong with most online choices, and there are plenty of them!

    11. Baking Pans & Baking Mat

    What I use: Fat Daddio's Round Cake Pans are a great starter set to have in any kitchen. This gives you a 10", 8", and a 6" baking pan, perfect for most needs. They also make a 9" x 13" sheet pan that is indispensable in your kitchen. I love this brand because they have the right amount of versatility to suit many cooking needs, from making delicious cakes to preparing savory dishes such as lasagna.

    What I use: Silpat NonStick Silicone Baking Mat Now parchment paper is great, but I really love these mats. It lays flat on the cookie sheet! Can I get a hallelujah! I use these almost every time I use a sheet pan. Every cookie I make is baked on top of one of these. It's also great for your savory dishes. I also roll dough onto them. I could go on and on about their uses. I probably own 10 of these, but I use them daily. Start with one, and you will soon see how much you love it, and then start adding it to your Christmas and birthday wish lists!

    12. Cooking Alarm & Thermometer

    What I use: ChefAlarm® Cooking Alarm Thermometer and Timer by Thermoworks. I use this almost every time I bake something. Either for the timer feature for baking or the thermometer to ensure my recipes are always just right no matter what type of dessert I create - whether cookie doughs and caramels that call for precise temperature or time ranges in their instructions. I love the easy-to-read digital readout on top with alert settings built into them, so there's never any guesswork involved whatsoever. This company has multiple thermometers, and this one is a great basic thermometer and timer.

    What are your favorite tools for baking? Please share in the comments, I always love hearing other ideas!

    More Baking Basics Posts:

    • A Bakers Guide to Chocolate
    • Top Ten Baking Tips
    • The Cocoa Process
    Essential Baking Tools


    We do not work with any of these brands in this post. But the links are affiliate links. Which means Amazon may give us a few pennies if you purchase one of the items. These tools are all things we utilize and love in the kitchen.

    • « Go to Previous Page
    • Go to page 1
    • Interim pages omitted …
    • Go to page 6
    • Go to page 7
    • Go to page 8
    • Go to page 9
    • Go to page 10
    • Interim pages omitted …
    • Go to page 17
    • Go to Next Page »

    Primary Sidebar

    Hi, I'm Serena!

    Join us and you will learn all sorts of creative techniques from baking to food photography that is easy enough for a novice to recreate at home, but look and taste like they were made by a seasoned pro.

    Get Inspired, Cook Confidently, Eat Well

    More about me →

    Ice Cream Recipes

    • Scoop of chocolate mint ice cream in bowl with ice cream cone
      No Churn Chocolate Mint Ice Cream
    • Bowl of key lime pie ice cream with a spoon
      No Churn Key Lime Pie Ice Cream
    • Apple Ice Cream in a waffle cup
      Apple Ice Cream
    • Chocolate Chunk Ice Cream In A Bowl
      Chocolate Chunk Ice Cream
    • Frozen Greek Yogurt from your Instant Pot
      Instant Pot Frozen Greek Yogurt
    • Avocado Ice Cram In a serving Bowl
      Easy Avocado Ice Cream Recipe

    Popular Recipes

    • Jamaican Sweet Potato Pudding
      Jamaican Sweet Potato Pudding
    • Peanut Butter Fudge Cups
      Peanut Butter Fudge Cups
    • Samoas on a plate
      Make at Home Samoas - Homemade Samoas: Girl Scout Cookies
    • Italian Chocoalte Walnut Cake
      Italian Chocolate Walnut Cake (Torta di Noci)

    Photography Challenge

    Master The Art of Food Photography

    Footer

    ↑ back to top

    About

    • Privacy Policy

    Newsletter

    • Sign Up! for emails and updates

    Contact

    • Contact

    As an Amazon Associate, I earn from qualifying purchases.

    Copyright © 2023 Serena Lissy