
• Skip to primary navigation
  • Skip to main content
  • Skip to primary sidebar
  • Home
  • Collaborate with us
  • Contact

Serena Lissy logo

  • Recipe Index
  • Privacy Policy
menu icon
go to homepage
  • Christmas
  • Recipes
  • Photography
  • About
    • Facebook
    • Instagram
    • Pinterest
  • search icon
    Homepage link
    • Christmas
    • Recipes
    • Photography
    • About
    • Facebook
    • Instagram
    • Pinterest
  • ×

    Serena Lissy » Recipes

    Blog

    Chocolate Cranberry Scones

    June 4, 2021

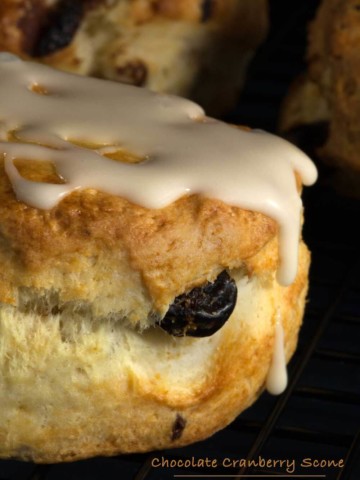
    Chocolate Cranberry Scones with dripping icing

    Chocolate Cranberry Scones are a delicious marriage of semi-sweet chocolate, tart cranberries and a citrusy orange glaze. Don't forget to freeze some of the dough so you can enjoy these any time the mood strikes!
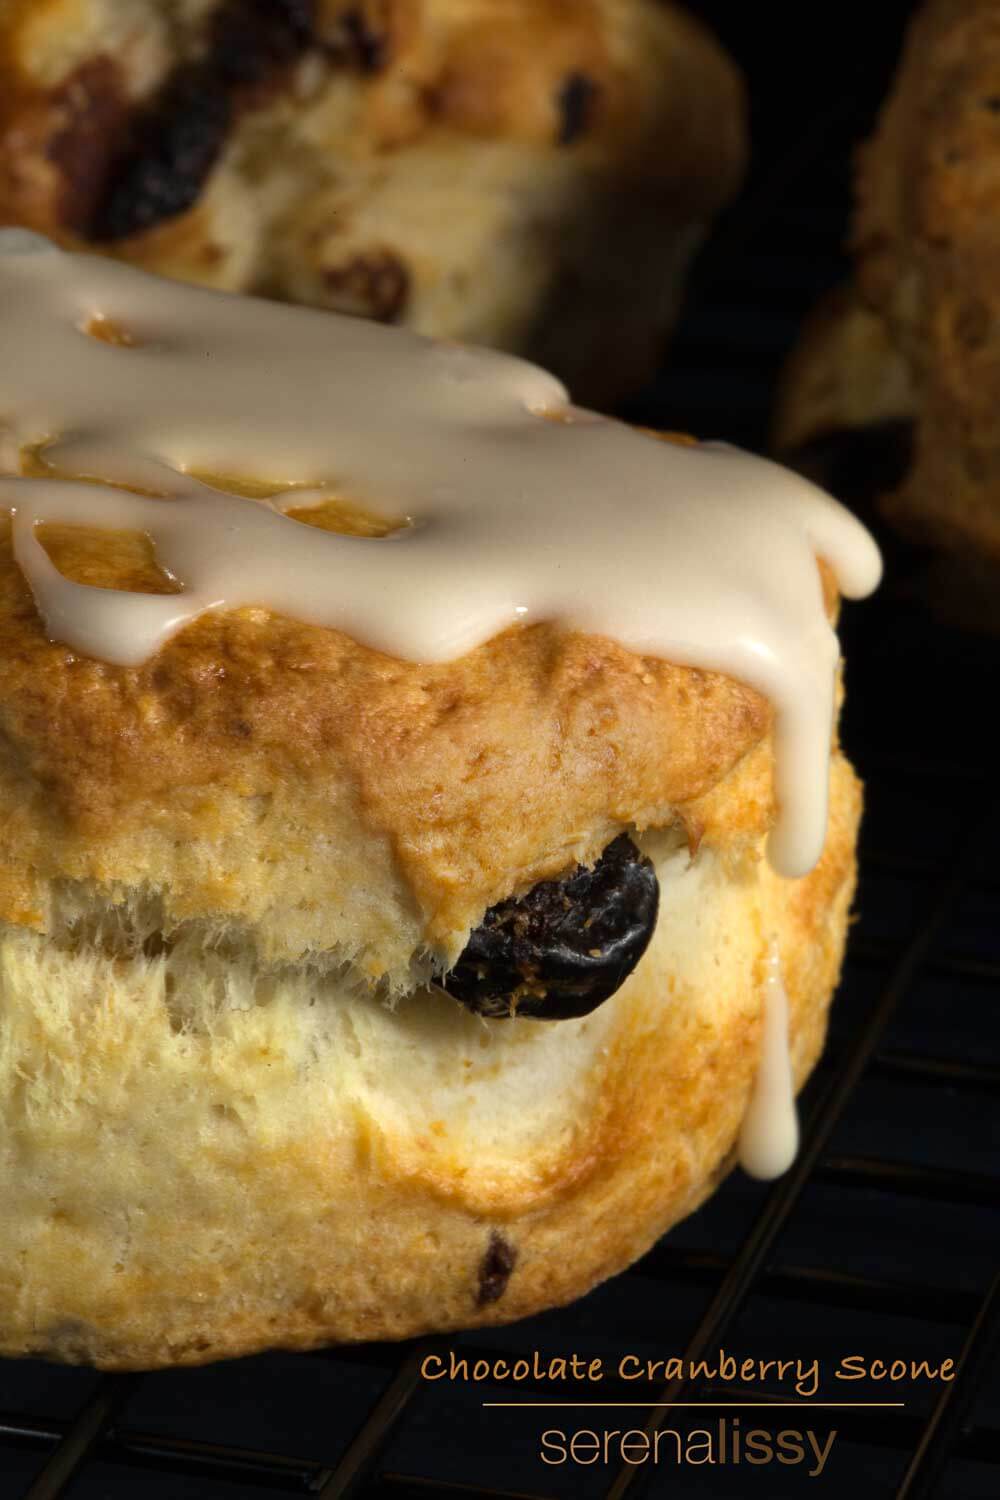
    Chocolate Cranberry Scones with dripping icing

    A Love Affair with Scones

    I've had a love affair with scones since pastry school when I worked at a teashop that made fresh scones daily: those savory, cheddar cheese, rosemary, flakey delicious pastries. Oh gosh, I want one right now! It was my breakfast every day before class. I would work at the tea shop as the baker from pre-open hours until about 9 am, then eat my employee breakfast and head to culinary school. It didn't take long for me to develop a love affair with those warm, buttery, flavorful scones. I miss the days of daily scones, so I decided to whip up these Chocolate Cranberry Scones.

    Ingredients in The Scones
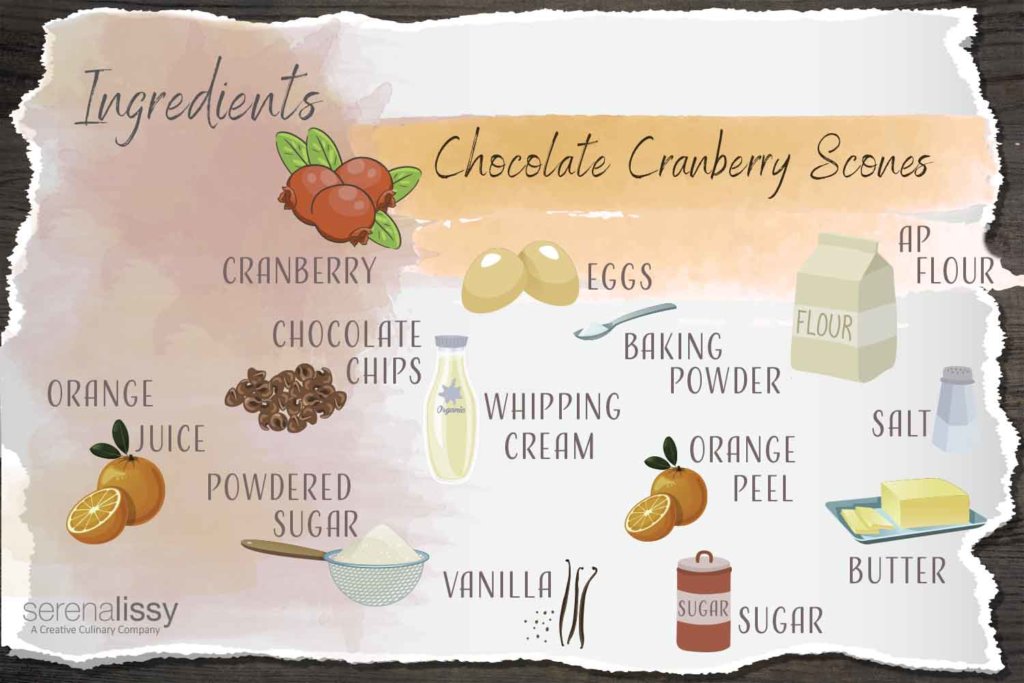
    Ingredients for Chocolate Cranberry Scones
    • All-purpose flour
    • Sugar
    • Baking powder
    • Salt
    • COLD butter
    • Eggs
    • Heavy whipping cream
    • Dried cranberries
    • Miniature semi-sweet chocolate chips
    • Orange peel
    • Powdered sugar
    • Orange juice
    • Vanilla

    The Key to Flakey Chocolate Cranberry Scones

    Before my teashop days, I had no appreciation for scones. I thought they were all dry, crumbly triangles. After testing a few recipes, I learned that the key to a great flakey scone is all in the butter. Cold butter. The colder, the better. I can't stress this enough. When the little crumbs of butter melt as the scones bake, they release steam and create little pockets of air. Making the scones airy and flakey on the inside while the outside remains crisp and crumbly. Think of it as little pockets of buttery goodness.

    How To Make Scones
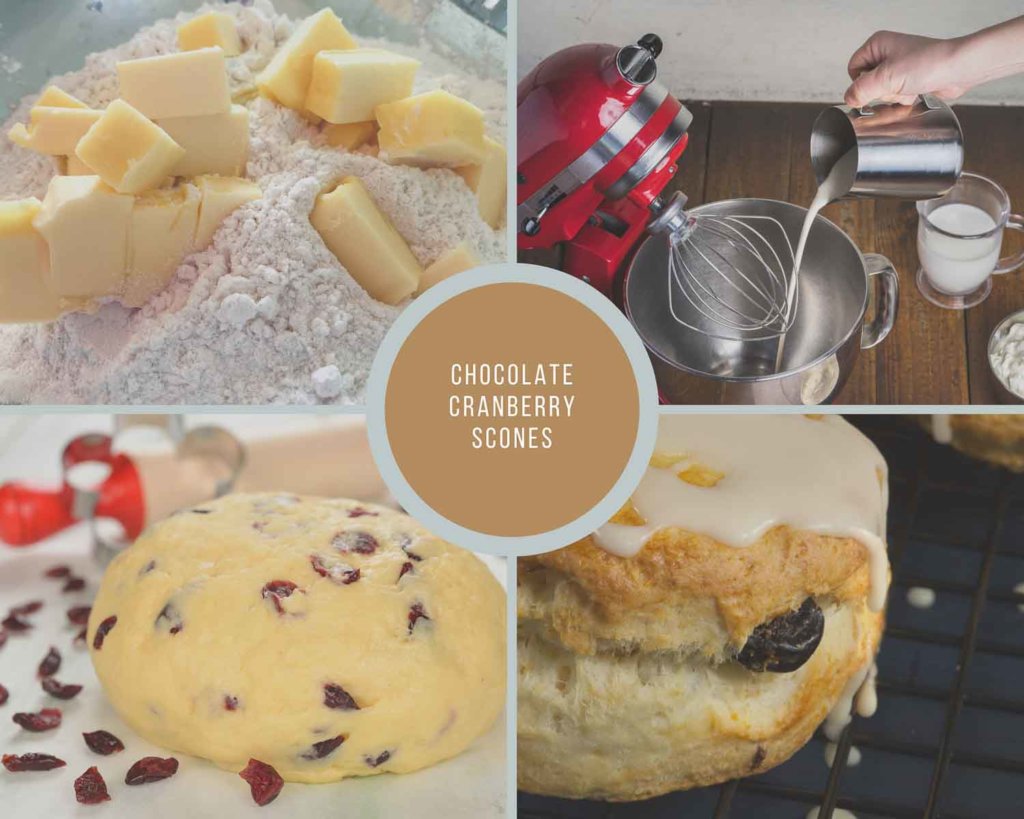
    Process Collage for Chocolate Cranberry Scones
    1. Make the Dough - Stir together flour, sugar, baking powder, and salt. Cut in the butter with a pastry blender. Combine eggs, heavy cream, cranberries, chocolate and orange peel and blend into the flour and butter mixture with a fork until just moistened.
    2. Knead and Freeze - Knead the dough on a lightly floured surface, divide, and roll into two 6-inch circles. Cut each circle into 6 wedges, brush with cream and freeze, uncovered on a baking sheet for 30 minutes.
    3. Bake - Bake at 400°F for 12-14 minutes.
    4. Glaze and Serve - Allow the scones to cool slightly while you prepare the glaze. Drizzle over the scones and serve.

    Kitchen Tips

    Do not overwork the dough. You just end up creating a tough scone. Remember, you don't want to melt the butter.

    Use a pastry blender. If you don't have one of these to cut in the dough, you could use a fork; it will just take a bit longer.

    Freeze the dough. I like to do this so I can have a chocolate cranberry scone whenever I like. Once it is rolled and shaped, I place them into a freezer bag. Then I can pull them out one at a time and bake. It's like the gift that just keeps giving. Freeze these for up to one month.

    Make the glaze last. I always have fresh oranges in the refrigerator. So this is just a combination of fresh-squeezed orange juice, a tiny bit of vanilla, and powdered sugar. The glaze will seep into the top of the scones, providing a sweet flavor that blends perfectly with the chocolate and cranberry. It will harden quickly, so make it when you are ready.
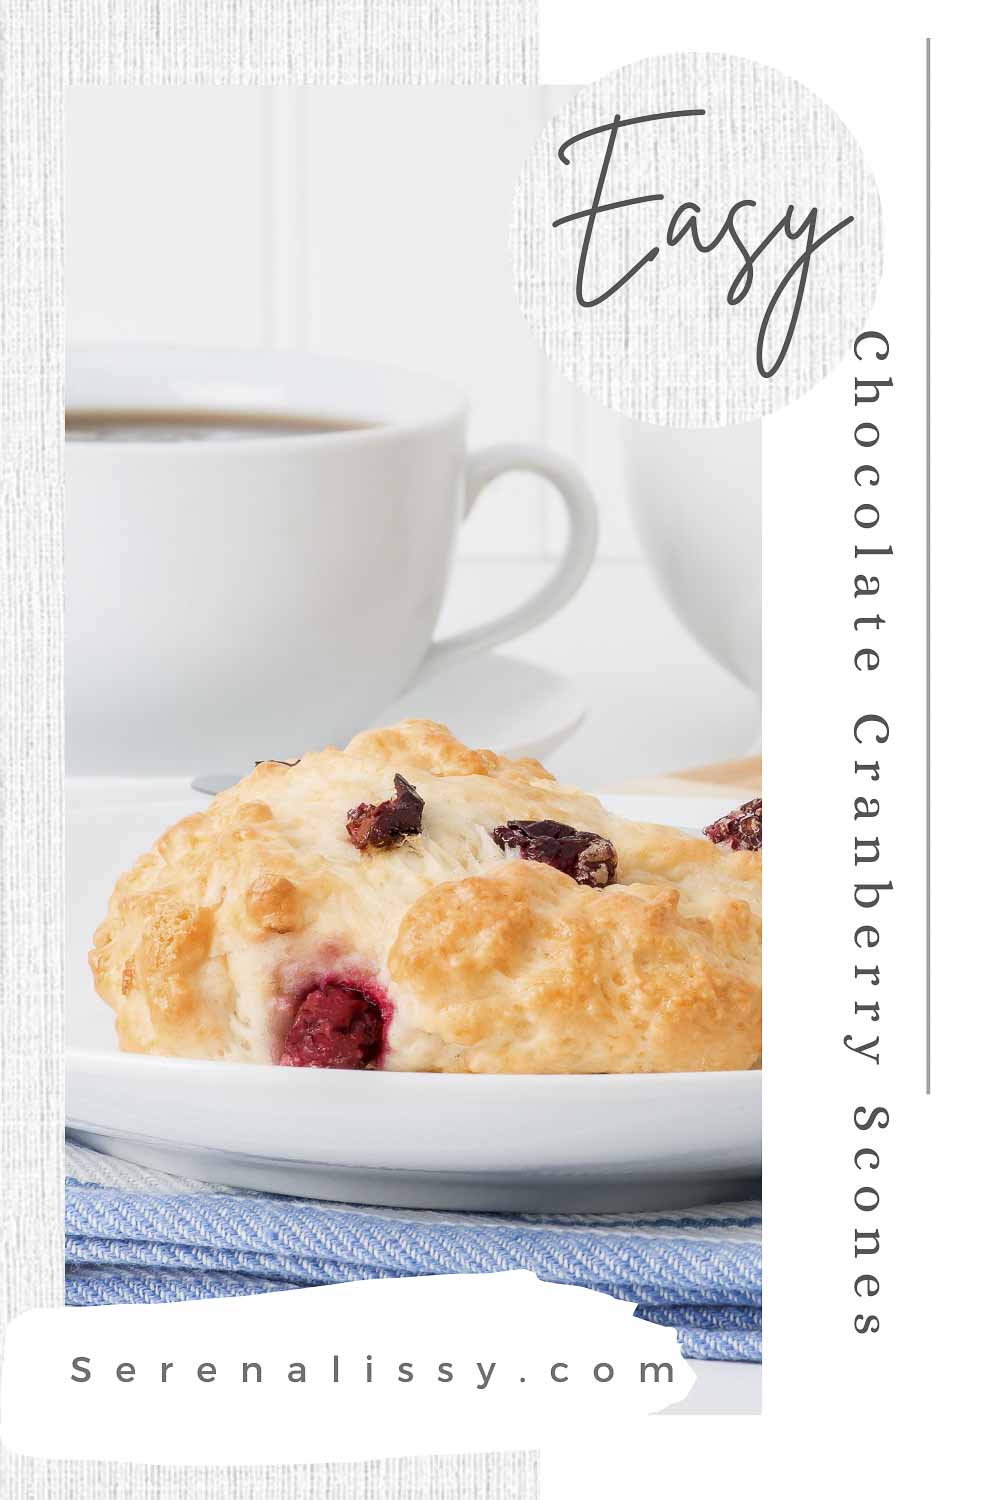
    Cranberry Scone on a plate with coffee in background

    Other Recipes You May Like:

    • Cherry Almond Scones
    • Cranberry Pear Spice Crisp
    • Chocolate Butter Cookies
    • Raspberry Mousse Chocolate Cheesecake
    • Nailed It! Key Lime Tarts

    I hope you like this as much as I do. Give the recipe a try and let us know how it goes.

    Looking For More Recipes?

    Subscribe to my free newsletter to get new baking tips in your inbox monthly. Find me sharing new recipes and tips on Pinterest, Instagram, or Facebook.
    Chocolate Cranberry Scones

    Chocolate Cranberry Scones

    Chocolate Cranberry Scones are a delicious marriage of semi-sweet chocolate, tart cranberries and a citrusy orange glaze. Perfect for breakfast, tea or snacking.
    5 from 7 votes
    Print Pin Rate
    Course: Breakfast, Snack
    Cuisine: American
    Prep Time: 12 minutes minutes
    Cook Time: 15 minutes minutes
    Freezing Time: 30 minutes minutes
    Total Time: 57 minutes minutes
    Servings: 12 Scones
    Calories: 289kcal
    Author: Serena

    Ingredients

    • 2 ½ cup all purpose flour
    • 2 tablespoons sugar
    • 1 tablespoon baking powder
    • ¼ teaspoon salt
    • ⅓ cup butter - Cold
    • 2 eggs lightly beaten
    • ¾ cup heavy whipping cream
    • ⅓ cup chopped dried cranberries
    • ¼ cup miniature semisweet chocolate chips
    • ¾ teaspoon finely shredded orange peel

    Orange Drizzle

    • 1 cup powdered sugar
    • 1 tablespoon orange juice
    • ¼ teaspoon vanilla

    Instructions

    • Preheat oven to 400° F.
    • In a large bowl stir together flour, sugar, baking powder, and salt. Using a pastry blender, cut in butter until the mixture looks like coarse crumbs. Do not overwork the dough.
    • In a medium bowl combine eggs, heavy cream, cranberries, chocolate and orange peel.
    • Add egg mixture to flour mixture. Stir using a fork until just moistened.
    • Turn dough onto lightly floured surface. Knead dough for 10 - 15 strokes until it is nearly smooth.
    • Divide dough in half. Roll each portion into a 6" circle. Cut each circle into six wedges. We used a cutter and just made round pieces instead of wedges.
    • Place on an ungreased baking sheet. Brush the wedges with additional cream. Place these in the freezer uncovered for about 30 minutes.
    • Remove from freezer and bake for 12 - 14 minutes until golden. Cool slightly and drizzle with glaze.

    Orange Glaze

    • In a small bowl stir together the powdered sugar, orange juice and vanilla. Stir in additional orange juice if needed to reach a drizzling consistency.

    Notes

    Recipe Source: SerenaLissy.com
    This website provides approximate nutrition information for convenience and as a courtesy only. Nutrition data is gathered primarily from the USDA Food Composition Database via Spoonacular API, whenever available, or otherwise other online calculators. While this information can be helpful in estimating the nutritional information of a recipe, it is by no means accurate or official and is not evaluated by the Food and Drug Administration.
     
    All images and content are copyright protected. Do not use our images without prior permission.

    Nutrition

    Serving: 1Scone | Calories: 289kcal | Carbohydrates: 38g | Protein: 4g | Fat: 14g | Saturated Fat: 8g | Polyunsaturated Fat: 1g | Monounsaturated Fat: 4g | Trans Fat: 1g | Cholesterol: 62mg | Sodium: 217mg | Potassium: 84mg | Fiber: 1g | Sugar: 16g | Vitamin A: 422IU | Vitamin C: 1mg | Calcium: 82mg | Iron: 2mg
    Tried this Recipe? Pin it Today!Mention @SerenaLissy or tag #serenalissy!

    As an Amazon Associate and member of other affiliate programs, I earn from qualifying purchases. What that means is if you click on one of our affiliate links, they may toss a few pennies our way for a commission.
    Food Photography and Styling on a Budget

    June 2, 2021

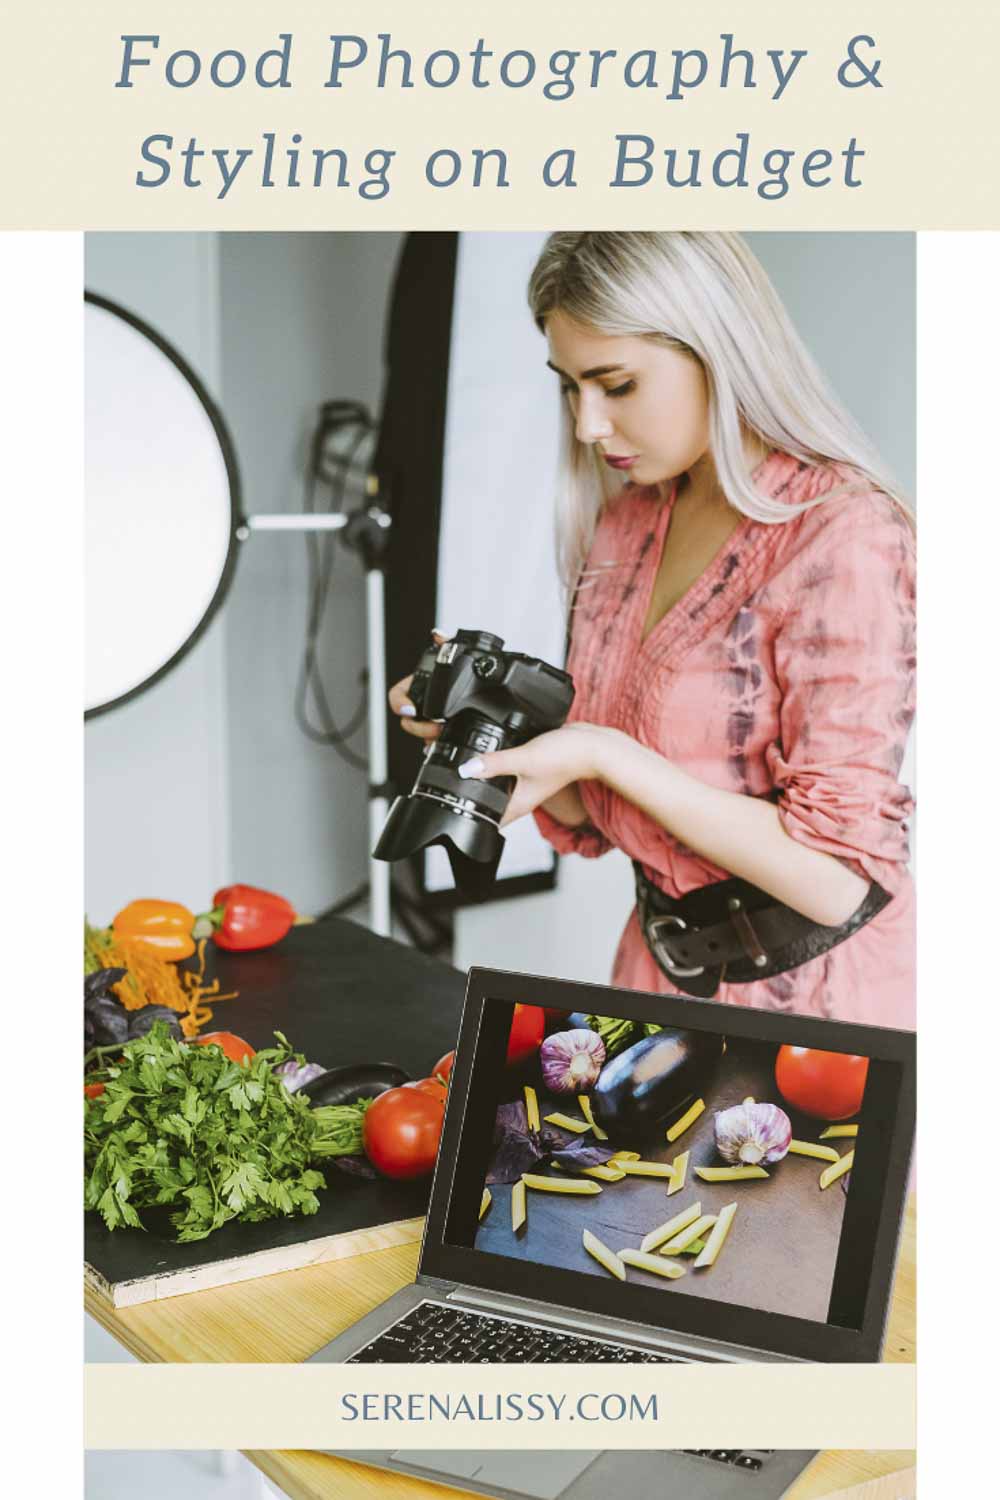
    Woman food photographer taking image of vegetables

    As a chef and baker, you might be overwhelmed the first time you pick up a camera and try to capture all of your hard work on film. After all, one photo of the final product can’t communicate how much work went into preparing the food. Some foods, while delicious, don’t look very appetizing either.

    Today, we’re taking a look at food styling. Food styling is the practice of making food look extremely presentable and photogenic. For large publications, a professional food stylist is hired for the specific act of making dishes look appealing and beautifully arranged. The photographs are taken by professional photographers.

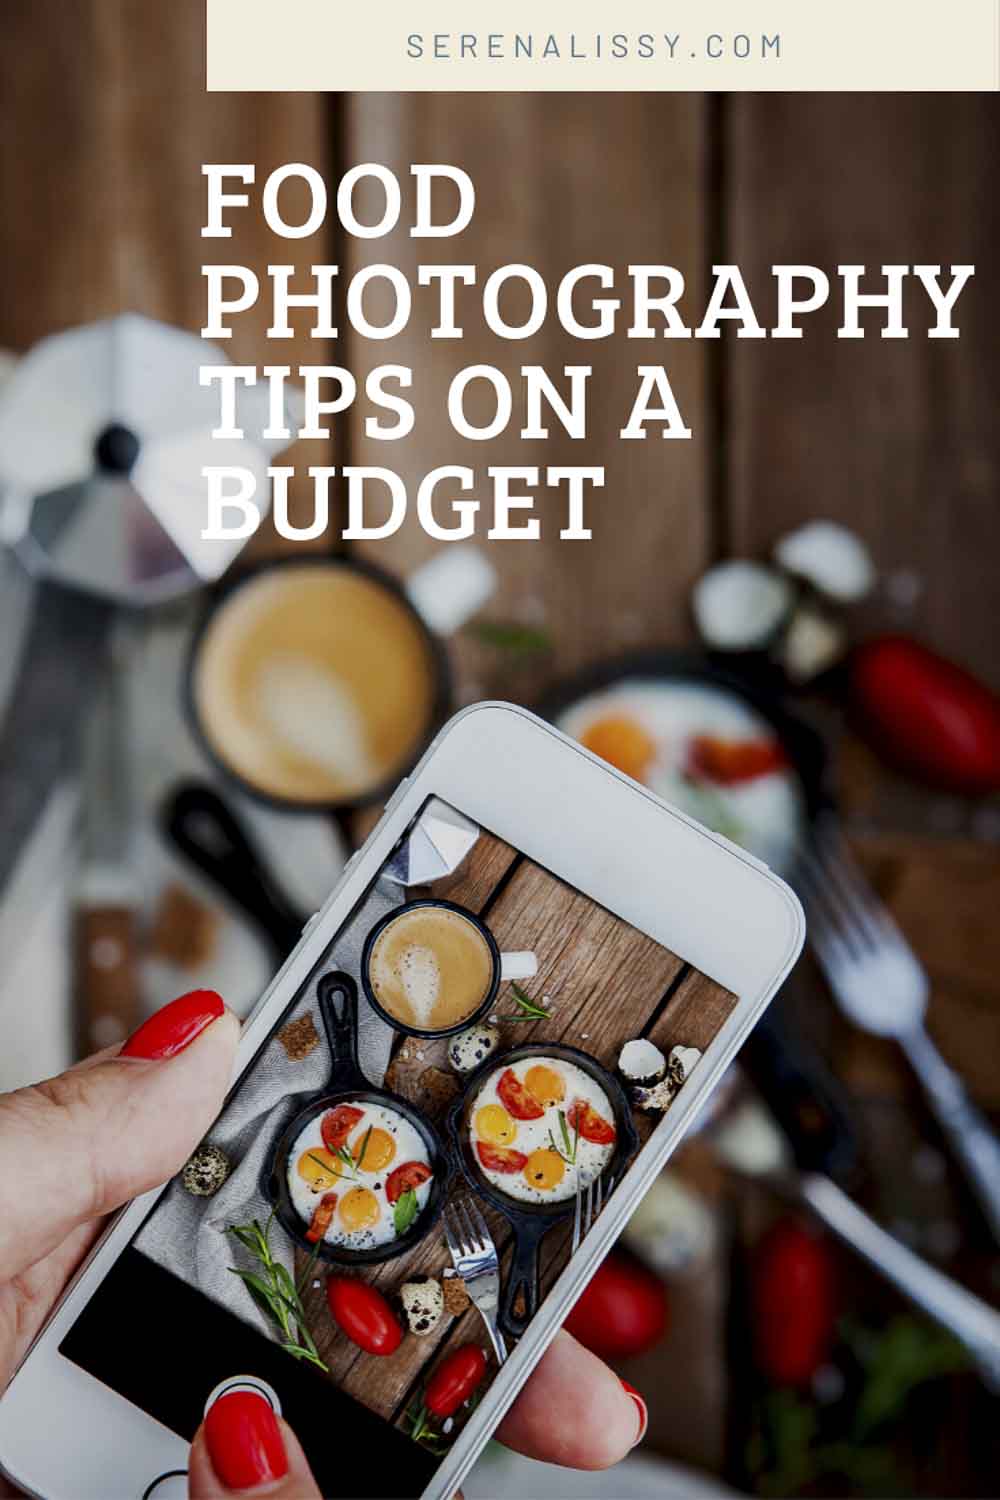
    Here on SerenaLissy.com, we explore the beautiful acts of both baking and conducting food photography. Here are our best tips for food styling on a budget as you take on the role of both chef and food photographer.

    Food Photography on a Budget

    Multi-Use Props and Backgrounds

    One of the most budget-friendly options (for any hobby) is to acquire props and tools that are multi-functional. After all, if you can use something more than once, its value increases exponentially. You’ll also be doing your part in keeping the world greener and environmentally friendly.

    One of the easiest multi-use props is a great background for your food props. Think of a milky-white tablecloth setting or even a simple square foot of lace. Beautiful yet simple backdrops like this are perfect for keeping the focus on your food items while offering a piece of elegance. We have a full storage box of just fabric pieces for our prop collection. Fabrics can be used in so many different ways in your styling.

    Artisan cutting boards, vintage forks and knives, and fake plants are also great options for multi-use props that are appropriate for almost any dish. Consider going to a Goodwill or other secondhand thrift stores near you for greater deals and to help upcycle.

    Etsy is a great place to find artisan pieces of work that are unique and able to be used long-term for beautiful photos. You can also find affordable food photography backgrounds on Etsy. I spent so much time on Pinterest looking for good ideas or the best way to use a prop. But now I spend much more time on Etsy for these things.

    Playing with Food Composition

    One of the best ways to style food on a budget is to play with food composition. After all, it costs nothing to shift the angle at which you take a photo. The most classic food composition shot is a top-down shot, commonly known as flat lays.

    These are taken directly above the food dish, with the lens and camera pointing straight down at the center of the food. This is a wonderful way to feature many different parts and ingredients of a dish. When going for a top-down shot, try to center your dish in the shot as it is an effortless way to spot asymmetrical parts of a dish. If you are curious to learn more about flat lay photography, take a look at our post on Ten Tips For Flat Lay Food Photography.

    The Diner’s View of a dish, by comparison, is shot from a sitting angle to emulate how one would see their food if it was sitting in front of them at a restaurant. By playing with different food compositions and angle shots, you can easily create a wide variety of food shots without spending another dollar.

    Plan Your Meals & Photoshoots Together

    According to The Core by DMA Solutions, a publication focused on fresh marketing solutions, food photography trends are starting to lean toward readers seeking relatable and less staged content.

    While food styling and photo composition still require a lot of work, viewers and readers still want to hear how the work you create relates to actual life. One of the best ways to do this with food photography is to plan your meals and photoshoots together.

    Do you write a vegan-centric dinner blog? Does your cookie or cake dessert seem to be out of place?

    You might be surprised to find that your viewers might appreciate a properly sectioned blog with additional topics/areas of food. Sure, it might not be the on-theme content you initially planned, but relating to your audience doesn’t always have to be themed.

    Do you prefer only to share "off-brand" content on secondary platforms? Sharing casual photoshoots of food that you eat on your Instagram stories, TikTok, or other social media content can help make your main content more relatable and even bring additional people to your site.

    Food Photography and styling on a Budget with iphone.

    Upcycling Food and Treats

    Another great way to approach food photography and food styling on a budget is to upcycle your food items. Much like being able to reuse non-food props and backgrounds, any food and treats that can be used more than once will save you time and money (and even offer you more treats to enjoy).

    Think of ingredients that can be enjoyed in different forms, preferably sequentially. For example, fresh bread can be enjoyed plain or as toast with honey, butter, or Nutella. But it can also be "upcycled" into croutons or bread pudding. I like to give my food double duty and get the most out of an ingredient.

    An entire loaf of bread or a whole baguette could be beautiful for a photoshoot. But it can be hard to eat the entire loaf of bread, particularly if you’re making more than one loaf at a time.

    However, by turning your bread into croutons, bread pudding, toast, and more, you can triple your food photography content while giving yourself the gift of food variety. It saves on food costs and lets you develop multiple creative ways to have your main subject appear in different photography sessions.

    Other food items you can "upcycle" include fruits, biscuits, spinach, and cheese. Organize a few recipes based on how processed/in-depth the steps are. You’ll be able to identify ingredients that can be used in more than one recipe before being fully eaten.

    Upcycling Example

    We have fruit trees that give us lots of lemons. We recently made about five different recipes that all used lemon curd or lemon curd butter that we made from a handful of lemons. And we kept developing recipes that were utilizing the original lemon curd. A little bit of planning and having a starting point of using lemons enabled us to make multiple blog posts. As a bonus, we avoided running to the grocery store to shop for multiple recipes. You can bet every recipe had multiple shots of lemons at different angles with different lighting—some on white plates, some on dessert plates, even some on the kitchen table.

    Varying The Light in Your Photographs

    I’ve used natural light mainly for my food photography for many years. I have to admit the decision has come with a few drawbacks. When it gets dark, and there is little or no sunlight left, you can only take photos if you use artificial lighting. Which means spending a few hundred dollars on set-ups. The decrease in quality from not relying solely on natural sun hitting your subject also concerns me. However, despite these disadvantages, I still prefer shooting in only daylight because that's what captures the truest representation of each dish and its unique moods depending upon the time of day and weather conditions. I love that I'm able to change the setup of the shot just by changing up the place in my house to photograph. An inexpensive white poster board from home depot or your local craft store does wonders to varying the light in your photographs. If you want light and bright, use white. If you want more dark and moody, then go with black to create shadows and get a deeper feeling in the photograph.

    Food Photography & Food Styling on a Budget

    When it comes to food styling on a budget, finding ways to reuse props, backgrounds, and even ingredients is a great first step to reducing your costs. If you reuse recognizable props and backgrounds, your photos can start to look consistent and help build your brand.

    Try using consistent colors in your props and backgrounds, based on your brand, and more. This will help you further if you choose to expand your content into different food or topics, as brand consistency can be recognized by your props and colors alone.

    And one last tip, this one is so obvious I forget about it sometimes. Don't forget to do your shopping at home first. There is no sense in buying new props if you already have something similar at home. We sometimes look through food magazines for inspiration, and then I look through the props I already own to see if I have something similar. Don't overlook the good stuff you already have. It's always a good idea to take a mental inventory of what you have at home. I'm all about the great finds, but if I already have something very similar taking up space, is it really a great find?

    Ready to learn even more about food photography and how to create beautiful photos? Consider reading our articles on Food Photography: Five Ways To Create Texture or Tips For Taking Great Food Photos.  Or even, Five Steps to Becoming a Great Food Photographer. If you are a cell phone photographer, then check out Six Tips for Food Photography With Your Smartphone.

    Five Day Food Photography Challenge

    Want to take your food photography up a notch?

    I’ve been photographing food for years and have learned some tricks of the trade. Join me on this 5-day challenge where you’ll learn how to master the art of food photography, one bite at a time. You’ll be amazed by what you can do with just a few simple tips. You will learn how to make your photos pop with color, texture, and lighting. Sign up today!

    Looking For More Recipes?

    Subscribe to my free newsletter to get new baking tips in your inbox monthly. Find me sharing new recipes and tips on Pinterest, Instagram, or Facebook.

    As an Amazon Associate and member of other affiliate programs, I earn from qualifying purchases. What that means is if you click on one of our affiliate links, they may toss a few pennies our way for a commission.
    Food Styling

    Raspberry Mousse Chocolate Cheesecake

    May 31, 2021

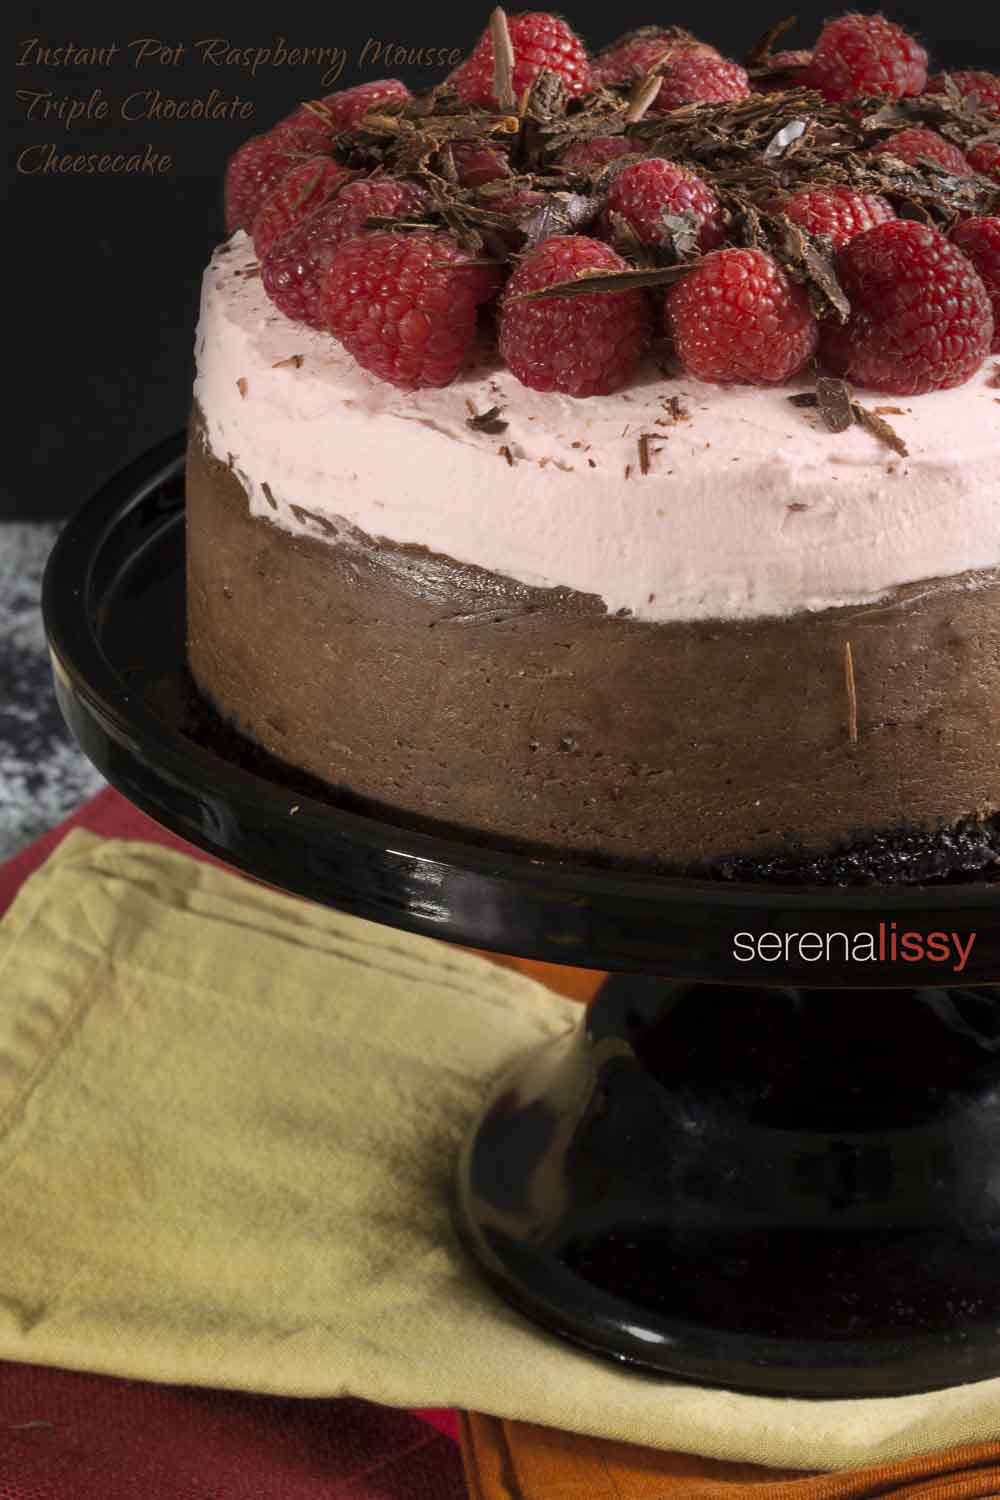
    Instant Pot Raspberry Mousse Chocolate Cheesecake

    Rich, creamy, cheesecake, topped with raspberry mousse; this is a serious chocolate fix, and it looks pretty darn impressive. This Instant Pot Chocolate Cheesecake with raspberry mousse is probably one of the most decadent desserts you are going to have this year!

    Instant Pot Raspberry Mousse Chocolate Cheesecake

    Decadent Instant Pot Chocolate Cheesecake At Home

    We don't usually do too much during Valentine's at my house, but a great dessert is a priority after dinner that night. It's always so crowded at restaurants and seems like prices constantly increase just for this night, so because of this, home is where I tend to hang out.

    When I came across some gorgeous fresh raspberries, I knew they would pair perfectly with chocolate cheesecake. And since pressure cooker cheesecake is so easy to make I knew it would be the perfect indulgent dessert for a Valentine's night in.

    Tips for Cooking Instant Pot Cheesecake

    This is a very simple Instant Pot cheesecake recipe and the cheesecake is dense and delicious.

    We use a  7-Inch Round Non-Stick Springform Pan for the recipe, but it's important to note that not all 7" pans are not created equal. We found some discrepancies between the height of the sides in different brands of springform pans. So, if you don't have the same brand as what I'm using, that's fine; just be sure to not overfill your pan, or cheesecake may overflow during cooking and run down the side of your pan. First, it's a mess when that happens, and second, it's a waste of darn good chocolate. So if you have a different model, just leave about a ½" from the top.

    We covered the top of the cheesecake with foil during the cooking process. A loose wrap is all you need. If you wrap the foil so tight that nothing gets in, you will need to extend the cooking time. If you have excess moisture after cooking, then just dab it with a napkin to remove the excess water.

    Raspberry Mousse Chocolate Cheesecake Ingredients

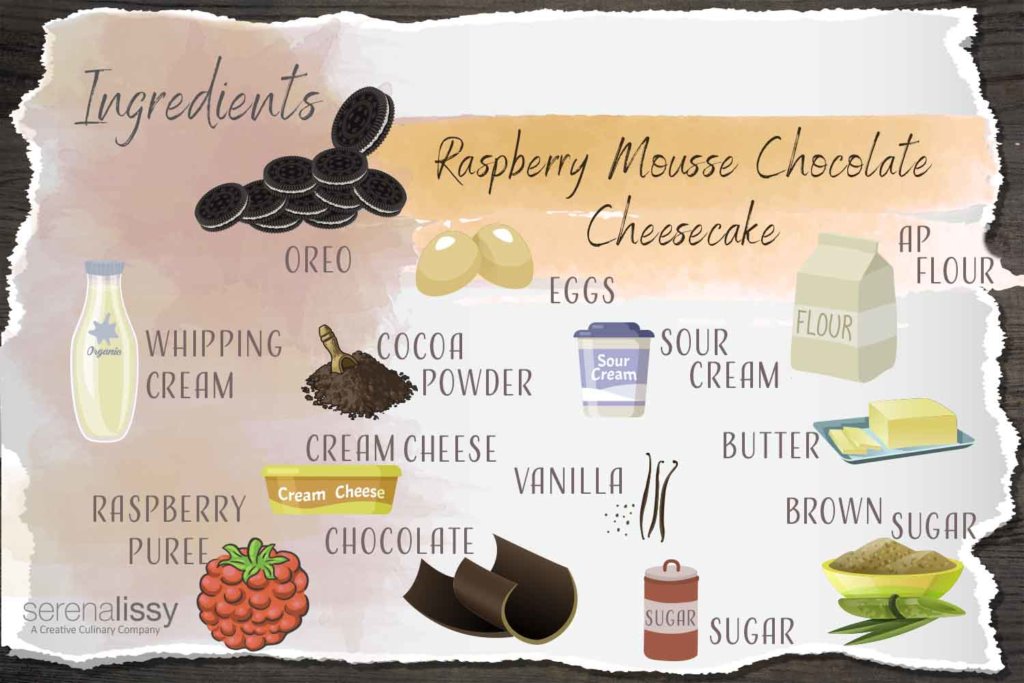
    Ingredients in Instant Pot Chocolate Cheesecake with Raspberry Mousse

    •  Oreo cookies
    • Unsalted butter
    • Cream cheese 
    • Dark brown sugar
    • White sugar
    • Whole egg
    • Egg yolks
    • Sour cream
    • 53% - 60% Chocolate
    • Vanilla extract
    • Flour
    • Cocoa powder
    • White chocolate
    • Heavy whipping cream
    • Raspberry puree
    • Raspberries

    When making cheesecake use room temperature ingredients. Allow the eggs, cream cheese, and sour cream to come to room temperature and allow the chocolate to cool after melting. This will ensure that you have a smooth and creamy cheesecake every time.

    We used chocolate in the 53% - 60% range. The brand doesn't matter, if you have a favorite use it. For the white chocolate in the mousse, we used Ghirardelli Premium Baking Chips. Again, if you have a favorite, go ahead and use it. The important thing here is to not over melt the white chocolate. When the time comes, just put it in the microwave for 10 second intervals. Stir after each 10 seconds and only go long enough to melt it.

    For the recipe, we used a raspberry puree. Now during the summertime, I may switch to a strawberry puree if I can find great strawberries during the season. To make your own puree, just put the raspberries in your food processor and pulse until they are liquid. Depending on the size of your raspberries, it may take a full pint size container of raspberries to get this much puree. If you don't want clumps strain through a cheesecloth to remove any clumps and there you go. I kept the larger pieces in my mousse. Just depends on what you like.

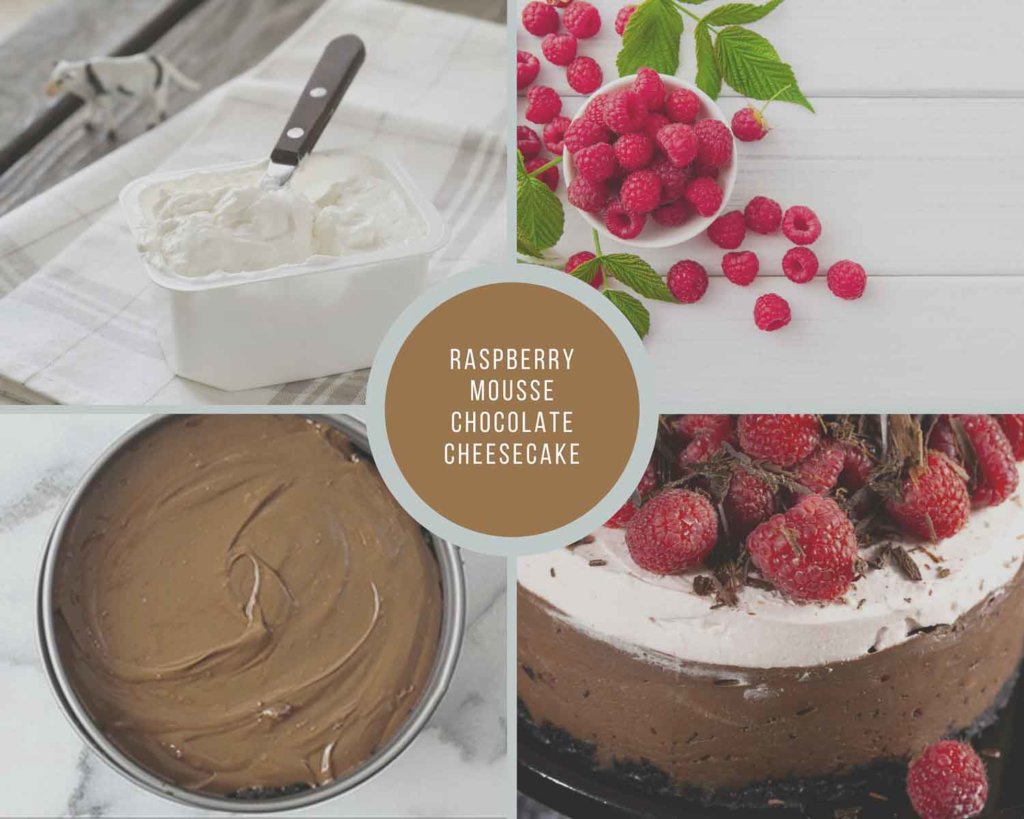
    Raspberry Mousse Triple Chocolate Cheesecake Process Collage

    How To Make Pressure Cooker Cheesecake

    1. Prepare the crust and press into the springform pan. Freeze for at least 10 minutes.
    2. Mix the cheesecake filling and pour into the springform pan being sure to leave at least ½ inch at the top of the pan.
    3. Pour two cups of water into the bottom of the instant pot and lower in your springform pan using a tinfoil sling.
    4. Cover and set to seal and cook at high pressure for 28 minutes. Note: This does not include the time it takes for the Instant Pot to reach full pressure.
    5. Allow for a 15-minute natural pressure release before opening the instant pot and removing the cheesecake.
    6. Cool overnight in the fridge before topping with mousse and fresh raspberries.
    Overhead view of the Chocolate Cheesecake

    If raspberries just aren't your thing, we also have a triple chocolate cheesecake instant pot recipe topped with chocolate ganache or a white chocolate peppermint cheesecake.

    More Decedent Dessert Recipes

    • Instant Pot Pumpkin Cheesecake
    • The Best Lemon Cheesecake Recipe
    • Manchego Cheesecake
    • Strawberry Mousse Cake
    • Gluten-Free White Chocolate Raspberry Blondies

    Looking For More Recipes?

    Subscribe to my free newsletter to get new baking tips in your inbox monthly. Find me sharing new recipes and tips on Pinterest, Instagram, or Facebook.

    Please share if you end up making this pressure cooker cheesecake recipe. Always love hearing how it turns out.

    Instant Pot Raspberry Mousse on Cake plate

    Raspberry Mousse Chocolate Cheesecake

    This instant pot chocolate cheesecake is moist and dense and topped with creamy raspberry mousse and fresh rapberries.
    5 from 12 votes
    Print Pin Rate
    Course: Dessert
    Cuisine: American
    Prep Time: 30 minutes minutes
    Cook Time: 45 minutes minutes
    Cooling: 6 hours hours
    Total Time: 7 hours hours 15 minutes minutes
    Servings: 8 Servings
    Calories: 644kcal
    Author: Serena

    Ingredients

    Crust

    • 15 whole Oreo cookies
    • 3 tablespoon of unsalted butter melted then cooled

    Cheesecake

    • 1 lb room temperature cream cheese At least 2 hours at room temp
    • ¼ cup packed dark brown sugar
    • ¼ cup white sugar
    • 1 whole egg - room temperature
    • 2 egg yolks - room temperature
    • ¼ cup sour cream
    • 8 oz chocolate 53% - 60% Melted
    • 1 teaspoon vanilla extract
    • 1 tablespoon flour
    • 1 tablespoon cocoa powder

    Mousse

    • 2 oz white chocolate melted and cooled
    • 1 cup heavy whipping cream
    • 2 tablespoons sugar
    • 4 ounce cream cheese softened
    • 2 ounce raspberry puree
    • Extra raspberries for the top decoration

    Instructions

    • Spray the 7" springform pan with cooking spray.
    • Add two cups of water to the instant pot and place the rack on the bottom.
    • Make a tin foil sling to lift the cheesecake in and out of the instant pot.

    Crust

    • In a food processor combine the whole Oreo cookies and the butter.
    • Pour the crumb butter mixture into the bottom of the pan and pat until even and going up the sides of the pan. Put in freezer for 10 minutes.

    Cheesecake

    • In a food processor, mix the cream cheese with dark brown and white sugar, and cocoa powder.
    • Once combined, add one egg followed by the 2 egg yolks.
    • Add the melted chocolate and sour cream.
    • Continually scrape the bowl down. Add vanilla and flour and mix until creamy.
    • Pour mixture into the springform pan and smooth with a spatula.
    • Place pan on the tin foil sling and slowly lower into the Instant Pot. Loosely cover cheesecake with a piece of foil to prevent moisture buildup.
    • Set Instant Pot to maximum pressure for 28 minutes.
    • Once done, turn machine off and let it return to normal pressure for 15 minutes.
    • Unlock lid and use sling to transfer pan to cooling rack for an hour.
    • Chill in refrigerator overnight.

    Chocolate Mousse

    • Melt chocolate and let cool.
    • Whip heavy cream to soft peaks and then add sugar. Continue mixing on high until stiff peaks.
    • In another bowl, whip cream cheese until smooth. Add chocolate and raspberry puree.
    • By hand, fold cream cheese mixture into whip cream mixture. Do not overmix.
    • Spread onto the cheesecake and let set in the refrigerator.

    Notes

    Recipe Source: SerenaLissy.com
    This website provides approximate nutrition information for convenience and as a courtesy only. Nutrition data is gathered primarily from the USDA Food Composition Database via Spoonacular API, whenever available, or otherwise other online calculators. While this information can be helpful in estimating the nutritional information of a recipe, it is by no means accurate or official and is not evaluated by the Food and Drug Administration.
     
    All images and content are copyright protected. Do not use our images without prior permission.

    Nutrition

    Serving: 1Serving | Calories: 644kcal | Carbohydrates: 61g | Protein: 15g | Fat: 40g | Saturated Fat: 23g | Polyunsaturated Fat: 2g | Monounsaturated Fat: 13g | Trans Fat: 1g | Cholesterol: 149mg | Sodium: 588mg | Potassium: 406mg | Fiber: 3g | Sugar: 48g | Vitamin A: 933IU | Vitamin C: 2mg | Calcium: 285mg | Iron: 3mg
    Tried this Recipe? Pin it Today!Mention @SerenaLissy or tag #serenalissy!

    Disclaimer: this post contains affiliate links, which means that if you purchase an item after clicking on the link, I will receive a small commission from the sale. This is at no extra cost to you, and as always, all opinions and recommendations are my own.

    If you love cheesecake you will love how easy it is to make dense and creamy pressure cooker cheesecake. This Instant Pot Raspberry Mousse Triple Chocolate Cheesecake by @serenalissy is the perfect Valentine's dessert.
    Instant Pot Raspberry Mousse Triple Chocolate Cheesecake

    />

    Serve up a slice of Instant Pot Raspberry Mousse Triple Chocolate Cheesecake for your sweetheart. This creamy pressure cooker cheesecake is easy to make and comes out perfectly every time.  @serenalissy
    Instant Pot Raspberry Mousse Triple Chocolate Cheesecake

    Easy Avocado Ice Cream Recipe

    May 28, 2021

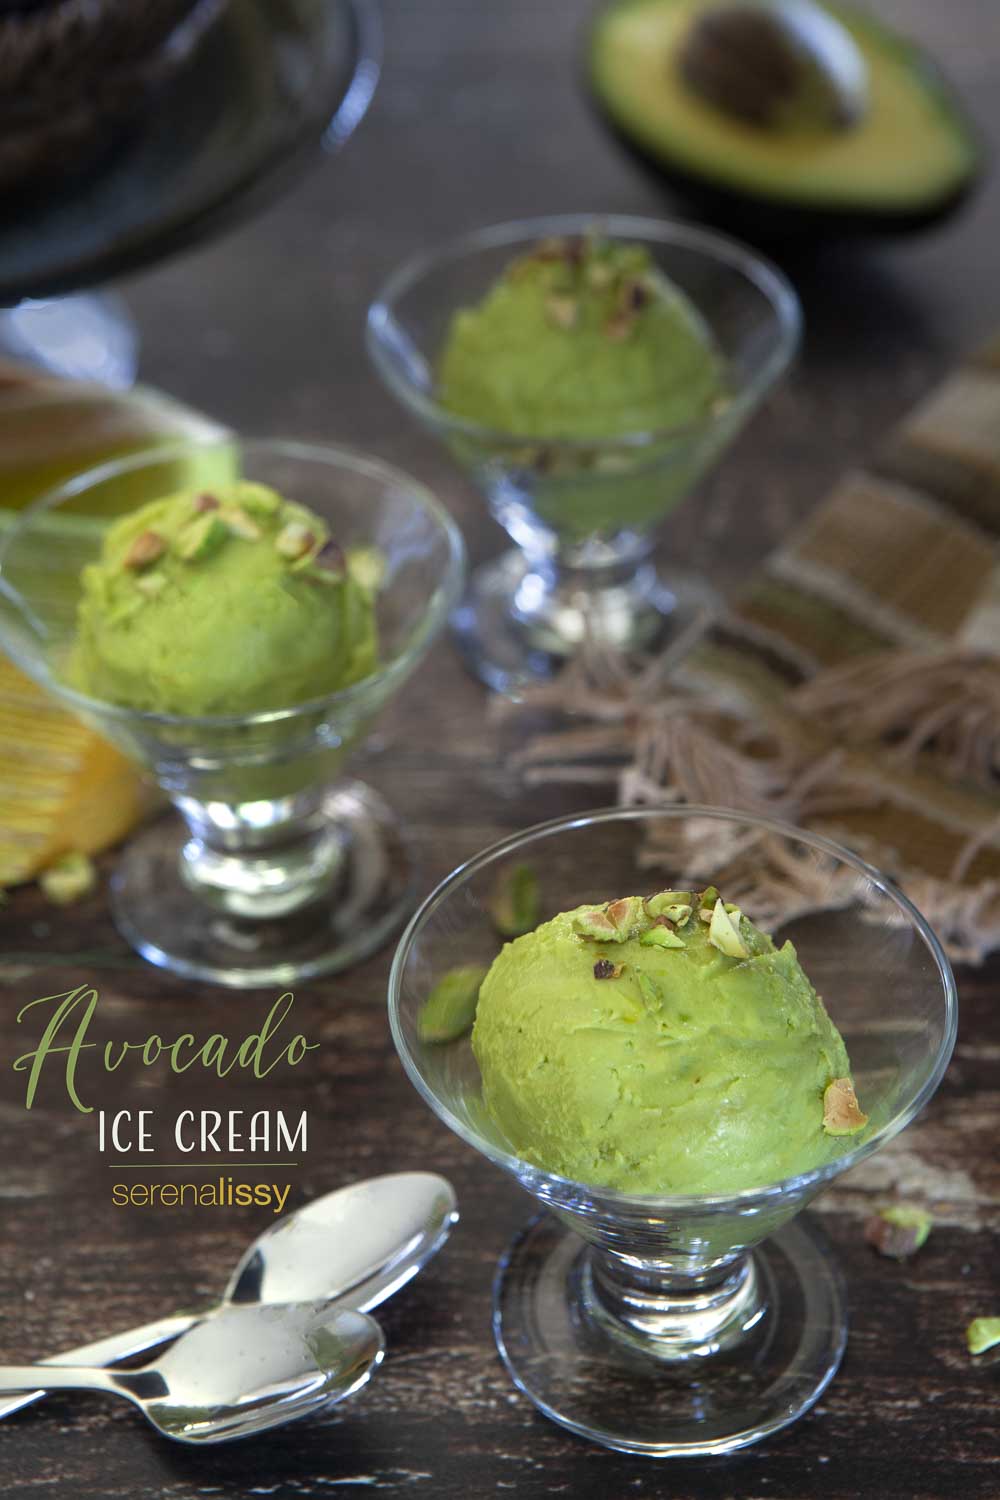
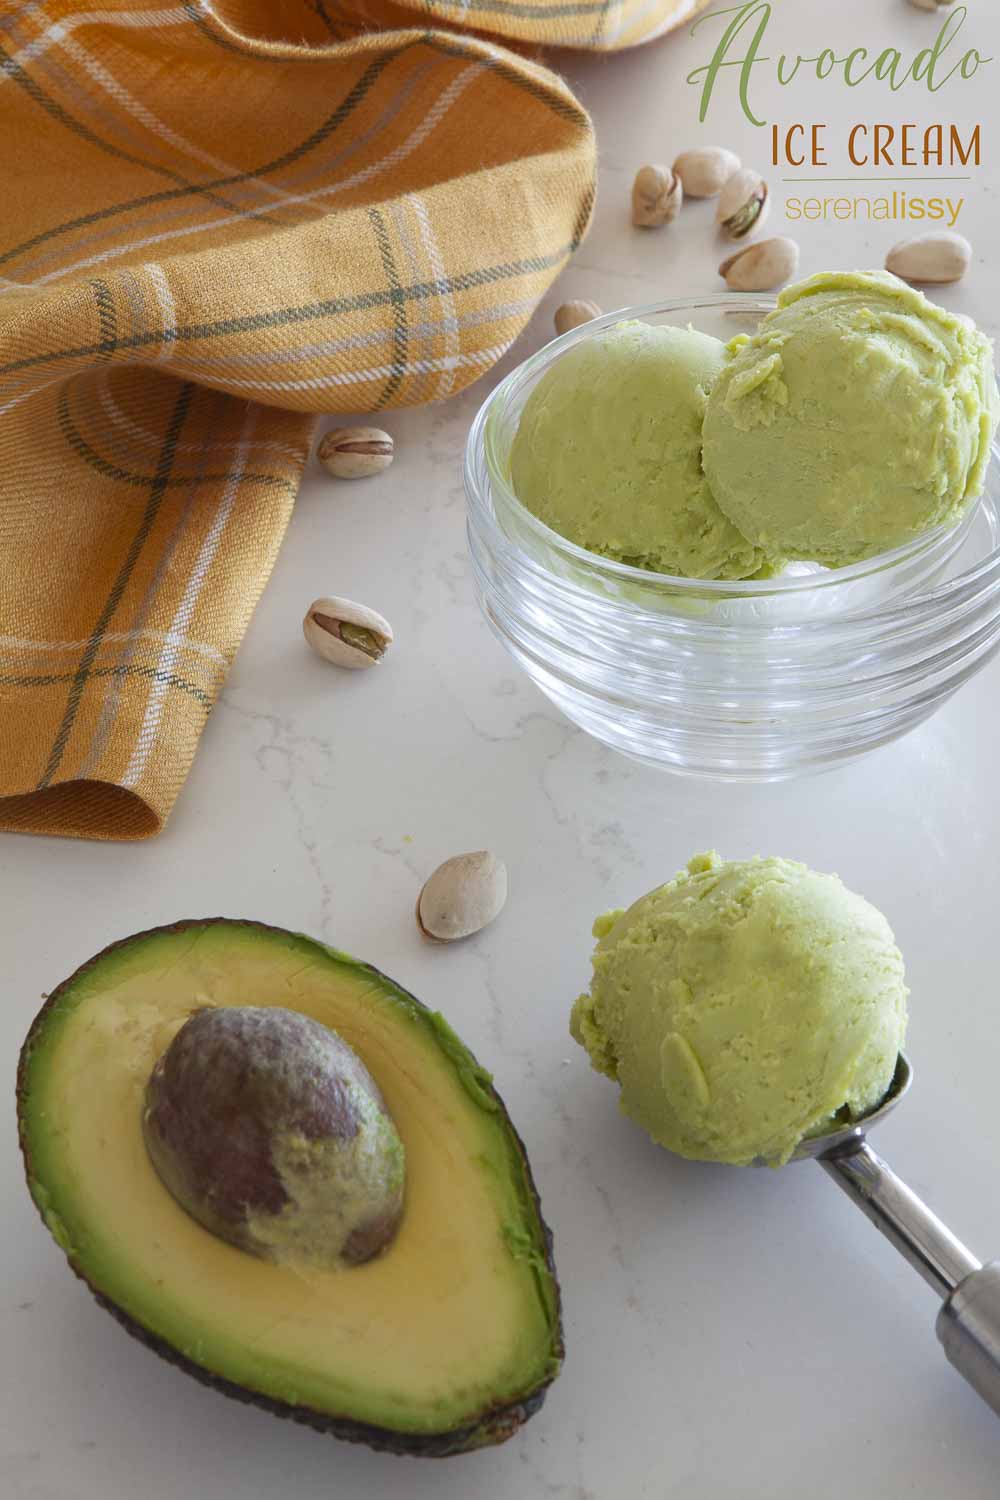
    Avocado Ice Cram In a serving Bowl

    A lot of people enjoy ice cream in the summer months because it's a perfect treat; creamy texture, delicious flavors, cold, refreshing, and indulgent. Have you ever tried avocado ice cream before? It is surprisingly easy to make and tastes delicious! In this post, we will show you how to make your own ice cream with our easy avocado ice cream recipe that doesn't require any complicated ingredients.

    Avocado Ice Cram In a serving Bowl

    Avocado Ice Cream

    The avocado is a fruit, but it's also the hottest ingredient in Mexican and American fusion food. I love avocados because they're so easy to eat; you can slice them into wedges for lunch or snacking on its own with some salt sprinkled over top. Oh and let's not forget about the avocado toast craze over the last few years. But my favorite thing about this versatile fruit is how well it blends with other flavors- I've had guacamole topped off by slices of an avocado before! Once upon a time, there wasn't even such as thing as "avocado ice cream," but since then we've seen coffee shops serve up iced coffees made from blended avocado smoothies that are rich and creamy just like their inspiration!

    Where do Avocados Come From?

    Avocados are native to Mexico and Central America but have spread throughout the world because of their popularity. They grow on large trees, which can live up to 100 years!

    Did you know? There is more potassium in an avocado than there is in a banana. Avocado ice cream has healthy fats that make it easy for your body to absorb vitamins A, D, E and K from other food sources. For more nutritional information check out Avocados from Mexico.

    What's one way people enjoy using avocados at home?

    The most popular use of avocados seems to be guacamole. But some people also like adding them to smoothies or even eating them as snacks with salt! We'll show you how!

    California Avocados

    California Avocados Direct are the best avocados in existence and I’m not just saying that because they ship them to my door. Not only do these hand-picked, farm-fresh stones of deliciousness taste like heaven but their service is impeccable as well with a box arriving at your doorstep within days after you order! Talk about convenience! For more information visit them online today!

    Avocado Ice Cream Ingredients

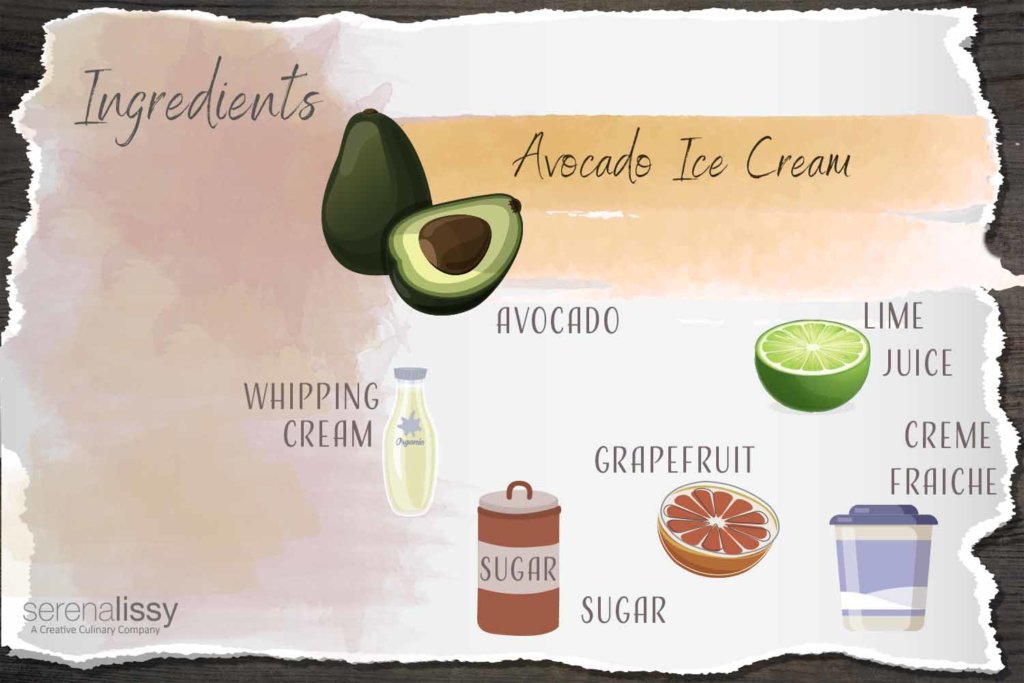
    Ice Cream Ingredients

    • Avocados - We used ripe California Hass. This is the main ingredient so make sure to only use ripe, quality avocados.
    • Creme Fraiche
    • Heavy Cream
    • Grapefruit Juice - Only use fresh squeezed for the best taste
    • Lime Juice - Only use fresh squeezed for the best flavor (You could use lemon juice instead if that is what you have)
    • Sugar & Salt

    How Do You Peel An Avocado?

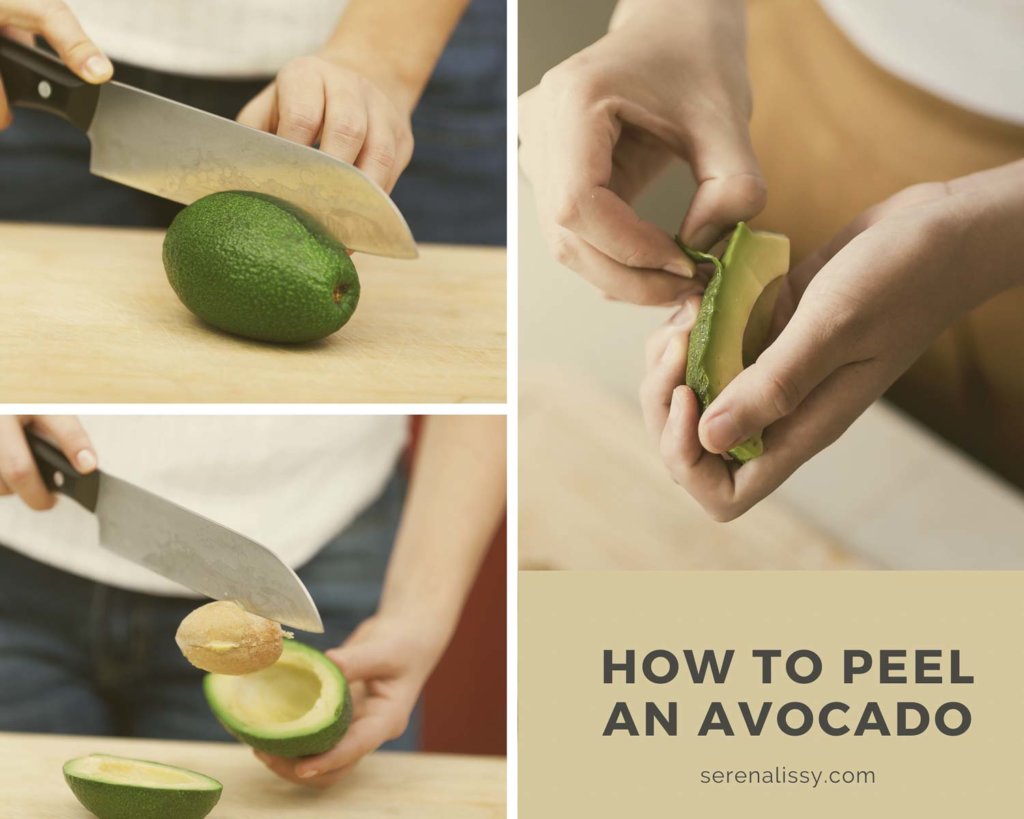
    First, make an incision around the fruit's circumference slightly deeper than its skin thickness; rotate the blade to the depth desired for removing flesh from inside seed cavity. After you have cut the avocado, pull the two pieces apart from each other.

    Second, remove the seed. Be careful here. I use my knife to do this. I hold my chef’s knife two inches away and then I use the sharp end of my knife and strike the pit, near the heel. Once the knife is lodged into the pit, I twist the pit out of the avocado. Be very careful getting the pit off your knife, this is the hardest part about peeling an avocado.

    Now slice your avocado halves into quarters. You will have four slices of avocado now. Grab the outer skin of the avocado and pull it away from the quarter. This will yield the most avocado for your ice cream. No sense in leaving any of that avocado to go to waste. If your skins aren't smoothly coming off, the second-best way is to use a spoon and scoop out the avocado.

    Steps to Peel an Avocado

    How To Make The Avocado Ice Cream

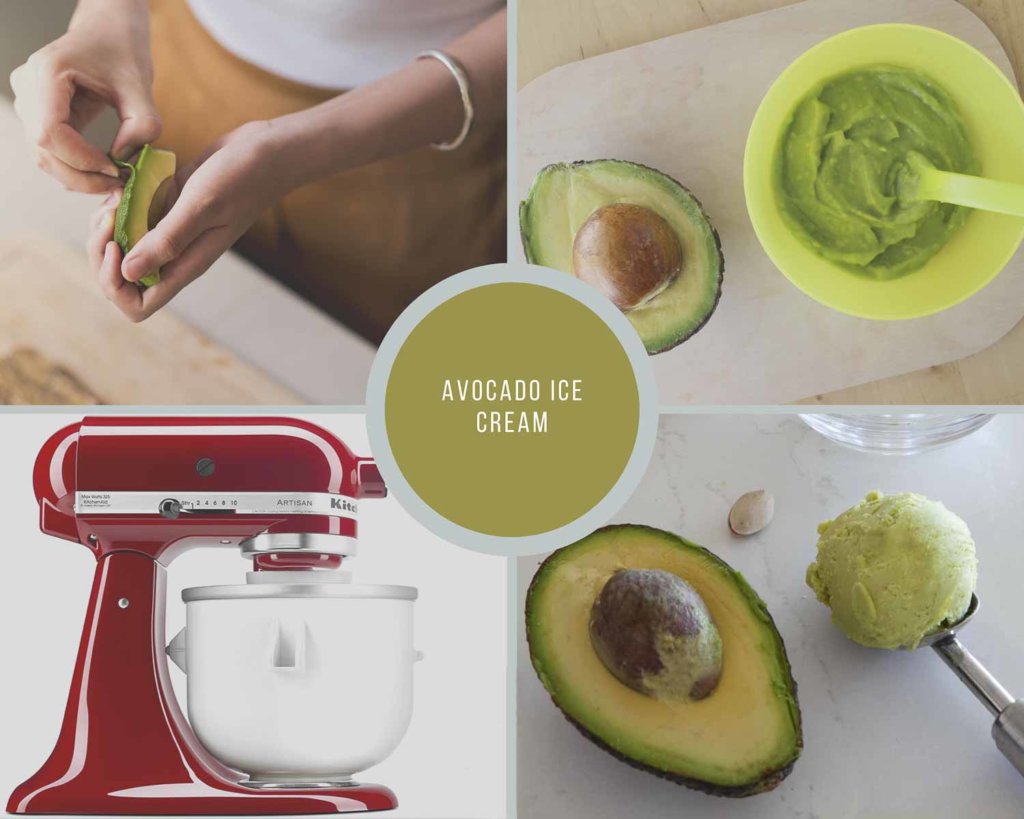
    Slice the ripe avocados and remove the pit. Scoop out the flesh and cut it into small pieces. Puree the avocados with all the other ingredients until smooth and the sugar is dissolved. We used a food processor for this, you could also use your blender.

    Refrigerate for a few hours then freeze with your ice cream maker according to the manufacturer's instructions. This freezes firm. When you are ready to enjoy this delicious dessert, take it out of the freezer for 10-15 minutes to soften it.

    Avocado Ice Cream Process Collage

    Equipment Used

    Whenever I make ice cream at home I use my KitchenAid stand mixer and the ice cream attachment. This makes a maximum of 2 quarts. So depending on your ice cream goals that could be good or bad. Most of my home recipes for ice cream make about a quart. Remember, you are making the ice cream, which usually means no preservatives or chemicals like you see in the store-bought stuff. The shelf life of your homemade ice cream is generally capped at two weeks.

    I store my ice cream in plastic freezer storage ice cream containers. You could easily use a loaf pan and cover it with plastic wrap if you don't have something similar to the storage containers.

    Scoop of Avocado Ice Cream

    FAQ

    Is Avocado Ice Cream Healthy?

    Well, let me just start with avocados are very healthy. But Avocado ice cream isn't making the top 10 list of most nutritious foods to consume. It's a healthier alternative to other ice creams due to the good fat contained in avocados.

    What does Avocado Ice Cream taste like?

    Avocado ice cream tastes just like a cold avocado. The other ingredients you choose to use help to sweeten up the ice cream a bit.

    Can I use unripened Avocados in the ice cream?

    I wouldn't recommend it. It won't have that creamy texture and the flavor might not be what you are expecting.

    Can I add chocolate to the ice cream?

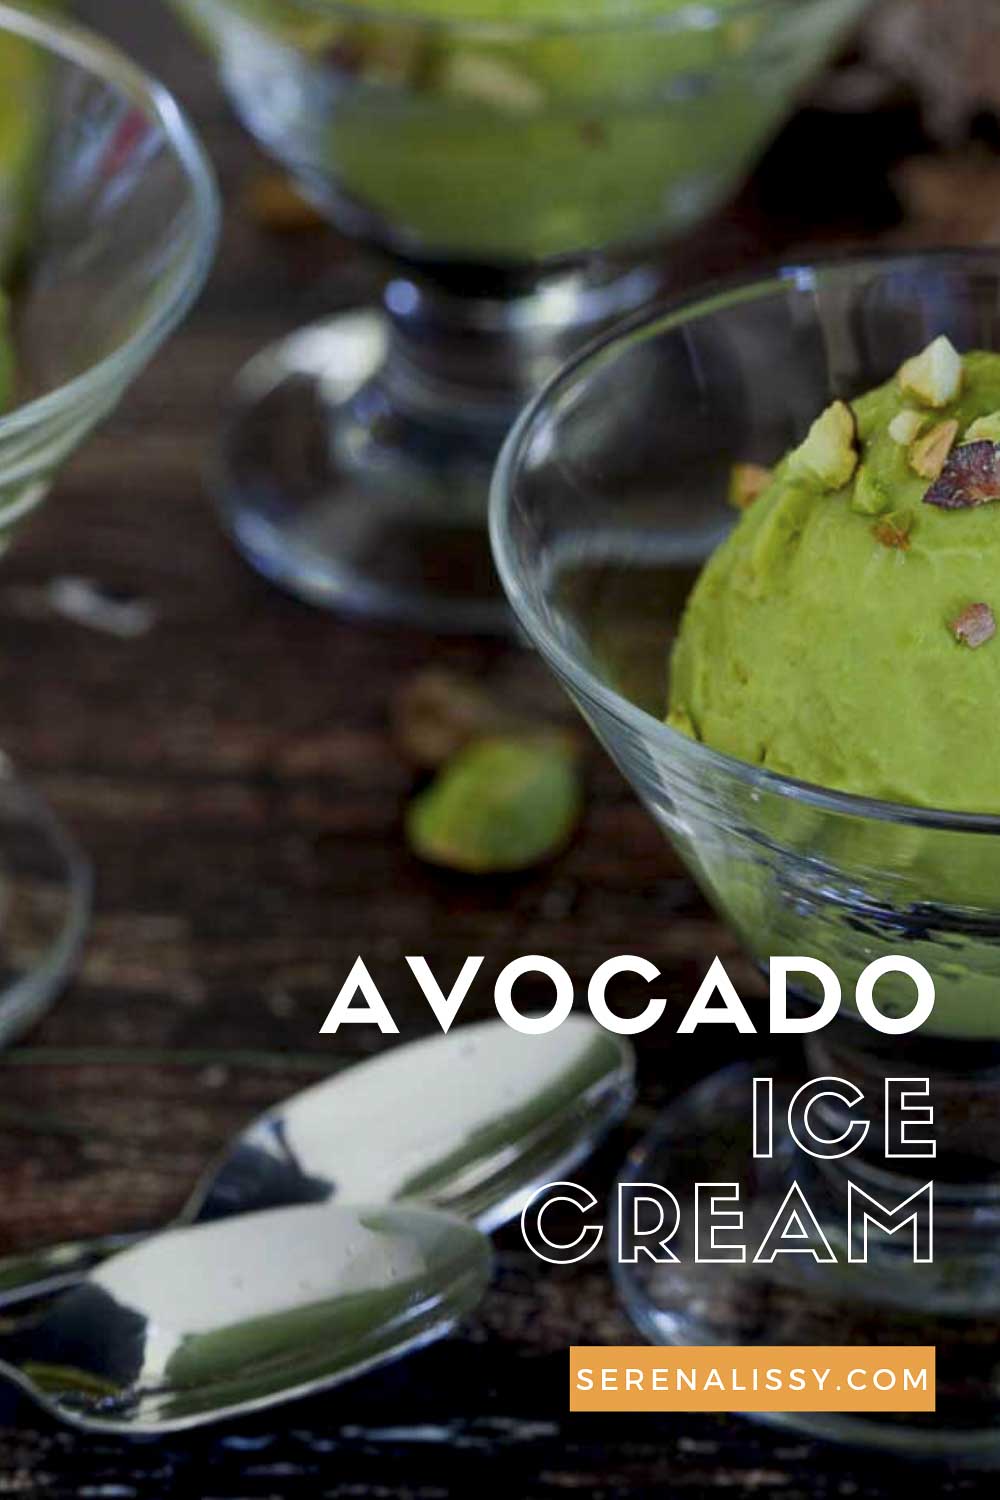
    Yes, you could easily cut up some chocolate chips and process them with the ice cream. We topped ours with pistachio pieces as an alternative to the chocolate.

    Let Us Know If You Make It

    From the cold refreshing treat to an indulgent dessert you can enjoy with friends and family all summer long, ice cream has many uses. This homemade avocado ice cream is surprisingly easy to make, tastes delicious, and is made with simple ingredients! As always, please feel free to comment below with any questions or feedback. I hope we have inspired you to try making your own. If so, be sure to share the results of your efforts by tagging us in them on Instagram or Facebook.

    Other Ice Cream Favorites

    • Lemon Curd Ice Cream
    • Chocolate Chunk Ice Cream
    • Mocha Ice Cream Sandwich

    Looking For More Recipes?

    Subscribe to my free newsletter to get new baking tips in your inbox monthly. Find me sharing new recipes and tips on Pinterest, Instagram, or Facebook.

    Avocado Ice Cream in Glass Bowl

    Avocado Ice Cream

    You won't find a more delicious way to eat avocado than in this easy avocado ice cream recipe.
    5 from 6 votes
    Print Pin Rate
    Course: Dessert
    Cuisine: American
    Prep Time: 10 minutes minutes
    Cook Time: 20 minutes minutes
    Freezing Time: 5 hours hours
    Total Time: 5 hours hours 30 minutes minutes
    Servings: 16 Servings
    Calories: 145kcal
    Author: Serena

    Ingredients

    • 3 Ripe Avocados
    • 8 ounces Creme Fraiche (226 grams)
    • ½ cup Heavy Whipping Cream (125 mL)
    • ½ cup Grapefruit Juice (120 mL)
    • 1 tablespoon Lime Juice
    • ⅔ cup Sugar (135 grams)
    • Dash of Salt

    Instructions

    • Slice the avocados in half and remove the pit.
    • Scoop out the flesh and cut into small pieces.
    • Puree the avocado pieces in your food processor or blender with all other ingredients. Puree until the sugar is dissolved and it is smooth.
    • Place mixture in refrigerator for 2 hours and then freeze in your ice cream maker according to your manufacturers instructions.

    Notes

    Recipe Source: SerenaLissy.com
    This website provides approximate nutrition information for convenience and as a courtesy only. Nutrition data is gathered primarily from the USDA Food Composition Database via Spoonacular API, whenever available, or otherwise other online calculators. While this information can be helpful in estimating the nutritional information of a recipe, it is by no means accurate or official and is not evaluated by the Food and Drug Administration.
     
    All images and content are copyright protected. Do not use our images without prior permission.

    Nutrition

    Serving: 1Serving | Calories: 145kcal | Carbohydrates: 13g | Protein: 1g | Fat: 10g | Saturated Fat: 4g | Polyunsaturated Fat: 1g | Monounsaturated Fat: 4g | Cholesterol: 10mg | Sodium: 20mg | Potassium: 202mg | Fiber: 3g | Sugar: 10g | Vitamin A: 165IU | Vitamin C: 6mg | Calcium: 10mg | Iron: 1mg
    Tried this Recipe? Pin it Today!Mention @SerenaLissy or tag #serenalissy!

    As an Amazon Associate and member of other affiliate programs, I earn from qualifying purchases. What that means is if you click on one of our affiliate links, they may toss a few pennies our way for a commission.

    Avocado Ice Cream in bowl with spoon

    How to Find The Perfect Props for Your Food Photography

    May 26, 2021

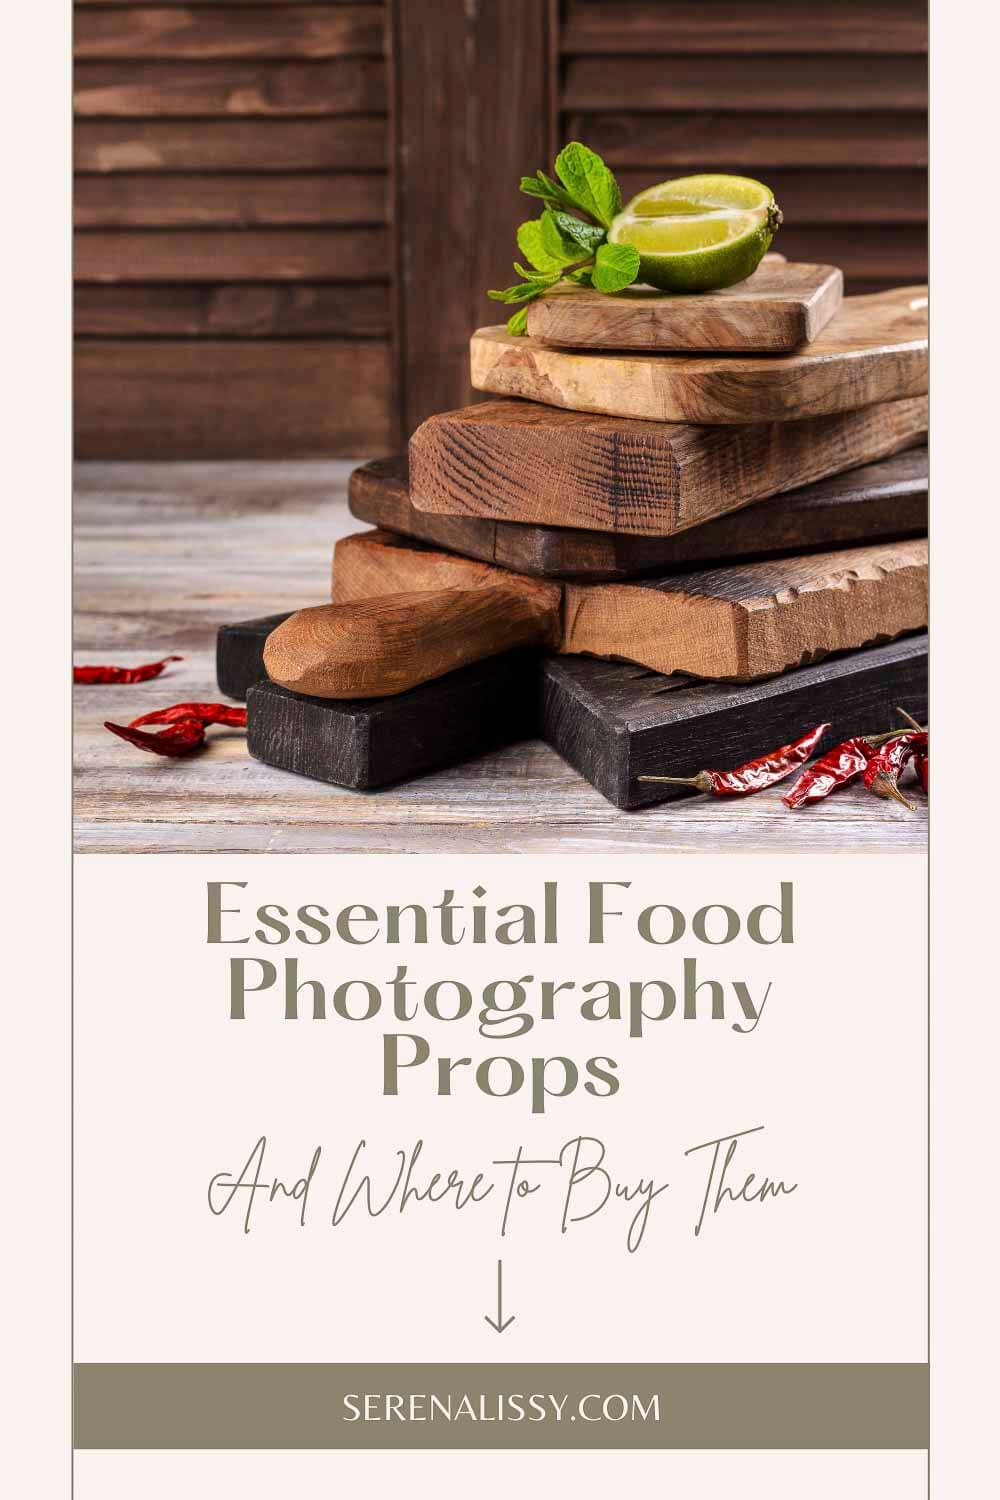
    A stack of cutting boards

    The food we eat is not only a pleasurable experience, it's something that can be shared with others. And when you're trying to communicate the deliciousness of your pastries, burgers, pasta, chocolate cakes and more through photos - there are very few things that compete with taste! Taste is always your number one concern! But being able to communicate how great your bakes are through photos may very well be your second. Shopify, one of the world’s leading e-commerce platforms, claims that plating, lighting, and composition are all controllable parts of food photos that are essential.

    Food Photography Props

    So you've finally baked your way to the perfect recipe, and now you're faced with a dilemma. How are you going to take photos of your delicious food in order to share it on your website, blog post or social media? We all know that having great pictures is important for attracting new customers, but how do you find props that will really make your food pop? Today, we’re exploring some essential food photography props and where to find them, for your food photos that will help you ace every aspect of a hunger-inducing photo each and every time. 

    A stack of cutting boards

    Antique Prop Shopping

    Finding food photography props that are unique and beautiful can be intimidating. So unless you’re going for a "busy" shot, it’s best to rely on a fewer number of large props first. One of the most invaluable props includes wooden boards or large plates that can serve as photo backgrounds.

    After all, no one wants to see ugly napkins under a busy plate when looking at a food photo! But a cute, vintage-inspired white wooden backdrop can induce the feeling of adventure and picnics through a screen.

    Consider shopping for pre-owned pewter plates, vintage pie pans, antique breadboards, and more on eBay or at your local thrift stores like Goodwill, Salvation Army, and more. If you have antique stores close by, this is a great place as well to snag some great props. You just might be able to find some vintage props or other affordable options while also reducing waste in the world!

    Unique Cutting Boards

    What screams value more than a beautiful prop that is functional, too? Cutting boards don’t have to be boring slabs of wood, and when you find a beautiful one, they can make baking and cooking more enjoyable.

    They’ll also make your food photos look amazing as you show off a beautiful taste in tools alongside your dish. A few popular options for unique yet functional cutting boards are marble cutting boards and darker grain wood cutting boards. If your storage space allows for it, invest in more than one wooden cutting board. These are one of those items that the more we use it the better it gets and it just becomes that perfect prop. You can also find more creatively shaped fun cutting boards like these lemon and pineapple fruit-shaped options. These are great additions for summertime fun.

    Utensil Creativity: Cute Spoons, Wooden Forks, and More

    More beautiful yet functional food photography props include unique utensils. Think, wooden spoons and forks, or ceramic spoons with designs. These are particularly useful if you often follow recipes needing tablespoon measurements or make different renditions of a smoothie bowl.

    Say goodbye to your trustworthy but uninteresting, water-marked metal spoon from Ikea. Say hi to reusable and beautiful kitchen utensils that can double for functionality and beautiful photos.

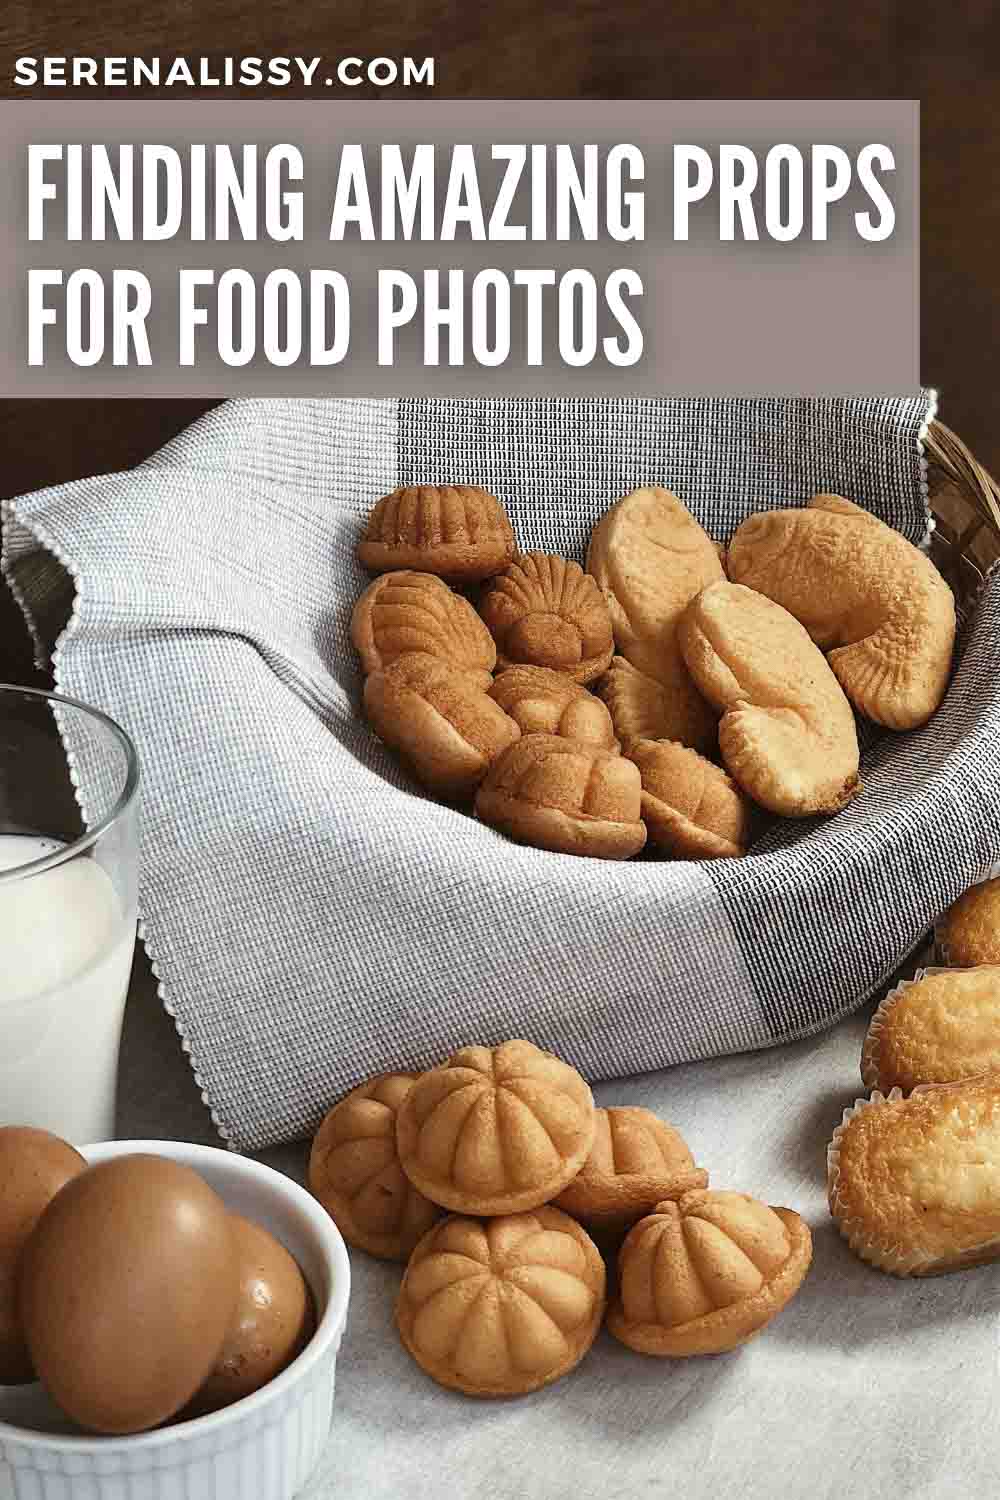
    Muffins in a basket.

    Craft Stores for Prop Accents

    If you’re on a time crunch, heading to a local arts and crafts store is always a great option when looking for food photography props and backdrops. Some favorites you may find include uniquely textured fabrics for a pretty lace background and small baubles for a whimsical aesthetic. This is an easy way to stock up on small details or props of different colors. Sometimes these are even a good place to grab white bowls of varying sizes or just different dishes that you might only need one of instead of a set of eight.

    Common craft stores in the United States include Michael’s, Jo-Ann Stores, and Hobby Lobby. Have you heard of the Hobby Lobby challenge? The trend was widespread amongst teenagers in 2018, and involved individuals taking photos with flowery props inside Hobby Lobby before editing them to look like outdoor shots. The results were magnificent, albeit the plethora of teens going to stores just to take photos did anger many employees.

    I’m not encouraging you to do the same (it’s never a good idea to make someone else’s job harder). However, the challenge only proves how well a good prop or even a fake plant can serve in a great photo.

    Discount Stores for DIY Props

    The Dollar Store, Dollar Tree, and even Five Below are known for one thing: affordability. But did you know that depending on the location, they can be a goldmine for adorable food photo props?

    Many dollar stores sell beautiful mason jars perfect to hold chocolate pretzels. You could also find ribbons and fake flowers for half the price of those at traditional craft stores. You can get creative with custom balloon options, which can be a great way to accentuate a milestone for your food blog or personal life.

    Washi tape, planners, burner covers, wire baskets, and more are often available at these stores. If you’re not looking for a particular prop set-up, starting with a trip to a discount store can be a great starting point to get the creative juices moving on a budget.

    Fabric Stores

    Sometimes you need a specific color, size, or texture in order to make your dish look more appetizing. One of the most inexpensive places that sells these types of items are fabric stores! A little bit of fabric is one of my favorite props to use. I can go to places like Sur La Table or West Elm to find napkins or tablecloths, but fabric stores are so much more economical. A small bit of fabric usually takes my food images to the next level.

    Planning Your Food Photoshoot

    Now that you have a bunch of ideas for beautiful food photography props and where to find them, it’s time to go over a few composition guidelines that can help save you from accidentally pairing props that don’t match.

    When creating a food photoshoot, try to stay away from incredibly detailed patterns in backdrops or secondhand props. Remember that the focus of your shot should remain on your food item. Having busy patterns or bright neon props can take away focus from your main subject.

    Next up is plating. Where will your food sit in the shot? Will it be a bit messier for an artsy look on a lace napkin? Or is it a decadent pancake set on a small dining plate so that it almost overflows? Sometimes abundance is the most enticing thing!

    Don’t be afraid to play around with different plating options and sizes. Whether or not your food should take up most or very little of the plate can communicate different moods and feelings through photos alone. Rely on your personal style and your brand message to help convey moods. 

    We recommend experimenting with various photography props to find what works best for your food photography. Try different colors, textures and shapes of plates, bowls or spoons. You might also want to investigate lighting options such as natural light (if you have a window in the kitchen) or artificial light if not.

    Creating the Perfect Food Photos with Props

    You’ve aced the perfect cupcake, or created the most beautiful croissant. But when it comes to sharing that baked treat beyond tasting it, photos are the best way to let your creation live on, forever.

    Start your journey toward finding amazing props for your food photos online today and consider visiting a dollar-based store or a crafts store near you for more inspiration. You’ll be surprised by what gems you find! Here at SerenaLissy.com, we marry my two loves of food and photography and would love to help you further in your journey. Read more on how to create a composition for your food photography shot in my article Food Photography: Composition Made Simple.

    Five Day Food Photography Challenge

    Want to take your food photography up a notch?

    I’ve been photographing food for years and have learned some tricks of the trade. Join me on this 5-day challenge where you’ll learn how to master the art of food photography, one bite at a time. You’ll be amazed by what you can do with just a few simple tips. You will learn how to make your photos pop with color, texture, and lighting. Sign up today!

    As an Amazon Associate and member of other affiliate programs, I earn from qualifying purchases. What that means is if you click on one of our affiliate links, they may toss a few pennies our way for a commission.
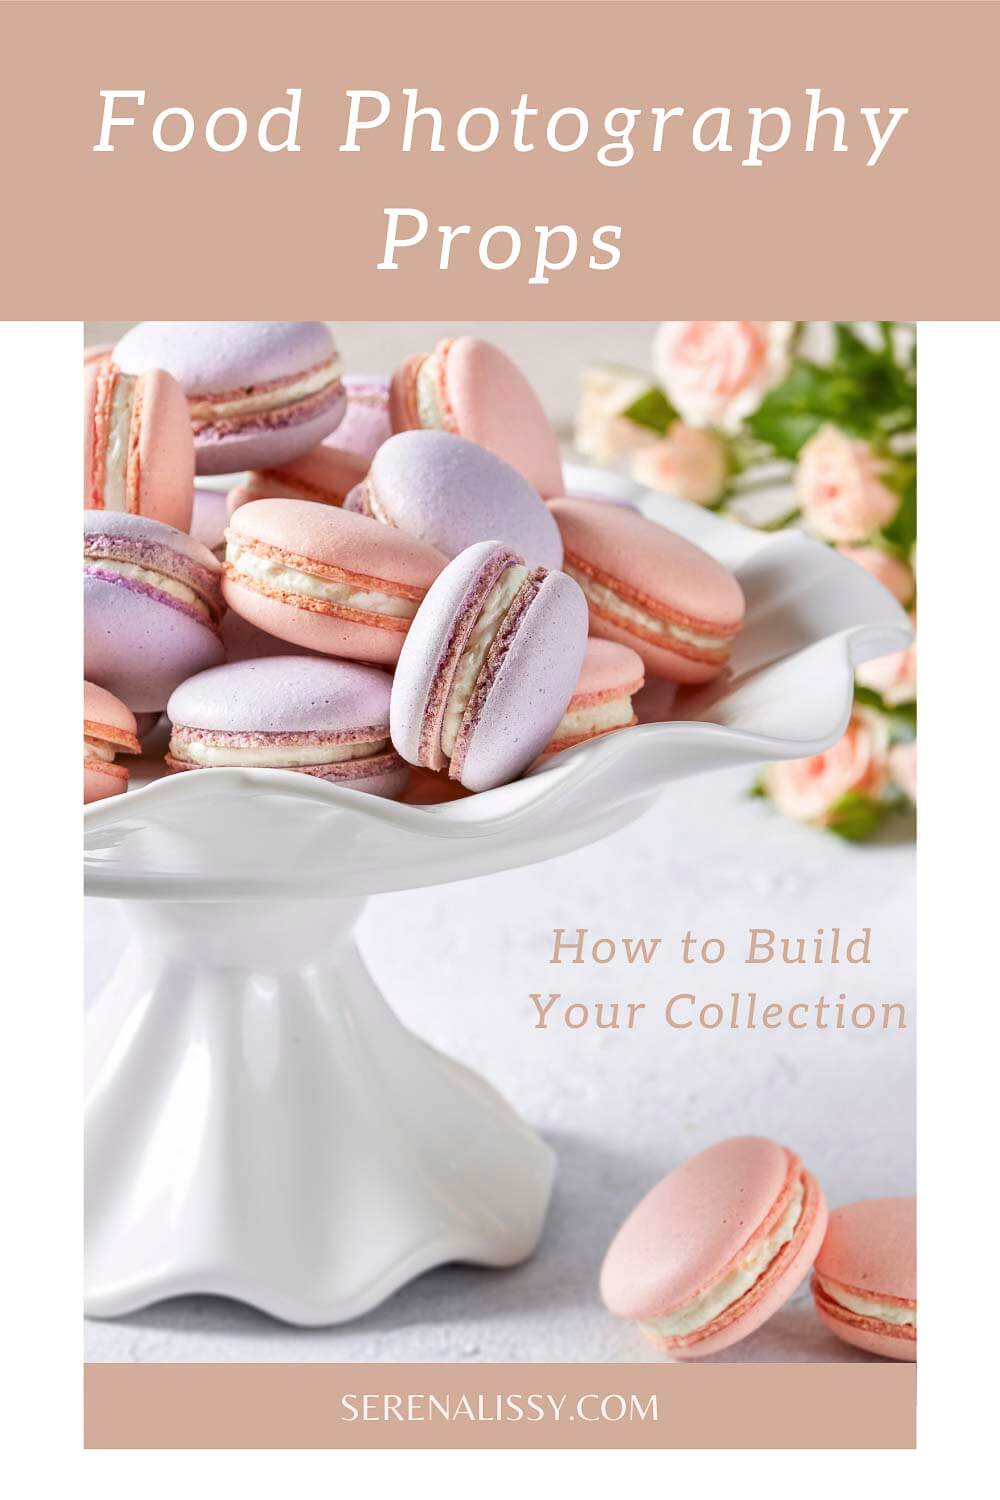
    Macarons on a cake plate.

    Looking For More Recipes?

    Subscribe to my free newsletter to get new baking tips in your inbox monthly. Find me sharing new recipes and tips on Pinterest, Instagram, or Facebook.

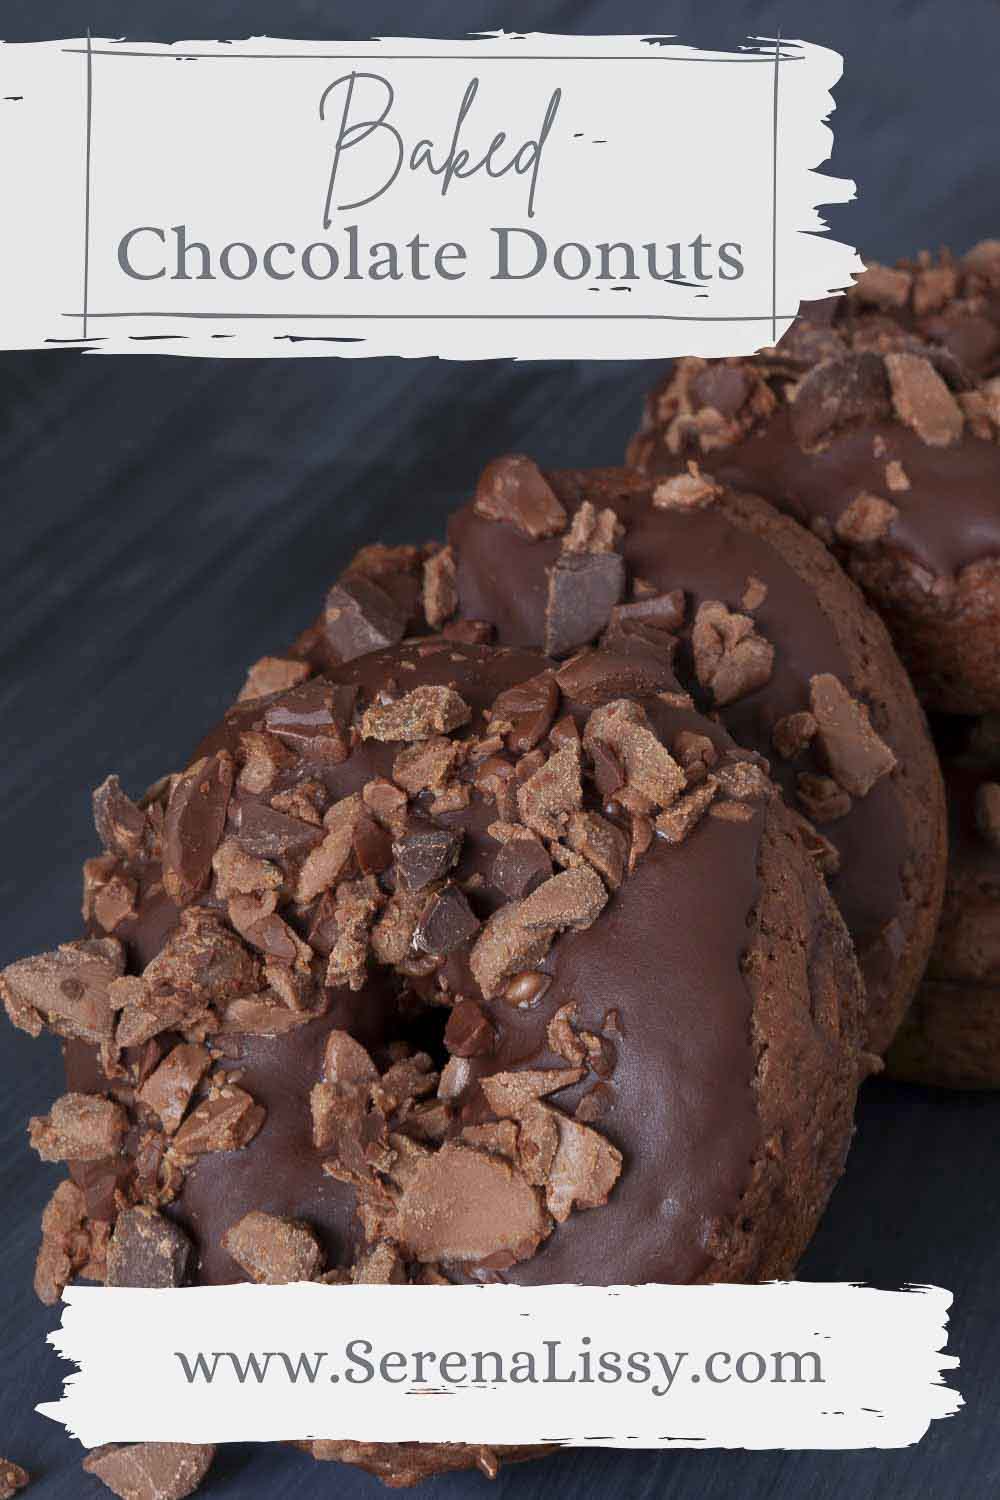
    Double Chocolate Baked Donuts

    May 24, 2021

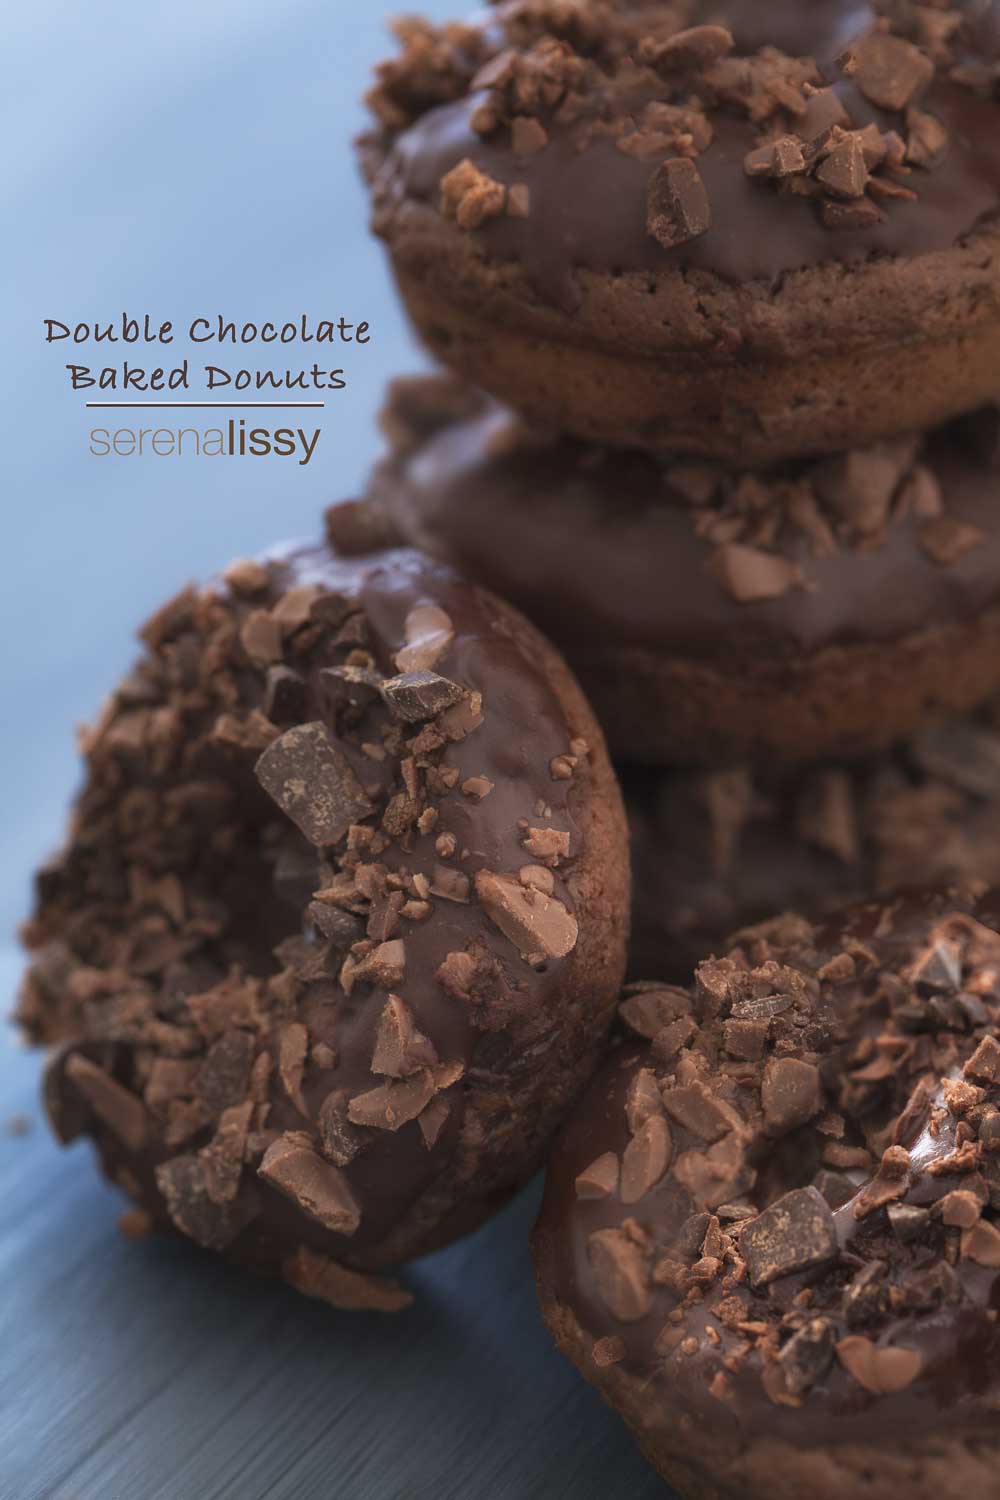
    Double Chocolate Baked Donuts on Table

    We all have our favorite baked goods, but when it comes to a Saturday morning breakfast, there is nothing quite like warm donuts. These baked chocolate donuts are quick and easy to make - they only take about 20 minutes in the oven! They also won't fill your house with that fried food odor that lingers for days.
    Donut baking can be messy and time consuming: not these ones! The recipe couldn't be easier or quicker. Don't forget the glaze - it's what takes them from good to great!

    Double Chocolate Baked Donuts are chocolate, on chocolate, on chocolate. Chocolate lover's will enjoy this easy baked donut recipe for breakfast. They can be made in about 20 minutes and won't leave a lingering fryer odor in your house.

    Easy Baked Donuts

    There is no doubt that I love a fresh-from-the-fryer donut. But what I don't love is the cleanup after that or the fryer smell that lingers in the kitchen. So we set out to come up with an easy, delicious double chocolate baked donut that I could wake up and cook for breakfast with minimal cleanup.  

    And after testing about 10 iterations of this recipe, we finally nailed it. Actually, we ended with two recipes. This one has a much more traditional baked donut feel regarding texture, and the second one is more cake-like. I won't be sharing the second one today, but you can bet it will be making an appearance on the blog another day!

    We covered these choocolate baked donuts in a chocolate glaze and then sprinkled that with even more chocolate. Why not right?!? But you could easily make a simple confectioners' sugar glaze. Or you could even cover these with sugar. I'd brush butter on them once you take them out of the oven and roll them into finely ground sugar.

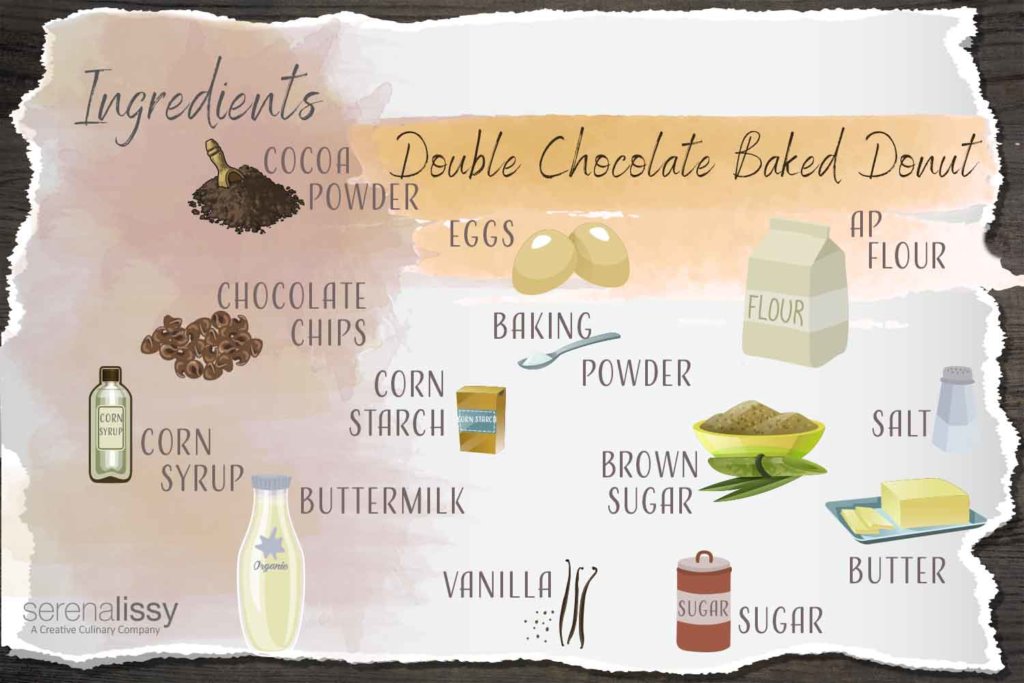
    Ingredients in Baked Donuts

    Double Chocolate Baked Donuts Ingrdients
    • All purpose flour - Make sure to measure this properly so you don't end up with dry donuts.
    • Light brown sugar
    • Milk chocolate chips
    • Cocoa powder
    • Cornstarch
    • Baking powder
    • Salt
    • Buttermilk
    • Unsalted butter melted
    • Large egg plus 1 large yolk
    • Semisweet chocolate chips
    • Butter
    • Corn syrup
    • Vanilla extract

    How to Make Baked Donuts

    Double Chocolate Baked Donuts Process Collage

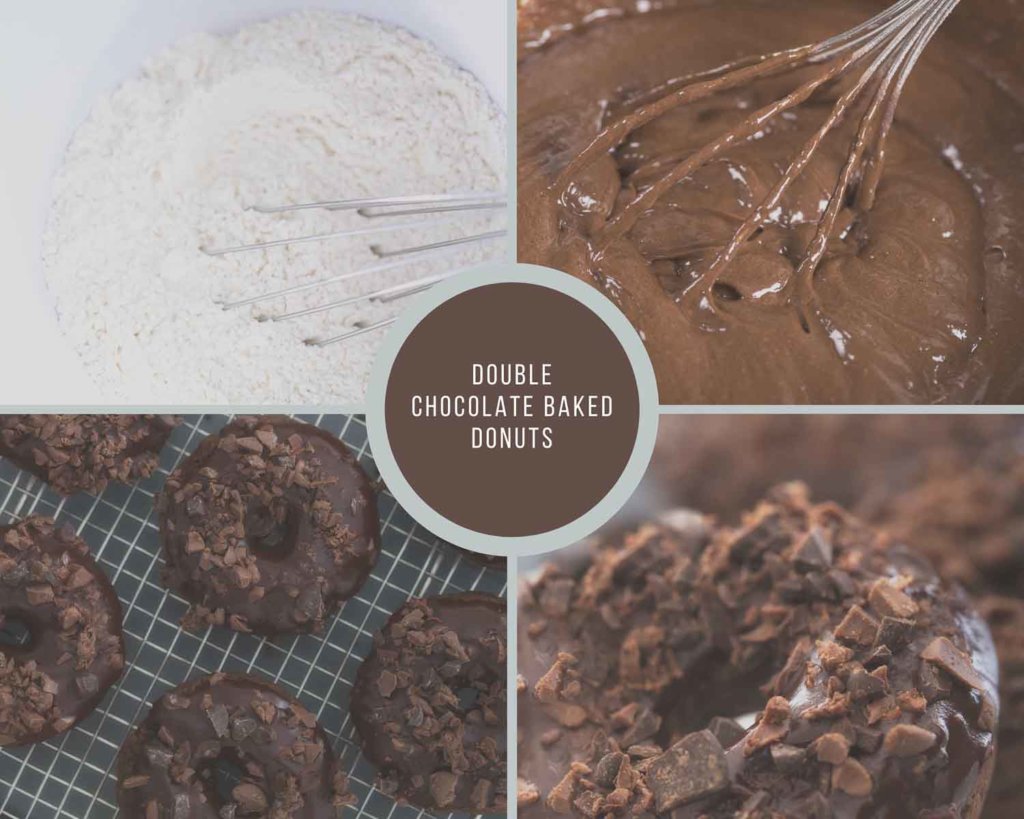
    You will need a donut pan for this recipe. They are available in specialty baking stores and stores with a kitchenwares department.

    1. Mix together the dry ingredients needed for the donuts and then whisk in the wet ingredients until just combined.
    2. Pipe the batter into the prepared donut pan and bake for 8-10 minutes.
    3. Allow the donuts to cool for about 5 minutes then dunk them into the glaze and sprinkle with chopped chocolate chips before serving.

    More Chocolate Recipes

    • Chocolate Donut Bread Pudding
    • Chocolate Butter Cookies
    • Triple Chocolate Cheesecake
    • Easy Homemade Chocolate Pop Tarts

    This baked donut recipe is a chocolate lover's dream and is so easy to make. We hope you like these chocolate baked donuts as much as we do.

    Looking for more recipes?

    Subscribe to my free newsletter to get new recipes in your inbox monthly. Find me sharing new recipes and tips on Pinterest, Instagram or Facebook.

    Double Chocolate Baked Donuts

    Double Chocolate Baked Donuts

    Enjoy chocolate, on chocolate, on chocolate with this easy baked donut recipe.
    5 from 7 votes
    Print Pin Rate
    Course: Breakfast, Snack
    Cuisine: American
    Prep Time: 10 minutes minutes
    Cook Time: 15 minutes minutes
    Total Time: 25 minutes minutes
    Servings: 9 Donuts
    Calories: 299kcal
    Author: Serena

    Ingredients

    Donuts:

    • 7 ounces all purpose flour
    • ½ cup packed Imperial Sugar light brown sugar
    • ½ cup milk chocolate chips chopped
    • ¼ cup cocoa powder
    • ⅛ cup cornstarch
    • 1 ½ teaspoon baking powder
    • ½ teaspoon salt
    • ½ cup buttermilk
    • 4 tablespoons unsalted butter melted
    • 1 large egg plus 1 large yolk

    Glaze:

    • ½ cup semisweet chocolate chips
    • 2 tablespoons butter
    • 1 tablespoon corn syrup
    • ¼ teaspoon vanilla extract

    Instructions

    • Adjust oven rack to middle position and heat to 400°. Spray donut pan with vegetable oil spray. Whisk flour, sugar, chocolate chips, cocoa powder, cornstarch, baking powder and salt together in a bowl.
    • Whisk buttermilk, butter, eggs, and yolk in a second bowl.
    • Add the wet ingredients into the dry ingredients and stir until just combined.
    • Pipe batter into prepared donut pan. Fill about ¾ full. This should give you about 9 donuts.
    • Bake until toothpick inserted in center comes out clean. 8 to 10 minutes. Let donuts cool in pan for 5 minutes.

    For the Glaze:

    • Combine chocolate chips, butter, corn syrup and vanilla in a double boiler until melted.
    • Dunk your donuts into the glaze making a swirling motion as you pull it out.
    • We then sprinkled chopped up chocolate chips onto the top.

    Notes

    Recipe Source: SerenaLissy.com
    This website provides approximate nutrition information for convenience and as a courtesy only. Nutrition data is gathered primarily from the USDA Food Composition Database via Spoonacular API, whenever available, or otherwise other online calculators. While this information can be helpful in estimating the nutritional information of a recipe, it is by no means accurate or official and is not evaluated by the Food and Drug Administration.
     
    All images and content are copyright protected. Do not use our images without prior permission.

    Nutrition

    Serving: 1Donut | Calories: 299kcal | Carbohydrates: 44g | Protein: 5g | Fat: 12g | Saturated Fat: 7g | Polyunsaturated Fat: 1g | Monounsaturated Fat: 3g | Trans Fat: 1g | Cholesterol: 36mg | Sodium: 234mg | Potassium: 164mg | Fiber: 2g | Sugar: 22g | Vitamin A: 214IU | Calcium: 86mg | Iron: 2mg
    Tried this Recipe? Pin it Today!Mention @SerenaLissy or tag #serenalissy!

    As an Amazon Associate and member of other affiliate programs, I earn from qualifying purchases. What that means is if you click on one of our affiliate links, they may toss a few pennies our way for a commission.
    Baked Chocolate Donuts on Board


    "

    An InLinkz Link-up


    "

    Easy Gluten Free Chocolate Cake

    May 21, 2021

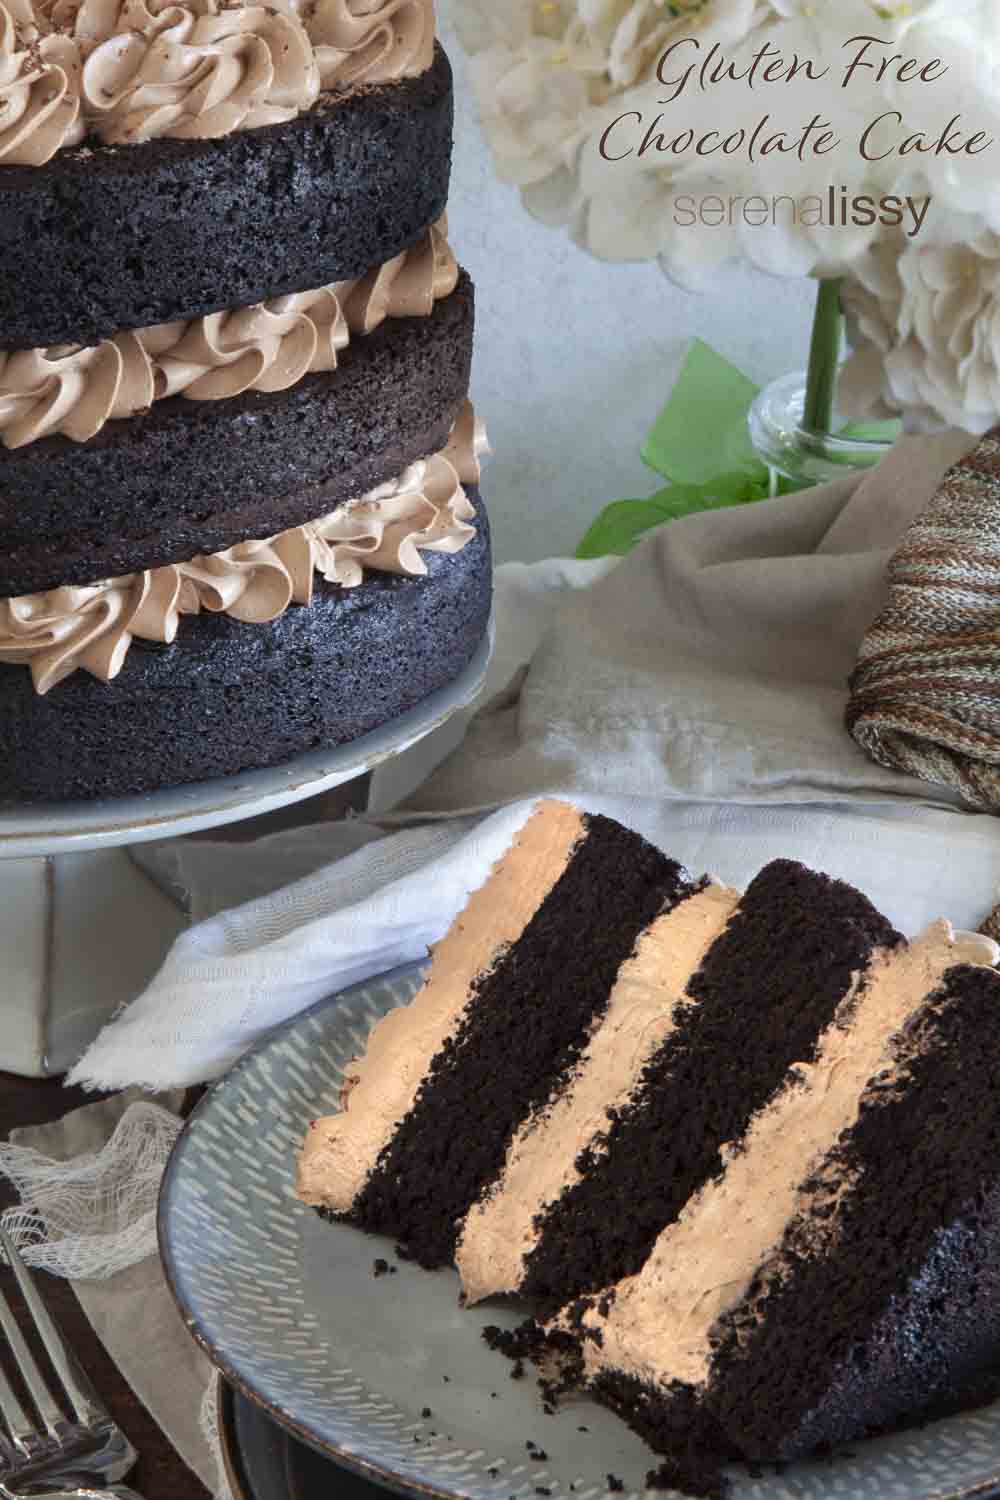
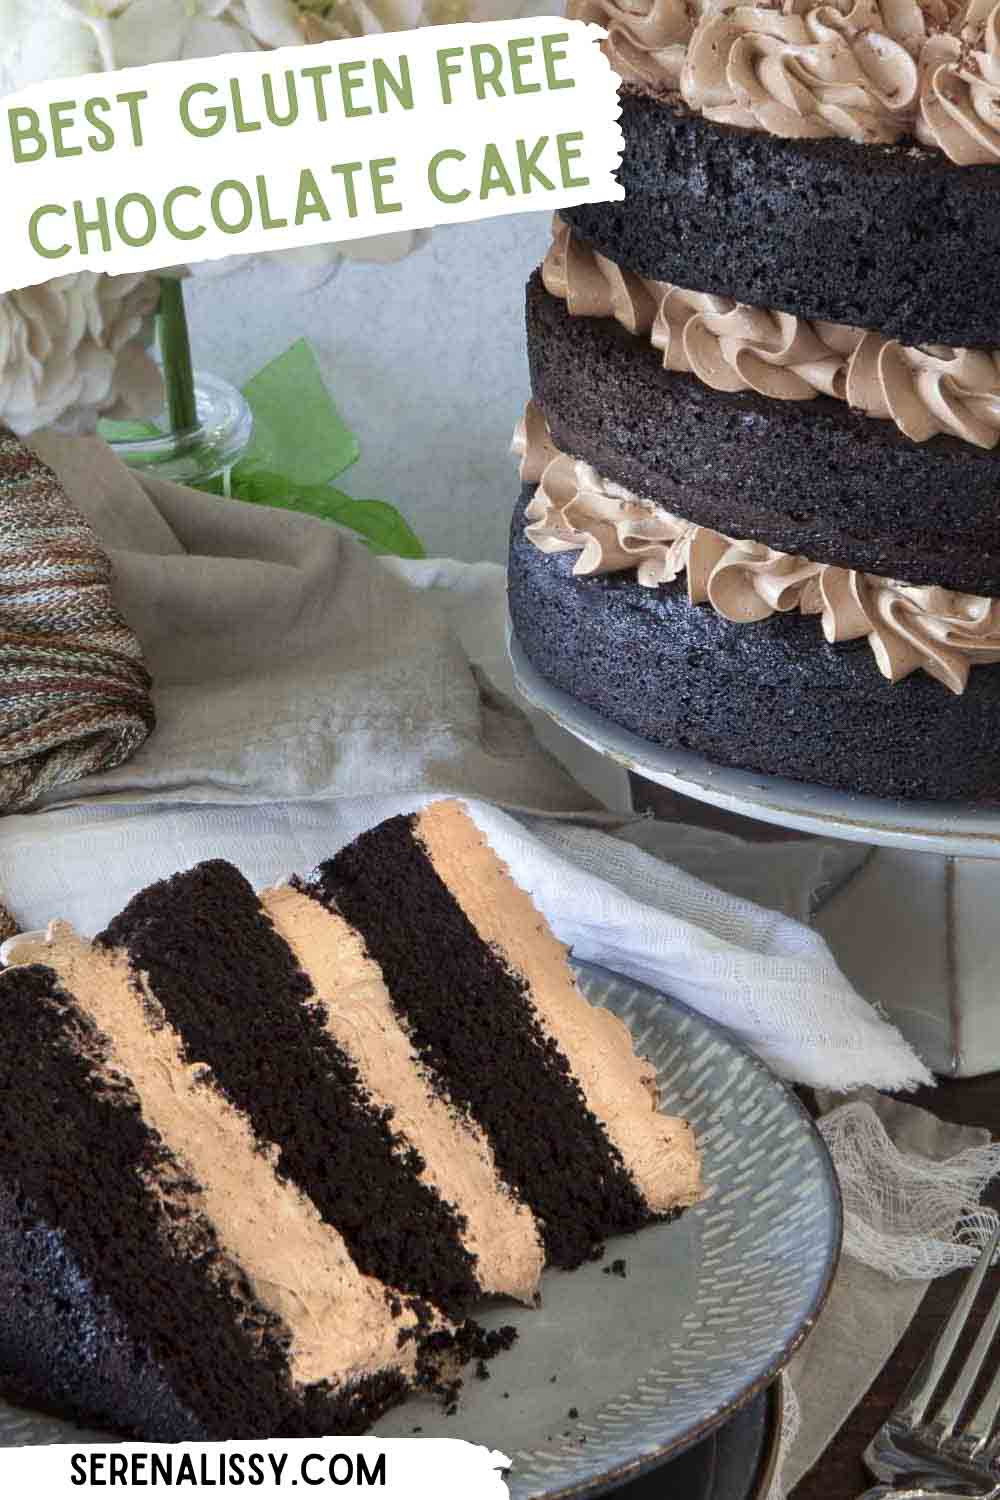
    Slice of three layer gluten free chocolate layer cake on a plate

    Chocolate lovers rejoice! Looking for a gluten free chocolate cake recipe? This easy homemade gluten free chocolate cake is so moist and fluffy you won't be able to tell it's gluten free! The best part about this easy gluten-free chocolate cake recipe? It's made from scratch with simple ingredients and requires no fancy equipment.

    It takes less than fifteen minutes to make the batter for our easy gluten-free chocolate cake, which means you'll have more time to spend on other things in your life - like cooking up something else scrumptious! What are you waiting for?!

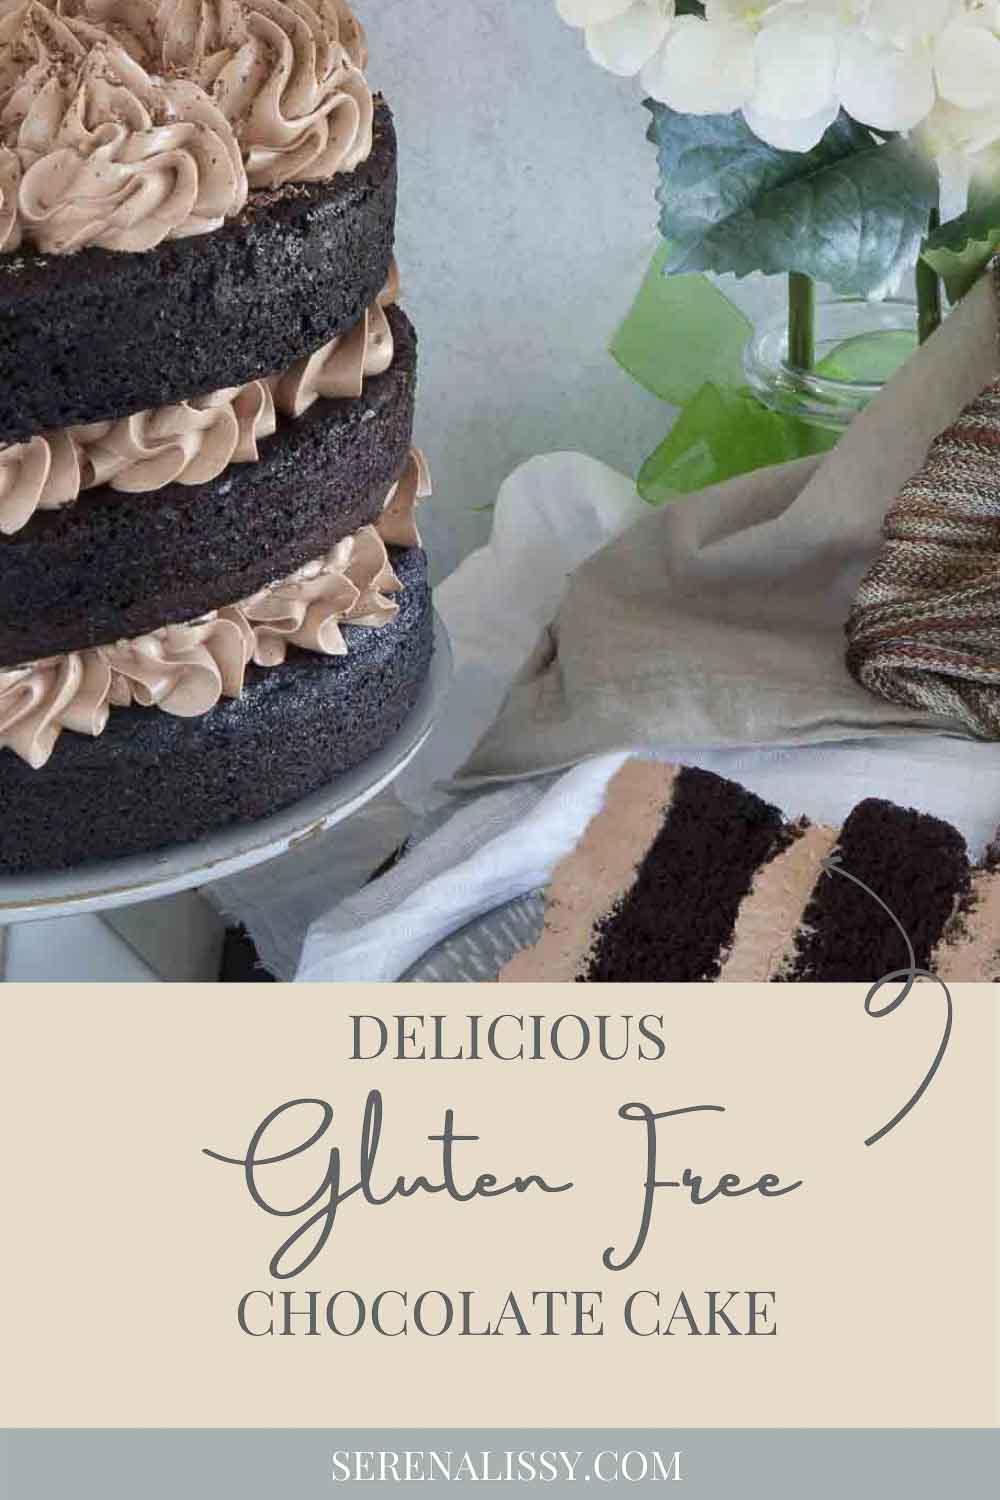
    Slice of three layer cake next to the cake on a stand.

    Gluten Free Chocolate Cake

    We have just recently been exploring gluten free baked goods. What I found is that a lot of them are dry and flavorless. Which isn't how a baked good should be. So, for my first foray into the world of GF baking (or any new recipe!), I revisited an old favorite: Chocolate Cake with Chocolate Buttercream Frosting. We use this cake any time we have a special occasion and it's just the best chocolate cake.

    I started by making two batches--one using regular all-purpose flour as in the original recipe; one substituting it out entirely with King Arthur Gluten Free AP Flour. It took me some time to get this right but after a few attempts, we have what you see before you today: A rich chocolate cake topped off with deliciously smooth frosted Italian buttercream.

    How Many Cake Layers Do You Want?

    The recipe as written makes two layers. So if you want a three layer cake as shown, just increase the recipe by 50%. Or if you just want to double the recipe, you could make a few cupcakes instead of four layer cakes. The cake freezes well, so go ahead and make more for another day. I wouldn't recommend going over three layers. The structure of the cake isn't strong enough to support the weight of the layers.

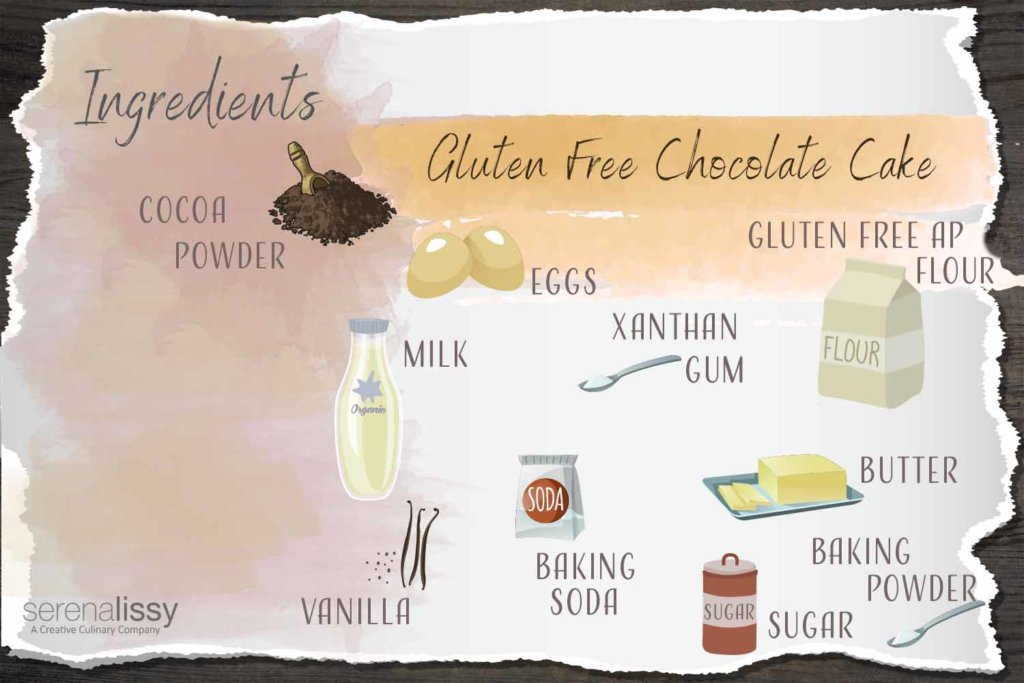
    Gluten Free Chocolate Cake Ingredients

    Cake Ingredients

    • Gluten Free AP Flour (We have only used King Arthur GF AP flour in this recipe. You can easily find it in grocery stores or online at Amazon)
    • Xanthan Gum (If your GF Flour already has this, you won't need it)
    • Cocoa Powder (Use good quality to get the best chocolate flavor)
    • Baking Powder & Baking Soda
    • Butter (Room temperature)
    • Caster Sugar
    • Eggs
    • Milk
    • Vanilla Extract
    • Boiling Water
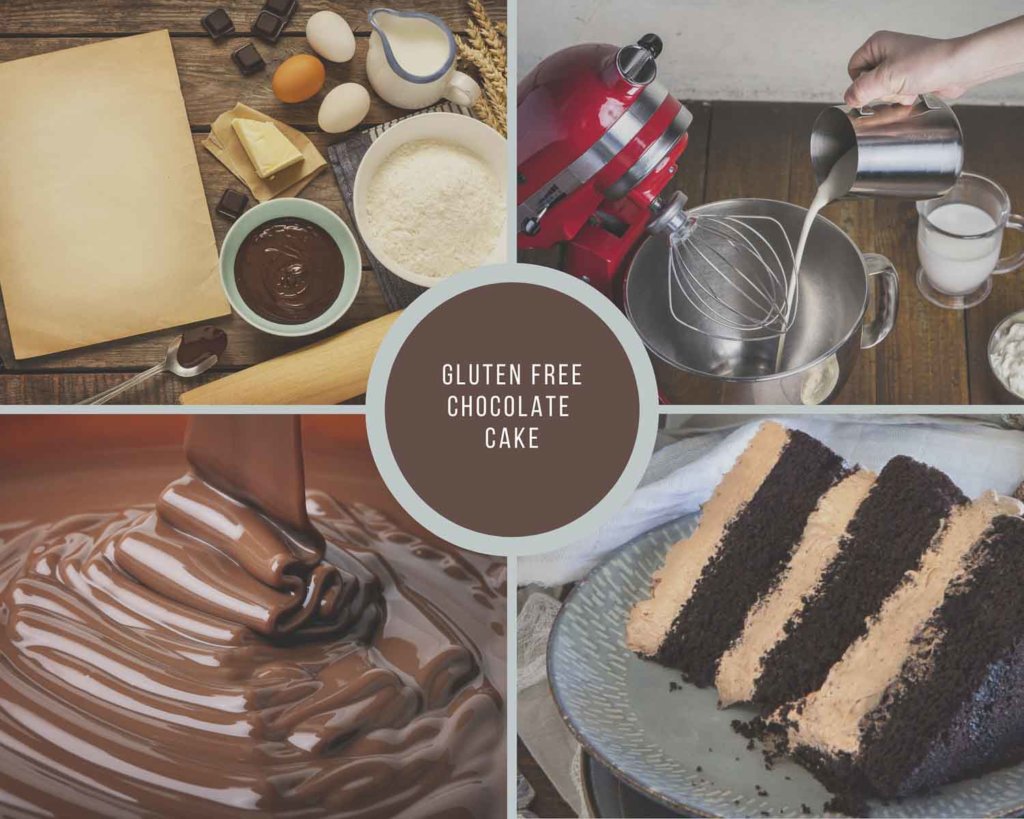
    Gluten Free Chocolate Cake Process Collage

    How to Make the Gluten Free Cake

    1. Preheat oven and grease and line two 8" round cake pans with parchment paper. Be sure to get the sides of the pan as well as the bottom.
    2. In a large mixing bowl, whisk the flour, xanthan gum, cocoa powder, baking powder and baking soda. Set aside.
    3. In a second bowl using an electric mixer, or the bowl of your stand mixer fitted with the paddle attachment, beat the room temperature butter and sugar on medium speed for 2-3 minutes.
    4. Add eggs and combine. Then add vanilla and milk, mixing until smooth.
    5. Add the dry ingredients to the wet ingredients. Mix on low speed until just combined.
    6. With mixer on low speed, slowly add the boiling water a little at a time until incorporated.
    7. Pour the cake batter into your prepared cake pans and bake.
    8. Remove from oven and cool for 15 minutes then remove and place onto a wire rack to finish cooling.
    Chocolate Cake decorated with buttercream

    Tips For Baking The Best Gluten Free Cake

    • Lightly grease the bottoms of your cake pans with gluten free cooking spray and place a sheet of parchment paper cut to fit in the bottom. This will make removing cakes from their pan super easy!
    • Make sure to allow time for your butter to soften. You can read more about the importance of that in our Baking with Room Temperature Ingredients writeup.
    • Allow the cakes to cool in the pan for 10 - 15 minutes, then remove and place on a wire cooling rack.
    • The cakes must be completely cool before icing them.
    • I don't recommend making this cake days ahead of time for when you need it. The earliest I would recommend making a gluten free cake is the day before you need it.
    • Store in an airtight container to keep the moisture in.
    • If you want to know more about the whys and hows of gluten free baking, King Arthur has a great writeup for beginners entering the gluten free world.

    Looking For More Recipes?

    Subscribe to my free newsletter to get new baking tips in your inbox monthly. Find me sharing new recipes and tips on Pinterest, Instagram, or Facebook.

    Gluten Free Chocolate Cake on a Plate

    Easy Gluten Free Chocolate Cake

    This easy homemade gluten free chocolate cake is so moist and fluffy you won't be able to tell it's gluten free!
    5 from 11 votes
    Print Pin Rate
    Course: Dessert
    Cuisine: American
    Prep Time: 15 minutes minutes
    Cook Time: 25 minutes minutes
    Total Time: 40 minutes minutes
    Servings: 14 slices
    Calories: 620kcal
    Author: Serena

    Ingredients

    Gluten Free Chocolate Cake

    • 1 ⅓ cups Gluten Free AP Flour (208 grams)
    • ¼ teaspoon Xanthan Gum (Omit if your flour already has this)
    • ⅔ cup Cocoa Powder (62 grams)
    • 2 teaspoon Baking Powder (10 grams)
    • 1 teaspoon Baking Soda (6 grams)
    • ⅔ cup Unsalted Butter (150 grams)
    • 1 ½ cups Superfine/Caster Sugar (312 grams)
    • 3 Large Eggs Room Temperature
    • ½ cup Whole Milk (120 mL)
    • 1 teaspoon Vanilla Extract
    • ⅔ cup Boiling Water (160 mL)

    Chocolate Italian Buttercream

    • ⅔ pound Sugar (303 grams)
    • 151 grams Egg Whites (5-6 large eggs)
    • 2.66 ounces Water (80 mL)
    • 1 pound Unsalted Butter cut into 1" cubes (453 grams)
    • 6 ounces Melted and cooled bittersweet chocolate (170 grams)

    Instructions

    Gluten Free Chocolate Cake

    • Preheat the oven to 350° F. Grease and line two 8" round cake pans.
    • In a mixing bowl, whisk together the flour, xanthan gum, cocoa powder, baking powder and baking soda. Set aside.
    • In the bowl of a stand mixer, beat the butter and sugar on a medium speed for 2-3 minutes to combine.
    • Add the eggs, 1 by 1, beating on a medium speed between each addition.
    • Add the vanilla extract and milk and mix until smooth.
    • Add in the flour mixture and mix on a low speed until just combined, scraping down the sides when necessary.
    • With the mixer on a low speed, slowly pour in the boiling water a little at a time until all of it has been added and incorporated through.
    • Pour the mixture into your cake pans, distributing it evenly between the two. It will be very runny, but don’t worry – this is how it’s supposed to look!
    • Bake for 25-30 minutes, or until a skewer poked into the center of the cake comes out with just a few moist crumbs and no wet cake mixture.
    • Leave the cakes to cool in the pans for10 minutes before transferring to a wire rack.

    Chocolate Italian Buttercream

    • Combine 76 grams of the sugar with the egg whites in the bowl of your stand mixer.
    • Combine water with the remaining sugar in a small saucepan. Cook on medium heat this until the mixture reaches 240° F (Soft ball stage).
    • When the sugar syrup reaches 230°F, begin whipping the eggs in your stand mixer on medium speed with the whisk attachment. The whites should reach a soft peak stage by the time the sugar reaches 240°F.
    • Carefully stream the hot sugar into the whipping whites. Continue whipping until room temperature.
    • Once the meringue is cooled, switch to the paddle attachment and slowly add the butter on medium speed. Cream until smooth and light.
    • Once the buttercream is at the proper texture add in the melted chocolate and whip until incorporated.
    • Cover and store in the refrigerator until ready to use.

    Notes

    Recipe Source: SerenaLissy.com
    This website provides approximate nutrition information for convenience and as a courtesy only. Nutrition data is gathered primarily from the USDA Food Composition Database via Spoonacular API, whenever available, or otherwise other online calculators. While this information can be helpful in estimating the nutritional information of a recipe, it is by no means accurate or official and is not evaluated by the Food and Drug Administration.
     
    All images and content are copyright protected. Do not use our images without prior permission.

    Nutrition

    Serving: 1Serving | Calories: 620kcal | Carbohydrates: 61g | Protein: 6g | Fat: 42g | Saturated Fat: 26g | Polyunsaturated Fat: 2g | Monounsaturated Fat: 11g | Trans Fat: 1g | Cholesterol: 130mg | Sodium: 411mg | Potassium: 185mg | Fiber: 4g | Sugar: 48g | Vitamin A: 1151IU | Calcium: 81mg | Iron: 2mg
    Tried this Recipe? Pin it Today!Mention @SerenaLissy or tag #serenalissy!

    As an Amazon Associate and member of other affiliate programs, I earn from qualifying purchases. What that means is if you click on one of our affiliate links, they may toss a few pennies our way for a commission.

    Completed Gluten Free Chocolate Cake on Cake Stand

    Camera Modes: A Beginner's Guide to Camera Settings

    May 19, 2021

    Beginners Guide to Camera Modes on A Camera

    Depending on who you ask, the value of purchasing a standalone new camera is easily debated. Why purchase a fancy DSLR camera when your phone camera will do just fine? We hear this debate a lot. We also hear, "I have a new camera and I want to know what settings I should use." The answer to both of these is always, it depends. Different people's photography needs are not always the same.

    Sales of digital cameras took a bit of a dip due to the coronavirus pandemic. However, the volume of digital cameras sold worldwide will hit an all-time high in 2025 with a projected 128.17 million units to be sold. 

    And yet many of us continue to shamefully resort to the automatic camera mode 24/7 because, no one has time to learn about the other available settings.

    If you have a camera, chances are that it has more than one setting. Today's post is a beginner's guide for camera settings and what each setting is used for. We'll cover how to use camera modes properly and how each one can make your photos better. I bet you'll have a more enjoyable experience behind the camera too after learning more about camera modes!

    Guide to Camera Settings

    Don’t worry, there’s no shame in relying on the reliable automatic mode! But having more tools up your sleeve can widen your artistic range and portfolio. So let's get started, the first step to better photos is understanding the exposure triangle. Next is picking your camera mode: P mode (program), A mode (aperture priority), or S mode (shutter priority).

    Beginners Guide to Camera Modes on A Camera

    The Exposure Triangle

    As you probably know a photograph is made by capturing light. The amount of light is registered by a sensor in your digital camera. The right amount of light will determine your correct exposure. To let in the right amount of light we depend on what is known as the exposure triangle. The three pieces that make up the triangle are aperture, shutter speed and ISO. There is a fine balance between them. When you adjust one, you must make adjustments to the others to compensate for the change. Most cameras come with a full automatic mode to do the adjustments for you. Some semi-automatic modes will let you determine one of the three pieces of the triangle and the camera will determine the rest for the proper exposure compensation.

    Automatic or Program Mode

    The quickest camera mode will always have your back. Whenever you need to snap a quick picture before it passes, full auto mode is your best bet! Most cameras are set to this mode upon powering on, so a simple press of the shutter button can capture fleeting moments. The benefit of this mode is that it's easy and quick. This can be great for beginner photographers who need help with exposure time or want an easier way to take pictures in average lighting situations without any prior knowledge about photography settings.

    Automatic mode means your camera will automatically choose the optimum shutter speed, aperture, ISO, and flash settings at the time of shooting the picture. Think of when you’ve used a digital camera and heard the lens quickly spin and adjust itself. This is probably a result of the camera automatically shifting to let in more light or less light depending on your subject.

    While automatic modes are extremely convenient, they do have their downsides. The automatic function does mean there will be some loss of creative control over things like exposure time, ISO sensitivity and white balance which may result in photographs that aren't as good as desired. For example, letting your camera auto-choose an aperture setting can mess up your shot in darker settings. The aperture setting of a camera determines how much light can enter your lens.

    Aperture is measured in F stops that often range from 1.4 to 16. Lower numbers represent larger apertures and therefore larger diameters of the light-entering area. When shooting in an unlit or poorly-lit room, allowing more light into your lens will allow you to capture subjects artfully. Ready to learn more about aperture? Give our in-depth article on Understanding Aperture in Photography a read.

    Shutter Priority Mode

    Shutter priority mode will appear on your camera marked by either "TV" or "S." This mode, as the name implies, prioritizes the shutter speed you’ve manually set over anything else. In fact, prioritization is a weak word for it. Your camera won’t deviate from the speed you’ve set at all!
    If you are experimenting with motion blur or long exposures, or need to avoid camera shake this is the mode you want. Think of shutter priority mode as the ideal setting for catching subjects in motion. Often, your camera’s automatic shutter speed won’t be fast enough to catch a racing cat or a moving train. Try to capture one of these on automatic mode, and you’ll hear a long shutter sound only to reveal blurry images.

    Instead, manually forcing your shutter speed to be as quick as possible will create cleaner images of moving subjects. On the other hand, you can have a slower shutter speed to explore more dreamy and symbolic effects with motion blur.

    A big benefit to this mode is that it can allow for taking pictures in low light without a tripod. In the food photography world, I always advocate for using a tripod. However, if you are doing something like street photography, a tripod isn't a good fit.
    Aperture Priority Mode

    Conversely, aperture priority mode is a camera setting that sets the aperture and automatically adjusts the shutter speed. While shutter priority mode can help you forcibly focus on a moving subject, aperture priority mode can help you in setting a depth of field.

    Consider a portrait photographer learning how to best frame their subject. You’ll probably want a solid focus on your human subject, instead of on the detailed forest trees behind them. Using aperture priority mode, you can manually set an aperture and F stop size that creates crisp pictures of your subject.
    Think about your most recent food photographs. Depending on what's important in that image, you could go with a wide aperture or a small aperture. A wide aperture would be F stops in the range of F1.4, F2, F2.8, which result in a shallow depth of field. This is really useful when you want to direct your viewers eye to a specific focal point in the image. Let's say you have an image of a donut, with blurred flowers in the background. The flowers add a nice photographic prop but are not the hero in the image.

    A small aperture would be F stops in the range of F11, F16, F22, which result in a deep depth of field. Let’s say your donut was sitting next to a milk carton. Maybe the milk company is paying you for the image. You want to make sure everything is in focus to capture that product in all it's glory.

    After snapping a photo, your camera won’t automatically adjust to focus on the more textured trees behind your subject. It will stay where it was and allow you to take even more photos. Perfect! No more fussing with automatic camera settings and wasting minutes hoping for the sun to tell your camera what to do.

    Manual Mode

    The most intricate camera mode is appropriately named manual mode. In this mode, you set the shutter speed, aperture and ISO setting before taking a photo. Your camera will not deviate from these settings, even if you alternate between quickly-moving and still subjects. This mode gives you the most creative freedom since you have full control over the camera. It's a good idea to work your way up to full manual mode.

    The only downside to this mode, is you need more experience with photography to figure out how the camera settings will affect your pictures. Practice makes progress. The technology with cameras today really helps you to slowly work your way into this mode. Once you are comfortable with the semi automatic modes, it will become easier for you to pick the best camera settings for your work flow.

    Creating Art and Memories with Camera Modes

    The next time you’re creating beautiful art and memories with your camera, play around with different camera modes. This will greatly widen your portfolio and effects. Choosing a manual shutter speed using either shutter priority or manual mode can capture an artful blur of a roller coaster or a fleeting smile on a child’s face.

    Remember that creation and art are forms of expression and using different camera modes can give you more tools to expressing yourself! Are you ready to dive back into picture-taking but feeling a bit tired of technical terms? My previous post on The Creative Eye: What Inspires Your Photography can help you dive into your past favorite photos to find inspiration for your next groundbreaking pieces.

    Five Day Food Photography Challenge

    Want to take your food photography up a notch?

    I’ve been photographing food for years and have learned some tricks of the trade. Join me on this 5-day challenge where you’ll learn how to master the art of food photography, one bite at a time. You’ll be amazed by what you can do with just a few simple tips. You will learn how to make your photos pop with color, texture, and lighting. Sign up today!

    As an Amazon Associate and member of other affiliate programs, I earn from qualifying purchases. What that means is if you click on one of our affiliate links, they may toss a few pennies our way for a commission.

    Looking For More Recipes?

    Subscribe to my free newsletter to get new baking tips in your inbox monthly. Find me sharing new recipes and tips on Pinterest, Instagram, or Facebook.

    Mocha Ice Cream Sandwich

    May 17, 2021

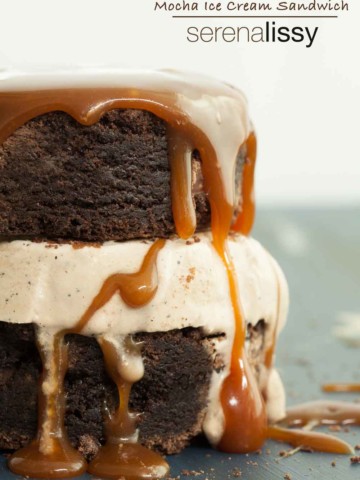
    Mocha Ice Cream Sandwich

    This Mocha Ice Cream Sandwich is the perfect treat for a hot day. Mocha ice cream is sandwiched between two cinnamon spiced brownies and drizzled with a buttery salted caramel sauce. Everyone will love this brownie sandwich.

    Mocha ice cream is sandwiched between two cinnamon spiced brownies and drizzled with a buttery salted caramel sauce.

    Hot Days Were Made for Mocha Ice Cream Sandwiches

    I'm not sure what you are doing this summer to cool off from the heat, but this is what we are doing! Mocha ice cream held together by two cinnamon spiced brownies. Good grief, I could eat this every single day. I never realized how much I loved brownie sandwiches until now. This Mocha Ice Cream Sandwich is definitely my new go to on a hot summer day.

    What Inspired This Brownie Ice Cream Sandwich?

    I saw this recipe in Sift Magazine and decided to give it a try for our Friday food reads. It's simple, sweet, no decorating, and I didn't have to do anything to make it look cute.

    I ended up making a very minor change to the brownie recipe. The original recipe had just too much cinnamon for my liking. So I cut this down to a teaspoon from a tablespoon of ground cinnamon. Just a hint of cinnamon flavor was all that I needed to go with the mocha ice cream. But if you are a cinnamon lover, then, by all means, go with the full tablespoon.

    I made extra ice cream to have other sandwiches but I ended up just eating all the ice cream before I ever got a chance to make other cookies. When you have ice cream infused with espresso and chocolate, it doesn't last long at my house.

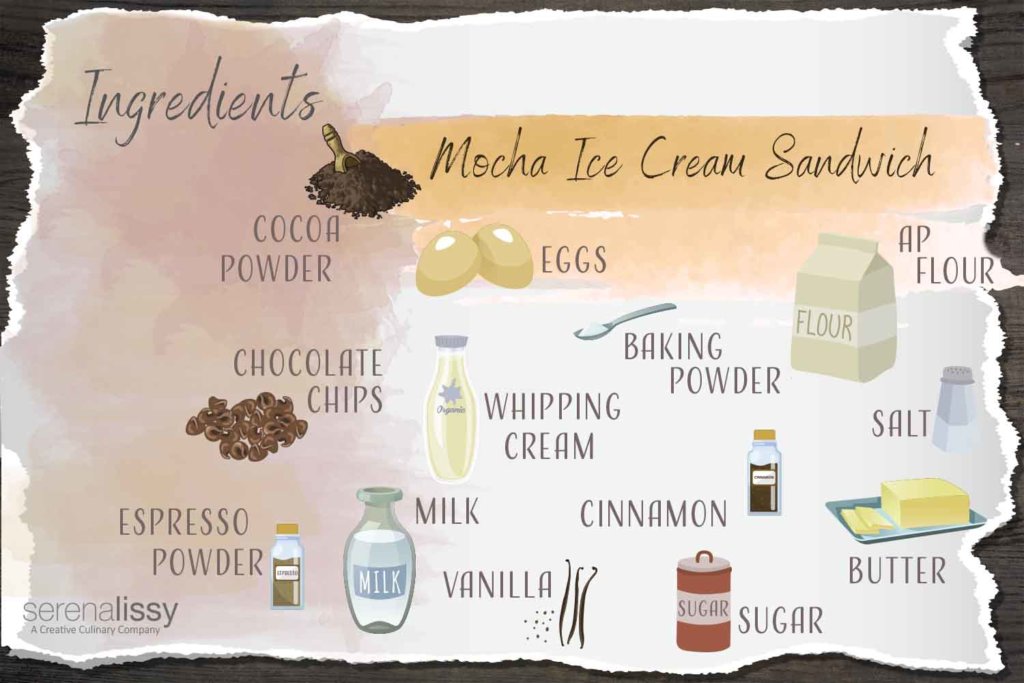
    Mocha Ice Cream Sandwich Ingredients

    Ingredients for Mocha Ice Cream Sandwich

    This recipe makes three separate parts that combine to make a whole lot of goodness. This ingredient list feels long but these sandwiches make every moment in the kitchen worth the effort.

    • Unsalted butter
    • Sugar
    • Dutch process cocoa powder
    • Salt
    • Baking powder
    • Espresso powder
    • Ground cinnamon
    • Vanilla extract
    • Eggs
    • All-purpose flour
    • Semi-sweet chocolate chips
    • Whole milk
    • Cocoa powder
    • Heavy cream

    How to Make Mocha Ice Cream Sandwiches

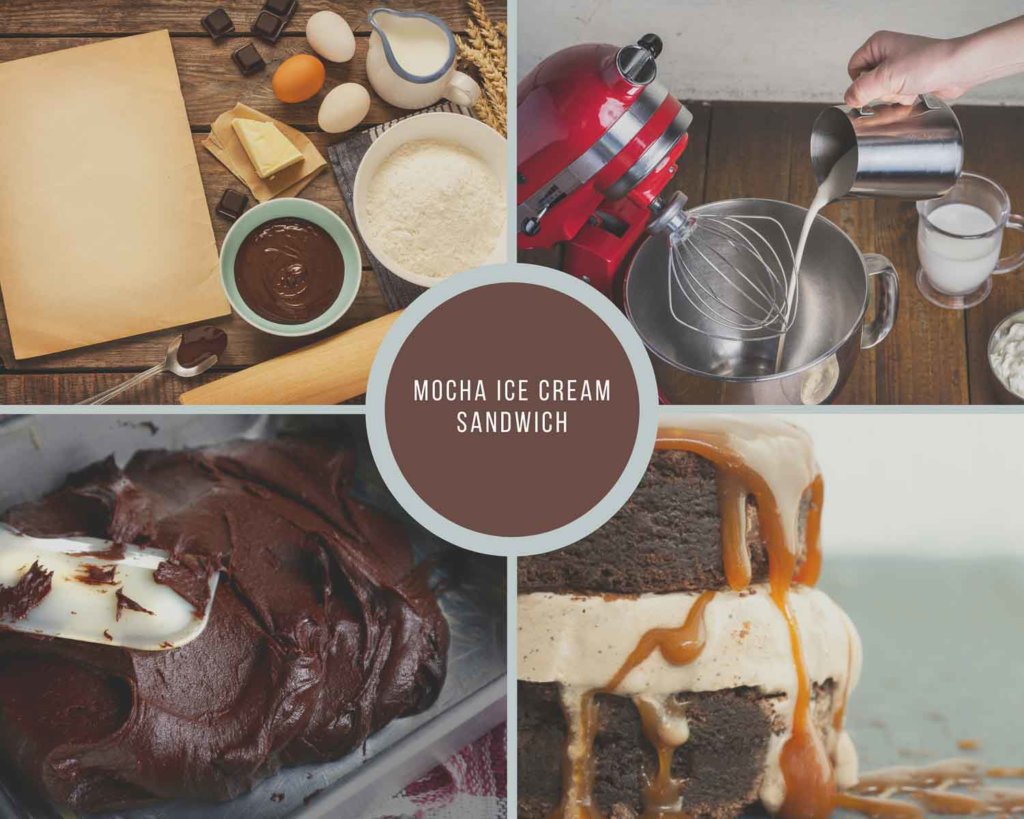
    Process Collage for Mocha Ice Cream Sandwich
    1. Bake the Brownies - Melt the butter and sugar in a saucepan before adding the dry ingredients. When will mixed whisk in the eggs, add the flour and fold in the chocolate chips. Bake at 350° for 34-36 minutes.
    2. Make the Mocha Ice Cream - Whisk together the ice cream ingredients and process them in your ice cream machine according to the manufacturer's instructions.
    3. Make the Caramel Sauce - Boil sugar, water and salt until it turns amber in color. Remove from heat and stir in the butter. When melted, add in the heavy cream and vanilla.
    4. Assemble the Mocha Ice Cream Sandwiches - Cut the brownie into equal pieces. Scoop ice cream onto a brownie and top with another brownie. Drizzle with salted caramel sauce.

    Why You'll Love These Ice Cream Brownie Sandwiches

    Everything about this mocha ice cream sandwich recipe was easy. Only three components and if you are thinking about skipping that caramel sauce, don't even do it! It's a very easy caramel to make and it is just so delicious on the brownie sandwich. It's going to get messy but trust me, it's worth it. Worse case scenario, you need to eat it with a fork.

    Try These Brownie and Ice Cream Recipes

    • Chocolate Chunk Ice Cream
    • El Rey Chocolate Brownies
    • Peppermint Pattie Brownies

    This is the first recipe I have made from Sift Magazine. If you aren't familiar with it, you can probably find it in your local bookstore. It's a publication by King Arthur Flour. I'm a huge fan of their products. They aren't paying me to say this; I just love their products. And this magazine is a food photographers dream come true. Beautiful imagery and if everything works as well as this recipe, then it's also a great source for delicious recipes.

    Give it a try, we would love to hear how it worked out for you. Or even if you were inspired and decided to use the components in other desserts, let us know. Stay cool, and happy summer!

    Looking For More Recipes?

    Subscribe to my free newsletter to get new baking tips in your inbox monthly. Find me sharing new recipes and tips on Pinterest, Instagram, or Facebook.

    Mocha Ice Cream Sandwich

    Mocha Ice Cream Sandwich

    Mocha ice cream is sandwiched between two cinnamon spiced brownies and drizzled with a buttery salted caramel sauce. This treat is easy to make and perfect for a hot summer day.
    5 from 26 votes
    Print Pin Rate
    Course: Dessert
    Cuisine: American
    Prep Time: 15 minutes minutes
    Cook Time: 35 minutes minutes
    Freezing Time: 3 hours hours
    Total Time: 3 hours hours 50 minutes minutes
    Servings: 12 Sandwiches
    Calories: 911kcal
    Author: Serena

    Ingredients

    Cinnamon Spiced Brownies

    • 1 cup unsalted butter
    • 2 ¼ cups sugar
    • 1 ¼ cups Dutch process cocoa powder
    • 1 teaspoon salt
    • 1 teaspoon baking powder
    • 1 teaspoon espresso powder
    • 1 teaspoon ground cinnamon
    • 1 tablespoon vanilla extract
    • 4 large eggs
    • 1 ½ cups King Arthur Unbleached All Purpose Flour
    • 2 cups semisweet chocolate chips

    Mocha Ice Cream

    • 1 cup cold whole milk
    • ¾ cup sugar
    • 2 tablespoons espresso powder
    • 2 tablespoons cocoa powder
    • 2 cups cold heavy cream
    • 1 teaspoon vanilla extract

    Salted Caramel Sauce

    • 1 cup sugar
    • 2 tablespoons water
    • ¼ teaspoon salt
    • 6 tablespoons unsalted butter
    • ½ cup heavy cream
    • 2 teaspoons vanilla extract

    Instructions

    Cinnamon Spiced Brownies

    • Preheat the oven to 350° F. Lightly grease a 9" x 13" pan, line it with parchment and grease the parchment.
    • In a medium saucepan, over low heat, melt the butter and add the sugar. Stir to combine. Heat briefly just until hot throughout.
    • Remove from heat and stir in cocoa powder, salt, baking powder, espresso powder, cinnamon, and vanilla. Whisk in the eggs, continue stirring until smooth. Stir in the flour.
    • Fold in the chocolate chips.
    • Spoon the batter onto the prepared pan and smooth the top.
    • Bake for 34 to 36 minutes, until a toothpick inserted into the center comes out clean. They should be set at the edges and just barely set in the center. Remove from oven and let cool in the pan.

    Mocha Ice Cream

    • Whisk together the milk, sugar, espresso powder, and cocoa powder until sugar has dissolved. Stir in heavy cream and vanilla.
    • Freeze in your ice cream maker according to the manufacturer's instructions. Transfer to covered container once done and freeze for 2 - 4 hours before serving.

    Salted Caramel Sauce

    • Place sugar, water and salt in a 2 quart saucepan. Bring to a boil over medium heat, stirring occasionally until the sugar dissolves. Continue to cook until mixture turns a rich amber color. Remove from heat and stir in the butter. Once butter is absorbed stir in the heavy cream and vanilla extract. When sauce is smooth pour into a heatproof container to store, covered and refrigerated until ready to use.
    • When ready, cut the brownies, scoop the ice cream, assemble and drizzle the caramel on top.

    Notes

    Recipe Source: SerenaLissy.com
    This website provides approximate nutrition information for convenience and as a courtesy only. Nutrition data is gathered primarily from the USDA Food Composition Database via Spoonacular API, whenever available, or otherwise other online calculators. While this information can be helpful in estimating the nutritional information of a recipe, it is by no means accurate or official and is not evaluated by the Food and Drug Administration.
     
    All images and content are copyright protected. Do not use our images without prior permission.

    Nutrition

    Serving: 1Sandwich | Calories: 911kcal | Carbohydrates: 104g | Protein: 9g | Fat: 54g | Saturated Fat: 33g | Polyunsaturated Fat: 2g | Monounsaturated Fat: 15g | Trans Fat: 1g | Cholesterol: 182mg | Sodium: 336mg | Potassium: 464mg | Fiber: 6g | Sugar: 79g | Vitamin A: 1504IU | Vitamin C: 1mg | Calcium: 127mg | Iron: 4mg
    Tried this Recipe? Pin it Today!Mention @SerenaLissy or tag #serenalissy!

    As an Amazon Associate and member of other affiliate programs, I earn from qualifying purchases. What that means is if you click on one of our affiliate links, they may toss a few pennies our way for a commission.

    Olive Oil Carrot Cake

    May 14, 2021

    Olive Oil Carrot Cake On Cutting Board

    This olive oil carrot cake is a perfect way to celebrate the spring season. It is full of fresh carrots and bursting with flavor. Not only does carrot cake made with olive oil taste great, but it's also easy to make, which makes it perfect for any occasion!

    Carrot Cake with Olive Oil on a cutting board

    Can You Make a Carrot Cake with Olive Oil?

    Using olive oil for baking is such a great option compared to butter and other refined oils like canola or coconut oil. Olive oil is full of beneficial fatty acids and powerful antioxidants, and it contains mostly monounsaturated fats.

    Since olive oil is heat resistant, it works well in baking applications because it won't become rancid or release carcinogenic compounds during the baking process. You will come away with a moist and flavorful cake that's healthier to boot.

    If you're concerned about the taste, start with a milder olive oil, but I think you will be pleasantly surprised and barely notice the oil flavor in the finished recipe. After learning about and tasting oils at the Cobram Estate, I was inspired to use olive oil in this flavorful carrot cake.

    A Bit About Cobram Estate

    Last week I attended the International Food Blogger Conference (IFBC). Such a fun time out in Sacramento, the farm to fork capital. One of the preconference excursions was a trip to Cobram Estate and a visit with the California Olive Oil Council.  Cobram was named the World's Healthiest Extra Virgin Olive Oil at the 2017 Health & Food EVOO Awards Competition in Spain. Their specialty is cold pressed juice that is not processed and does not contain chemicals or additives. They have exclusive harvesting and crushing techniques. One key item for them is using olives at the peak of freshness and pressing them within four to six hours of being picked from the branch. This makes the most flavorful, healthy, antioxidant-rich and freshest olive oil. I will say I sampled two-day-old olive oil, and I am a believer! Holy cow, that was so good!

    California Olive Oil Council

    The California Olive Oil Council (COOC) is a trade association with the mission of encouraging the consumption of certified California extra virgin olive oil through education, outreach and communications. The COOC has grown to represent over 90% of the olive oil production in California. CBS did a report on the olive oil fraud coming from Italy and how most of it isn't as pure as we think. Quite an interesting watch if you haven't seen it. I'm now convinced why the council is needed. 

    Olive Oil Tasting

    The tour gave us the full olive harvest experience and explained the journey from tree to table. After tasting a few samples, we learned that the flavor of extra virgin olive oil can be buttery and soft or spicy and sharp. It can be reminiscent of pepper, lemon, or grass. Thanks to California’s range of growing conditions and olive varieties, there truly is a California extra virgin olive oil to suit every palate. I'm looking forward to making a return trip just to try other oils.

    Benefits of Fresh Olive Oil

    And as a side note, high quality extra virgin olive oil provides the best health benefits and flavor when it’s fresh. Extra virgin olive oil should be purchased within 12 to 18 months of its harvest date and should be used up within six months of opening. Be sure to store it in a cool, dark place for the best results.

    So, after all the olive oil education and love of the flavor, we decided to go ahead and try an olive oil carrot cake. We started with a base recipe from Cobram and made a few modifications to suit our taste buds. This cake would be great any time of the year, but we decorated it for a lovely fall dessert.

    Ingredients

    Ingredients for Olive Oil Carrot Cake
    • Eggs
    • Buttermilk
    • Olive Oil
    • Sugar
    • AP Flour
    • Cinnamon
    • Baking Powder
    • Baking Soda
    • Salt
    • Carrots
    • Powdered Sugar
    • Cream Cheese
    • Olive Oil

    We recommend getting the freshest Olive Oil you have access to. It really does make such a difference.

    How to Make the Cake

    Olive Oil Carrot Cake Process Shot

    This carrot cake is pretty easy, but let's walk through the process together. Begin with two mixing bowls—one for all the dry ingredients except the sugar and carrots. Whisk the dry ingredients together until combined.

    Next, in your stand mixer bowl (you could easily go with a second bowl and mix by hand), combine eggs and buttermilk, then oil. Then add the sugar and mix until thick and foamy.

    Slowly add the dry ingredients to the wet ingredients until combined. Once combined, stir in your carrots.

    Cream Cheese Frosting

    To make this recipe one step easier, I use my classic cream cheese frosting recipe for the icing. The cream cheese frosting is a go-to for many special occasions. The tangy, smooth consistency of the icing makes it perfect to top off this Olive Oil Carrot Cake with its rich flavor. It’s so smooth, tangy, and glides on the cake seamlessly.

    If you are looking to pipe decorations with this frosting, put it in the refrigerator for about 20 minutes to let it get cold so that it will hold its shape.

    Carrot Cake Success Tips

    • Choose the right carrots: Look for skinny to medium sized. Also, be sure to peel them before grating. Sometimes the skin tastes bitter.
    • Use a food processor: The easiest way to grate your carrots is to use a food processor with the grating attachment. Now, if you don't have one, then a good old box grater will also work.
    • Don't overmix: If you overmix, you run the risk of a dense, tough cake and no one wants that.

    I hope you like the cake as much as we do. It's a simple, delicious carrot cake recipe. Please give it a try and let us know how it goes.

    Looking For More Recipes?

    Subscribe to my free newsletter to get new baking tips in your inbox monthly. Find me sharing new recipes and tips on Pinterest, Instagram, or Facebook.

    Olive Oil Carrot Cake On Cutting Board

    Olive Oil Carrot Cake

    Flavorful carrot cake is made light and moist with the addition of olive oil. It compliments the earthy flavors and adds airiness without overwhelming the cake.
    5 from 47 votes
    Print Pin Rate
    Course: Dessert
    Cuisine: American
    Prep Time: 20 minutes minutes
    Cook Time: 55 minutes minutes
    Total Time: 1 hour hour 15 minutes minutes
    Servings: 16 Pieces
    Calories: 600kcal
    Author: Serena

    Ingredients

    Carrot Cake

    • 3 eggs - room temperature
    • ⅓ cup buttermilk - room temperature
    • 1 ½ cups olive oil
    • 2 cups sugar
    • 3 cups AP flour
    • 1 tablespoon cinnamon
    • 2 teaspoons baking powder
    • 1 teaspoon baking soda
    • 1 teaspoon salt
    • 1 pound carrots peeled and grated

    Frosting

    • 3 cups powdered sugar
    • 1 pound Philadelphia cream cheese
    • 6 oz olive oil

    Instructions

    Cake

    • Preheat oven to 325°F
    • Oil and flour two 8" round pans
    • In a stand mixer, combine eggs and buttermilk on medium speed. Slowly stream in oil.
    • Stream in the sugar and mix until thick and foamy on high speed. This will become a pale lemon yellow in color.
    • In a separate bowl, whisk flour, cinnamon, baking powder, baking soda and salt together. Slowly add into the stand mixer and continue mixing.
    • Once combined, add carrots and mix until just incorporated.
    • Spread into the 8" pans, and bake for 45-55 minutes or until a toothpick inserted in center comes out clean. Remove from oven and let cool

    Frosting

    • In a stand mixer, cream the powdered sugar with cream cheese until combined.
    • Slowly stream in the olive oil until incorporated
    • Once cakes have cooled, remove from pan and decorate with the frosting.

    Notes

    Recipe Source: SerenaLissy.com
    This website provides approximate nutrition information for convenience and as a courtesy only. Nutrition data is gathered primarily from the USDA Food Composition Database via Spoonacular API, whenever available, or otherwise other online calculators. While this information can be helpful in estimating the nutritional information of a recipe, it is by no means accurate or official and is not evaluated by the Food and Drug Administration.
    All images and content are copyright protected. Do not use our images without prior permission.

    Nutrition

    Serving: 1Piece | Calories: 600kcal | Carbohydrates: 71g | Protein: 8g | Fat: 32g | Saturated Fat: 5g | Polyunsaturated Fat: 4g | Monounsaturated Fat: 23g | Trans Fat: 1g | Cholesterol: 35mg | Sodium: 504mg | Potassium: 216mg | Fiber: 2g | Sugar: 50g | Vitamin A: 4805IU | Vitamin C: 2mg | Calcium: 158mg | Iron: 2mg
    Tried this Recipe? Pin it Today!Mention @SerenaLissy or tag #serenalissy!
    Olive Oil Carrot Cake On Cutting Board

    Other Reader Favorites:

    The Cutest Easter Bark

    Chocolate Rum Banana Bread

    Strawberry Mousse Cake

    As an Amazon Associate and member of other affiliate programs, I earn from qualifying purchases. What that means is if you click on one of our affiliate links they may toss a few pennies our way for a commission. 

    Baking Soda vs Baking Powder

    May 12, 2021

    Bowl of baking soda on a towel on tabletop

    We’ve all been there. You’re ready to make the most delicious Ginger Molasses Pizzelles or Apple Cinnamon Muffins. All of your ingredients are lined up and you may have even mixed the wet ingredients together.

    You have your dry ingredients ready to go and even started mixing and sifting them together...when you realize you’re out of baking soda or powder. Ouch! 

    These ingredients are huge factors in leavening in recipes, forcing baked goods to rise and often giving beautiful fluffy textures in the process. Unfortunately, they are also often irreplaceable depending on the recipe on hand.

    Today, we’re exploring the differences between baking soda vs. baking powder and finding some solutions if the recipe calls for one and you find yourself short.

    Baking Soda and Baking Powder as Chemical Leavening Agents

    Why do we use baking soda and powder in recipes? Well simply, many recipes would literally fall flat without them.

    Baking powder and baking soda are chemical leavening agents that release carbon dioxide gas within your bakes. These carbon dioxide bubbles creates a rise in each bake as the air is forced out, often inside your mixture, forming small air pockets and "fluffy" or "airy" textures.

    The key differences between the two are on a chemical level.

    The Chemical Makeup of Baking Soda

    Baking soda, also known as sodium bicarbonate or bicarbonate of soda, is a simple chemical compound. It is a solid, white compound that is most frequently used in fine powder form. In chemistry terms, the compound is considered a basic salt, the opposite of acidic.

    So what does all this science mean in terms of baking? Well, baking soda will react to acids included elsewhere in a recipe to create a chemical reaction of carbon dioxide gas. This gas gets released into pastries and other bakes, forcing a rise and creating delicious pockets of air out of the oven. Yum!

    The Chemical Makeup of Baking Powder

    Baking powder is very similar to baking soda. Baking powder is actually baking soda, with an additional acidic ingredient. This is why research into baking powder can be confusing, as you’ll often find answers related to the exact same sodium bicarbonate reaction.

    However, unlike baking soda, baking powder comes "pre-packed" with its own additional acids. The sodium bicarbonate won’t react with this acid until the entire mixture is wet.

    Additionally, there are two types of baking powder to look for. The first is a continuous or single-acting baking powder. This version holds only one kind of acid and therefore reacts continuously or once when the mixture is made wet with other ingredients.

    The other type of baking powder is double acting or multiple-action baking powder, which contains more than one additional powdered acid. Typically, these acids are very different from each other. The sodium bicarbonate will react with one acid at lower temperatures, and again with the second acid at higher temperatures during the bake. 

    All of this science means that there are many different options out there to get the perfect texture in your baking adventures!

    Baking Soda vs. Baking Powder

    Using Baking Soda vs. Baking Powder

    Great, so we’ve sloughed through the science-heavy portions. Heavy! How does this help us determine when to use baking soda vs. baking powder? Most recipes clarify when to use baking soda or baking powder, and this typically shouldn’t be messed with.

    However, knowing why each recipe chooses one over the other can be extremely helpful when adjusting recipes. Sometimes we don’t like how fluffy things turn out, or we can tell that our heavy mixing will need a bit more lift before going into the oven.

    Typically, baking soda is used in recipes in which acidic-heavy other ingredients will also be used. Common acids used in recipes include lemon juice, brown sugar, yogurt, and more.

    On the other hand, baking powder is most commonly used in recipes that do not innately have acidic ingredients. This includes biscuits and pancakes.

    Mixing these situations up is a common way to get flat or runny ingredients. You probably had too much or too little acidity available to mix with your sodium bicarbonate.

    Substituting Baking Soda and Powder for Each Other

    Alright, obviously replacing baking soda for powder or vice versa isn’t going to work out for us. But is there a way to make this work without a trip to the grocery store?

    You may have heard that one tablespoon of baking soda can be replaced by three tablespoons of baking powder. And this is true!

    According to ThoughtCo’s scientific article exploring these substitutions, baking powder can be used as a baking soda replacement in higher quantities because the powder still contains sodium bicarbonate. Larger amounts will be needed since the acidic ingredients in baking powder make it a less potent of a crystal. But sometimes that much baking powder will result in a bitter taste or metallic taste in your final product.

    What about the other way around? Baking soda can be used as a replacement for baking powder when mixed with cream of tartar. You’ll want to add two parts cream of tartar for one part of baking powder. But as a good rule of thumb, I'd stick to what the recipes call for.

    Replacing Baking Soda and Baking Powder at Home

    Looking at the background we already explored, these alterations can make sense! You’ll need to compensate for needed acidity in baking powder and need additional help in sodium bicarbonate when replacing baking soda.

    Keep in mind that replacing baking powder with baking soda and cream of tartar is more preferable to replacing baking soda. This is because the additional ingredients in baking soda can harm the taste of a baking powder recipe.

    However, some folks even prefer to make homemade baking powder since they can have greater control over what goes into the powder and reduce aluminum intake.

    Don't Forget These Expire

    I never forget to replace my baking powder and baking soda because I know they're not only important for taste, but also so that my baked goods get a good rise and don't come out flat. I keep these for a maximum of three months once I open the package. An easy way to remember to replace them is to write the expiration date on the top of the box or can when you open it, and then I make sure to replace them within 90 days.

    Baking Soda and Baking Powder At Home

    No matter the bake you like best or excel in, it’s a great idea to keep both baking soda and baking powder available at home. You never know when a new recipe like our Chocolate Rum Banana Bread will come along to entice you!

    But if you have to go without, keep an excess of baking powder on hand to replace baking soda. And hey, a bit of cream of tartar doesn’t hurt either. Explore more of our delicious recipes and our Top 10 Baking Tips to help you excel in your bakes!

    As an Amazon Associate and member of other affiliate programs, I earn from qualifying purchases. What that means is if you click on one of our affiliate links, they may toss a few pennies our way for a commission.

    Baking Soda vs. Baking Powder

    Looking For More Recipes?

    Subscribe to my free newsletter to get new baking tips in your inbox monthly. Find me sharing new recipes and tips on Pinterest, Instagram, or Facebook.

    Blueberry Muffins With Lemon Curd Butter

    May 10, 2021

    Blueberry Muffins in a basket

    What's better than a blueberry muffin? Blueberry muffins with lemon curd butter, of course. These easy-to-make breakfast treats are perfect for anyone who is looking for an easy recipe that won't take too much time to make. When you're in the mood for something sweet, these muffins will satisfy any craving! The lemon curd butter takes these muffins from delicious to absolutely amazing!

    Blueberry Muffins in a basket

    Why Make Blueberry Muffins?

    Breakfast on the go – Muffins can be enjoyed for breakfast, as a snack or dessert! They are quick and easy to make. And they are made with just a few ingredients you probably have in your pantry already.

    You'll love it – With homemade lemon curd butter this easy recipe is delicious no matter which way you slice them.

    Blueberry Muffins With Lemon Curd Butter Ingredients

    Ingredients For The Muffins

    • AP (All Purpose) Flour
    • Sugar
    • Light Brown Sugar
    • Baking Powder & Baking Soda
    • Salt
    • Sour Cream
    • Lemon Zest & Juice - Just a hint of lemon flavor comes through the muffin making it a match made in heaven with the blueberries. If you are ever wondering about flavor combinations, I am recommending the book The Flavor Bible by Karen Page and Andrew Dornenberg. It's so simple to use and such a valuable resource for any kitchen.
    • Blueberries - If you are a big fan of blueberries you could possibly get away with adding another ¼ cup of blueberries. I'd try the recipe first as written, and next time you will know if you want more. You can use fresh berries or frozen for the recipe.
    • Butter

    Ingredients For The Lemon Curd Butter

    • Lemon Curd - We have a great recipe for this if you want to use homemade curd. Store bought would also work.
    • Room Temperature Butter
    Blueberry Muffins Process Collage

    How to Make Moist Blueberry Muffins with Lemon Curd Butter

    This is a really simple recipe. You could use a stand mixer with a paddle attachment if you wanted on low speed, but it's so simple to incorporate the ingredients, I'd recommend a bowl and rubber spatula to avoid any chance of overmixing.

    You are going to mix the dry ingredients into a bowl. Then in a second separate bowl, you will mix the sour cream, eggs, lemon zest and lemon juice. Slowly fold the wet ingredients, the sour cream mixture, into the dry ingredients. Then with a rubber spatula fold in the butter. Once you have all that mixed together let it sit for about 15 minutes to rest the gluten. Then fold in your blueberries. Portion out the muffin batter into the muffin tins and bake.

    The Best Way to Make The Muffins Rise

    By starting the muffins off at such a high temperature it is the initial high heat of 425 degrees that causes the batter to have greater oven spring or a rapid rise during the first few minutes of baking. The higher heat creates a burst of steam that lifts the batter, and helps you get a taller muffin top.

    Blueberry Muffins in a basket

    Tips For Great Tasting Muffins

    • You can store leftover muffins in an airtight container or ziptop freezer bags and warm them up in a 200 degree oven for 5-7 minutes. You can also microwave these for 10-15 seconds if you are short on time.
    • Having eggs and butter, at room temperature helps them form a smooth mixture that traps air and expands when heated in the oven. Keeps your muffins light and fluffy.
    • To keep your blueberries from sinking to the bottom of your mix, toss your blueberries with a little flour, about a tablespoon before adding them to the batter. This works with frozen or fresh blueberries.
    • If your blueberries are frozen, you do not need to thaw them before using.
    • You can use a measuring cup or cookie scoop to portion out your muffins.
    • You can bake these muffins right in the muffin tin, or you can use muffin liners if you would rather.
    • I'm a fan of the lemon curd butter, but if you don't want to make that, these muffins are delicious if you just top them with extra lemon curd. If you don't have leftover lemon curd, I'd just go with butter.
    • You could also sprinkle some turbinado sugar on top of the muffins before baking to give you more of a bakery style finish.
    Delicious Blueberry Muffins on Cooling Rack

    Give These Other Lemon Recipes A Try

    • Lemon Curd Ice Cream
    • How To Make Lemon Curd
    • Nailed It! Key Lime Verrine
    • Easy Pumpkin Chocolate Chip Muffins

    Looking For More Recipes?

    If you're looking for a delicious, easy recipe that will take less than an hour to make and won't require too much effort on your part, these muffins are perfect. The lemon curd butter takes them from good to great! Sign up below to get updates about new recipes or food photography tips, and techniques delivered straight to your inbox. Have blueberries on hand? Get started with this simple recipe today!

    Subscribe to my free newsletter to get new baking tips in your inbox monthly. Find me sharing new recipes and tips on Pinterest, Instagram, or Facebook.

    Blueberry Muffins Completed on Cooling Rack

    Blueberry Muffins With Lemon Curd Butter

    When you're in the mood for something sweet, these blueberry muffins will satisfy any craving! The lemon curd butter takes them from delicious to absolutely amazing!
    5 from 6 votes
    Print Pin Rate
    Course: Breakfast, Dessert
    Cuisine: American
    Prep Time: 10 minutes minutes
    Cook Time: 25 minutes minutes
    Total Time: 35 minutes minutes
    Servings: 12 Muffins
    Calories: 419kcal
    Author: Serena

    Ingredients

    • 15 Oz AP Flour (425 grams)
    • 3.5 Oz Sugar (100 grams)
    • 3.5 Oz Light Brown Sugar (100 grams)
    • 1 tablespoon Baking Powder (16 grams)
    • ½ teaspoon Baking Soda
    • ½ teaspoon Salt (3.1 grams)
    • 1 ½ Cup Sour Cream (375 grams)
    • 2 Large Eggs
    • 1 tablespoon Fresh Lemon Juice
    • 2 teaspoon Lemon Zest (3 grams)
    • 8 tablespoon Unsalted Butter, melted and cooled (113 grams)
    • 1 ½ Cup Blueberries (250 grams)

    Lemon Curd Butter

    • 4 Oz Lemon Curd
    • 3 Oz Unsalted Butter - Room Temperature

    Instructions

    • Adjust oven rack to middle position, heat oven to 425°. Grease a 12 cup muffin pan.
    • In a large bowl, whisk together the flour, sugar, light brown sugar, baking powder, baking soda and salt.
    • In a small bowl, whisk eggs, sour cream, lemon zest and lemon juice.
    • Fold in the sour cream mixture into the dry mixture until just combined. Then add the butter and stir until combined.
    • Let dough rest for 15 minutes.
    • In a medium bowl, toss the blueberries with an additional 1 tablespoon of flour. This will prevent them from sinking to the bottom of the muffins. Then gently fold into the batter.
    • Using a greased ⅓ cup measure, portion the batter into the muffin cups.
    • Bake at 425° for 8 minutes, reduce heat to 350° and continue baking until golden brown, 15-17 additional minutes. A toothpick inserted into the center should come out with just a few crumbs.
    • Let the muffins cool in the pan for about 5 minutes, then flip them onto a cooling rack. Let cool for about 10 minutes before serving.

    Lemon Curd Butter

    • In a small bowl mix the room temperature butter with lemon curd. Mix by hand until combined.

    Notes

    Recipe Source: SerenaLissy.com
    This website provides approximate nutrition information for convenience and as a courtesy only. Nutrition data is gathered primarily from the USDA Food Composition Database via Spoonacular API, whenever available, or otherwise other online calculators. While this information can be helpful in estimating the nutritional information of a recipe, it is by no means accurate or official and is not evaluated by the Food and Drug Administration.
    All images and content are copyright protected. Do not use our images without prior permission.

    Nutrition

    Serving: 1Muffin | Calories: 419kcal | Carbohydrates: 53g | Protein: 6g | Fat: 21g | Saturated Fat: 13g | Polyunsaturated Fat: 1g | Monounsaturated Fat: 5g | Trans Fat: 1g | Cholesterol: 78mg | Sodium: 270mg | Potassium: 120mg | Fiber: 1g | Sugar: 25g | Vitamin A: 639IU | Vitamin C: 3mg | Calcium: 112mg | Iron: 2mg
    Tried this Recipe? Pin it Today!Mention @SerenaLissy or tag #serenalissy!

    As an Amazon Associate and member of other affiliate programs, I earn from qualifying purchases. What that means is if you click on one of our affiliate links, they may toss a few pennies our way for a commission.

    • « Go to Previous Page
    • Go to page 1
    • Interim pages omitted …
    • Go to page 4
    • Go to page 5
    • Go to page 6
    • Go to page 7
    • Go to page 8
    • Interim pages omitted …
    • Go to page 17
    • Go to Next Page »

    Primary Sidebar

    Hi, I'm Serena!

    Join us and you will learn all sorts of creative techniques from baking to food photography that is easy enough for a novice to recreate at home, but look and taste like they were made by a seasoned pro.

    Get Inspired, Cook Confidently, Eat Well

    More about me →

    Ice Cream Recipes

    • Scoop of chocolate mint ice cream in bowl with ice cream cone
      No Churn Chocolate Mint Ice Cream
    • Bowl of key lime pie ice cream with a spoon
      No Churn Key Lime Pie Ice Cream
    • Apple Ice Cream in a waffle cup
      Apple Ice Cream
    • Chocolate Chunk Ice Cream In A Bowl
      Chocolate Chunk Ice Cream
    • Frozen Greek Yogurt from your Instant Pot
      Instant Pot Frozen Greek Yogurt
    • Avocado Ice Cram In a serving Bowl
      Easy Avocado Ice Cream Recipe

    Popular Recipes

    • Jamaican Sweet Potato Pudding
      Jamaican Sweet Potato Pudding
    • Peanut Butter Fudge Cups
      Peanut Butter Fudge Cups
    • Samoas on a plate
      Make at Home Samoas - Homemade Samoas: Girl Scout Cookies
    • Italian Chocoalte Walnut Cake
      Italian Chocolate Walnut Cake (Torta di Noci)

    Photography Challenge

    Master The Art of Food Photography

    Footer

    ↑ back to top

    About

    • Privacy Policy

    Newsletter

    • Sign Up! for emails and updates

    Contact

    • Contact

    As an Amazon Associate, I earn from qualifying purchases.

    Copyright © 2023 Serena Lissy