• Skip to primary navigation
  • Skip to main content
  • Skip to primary sidebar
  • Home
  • Collaborate with us
  • Contact

Serena Lissy logo

  • Recipe Index
  • Privacy Policy
menu icon
go to homepage
  • Christmas
  • Recipes
  • Photography
  • About
    • Facebook
    • Instagram
    • Pinterest
  • search icon
    Homepage link
    • Christmas
    • Recipes
    • Photography
    • About
    • Facebook
    • Instagram
    • Pinterest
  • ×

    Serena Lissy » Recipes

    Blog

    New York Bagel Recipe

    May 7, 2021

    New York Bagels

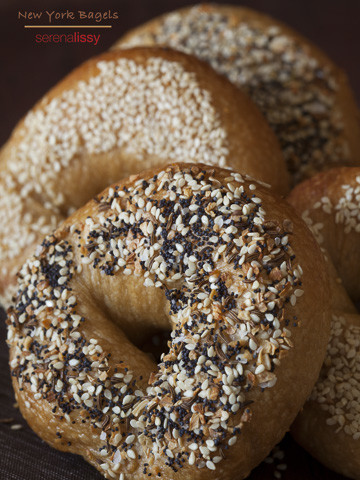
    This easy homemade New York bagel recipe is the best! They're simple to make, and with basic pantry ingredients you'll be enjoying hot out of the oven, freshly made, deliciously chewy New York style bagels in no time.

    It takes time, but it's so easy to make NY Bagels at home! Top your homemade New York Bagels with Everything Bagel seasoning, sesame seeds or your favorite toppings.

    NY Bagels

    If you have ever been to New York, you know bagels are a staple in New York City, with almost every street corner having its own bagel shop. For those looking for the next best thing to their favorite NYC bagels, this DIY New York Bagel Recipe is perfect! This homemade bagel recipe consists of four major parts: making and preparing the dough, shaping it, boiling them and topping with your favorite toppings, then baking so that they become crispy on the outside but chewy on the inside.

    I have been craving New York bagels for weeks. And I'll just say that being in Austin there is no chance of getting them here. And a flight to NY just to get bagels makes this a pretty expensive craving.

    A Bit Of Research To Get Started

    Because I have never made bagels before, I decided I would do a little research and test some recipes. After a tiny bit of research I stumbled onto America's Test Kitchen recipe for a New York bagel recipe. Their bread master, Andrew Janjigian, created this. I was familiar with Andrew, and I have eaten many breads that he has created while I worked at ATK. I knew that this would be a damn good recipe. Knowing the source, I stopped all research and went to the store to pick up the ingredients.

    After reading the NY bagel recipe my first thought about this was how easy it is to make bagels. Who knew? I don't know why I always thought they would just be a huge time consumption and always wondered if it was worth it. All I can say is pick up the ingredients from your local grocer and make this recipe. It's super easy.

    Homemade New York Bagels Ingredients

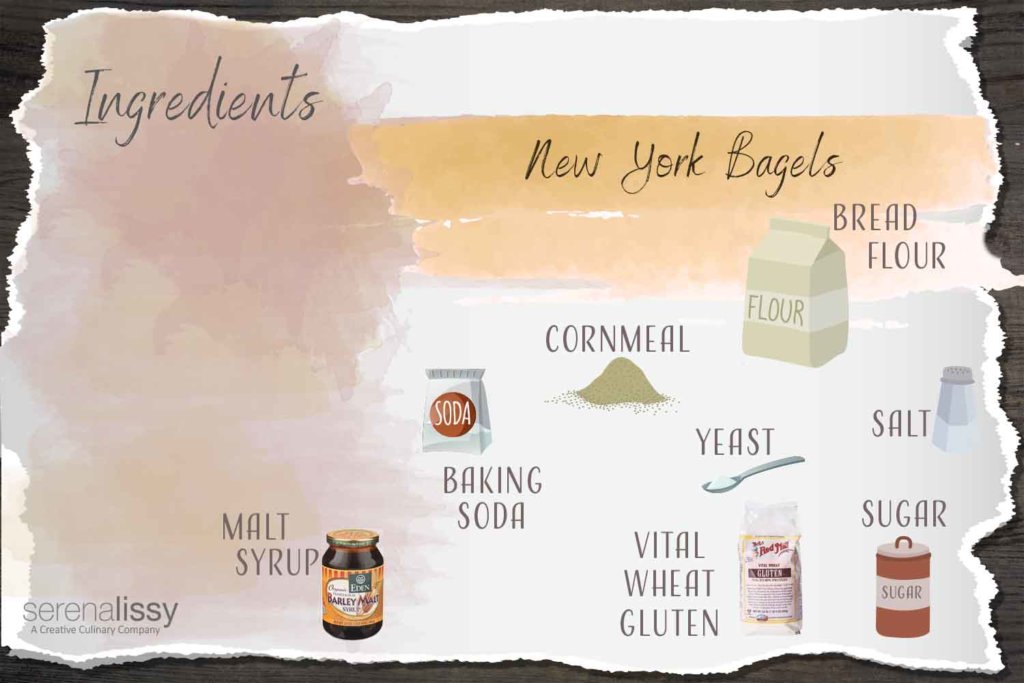
    Ingredients in this Homemade New York Bagel Recipe

    • Ice water
    • Malt syrup
    • Bread flour
    • Vital wheat gluten (We use Bobs Red Mill )
    • Instant or rapid rise yeast
    • Salt
    • Cornmeal
    • Sugar
    • Baking soda

    Everything Bagel Seasoning Ingredients

    • Poppy seeds
    • Sesame seeds
    • Onion flakes
    • Garlic flakes
    • Caraway seeds
    • Coarse salt
    New York Bagels Process Collage How to Make NY Bagel Recipe

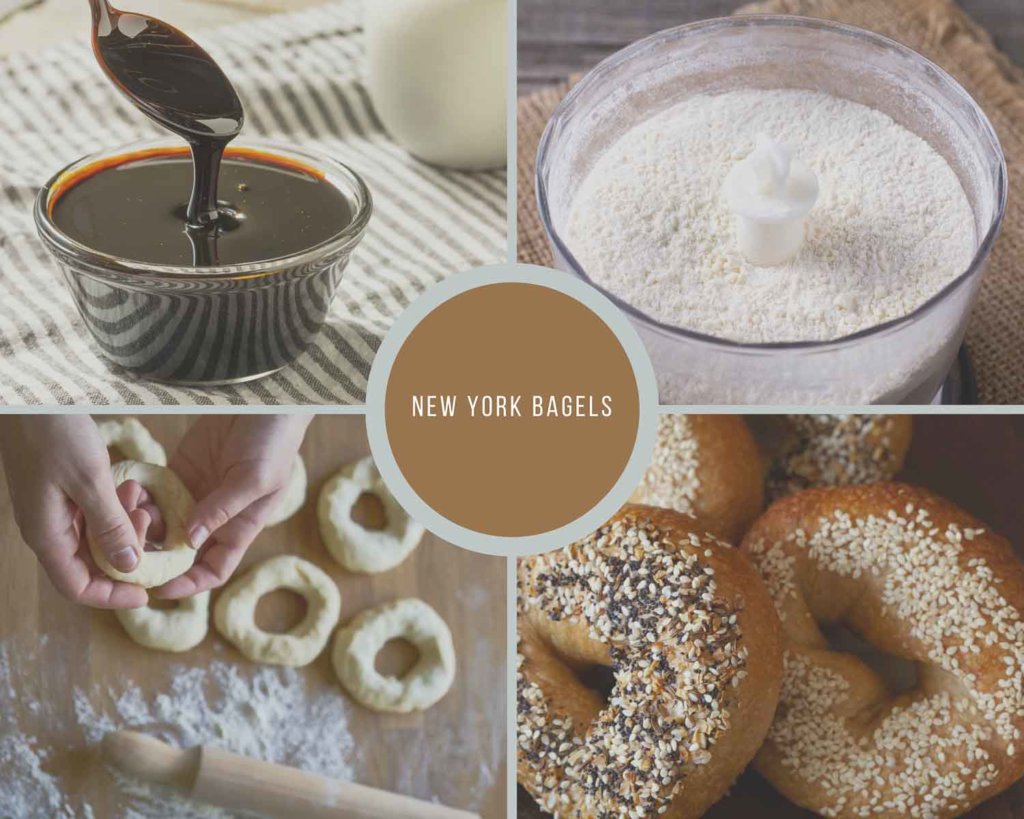
    How To Make This New York Bagel Recipe

    These bagels are made the traditional way: you boil them in water for a couple of minutes before baking. It might sound weird, but it just works!

    1. Make the dough and divide into 8 pieces.
    2. Form the pieces into smooth balls, cover and let sit for 15 minutes.
    3. Working one at a time, form the balls into a bagel shape.
    4. Let the formed bagels stand at room temperature for one hour then cover tightly and refrigerate over night.
    5. Boil the bagels for 20 seconds each then cool on a wire rack and top as desired.
    6. Bake 10-12 minutes, flip and bake 10-12 minutes more.
    7. Cool 15 minutes before serving.

    The NY bagel recipe requires refrigerating the shaped bagels for 16 to 24 hours before baking them. As a result, you want to make sure to plan accordingly. I like to start the bagels on Friday, and cook them on Saturday so I can have warm bagels for a weekend breakfast. These bagels are best eaten within a day of baking them. You can also freeze them for up to one month.

    New York Bagel FAQ

    Where did New York Bagels originate?

    When Eastern European Jewish people migrated to America during the 1800s of course their traditional foods came with them like bagels. Bagels were produced in small, privately owned bakeries throughout Jewish communities in New York. By the 1960s, the bagel began to grow popular in non-Jewish communities throughout New York city and the production of bagels increased. By the 1980s bagels had grown in popularity throughout the U.S.

    What makes New York Bagels different?

    Two key points set apart a New York bagel and are two things we’ll do in this recipe. First, is letting the shaped dough refrigerate for hours. The cooling process helps in the fermentation of yeast in the dough and creates a richer flavor. The second part is boiling. Traditionally, bagels are boiled in a water and malt barley mixture for 30 seconds to up to 3 minutes. Boiling is essential to produce a chewy bagel with the thick crust on the outside and doughy inside.

    Not all bagels are boiled? For mass production of bagels they are often baked in a hot oven and injected with steam. This creates a lighter bagel with a thinner, softer exterior.

    Were New York Bagels always so large?

    It is said that New York bagels grew from 3 ounces to the large 6 ounces commonly seen today.

    To toast or not to toast a bagel?

    A New York bagel is never toasted. New Yorker's believe that if a bagel is made well and fresh, it shouldn’t be toasted.

    What is typically eaten on a New York bagel?

    Since bagels originated in Jewish communities, considering Jewish dietary law means that prepared food must be kosher. Simply, one can’t eat pork, shellfish or mix dairy and meat. Also, bagels are commonly eaten cold. This is helpful for Jewish people because with the Sabbath, Friday sunset to Saturday sunset, Jews following the Sabbath will not cook. 

    That leaves us with the topping options: Butter, cream cheese, smoked fish and garnishes.  A bagel with lox (smoked salmon), a cream cheese schmear, and capers is a go-to option.

    More Recipes You'll Love

    • Triple Chocolate Cheesecake
    • Homemade Cronut™
    • Peanut Butter Fudge Cups
    • The Best Homemade Brownies
    • Homemade Peppermint Bark

    Looking For More Recipes?

    Subscribe to my free newsletter to get new recipes in your inbox monthly. Find me sharing new recipes and tips on Pinterest, Instagram or Facebook.

    I hope you enjoy this recipe as much as we did. Now I know next time I get a New York bagel craving, I can just cook up a few of these and save my money on the airfare!

    New York Bagels

    Make authentic New York-style bagels at home.
    5 from 6 votes
    Print Pin Rate
    Course: Breakfast
    Cuisine: American
    Prep Time: 30 minutes minutes
    Cook Time: 24 minutes minutes
    Resting Time: 1 day day
    Total Time: 1 day day 54 minutes minutes
    Servings: 8 Bagels
    Calories: 252kcal
    Author: Serena

    Ingredients

    Cooks Illustrated New York Bagels

    • 1 cup plus 2 tablespoons ice water (9 ounces)
    • 2 tablespoons malt syrup
    • 2 ⅔ cups 14 ⅔ ounces bread flour
    • 4 teaspoons vital wheat gluten
    • 2 teaspoons instant or rapid rise yeast
    • 2 teaspoons salt
    • ¼ cup 1 ¼ ounces cornmeal
    • ¼ cup 1 ¾ ounces sugar
    • 1 tablespoon baking soda

    Everything topping:

    • 2 tablespoons poppy seeds
    • 2 tablespoons sesame seeds
    • 1 tablespoon onion flakes
    • 2 teaspoons garlic flakes
    • 2 teaspoons caraway seeds
    • ½ teaspoon coarse salt

    Instructions

    • Stir ice water and malt syrup together until malt syrup has fully dissolved. (We used 8 ounces here instead of 9 because of weather in TX. I'd recommend starting with 8 ounces and if dough appears dry in the food processor add the other ounce) In a food processor, process flour, wheat gluten and yeast until combined. With processor running, slowly add ice water mixture and continue to process until dough is just combined and no dry flour remains. Let dough stand for 10 minutes once complete.
    • Add salt to dough and process until dough forms shaggy mass that clears the sides of work bowl, about 60-90 seconds. Transfer dough to unfloured counter and knead until smooth, about 1 minute. Divide dough into 8 equal pieces and cover loosely with plastic wrap.
    • Working with one piece of dough at a time and keeping remaining pieces covered, form dough pieces into smooth round balls. Let dough balls rest on counter, covered, for 15 minutes.
    • Sprinkle rimmed baking sheet with cornmeal. Working with one dough ball at a time, coat dough balls lightly with flour, and then, using your hands and rolling pin, pat and roll dough balls into 5 inch rounds. Starting with edge of dough farthest from you, roll into tight cylinder. Starting at center of cylinder and working towards ends, gently and evenly roll and stretch dough into 8-9 inch long ropes. Rolling end of dough under your hands in opposite directions, twist rope to form tight spiral. Without unrolling spiral, wrap rope around your fingers, overlapping ends of dough by about 2 inches under your palm to create ring shape. Pinch ends of dough gently together. With overlap under your palm, press and roll seam using circular motion on counter to fully seal. Transfer rings to prepared sheet and cover loosely with plastic leaving at least one inch between bagels. Let bagels stand at room temperature for one hour. Cover sheet tightly with plastic and refrigerate for 16-24 hours.
    • One hour before baking, place baking stone on oven rack, and heat oven to 450 degrees.
    • Bring 4 quarts water, sugar and baking soda to boil in large Dutch oven. Set wire rack in rimmed baking sheet and spray rack with vegetable oil spray.
    • Transfer 4 bagels to boiling water and cook for 20 seconds. Using wire skimmer, flip bagels over and cook 20 seconds longer. Using wire skimmer, transfer bagels to prepared wire rack, with cornmeal side facing down. At this time, dip your bagels into the toppings of your choice. Repeat with remaining four bagels.
    • Place sheet with bagels on preheated baking stone and pour ½ cup boiling water into bottom of sheet. Bake until tops of bagels are beginning to brown, 10-12 minutes. Using metal spatula, flip bagels and continue to bake until golden brown, 10-12 more minutes. Remove sheet from oven and let bagels cool on wire rack for at least 15 minutes. Serve warm or at room temperature.

    Notes

    Recipe Source: SerenaLissy.com
    This website provides approximate nutrition information for convenience and as a courtesy only. Nutrition data is gathered primarily from the USDA Food Composition Database via Spoonacular API, whenever available, or otherwise other online calculators. While this information can be helpful in estimating the nutritional information of a recipe, it is by no means accurate or official and is not evaluated by the Food and Drug Administration.
     
    All images and content are copyright protected. Do not use our images without prior permission.

    Nutrition

    Serving: 1Bagel | Calories: 252kcal | Carbohydrates: 48g | Protein: 9g | Fat: 3g | Saturated Fat: 1g | Polyunsaturated Fat: 2g | Monounsaturated Fat: 1g | Sodium: 1147mg | Potassium: 139mg | Fiber: 3g | Sugar: 10g | Vitamin A: 3IU | Vitamin C: 1mg | Calcium: 72mg | Iron: 1mg
    Tried this Recipe? Pin it Today!Mention @SerenaLissy or tag #serenalissy!

    As an Amazon Associate and member of other affiliate programs, I earn from qualifying purchases. What that means is if you click on one of our affiliate links, they may toss a few pennies our way for a commission.

    Room Temperature Ingredients Make A Difference In Baking

    May 5, 2021

    Eggs on a plate resting to get to room temperature

    If you’re like me, you love to bake, but you also love to eat. And while anyone can put ingredients together and technically make a bake...there’s a reason so many of us have favorite recipes, bakeries, and even bakers!

    Baking comes down to a science, and how closely you follow (or fail to follow) a recipe can make a world of a difference when it comes to flavor, texture, and mouth-feel. Today, we’re exploring the importance of why room temperature ingredients make a difference, and why it's a good idea to follow what the recipe asks for. 

    There are countless recipes that call for ingredients to only be used at room temperature, but we’ve all ignored that detail at least once. Here are some reasons behind that fine print that might inspire us to follow them next time!

    Emulsifiers, Baking, and Room Temperature Ingredients

    Have you heard of emulsifiers in baking? An emulsifier is a scientific word for an ingredient or substance that brings together other ingredients of different qualities. In baking, emulsifiers help ingredients with water and fat content bind together.

    Food Scientist Matt Gennrich explained to Baking Business that emulsifiers help bind both hydrophilic and lipophilic ingredients. So, emulsifier ingredients can bind to both water and fat-loving add-ins to bind your whole mixture together.

    While this might sound like a fancy new ingredient, you’ve probably been using emulsifiers to bake your whole life! Eggs have emulsifying properties. Whenever you mix liquids and feel a bit of resistance in their coming together, you’re probably forcing an emulsion. I have no doubt your favorite cookie recipe uses emulsifiers.

    A few emulsifiers that require a bit more planning include DATEM, and mono and diglycerides. These can be purchased separately and some bakers swear by them for more difficult doughs.

    You don’t have to dive into powered add-ins to be a great baker. Keep emulsion in mind when mixing and you’ll benefit from the added patience with your bake.

    Room Temperature Butter and Baking

    One of the quickest baking lessons I learned is the importance of room temperature butter when baking! A vast number, if not a majority of baking recipes call for butter creamed with sugar, the creaming method. It’s a common first step for many cookie recipes to get the creamy texture needed.

    Butter needs to be room temperature or at least, not completely solid in order to cream properly. When mixing sugar and butter together, the sugar creates a lifting effect inside the butter, incorporating air into the mixture.

    This doesn’t happen with cold butter, as the sugar particles simply cut away at the hard butter block and create a crumbly mess.

    Our Chocolate Butter Cookies recipe uses both melted and room-temperature butter. The melted butter is used to create a chocolate mixture with cocoa powder. The room-temperature butter is creamed with sugar and salt to create a fluffy-textured dough base. You’ll also find creaming butter with sugar to be a staple in recipes like our Manchego Cheesecake. That recipe calls for the technique to form graham cracker sheets used as a crumble in the final dish. Yum!

    Prepping Your Room Temperature Ingredients

    Cook’s Illustrated has a great guide to softened butter, which should bend without cracking at room temperature. If you’re forgetful (and let’s face it- we all are sometimes) you can also soften butter quickly by cutting it into small pieces and placing a warm towel over the bowl. 

    Microwaving frozen butter to soften is also a viable solution, although you’ll have to be careful to avoid melting it completely. Melted butter will prevent air bubbles when creaming, creating a quick, greasy mess.

    Another popular ingredient often requested at room temperature is eggs. We’ve all heard of curdling. Curdling is the opposite of emulsion and describes the formation of lumps and clumpy mixtures. Not ideal for many (if any) recipes.

    Eggs are huge instigators of curdling, as adding cold eggs can accidentally curdle a mixture due to the temperature difference. Curdled cake batters tend to rise poorly and don't usually result in fluffy cakes. Similar to creaming sugar in butter, eggs are also famous for their versatile texture. Beating eggs is essential for macarons, and for any recipe needing a fluffy effect. If you have forgotten to take your eggs out of the refrigerator, the best way to get them to room temperature quickly is to place them in a bowl of warm water. The temperature change will definitely take less time than just leaving them on the counter. 

    Because eggs and butter are so versatile, always check the recipe first to see if it calls for room temperature eggs, butter or even other dairy products like milk, sour cream or cream cheese.

    When to Use Cold Ingredients

    Okay, okay. We get it, emulsion is important! Planning is important! And thankfully microwaving can save our behinds on off days. But are there any cases in which cold ingredients are actually preferred?

    There are! While soft butter and room temperature eggs are perfect for fluffy textures in pastries, crumbly textures benefit from cold ingredients. This includes recipes for pie dough, scones, and more. So why is this true?

    Well, think of it like this. Emulsion creates air pockets and creaminess, while cold ingredients cause curdling. Curdling would then leave small lumps of butter and other fats in the dough, which reacts to heat in all of its original glory.

    This results in crumbles and flakes. Absolutely delicious in a purposeful pie dish, but a little less desired in cake. Yum!

    Creating a Habit of Room Temperature Ingredients

    Like any baking best practice, practice makes perfect with your baked goods. We’ve all used cold ingredients instead of room temperature, or completely messed up a recipe by misreading instructions. Part of the joy of baking is learning and adjusting as you go!

    Now that you know more about the importance of choosing the right temperature of ingredients, go ahead and make yourself a cheat sheet on types of bakes. Cakes and cookies typically require room temperature ingredients, while the keyword for cold ingredients is "flaky."

    Sometimes, the best cheat sheets are all-encompassing for a certain category, like our post on the Top 10 Baking Tips for the Perfect Cake.

    Some of our favorite recipes for practice with using room temperature ingredients include our Lemon Cheesecake Recipe and these Red Velvet Cookies. On the other hand, our recipe for Peanut Butter Cream Pie can benefit from slightly colder butter to form a flaky crust. Finally, remember that baking is all about practice and confidence. No one is an expert in a day, and we only grow with passion. Ready to learn more about baking and growing as a lover of sweets and more? Read our post on Top 10 Baking Tips today.

    As an Amazon Associate and member of other affiliate programs, I earn from qualifying purchases. What that means is if you click on one of our affiliate links, they may toss a few pennies our way for a commission.

    Looking For More Recipes?

    Subscribe to my free newsletter to get new recipes in your inbox monthly. Find me sharing new recipes and tips on Pinterest, Instagram or Facebook.

    Lemon Curd Ice Cream

    May 3, 2021

    Lemon Curd Ice Cream with Ice Cream Cones

    Lemon Curd Ice Cream is the newest addition to my list of favorite ice cream recipes. This recipe combines two of my favorite summertime flavors: lemon curd and ice cream. It's both refreshing and tart. The recipe uses this homemade lemon curd recipe, but can easily be substituted with a jar of store bought curd. If you are a lemon lover this homemade lemon curd ice cream is for you.

    Lemon Curd Ice Cream with Ice Cream Cones

    You Can Never Have Too Many Lemons

    Last week I made homemade lemon curd, lemon curd butter, lemon cheesecake, and lemon poppy seed cake. Are you seeing a pattern here with lemon recipes? I'm sure you are thinking she's one of those crazy lemon lovers or she has a huge lemon tree and is trying to use the produce. Almost both are true. I'm a huge lemon lover and I only have a small lemon tree, but I have huge hopes it will continue to produce large quantities of lemons. When I lived in California I had multiple lemon trees in my orchard, but now that I'm in Las Vegas, my yard is much smaller and so are my lemon trees.

    So with leftover lemon curd, what's a gal to do? This creamy ice cream will finally use up the last bit of curd I have, at least until the next batch. Come on little lemon tree! You can do it!

    Lemon Curd Ice Cream Ingredients

    Ingredients For The Ice Cream Base

    • 2 Lemons for lemon zest and lemon juice - Only use fresh lemon juice. That stuff that comes in the bottle, won't give you the best flavor. I also like to use organic lemons since we are using the zest. If you don't have organic, just be sure to clean your lemons well. Depending on your size of lemons, you might need a third to get you to the needed amount of lemon juice.
    • Sugar
    • Whole Milk
    • Heavy Cream
    • Lemon Curd - Homemade or store bought lemon curd. If using store bought lemon curd just be sure to get a good quality lemon curd.
    Lemon Curd Ice Cream Process Collage

    How To Make The Lemon Curd Ice Cream

    As with all ice cream recipes the ingredients come together quickly. In a blender or use a hand mixer to combine the sugar and lemon zest, until the zest is very fine. Add the lemon juice, then the milk and heavy cream. Mix until the sugar dissolves and is smooth. Pour this into a medium sized bowl and stir in 2 tablespoons of lemon curd. Cover with plastic wrap and let cool in the refrigerator for at least two hours or overnight, making sure enough cooling time has lapsed before putting it into the canister of an ice cream maker.

    Follow your manufacturers instructions on your ice cream machine to process the ice cream. Once completed use a spatula to spoon into a freezer safe container and layer with swirls of the remaining lemon curd. Use a table knife or skewer to swirl in the curd. At this time, your ice cream will be a soft serve consistency. I usually sneak a small bowl before I place in the freezer.

    Place your finished ice cream mixture in the freezer overnight or until ready to serve. This will last for about two weeks in the freezer.

    What About The Eggs?

    I wanted to make a light and refreshing, not heavy and rich ice cream. Egg yolks provide fat and protein which is pretty darn tasty but in the end I just felt it would be too rich for the lemon flavor that I was looking for. A super-eggy ice cream is essentially frozen ice cream custard—dense, chewy with slow melting qualities; it's all about texture and refreshing flavor in this case!

    Lemon Curd Ice Cream In A Cup with Cone

    Allow The Lemon Curd Ice Cream To Sit On The Counter for 10 Minutes

    Our lemon curd ice cream freezes well and can be hard to scoop when first removed from the freezer. Allow it to soften for a few minutes so you’ll have an easier time before serving up the lemon dessert! And for best results, I also run my ice cream scooper under hot water to heat it up a bit to help with scooping frozen ice cream. If you are really a lemon lover, top each bowl with some extra delicious homemade lemon curd for even more flavor that will make your taste buds sing.

    Looking For More Recipes?

    Summer heat and ice cream go hand in hand. It's a perfect way to beat the summer heat and cool down after a long day of work. If you are looking for an easy ice cream recipe that is sure to please everyone at your next family gathering or BBQ event then this lemon curd ice cream recipe has just what you’re looking for! You can find more tips on how to make delicious desserts like these by signing up below—we won't send anything else unless it's related only to food writing.

    • How To Make Lemon Curd
    • The Best Lemon Cheesecake Recipe
    • Chocolate Chunk Ice Cream
    • Lemon Poppy Seed Bundt Cake
    • Mocha Ice Cream Sandwich
    • Easy Avocado Ice Cream

    Subscribe to my free newsletter to get new baking tips in your inbox monthly. Find me sharing new recipes and tips on Pinterest, Instagram, or Facebook.

    Lemon Curd Ice Cream In a Cone

    Lemon Curd Ice Cream

    Lemon curd ice cream is a sweet, tart, and refreshing summertime treat that's perfect for hot days!
    5 from 13 votes
    Print Pin Rate
    Course: Dessert
    Cuisine: American
    Prep Time: 10 minutes minutes
    Cook Time: 15 minutes minutes
    Chilling time: 2 hours hours
    Total Time: 2 hours hours 25 minutes minutes
    Servings: 8 Servings
    Calories: 228kcal
    Author: Serena

    Ingredients

    • 2 Lemons - zested
    • ½ cup Sugar (100 grams)
    • ½ cup Fresh Squeezed Lemon Juice (125 mL)
    • 1 cup Whole Milk (250 mL)
    • 1 cup Heavy Whipping Cream (250 mL)
    • ½ cup Lemon Curd

    Instructions

    • Add lemon zest and sugar to blender and mix until the lemon zest is very fine.
    • Add lemon juice and blend until sugar is dissolved.
    • Blend in the whole milk and heavy cream until smooth.
    • Pour mixture into a medium bowl and add 2 tablespoons of lemon curd. Stir to combine. Cover your mixture with plastic wrap or use an airtight container, cover and chill for at least 2 hours.
    • Freeze your mixture into your ice cream maker according to the manufacturers instructions.
    • As you remove it from the machine, layer in the airtight freezer container with swirls of the remaining lemon curd.

    Notes

    Recipe Source: SerenaLissy.com
    This website provides approximate nutrition information for convenience and as a courtesy only. Nutrition data is gathered primarily from the USDA Food Composition Database via Spoonacular API, whenever available, or otherwise other online calculators. While this information can be helpful in estimating the nutritional information of a recipe, it is by no means accurate or official and is not evaluated by the Food and Drug Administration.
    All images and content are copyright protected. Do not use our images without prior permission.

    Nutrition

    Serving: 1Serving | Calories: 228kcal | Carbohydrates: 27g | Protein: 2g | Fat: 13g | Saturated Fat: 8g | Polyunsaturated Fat: 1g | Monounsaturated Fat: 3g | Trans Fat: 1g | Cholesterol: 44mg | Sodium: 68mg | Potassium: 116mg | Fiber: 1g | Sugar: 24g | Vitamin A: 494IU | Vitamin C: 20mg | Calcium: 62mg | Iron: 1mg
    Tried this Recipe? Pin it Today!Mention @SerenaLissy or tag #serenalissy!
    Lemon Curd Ice Cream In Cone on Table Top With Lemons

    As an Amazon Associate and member of other affiliate programs, I earn from qualifying purchases. What that means is if you click on one of our affiliate links, they may toss a few pennies our way for a commission.

    Friday Food Reads - Pie Camp

    April 30, 2021

    Pie Camp Cover Illustration

    The next book in our Friday Food Reads series is Pie Camp from Kate McDermott. Pie making is an art form that requires patience and skill. The good news? Once you have the basics down, it’s then time to get creative! You can mix up crust types, fillings, and toppings with ease using her "master" recipes.

    French Silk Pie on Plate

    About The Author

    For those that aren't familiar, Kate McDermott use to run a weekend pie baking school for bakers called Pie Camp. You would spend a weekend learning to make pies, both savory and sweet, and then you get to explore the city in your free time. I hope I have a chance to book one of the weekends this coming year. Let's see, travel to a beautiful city, breakfast, lunch, and dinner around pies and a bunch of new friends; it has everything a gal could want! In the meantime, I'm considering this my virtual pie camp while travel is still restricted.

    Pie skills are what Kate is known for. Before this book, she wrote Art of the Pie. Another great book, for aspiring pie makers. Kate believes you don't need to know all that much to make a great pie. And you know what, she is correct!

    Recipe For Success

    This book does a great job of giving you the essential pie tools and then teaches readers how to make pies. It goes into ingredients for successful pies, which is an art that can be shared with family members too! She's also a fan of investing in high-quality cooking equipment so you have something nice to pass down through generations as well as taking care of it properly so it lasts long enough. This cookbook provides "master recipes" where users are able to mix or match different recipes together depending on their preferences (or what they're making). There are even some gluten-free recipes.

    How The Book Is Broken Down

    The book contains just a few chapters. Dough, fruity pies, creamy pies, and kitchen cupboard pies are the main categories. Each chapter is filled with multiple master recipes making it easy to start with basics and go any direction you want to take your pie.

    Chocolate Mousse Chiffon Pie - A Pie Camp Master Recipe

    The first recipe we made from this book did not disappoint. It turned out to be one of our favorite recipes!

    Chocolate Mousse Chiffon Pie on Plate

    This is a "master" recipe; meaning there are six different variations you can make with just minor tweaks here or there. We're really excited about all these new dessert possibilities that come along with it too! What's that saying? Easy as pie!

    Recipes From The Master

    • Chocolate Raspberry Mousse Chiffon Pie
    • Mocha Mousse Chiffon Pie
    • Chocolate Ginger Mousse Chiffon Pie
    • Chocolate Coconut Pistachio Mousse Chiffon Pie
    • Spicy Hot Chocolate Chiffon Mousse Pie
    • Double Chocolate Banana Mousse Chiffon Pie

    Mixed Berry Slump From Pie Camp

    The second recipe we made was a mixed berry slump. Seasoned fruit, placed in a skillet and topped with biscuit dough. After that, you just bake it in the oven.

    Mixed Berry Slump in Cast Iron Skillet

    This recipe was simple and delicious. Whenever I see plops of biscuits I know it's going to be great comfort food. Now when I say simple, I mean simple. Heat the fruit and sugar up in a pan, make the dough and form it into 8 pieces, lay it on the fruit, and bake in the oven. Not only did I love this for an evening dessert, I really liked it the next day with my coffee.

    Should You Buy Pie Camp?

    So with all that, should you buy the book? I'd say yes. The book is packed with recipes that will have you cooking for hours. There is something for everyone, with recipes that range from beginner to advanced. With many beautiful photographs of the creations and easy-to-follow instructions throughout this cookbook, it would be a crime not to buy it!

    Other Friday Food Reads

    I'd recommend this book to anyone who is interested in baking or happens to be looking for new recipes. The two recipes that we have shared are just a small taste of the many delicious dishes inside! In conclusion, we hope you enjoyed our write-up on the cookbook and maybe even find another favorite recipe from it. If not, don't forget to check out some of our other Friday Food Reads.

    • Joy The Bakers, Peanut Butter Cream Pie
    • Friday Food Reads - 100 Cookies
    • Friday Food Reads - The Good Book of Southern Baking
    • Dessert Person - A Cookbook Review

    Looking For More Recipes?

    Subscribe to my free newsletter to get new baking tips in your inbox monthly. Find me sharing new recipes and tips on Pinterest, Instagram, or Facebook.

    As an Amazon Associate and member of other affiliate programs, I earn from qualifying purchases. What that means is if you click on one of our affiliate links, they may toss a few pennies our way for a commission.

    The Best Essential Baking Pans to Stock in Your Kitchen

    April 28, 2021

    Muffin, Cookie, and Bundt Baking pans

    Some people say that collecting craft supplies is a completely separate hobby from crafting. We might be guilty of the same in the baking world too! Sales of non-stick cookware in the United States hit a high of $1.55 billion in 2016 before dropping to $1.41 billion in 2018. 

    Sales have been on a rise since, and I might feel less alone knowing that I’m not the only one always with an eye out for the right tools to make baking and kitchen work easier.

    Today, we’re exploring the best essential baking pans to stock in your kitchen. From loaves, to breads, to cookies and more, these are pans that will not only get the job done but help you do so more quickly down the line.

    1. 9×5 Inch Loaf Pan

    Baked loaves are breathtakingly delicious. If you have to get one size of a loaf pan, opt for a 9x5 inch pan that is a classic for most recipes. There are a wide variety of options for these nonstick pans, and this Rachel Ray loaf pan comes with "grippy" handles to prevent spills and mistakes when baking.

    One thing to watch out for in any pan with handles or grips, is a temperature safety guide. This pan is safe in temperatures up to 500°F. Often, these grips are made of food-safe silicone that can quickly become unsafe when used in temperatures above recommended safety guidelines.

    2. Half-Sheet Pan

    Half sheet pans measure 18x13 inches which is half the size of a full sheet pan. This is a standard size for home baking, as 26x19 inch pans are harder to navigate and typically too large for home batches of bakes.

    Half-sheet pans usually have sides that are 1 inch tall, making it perfect for batters for brownies, cakes and breads. Delicious!

    3. Flat, Non-Stick Cookie Sheets

    While a flat cookie sheet is not a top consideration when it comes to essential baking pans in the kitchen, it’s a tool that is often overlooked in favor of a half-sheet pan that actually isn't ideal for cookie baking.

    Unlike a half-sheet pan with sides, a flat cookie sheet is completely flat and easier to navigate using a spatula for cookies. This difference may seem like a small unnecessary one, but imagine all of the cookie crumbs you won’t have to dig out of pan corners! You can avoid the extra hand-washing after baking simple cookies that don’t need a wall to begin with! Wonderful. I love using these for my favorite chocolate chip cookies.

    4. Muffin Tin or Cupcake Tray

    The only way to go wrong with a muffin tin or cupcake tray is to not have one! Grab a classic 12-cup tray to enjoy homemade cupcakes or muffins in a jiffy. This size is perfect for simple fruit and swirl inclusions.

    5. Jumbo Muffin Pan

    Don’t look at me like that. Who doesn’t love a jumbo-sized muffin? This jumbo muffin pan comes in a set of 2 for a total of 12 gigantic bakes. These can also be used for cupcakes, egg tarts and other large size baked goods.

    And while the size of baked goods does correlate to how long you get to enjoy them, I’d also argue that jumbo muffin pans are essential when testing more difficult recipes and complicated mixes with a plethora of different ingredients.

    It makes it easier to tell if your mix ratio is correct, before you branch into smaller muffins moving forward. So be sure to include this pan on your list of best essential baking pans to stock in your kitchen.

    6. 24-Count Muffin Pan

    I know, I know. Maybe you’re getting tired of the cupcake and muffin pans! But think about it this way...this mini muffin pan is the perfect solution for simple bake sale and play date needs. Unlike classic muffin tins and cupcake trays that hold 12 baked goods, this versatile pan is one of the best ways to get away with one bake time.

    While it may not be the best way to make brownies or cake bites, 24-count muffin pans can be used in other pinches when quantity is more important than pastry-shop size. Grab a 24-count muffin pan today to save time on those late night bakes.

    7. Round Cake Pans

    What is a cake without a round cake pan? Round cake pans are classic for a reason and come in many different dimensions to help with stacking of multi-tiered cakes. This cake pan from Cuisinart is an affordable choice that isn’t too heavy or light. The aluminized steel material allows for even heating and easy bakes. Simple and effective. If you are planning on making multiple layers and a variety of sizes, I'd recommend going with a set. Fat Daddio is who I like working with.

    8. 9x13 Inch Cake Pan

    Sometimes, large sheet cakes are in order. Grab a classic rectangular cake pan to ensure that you’ll always have a bottom layer for towering cakes. This is also a great option for large quantities of brownies or blondies at a time. Delicious! If you are looking for better quality, you could easily go with glass bakeware. Pyrex is a fabulous brand. You can make a cake one day, and you can whip up lasagna the next day. A 9x13 inch cake pan is an essential baking pan to have in your kitchen.

    9. Springform Pan

    Springform pans are similar to regular cake and pie pans, except they have a removable bottom that gives more flexibility and is perfect for an easy cake release. This is especially important for cheesecakes and cakes meant for display. Once you add a set of springform pans to your collection, you might be surprised how often you can use it for various bakes.

    10. Pie Plates (Pie Pan)

    While a regular round cake pan can be used for homemade pies, you might want a pie plate instead to accomplish a classic pie look. Pie plates have slightly indented and slanted edges, creating that traditional slope of pie crust. Yum!

    Pie plates come in a variety of different materials. Metal pie plates heat up quickly, which is great for many bakes. However, glass pie plates might be preferable for more finicky recipes. Glass heats up slower and will allow for more time to double-check baking and prevent burns. 

    Ceramic pie plates are probably the prettiest option and are very versatile in freezing, oven, and room temperatures. For a more detailed read on pie pans, take a look at our post on How To Choose The Right Pie Pans.

    The Best Baking Pans in Your Kitchen

    Having specific tools in your kitchen won’t make or break your bakes. But they can definitely save you time and even money in the long run! Different sizes and types of pans are essential kitchen equipment to create particularly intricate or a mass amount of basic creations. Explore more on SerenaLissy.com today for recipes and essential kitchen tools for your home. Last week, we explored the Ten Best Cookie Baking Tools to save you time, money, and ease.

    As an Amazon Associate and member of other affiliate programs, I earn from qualifying purchases. What that means is if you click on one of our affiliate links, they may toss a few pennies our way for a commission.

    Looking For More Recipes?

    Subscribe to my free newsletter to get new baking tips in your inbox monthly. Find me sharing new recipes and tips on Pinterest, Instagram, or Facebook.

    Homemade Cronut™

    April 26, 2021

    Cronut on Table

    Half donut, half croissant the Homemade Cronut is a treat that will make you swoon with its buttery layers and Champagne chocolate ganache. Make this Dominique Ansel Cronut Recipe from scratch right in your own kitchen.

    Learn how to make this delicious Dominique Ansel Cronut Recipe at home. It's not as difficult as you may think and it's filled with luscious Champagne Chocolate Ganache.

    The Dominique Ansel Cronut Recipe

    I'm not even sure where to start this post, other than, go to the grocery store, get these ingredients and make this pastry. For those of you that don't know what a cronut is or who Dominique Ansel is, just type any of those words into Google and watch the thousands of results pop up.

    Dominique was classically trained in Paris, a leader of a three star Michelin pastry kitchen in New York, and now the owner of New York's highest rated bakery, Dominique Ansel Bakery. Pretty impressive resume if you ask me. Shoot, just after that bit of knowledge I want to pack my bags and head to New York to figure out how to work there!

    I had heard of the cronut and the stories of hundreds of people waiting outside the bakery on a daily basis for this pastry. I have friends that have actually been to the bakery and every time they speak of that cronut, you can see their eyes glaze over and then extremely happy memories flood their minds, and they just can't stop smiling when speaking about it. When people have a reaction like that to a pastry, there is no doubt you gotta want to try it. Which is exactly what I did....almost.

    This Kind of Specialty Takes a Bit Of Time

    As appealing as flying to New York is just to pick up one of those cronuts, I went the practical route and bought his cookbook, The Secret Recipes. I went straight to the Dominique Ansel Cronut Recipe and figured I could whip up one at home. And boy I'm glad I did.

    Now I don't want to discourage anyone, but this homemade cronut recipe is a three day recipe. If you start it on Friday, you could be eating cronuts with your Sunday paper and coffee, if you plan it right. Now this recipe he gave in the book, isn't the cronut that is in his shop. Do you blame him? I wouldn't give that recipe up either. But he was nice enough to modify it for the home cook. So this recipe is Dominique Ansel's recipe for the Make at Home Cronut™.

    Homemade Cronut Ingredients

    Ingredients in this Homemade Cronut

    • Bread Flour
    • Kosher salt
    • Granulated sugar
    • Instant yeast
    • Water, cold
    • Egg white
    • Unsalted butter
    • Heavy cream

    See the recipe for the Champagne Chocolate Ganache and Glaze ingredients.

    Homemade Cronuts Process Collage How to Make a Cronut

    How to Make A Cronut

    There is nothing difficult about this recipe. But there are a few dos and don'ts about it. First, because the pastry is cream filled, it must be served at room temperature. Second, consume this pastry within 8 hours of frying. (Like that is really going to be a problem for anyone...We consumed 12 within about 2 hours, and remember, I had to photograph these, which took up some of those 2 hours) And third, you, and no one else, is in charge of your rolling pin. Rolling the dough in as perfect of a square as you can get, is important.

    1. Make ganache 2 days in advance and refrigerate.
    2. Make the cronut dough and proof for 2-3 hours.
    3. Punch down and form into a 10-inch square. Place on a sheet pan and cover tightly with plastic. Refrigerate overnight.
    4. Make a 7 inch butter block and refrigerate overnight.
    5. Set the dough on a floured surface and top with the butter block.
    6. Fold to seal in the butter.
    7. Roll into a 20 inch square then fold into a 10 inch square. Refrigerate 1 hour then repeat, cover and refrigerate overnight.
    8. Roll dough and allow to relax before cutting donut shapes.
    9. Proof until tripled in size, then fry.
    10. Inject each pastry with ganache. Roll the sides in sugar and top with chocolate glaze.
    11. Enjoy.

    Cronut FAQ

    What is a Cronut?

    A Cronut will be shaped like a doughnut but the pastry inside is like that of a croissant. It's composed of layers of flaky, buttery dough dipped in sugar, glazed with toppings, and/or filled with a variety of pastry creams. It's a wonderful blend created by Pastry Chef Dominique Ansel.

    What does a Cronut taste like?

    Surprisingly like a croissant, but gives you the pleasure of what it's like eating a custard filled donut.

    How long does a homemade Cronut stay fresh?

    These have a short shelf life and it's best to eat them within 8 hours of making them.

    Is there only one Cronut filling?

    This is where you imagination can run wild. The dough should pretty much always remain the same, but the fillings and the glaze are only limited by your imagination.

    More Recipes You'll Love

    • A Little Bit of Heaven: Espresso Profiteroles
    • Chocolate Butter Cookies
    • New York Bagel Recipe
    • S'mores Cake

    Looking For More Recipes?

    Subscribe to my free newsletter to get new recipes in your inbox monthly. Find me sharing new recipes and tips on Pinterest, Instagram or Facebook.

    I hope you enjoy these homemade cronuts as much as I did. I will definitely be making them again, and again. Give the recipe a try, we would love to hear how you do with it.

    The Cronut™

    Learn how to make a Dominique Ansel Cronut at home.
    4.95 from 19 votes
    Print Pin Rate
    Course: Breakfast
    Cuisine: American
    Prep Time: 30 minutes minutes
    Cook Time: 10 minutes minutes
    Resting Time: 2 days days
    Total Time: 2 days days 40 minutes minutes
    Servings: 12 Cronuts
    Calories: 618kcal
    Author: Serena

    Ingredients

    • At Home Cronut™ Pastry

    Pastry Dough

    • 525 grams Bread Flour
    • 6 grams kosher salt
    • 64 grams granulated sugar
    • 11 grams instant yeast
    • 250 grams water cold
    • 1 large egg white
    • 112 grams unsalted butter
    • 15 grams heavy cream

    Butter Block

    • 251 grams unsalted butter

    Champagne Chocolate Ganache

    • 26 grams water
    • 102 grams champagne
    • 9 grams unsweetened cocoa powder
    • 115 grams heavy cream
    • 3 large egg yolks
    • 38 grams granulated sugar
    • 165 grams dark chocolate 66% cocoa

    Champagne Chocolate Glaze

    • 200 grams glazing fondant
    • 50 grams champagne chocolate ganache

    Vanilla Sugar

    • 205 Grams granulated sugar
    • 1 vanilla bean

    Instructions

    • Two days before make ganache and refrigerate.

    Champagne Chocolate Ganache

    • Combine the water, 26 grams of champagne, and the cocoa powder in a small bowl. Mix to a smooth paste.
    • Combine the cream and the remaining 76 grams champagne in a small pot and bring to a boil over medium heat. Remove from the heat.
    • Whisk the egg yolks and granulated sugar together in a small bowl. Stream one- third of the hot cream mixture into the egg yolks, whisking constantly until fully blended, to temper them. Whisk the tempered yolks into the remaining hot cream. Return the pot to medium heat.
    • Keep whisking! Continue to cook the custard over medium heat until it reaches 185°. The custard will turn pale yellow and thicken so that it coats the back of a spoon. Remove from the heat and whisk in the cocoa powder paste until fully incorporated.
    • Place the chocolate in a medium heatproof bowl. Strain the custard through a small sieve over the chocolate. Let stand for 30 seconds.
    • Whisk the chocolate and custard until smooth. When finished the ganache will have the consistency of yogurt. Reserve 50 grams for the glaze. Cover with plastic wrap pressed directly onto the surface of the ganache, to prevent a skin from foaming. Refrigerate.

    Make At Home Cronut™ Pastry Dough

    • Combine the bread four, salt, sugar, yeast, water, egg whites, butter and cream in a stand mixer fitted with a dough hook. Mix until just combined, about 3 minutes. When finished the dough will be rough and have very little gluten development.
    • Lightly grease a medium bowl with nonstick cooking spray. Transfer the dough to the bowl. Cover with plastic wrap pressed directly on the surface of the dough to prevent a skin from forming. Proof the dough in a warm spot until doubled in size, 2-3 hours.
    • Remove the plastic wrap and punch down the dough by folding the edges into the center, releasing as much of the gas as possible. On a piece of parchment paper, shape into a 10 inch square. Transfer to a sheet pan, still on the parchment paper, and cover with plastic wrap. Refrigerate overnight.

    Make the Butter Block

    • Draw a 7 inch square on a piece of parchment paper with a pencil. Flip the parchment over so the butter doesn't come in contact with the pencil marks. Place the butter in the center of the square and spread it evenly with an offset spatula to fill the square. Refrigerate overnight.

    One Day Before

    • Remove the butter from the refrigerator.
    • Remove the dough from the refrigerator. Place the dough on a floured work surface. Using the rolling pin, roll out the dough to a 10 inch square about 1 inch thick. Arrange the butter block in the center of the dough so it looks like a diamond in the center of the square. Pull the corners of the dough up and over to the center of the butter block. Pinch the seams of dough together to seal the butter inside. You should have a square a little larger than the butter block.
    • Very lightly dust the work surface with flour to ensure the dough doesn't stick. With a rolling pin, roll out the dough from the center. When finished, you should have a 20 inch square about ¼ inch thick.
    • Fold the dough in half horizontally, so you are left with a rectangle. Then fold the dough vertically. You should now have a 10 inch square of dough with 4 layers. Wrap tightly in plastic wrap and refrigerate for one hour.
    • Repeat the last steps of rolling out the dough to a 20 inch square about ¼ inch thick, then fold dough in half horizontally, and vertically to get back to the 10 inch square. Wrap tightly in plastic wrap and refrigerate overnight.

    The Day Of

    • On a lightly floured work surface, roll out the dough to a 15 inch square about ½ inch thick. Transfer the dough to a half sheet pan, cover with plastic wrap, and refrigerate for 1 hour to relax dough.
    • Using a 3 ½ inch ring cutter, cut 12 rounds. Cut out the center of each round with a 1 inch ring cutter to create the donut shape.
    • Line a sheet pan with parchment paper and lightly dust with flour. Place the pastries on the pan, spacing them about 3 inches apart. Lightly spray a piece of plastic wrap with nonstick spray and lay it on top of pastries. Proof in a warm spot until tripled in size, about 2 hours.
    • Heat grapeseed oil in a large pot until it reaches 350°. Use a deep frying thermometer to verify that the oil is at the right temperature. Line a platter with several layers of paper towels for draining the pastries.
    • Gently place 3 or 4 of them at a time into the hot oil. Fry for about 90 seconds on each side, flipping once, until golden brown. Remove from oil with slotted spoon and drain on the paper towels.
    • Check to make sure oil is at right temperature, and continue frying.

    Make the Glaze

    • Warm the fondant in a small bowl in the microwave in 10 second intervals, stirring between intervals. When the fondant is slightly warm, about 20 seconds, add ganache and stir until fully blended.

    Make Flavored Sugar

    • Combine the sugar and its flavoring into a small bowl.

    Assemble the Make at Home Cronut

    • Transfer the ganache to a stand mixer fitted with a whisk. Whip on high speed until the ganache is smooth.
    • Cut the tip of a piping bag to snugly fit the Bismarck tip. Using a rubber spatula, place 2 large scoops of ganache in a piping bag so that it is one third full.
    • Place each pastry so that the flatter side is facing up. Inject the ganache through the top of the pastry in four different spots, evenly spaced.
    • Place the pastry on its side and roll in the sugar coating the outside edges.
    • If the glaze has cooled, microwave it for a few seconds until warm. Cut the tip of a piping bag to snugly fit a #803 tip. Using a rubber spatula, transfer the glaze to the bag.
    • Pipe a ring of glaze around the top of each pastry, making sure to cover all the holes created from the filling. Keep in mind the glaze will continue to spread slightly as it cools. Let the glaze set for about 15 minutes before serving.

    Notes

    Recipe Source: SerenaLissy.com
    This website provides approximate nutrition information for convenience and as a courtesy only. Nutrition data is gathered primarily from the USDA Food Composition Database via Spoonacular API, whenever available, or otherwise other online calculators. While this information can be helpful in estimating the nutritional information of a recipe, it is by no means accurate or official and is not evaluated by the Food and Drug Administration.
     
    All images and content are copyright protected. Do not use our images without prior permission.

    Nutrition

    Serving: 1Cronut | Calories: 618kcal | Carbohydrates: 65g | Protein: 8g | Fat: 37g | Saturated Fat: 22g | Polyunsaturated Fat: 2g | Monounsaturated Fat: 10g | Trans Fat: 1g | Cholesterol: 129mg | Sodium: 214mg | Potassium: 195mg | Fiber: 3g | Sugar: 29g | Vitamin A: 986IU | Vitamin C: 1mg | Calcium: 40mg | Iron: 2mg
    Tried this Recipe? Pin it Today!Mention @SerenaLissy or tag #serenalissy!

    As an Amazon Associate and member of other affiliate programs, I earn from qualifying purchases. What that means is if you click on one of our affiliate links, they may toss a few pennies our way for a commission.

    Three Cronuts made from the Dominique Ansel Cronut Recipe from Scratch

    Chocolate Donut Bread Pudding

    April 19, 2021

    Chocolate Donut Bread Pudding

    I don't often find myself with stale donuts, but when I do, this chocolate donut bread pudding is always my go to. Old donuts make great bread pudding!

    Chocolate Donut Bread Pudding leftover donut recipe topped with bourbon sauce.


    We have made it to Friday and aren't overloaded on chocolate yet. How about you? I hope you have been following along with this weeks #Choctoberfest. There have been some really good recipes out there for this event.

    What Can You Do With Day Old Donuts?

    When we made the double chocolate baked donuts, I'm almost embarrassed to say we had some leftovers. And it's no secret that donuts are darn good on the day made, but not so much a few days later. What else can one do with stale bread? You got it...Bread pudding. The combination of bread and delicious sauces in this leftover donut recipe warms my heart.

    I usually make my bread puddings with yeast bread, but I figured why not give the donuts a try. How bad could it be, right? Since we started the week with chocolate and bourbon, we may as well end the week with chocolate and bourbon. One of my better ideas, if I must say so myself.

    There is nothing hard about this donut bread pudding. My donuts used were about a day and a half old, and I almost felt bad about cutting them up into cubes. But with every chop, I was reminded how yummy they were going to be with a rich bourbon sauce drizzled onto them.

    Chocolate Donut Bread Pudding

    Ingredients In Chocolate Donut Bread Pudding

    Leftover stale donuts are the star of this recipe. You can certainly make or purchase donuts and let them sit on the counter for a day or two anytime you want to make this recipe.

    • Stale donuts
    • Eggs
    • Milk
    • Semi-sweet chocolate chips
    • Heavy whipping cream
    • Granulated Sugar
    • Bourbon
    • Vanilla paste

    The bourbon sauce takes this bread pudding to a whole new level.

    • Heavy whipping cream
    • Sugar
    • Cinnamon
    • Butter
    • Water
    • Cornstarch
    • Bourbon

    How To Make Chocolate Donut Bread Pudding

    Bread pudding is a classic recipe because it's both frugal and easy to make. You can turn leftover bread and stale donuts into a rich and flavorful dessert.

    1. First, whisk together the eggs, milk, chocolate chips, heavy whipping cream, sugar, bourbon, and vanilla paste.
    2. Then, pour the custard over the cubed donuts and bake for 40 minutes.
    3. While the donut bread pudding bakes, prepare the bourbon sauce by boiling cream, sugar, cinnamon in a saucepan. Add the cornstarch slurry and bring it back to a boil.
    4. Remove the pan from the heat and stir in the butter and bourbon.
    5. Serve the bread pudding with the sauce.
    Chocolate Donut Bread Pudding in bowls

    Imperial Sugar Giveaway (This giveaway has Ended)

    Now we are getting close to the end of #Choctoberfest with Imperial Sugar. So don't forget to signup for the giveaway if you haven't already. And if you have missed most of the week, here is the scoop:

    Imperial Sugar and our other sponsors have banded together to contribute some awesome prizes for our #Choctoberfest giveaway! Entering is simple - just click below to enter. Here's what you could win:

    • Granulated Sugar from Imperial Sugar
    • Chocolate Mint Essential Woman Omega Swirl and Chocolate Silk Greens from Barlean's
    • Chocolate bars (dark, milk, and white) from Lindt Chocolate
    • Hemp seed prize pack (hulled hemp seed, toasted hemp seed, hemp seed oil, and hemp protein powder) from Just Hemp Foods
    • Divine Chocolate gift set (15 flavors of chocolate bars!) from Divine Chocolate
    • Dark chocolate caramels from Tahana Confections
    • Vintage inspired gathering apron from Bless This Mess
    • Lulu's Lovepack (6 flavors of chocolate bars!) from Lulu's Chocolate
    • Pure Chocolate Lovers Supreme gift box from Pearson Farm

    We also have a nonprofit sponsor this year - Rescue Chocolate! They make vegan chocolate treats and donate 100% of their proceeds to animal shelters.

    Next time you are wondering what to do with stale donuts, look no further than classic bread pudding.

    Chocolate Donut Bread Pudding

    Chocolate Donut Bread Pudding

    This Chocolate Donut Bread Pudding is a twist on classic bread pudding. This leftover donut recipe is the perfect way to use stale donuts. The donuts are baked in a creamy custand and topped with luscious bourbon sauce.
    5 from 11 votes
    Print Pin Rate
    Course: Breakfast, Dessert
    Cuisine: American
    Prep Time: 14 minutes minutes
    Cook Time: 45 minutes minutes
    Total Time: 59 minutes minutes
    Servings: 8 Servings
    Calories: 372kcal
    Author: Serena

    Ingredients

    • 3 cups leftover donuts chopped
    • 2 large eggs
    • ⅔ cup whole milk
    • ½ cup semisweet chocolate chips
    • ⅓ cup heavy whipping cream
    • ⅓ cup granulated sugar
    • 1 tablespoon bourbon
    • ¼ teaspoon vanilla paste

    Bourbon Sauce

    • 2 ounces heavy whipping cream
    • 1.75 ounces sugar
    • Pinch cinnamon
    • ¼ ounce water
    • ¼ ounce butter
    • ¼ teaspoon cornstarch
    • ¼ ounce bourbon

    Instructions

    • Preheat the oven to 325° and have a small baking dish that holds about 4 cups liquid.
    • Place the donut cubes in a medium sized bowl.
    • In a small bowl, whisk together the eggs, milk, chocolate chips, heavy whipping cream, sugar, bourbon and vanilla paste. Pour over the donuts.
    • Pour all ingredients into baking dish. Bake on a small sheet pan for 40 minutes until the top is set, and no runny egg is revealed after a few pricks with a toothpick.

    To make the sauce:

    • Place the cream, sugar, cinnamon, in a small saucepan and bring to boil.
    • In a small bowl mix water and cornstarch to make a slurry. Add the slurry to the cream mixture in saucepan and bring back to a boil.
    • Remove from heat and add butter and bourbon. Stir until fully blended.
    • Serve the bread pudding warm with the bourbon sauce.

    Notes

    Recipe Source: SerenaLissy.com
    This website provides approximate nutrition information for convenience and as a courtesy only. Nutrition data is gathered primarily from the USDA Food Composition Database via Spoonacular API, whenever available, or otherwise other online calculators. While this information can be helpful in estimating the nutritional information of a recipe, it is by no means accurate or official and is not evaluated by the Food and Drug Administration.
    All images and content are copyright protected. Do not use our images without prior permission.

    Nutrition

    Serving: 1Serving | Calories: 372kcal | Carbohydrates: 22g | Protein: 3g | Fat: 12g | Saturated Fat: 7g | Polyunsaturated Fat: 1g | Monounsaturated Fat: 4g | Trans Fat: 1g | Cholesterol: 67mg | Sodium: 33mg | Potassium: 120mg | Fiber: 1g | Sugar: 20g | Vitamin A: 349IU | Vitamin C: 1mg | Calcium: 48mg | Iron: 1mg
    Tried this Recipe? Pin it Today!Mention @SerenaLissy or tag #serenalissy!

       "

    An InLinkz Link-up


    "

    Chocolate Rum Banana Bread

    April 16, 2021

    Chocolate Rum Banana Bread on Plate

    This Chocolate Rum Banana Bread is incredibly moist, flavorful, and loaded with chocolate. If you're a lover of banana bread and chocolate, then this recipe is for you. This recipe combines two classic flavors into one delicious dessert that's perfect as a breakfast treat or even as an afternoon snack!

    Moist and flavorful Chocolate Rum Banana Bread has a hint of rum.

    Chocolate Rum Banana Bread

    If you're looking for a treat that screams bananas, then this is it. Everyone's favorite fruit gets an upgrade with some chocolate and rum.

    What more do I need to say other than chocolate, rum, and bananas? Ok, maybe just a little bit more, but I'm sure you get the idea.

    I picked up some bananas the other day just for the purpose of making bread. I don't like eating bananas when they are this ripe, but I love the flavor they provide to bread. I usually go with a good old fashion banana bread, but this week I had some extra chocolate lying around and figured I would use it up.

    For those of you that don't know, we have moved into our commercial kitchen this week. So I'm halfway out of the house and halfway into the new kitchen/photo studio. Something as simple as banana bread was a bit of a challenge this week as my home studio/kitchen is almost empty, and the commercial kitchen/photography studio is almost set up. Almost is the keyword in that sentence. Trying to complete an entire project in one location is a bit of a precarious situation this week. But these bananas had about one more day in their life cycle, and instead of wasting them, I just went for it.

    Ingredients in Chocolate Rum Banana Bread

    Ingredients In Chocolate Rum Banana Bread

    • Bananas (very ripe)
    • Butter
    • Rum
    • Dark brown sugar
    • Egg
    • Vanilla extract
    • Baking soda
    • Salt
    • AP Flour
    • Dutch process cocoa powder
    • Valrhona Manjari chocolate chopped

    This recipe is an adaption of chocolate banana bread by Smitten Kitten. It's no secret; I'm getting to be known as the gal that likes to add liquor to her chocolate creations. So you guessed it. We have been working a lot with Treaty Oak Rum, and it was a great fit for this bread. Not only did we get just a hint of the flavor in the bread, but this bread was so moist, I think it technically should be called a cake. And, of course, nothing would be complete without my favorite brand of chocolate, Valrhona. Any dark chocolate and your favorite rum brand will work for this recipe if you don't have access to Valrhona or Treaty Oak, but I'm just saying, both of them make this a really nice product.

    How to Make Banana Bread

    I love banana bread for its sheer simplicity. It comes out perfectly, every time!

    1. Mash the bananas in a bowl and add the remaining wet ingredients.
    2. Sift in the dry ingredients and stir until just combined.
    3. Fold in the chocolate chunks and transfer the batter to a baking pan.
    4. Bake for 60-65 minutes or until a toothpick inserted into the center comes out clean.
    5. Cool 15 minutes before eating.

    What Else Can You Add To The Banana Bread

    Now, if you aren't a rum lover, this bread works perfectly fine without it. So just skip that ingredient. If you want to add a few other things to this bread, I'd go with nuts. Possibly walnuts or pecans. I also thought about drizzling melted peanut butter chips on the top. You could also add some into the batter.

    Chocolate Rum Banana Bread Process Collage

    How Long Will It Stay Fresh?

    This will last on the counter wrapped in an airtight container or plastic wrap for a week. You can also freeze this if you are planning on using it in the future. Once baked, just let cool, then wrap with plastic wrap. I'd then do a second wrap with aluminum foil or place it in a Ziploc plastic bag to keep any air out. Freeze for up to 2 months. Defrost on the counter when you are ready to use.

    Chocolate Rum Banana Bread Tips

    • Chocolate is the main ingredient here. So you want to make sure you are using good quality chocolate and cocoa powder. We used a 64% Valrhona Chocolate.
    • Bananas are super important. You want them to be as ripe as possible to let that delicious flavor out. You want them brown and very ripe.
    • I kept my chocolate pieces large when I chopped them. A bit larger than a chocolate chip.
    • I like the brown sugar in this recipe because it mixes really well with the banana flavor and adds a ton of moisture to the bread.
    • Watch the bread closely, starting around 55 minutes into the bake. I check it every 5 minutes after that. A toothpick inserted in the center of the bread should come out clean or with some melted chocolate on, but not raw batter.
    • Let the bread cool completely before cutting. It will be a bit crumbly, and this helps to keep your slices nice and neat.

    More Bread and Muffin Recipes to Try

    • Pumpkin Spice Pull Apart Bread
    • Pumpkin Bread Cake Balls
    • Chocolate Donut Bread Pudding
    • Apple Cinnamon Muffins
    • Easy Pumpkin Chocolate Chip Muffins

    Looking for More Recipes?

    Subscribe to my free newsletter to get new recipes in your inbox monthly. Find me sharing new recipes and tips on Pinterest, Instagram or Facebook.

    So if you are looking for something that is super easy to make, has a delicious flavor, and is extremely moist this is the bread for you. Give it a try, we would love to hear how it worked for you.

    Chocolate Rum Banana Bread

    This Chocolate Rum Banana Bread is incredibly moist, flavorful, and loaded with chocolate.
    4.89 from 9 votes
    Print Pin Rate
    Course: Breakfast, Dessert
    Cuisine: American
    Prep Time: 11 minutes minutes
    Cook Time: 1 hour hour 5 minutes minutes
    Total Time: 1 hour hour 16 minutes minutes
    Servings: 12 Slices
    Calories: 313kcal
    Author: Serena

    Ingredients

    Adapted from Smitten Kitten

    • 3 large very ripe bananas
    • ½ cup butter melted
    • 1 ounce Rum
    • ¾ cup dark brown sugar
    • 1 large egg
    • 1 teaspoon vanilla extract
    • 1 teaspoon baking soda
    • ¼ teaspoon salt
    • 1 cup AP Flour
    • ½ cup Dutch process cocoa powder
    • 1 ¼ cup Valrhona Manjari chocolate chopped

    Instructions

    • Heat oven to 350°
    • Spray a 9x5 inch loaf pan with nonstick baking spray.
    • Mash bananas into the bottom of a large bowl. Whisk in melted butter, rum, brown sugar, egg and vanilla.
    • Place baking soda, salt, flour and cocoa powder in a sifter and sift into wet ingredients. Stir with a spoon until combined.
    • Add chocolate chunks and stir to blend.
    • Pour into prepared pan and bake for 60 - 65 minutes, until a toothpick inserted into the center of cake comes out clean.
    • Cool in pan for 15 minutes, then take out and place on a cooling rack.

    Notes

    Recipe Source: SerenaLissy.com
    This website provides approximate nutrition information for convenience and as a courtesy only. Nutrition data is gathered primarily from the USDA Food Composition Database via Spoonacular API, whenever available, or otherwise other online calculators. While this information can be helpful in estimating the nutritional information of a recipe, it is by no means accurate or official and is not evaluated by the Food and Drug Administration.
     
    All images and content are copyright protected. Do not use our images without prior permission.

    Nutrition

    Serving: 1Slice | Calories: 313kcal | Carbohydrates: 39g | Protein: 4g | Fat: 16g | Saturated Fat: 10g | Polyunsaturated Fat: 1g | Monounsaturated Fat: 5g | Trans Fat: 1g | Cholesterol: 35mg | Sodium: 221mg | Potassium: 328mg | Fiber: 4g | Sugar: 21g | Vitamin A: 282IU | Vitamin C: 3mg | Calcium: 37mg | Iron: 3mg
    Tried this Recipe? Pin it Today!Mention @SerenaLissy or tag #serenalissy!

    As an Amazon Associate and member of other affiliate programs, I earn from qualifying purchases. What that means is if you click on one of our affiliate links, they may toss a few pennies our way for a commission.

    The Kitchen Brigade: Who's Doing What?

    April 13, 2021

    Kitchen Brigade Family Tree

    Who is Escoffier?

    Georges Auguste Escoffier created the kitchen brigade system. After serving in the French army, he brought his military hierarchy experience to a hotel kitchen in the 1800s to establish a kitchen hierarchy. The goal of the system was to streamline the kitchen duties and facilitate in the prevention of chaos.

    Kitchen Brigade

    The Mother Sauces

    Another thing you may not know about Georges Auguste Escoffier is that he created the five French mother sauces. These sauces serve as the staring point for most sauces. The five French mother sauces are béchamel, velouté, espagnole, hollandaise, and tomato. The five sauces are all equally important for your cooking repertoire, and they all have their own special uses. They're simple to make with a few ingredients (mostly flour, butter, and some sort of liquid) and a couple easy techniques. This is the reason I love Escoffier, a good béchamel has such a special place in my heart!

    History of the Kitchen Brigade System

    During the 1800s grand sized hotels started to become popular, requiring grand sized kitchens to feed all the patrons. Without organization of the larger staff, chaos might have ensued. Escoffier created a hierarchical system to aid in the daily production of food. Every station in the restaurant was identified and cooks were put in each place.

    Kitchen Brigade

    Over the years, kitchens and budgets have gotten smaller, and labor prices are much higher. Escoffier's system supports scaling to match any kitchen's needs.

    Modern Day System

    To make a comparison of this with today's restaurants, I went to a local Austin restaurant. They had an open, theater style kitchen and I ate my meal at the chef's counter seating, where I had a front row view to observe all the kitchen happenings. In today's culinary kitchen brigade, it is quite difficult to determine who does what. We have definitely mastered the fine art of multiple jobs from one person. From what I could see, I knew they had an Executive Chef, a Chef de Cuisine, and a Chef Patissier. I could also guess they had a Sous Chef, Chef Garde Manger (pantry chef, in charge of cold salads, appetizers, etc), A Chef Poissonier (Fish Chef), A Chef Grillardin (Grilled foods) and possibly a Chef Friturier (Fried items). It also appeared they had a few Commis (apprentices) and kitchen assistants.

    Even in an open kitchen where you can see what everyone is doing, it's hard to tell exactly what is their specific job. If you just saw the photographs from the restaurant could you identify what each person does in their brigade?

    Three images of a modern working kitchen

    When I attended culinary school, I was taught about the history of classical French cooking. However, the classes themselves were more likely to use some type of abbreviated version of this system because modern kitchens have less space and need a higher level of specialization. If you take a look at the Organization Chart that Lucky Peach Magazine had back in 2015 one can see that there are a lot of people doing a lot of things in the kitchen.

    Kitchen Brigade Organization Chart

    Kitchen Brigade Organization Chart

    But we all know times have changed, and restaurant kitchen staff structure are now much smaller and more specialized based on cuisine offered. This Kitchen Family Tree could look different by restaurant. What's most important is the established clear hierarchy in a kitchen to maximize the efficiency of the workers.

    Modern Day Kitchen Brigade

    Kitchen Brigade Family Tree

    There are many other positions possible in a kitchen, and there are also duties that have not been covered here, such as dishwasher and others, that are needed for the functioning of a busy kitchen. This is just a sampling of how times have changed in the kitchen and what they have become as processes and size are streamlined.

    Looking For Recipes?

    Subscribe to my free newsletter to get new baking tips in your inbox monthly. Find me sharing new recipes and tips on Pinterest, Instagram, or Facebook.

    As an Amazon Associate and member of other affiliate programs, I earn from qualifying purchases. What that means is if you click on one of our affiliate links, they may toss a few pennies our way for a commission.

    Kitchen Brigade

    Nailed It! Manchego Cheesecake

    April 6, 2021

    Manchego Cheesecake on a Plate

    Here we are at week number ten of the nailed it or failed it blog series and we are making a Manchego Cheesecake. We are still working from the Bachour book and learning new things weekly to add to our toolbox. If you haven't seen all the other creations I have made from the book you can find them here. This week I wanted to keep it simple while I waited for some parts for my oven to be repaired. Nothing like trying to bake something when your oven is 75° off, and overcooking everything. My fingers were crossed for the entire baking periods hoping I got the adjustment correct for the temperature fluctuations that were going on.

    Lissy_Serena_Manchego_Cheesecake_Vertical

    Manchego Cheesecake

    This recipe can be really quick if you want, or you can make all the components on the plate and spend a little more time with the recipe. You could easily use store bought graham cracker crumbs and store bought strawberry sorbet and just make the blackberry puree and the Manchego cheesecake. But one thing is for certain. All these ingredients are needed for the perfect taste pairing. The strawberry sorbet and the blackberry puree just make the nutty, rich flavor of the cheesecake so much better.

    I did use individual 3" ring molds for this, but there is no reason you couldn't just cook the cheesecake in a square pan, then cut individual squares from that if it is what you have in the kitchen.

    Ingredients

    Manchego Cheesecake Ingredients
    • Manchego cheese
    • Cream cheese
    • Sugar
    • All Purpose Flour
    • Eggs
    • Sour Cream
    • Unsalted Butter
    • Brown Sugar
    • Honey
    • Cake Flour
    • Wheat Flour
    • Salt
    • Baking Soda
    • Ground Cinnamon
    • Blackberries

    Steps to Make the Manchego Cheesecake

    Manchego Cheesecake Process

    What is Manchego Cheese

    This recipe uses a special cheese, not commonly used in cheesecakes. Manchego cheese is a Spanish cheese made from Machenga sheep’s milk. It’s known for being a cheese that most all taste palettes love and enjoy. Manchego cheese is a semi-firm cheese with a buttery, rich, and nutty taste.  When shopping for Manchego cheese look for fresh (fresco) or curado cheese (aged 2-4 months). The younger the cheese is, the easier and smoother it will be to blend. In this recipe the cream cheese and sugar in the cheesecake mixture balance out the sharper flavor of the Manchego cheese.

    How to Make the Cheesecake

    For the cheesecake you’ll heat your oven to 325 °F. You’ll blend the chunks of Manchego Cheese and water in a food processor until smooth. Then you’ll slowly add in the cream cheese and sugar. Next, combine the flour and eggs in a separate bowl and then add slowly to the cheese puree. The final addition is the sour cream and you’ll blend until the entire mixture is smooth. Pour into the ring molds and bake for 20-25 minutes. You’ll know if your cheesecake is done if it only jiggles slightly in the middle.

    Reasons to Make Your Own Graham Crackers

    What is also nice about this cheesecake is that the crumbs are all over the cheesecake, instead of just at the bottom of the cheesecake like a crust. Which is why I would recommend you take the time to make the graham cracker crumbs from scratch instead of purchasing from the store. If you are someone using a square pan and cutting pieces from there, the exterior crumb coating will hide any imperfections with the cut.

    How Do I Shape The Graham Crackers

    The recipe calls for you to roll out the entire dough and place in a sheet pan for baking. If you find you want some crackers for later, you can use a ruler and knife to cut the dough into even squares. I then use a fork to prick some holes into the dough to give it a graham cracker appearance.

    How Long Do Graham Crackers Last?

    You should keep the homemade graham crackers in an airtight container for up to a week. If you wanted you could also freeze the cooked graham crackers so you can have them when ever you want.

    Blackberry Puree

    The blackberry puree is a combo of blackberries with sugar and vodka. I like the flavor of the vodka in the puree, but if you are someone that does not drink alcohol, you could easily make the puree without the vodka.

    So go ahead and give this recipe a try, we would love to see how it works for you.

    Looking For More Recipes?

    Subscribe to my free newsletter to get new baking tips in your inbox monthly. Find me sharing new recipes and tips on Pinterest, Instagram, or Facebook.

    Nailed It! Manchego Cheesecake

    Manchego Cheesecake. A classic baked cheesecake that uses Spain’s rich Manchego cheese with a sweet blackberry puree to top it off.
    5 from 1 vote
    Print Pin Rate
    Course: Dessert
    Cuisine: American
    Prep Time: 10 minutes minutes
    Cook Time: 50 minutes minutes
    Total Time: 1 hour hour
    Servings: 9 Servings
    Calories: 682kcal
    Author: Serena

    Ingredients

    Manchego Cheesecake

    • 340 g Manchego cheese cut into ½ inch chunks
    • 85 g water
    • 340 g cream cheese
    • 113.5 g granulated sugar
    • 1 ½ tablespoon all purpose flour
    • 2 medium eggs
    • 85 g sour cream

    Graham Cracker Crumbs

    • 170 g unsalted butter
    • 71 g brown sugar
    • 56.5 g granulated sugar
    • 1 tablespoon honey
    • 99 g all purpose flour
    • 71 g cake flour
    • 71 g wheat flour
    • ¼ teaspoon salt
    • ½ teaspoon baking soda
    • ½ teaspoon ground cinnamon

    Blackberry Puree

    • 50 g blackberries
    • 10 g granulated sugar
    • 1 tablespoon vodka

    Instructions

    Manchego Cheesecake

    • Preheat oven to 325° F.
    • Blend Manchego cheese and water in a food processor until smooth.
    • Slowly add cream cheese and sugar and continue to blend until smooth.
    • In a separate bowl, combine flour and eggs. Add to cheese puree and blend until smooth.
    • Add sour cream and blend until smooth.
    • Pour into individual ring molds and bake for 20-25 minutes.

    Graham Cracker Crumbs

    • Preheat oven to 350°F.
    • In a stand mixer fitted with a paddle attachment, cream butter, sugars and honey.
    • In a separate bowl, combine all dry ingredients.
    • Beat into butter mixture until smooth.
    • Roll dough out between two sheets of parchment to ½ inch thickness, remove the top sheet of parchment and bake on a ½ sheet pan until golden and firm.
    • Cool completely before grinding in a food processor into crumbs.

    Blackberry Puree

    • Macerate blackberries with sugar and vodka overnight.
    • Heat mixture in a small pot and cook to reduce liquid slightly. Puree in a blender and reserve for assembly.

    Assembly

    • Roll a Manchego Cheesecake into graham cracker crumbs. Spread blackberry puree over the center of a plate and top with cheesecake. Top with a quenelle of strawberry sorbet and garnish with blackberries before serving.

    Notes

    Recipe Source: SerenaLissy.com
    This website provides approximate nutrition information for convenience and as a courtesy only. Nutrition data is gathered primarily from the USDA Food Composition Database via Spoonacular API, whenever available, or otherwise other online calculators. While this information can be helpful in estimating the nutritional information of a recipe, it is by no means accurate or official and is not evaluated by the Food and Drug Administration.
    All images and content are copyright protected. Do not use our images without prior permission.

    Nutrition

    Serving: 1Serving | Calories: 682kcal | Carbohydrates: 53g | Protein: 16g | Fat: 45g | Saturated Fat: 28g | Polyunsaturated Fat: 2g | Monounsaturated Fat: 8g | Trans Fat: 1g | Cholesterol: 164mg | Sodium: 503mg | Potassium: 135mg | Fiber: 1g | Sugar: 31g | Vitamin A: 1311IU | Vitamin C: 1mg | Calcium: 476mg | Iron: 1mg
    Tried this Recipe? Pin it Today!Mention @SerenaLissy or tag #serenalissy!
    Lissy_Serena_Manchego_Cheesecake_Comparison-

    Here are a few of our favorite Cheesecake recipes:

    • The Best Lemon Cheesecake Recipe
    • Raspberry Mousse Chocolate Cheesecake
    • Instant Pot Pumpkin Cheesecake

    As an Amazon Associate and member of other affiliate programs, I earn from qualifying purchases. What that means is if you click on one of our affiliate links, they may toss a few pennies our way for a commission.

    Triple Chocolate Cheesecake

    April 3, 2021

    Instant Pot Triple Chocolate Cheesecake

    Like everyone else out there, we got an Instant Pot on Black Friday from Amazon. I have heard great things about this little gadget and I could resist no longer.  I will say it took me a little while to open it. With the holidays, our chocolate shop was swamped, and we just had no time. And I'll also say, it was a wee bit intimidating. There is something scary about a pot that can blow up at any moment! I know I'm not alone in that thought, right?!? But sooner or later, I had to break it in, and what better way than a mouthwatering, delicious triple chocolate cheesecake?

    Slice of Instant Pot Triple Chocolate Cheesecake topped with Chocolate Ganache on a plate beside a whole instant pot cheesecake.

    Cheesecake in the Instant Pot?

    The day finally came after Christmas. I decided to give it a go. I read the instruction manual about 100 times. I can probably still recite it (it's not that much info). I then went for the water test to make sure it heated up properly and there were no issues. All was good so far. Now, what to cook?

    Everyone said how easy cheesecake was, so I figured why not. The first cheesecake I made was a New York-style topped with caramel and pecan brittle bark. I was amazed at how easy it was and how perfectly cooked it was. Hmmm, I thought. What else could I try? Of course, chocolate things are always the goal for me, so I figured why not try an easy chocolate cheesecake recipe in the instant pot. I did some research and saw a recipe in The Great Big Pressure Cooker Book for chocolate cheesecake. I gave it a go. It was good but needed a few modifications, like more chocolate. After some testing, we came up with the instant pot triple chocolate cheesecake.

    Triple Chocolate Cheesecake Ingredients

    Ingredients in Instant Pot Triple Chocolate Cheesecake

    The ingredients in this are pretty simple. The best advice I can give is to use the best chocolate you have access to. It really does make the flavor so much better. We use Valhrona for almost everything.

    • Oreo cookies
    • Unsalted butter
    • Cream cheese
    • Dark brown sugar
    • White sugar
    • Whole egg
    • Egg yolk
    • Sour cream
    • 53 - 60% chocolate
    • Vanilla extract
    • Flour
    • Cocoa powder
    • Chocolate
    • Whipping cream

    What Does Cocoa Percentage Mean?

    This is the weight of the bar that comes from cocoa butter and cocoa liquor. Which combined is cocoa mass. We will call this the cacao content. So if we are using a 65% chocolate, that tells me that 35% of the chocolate comes from non chocolate items. That could be things like cane sugar, milk powder, vanilla.

    There is More to it Than Just a Percentage of Chocolate

    The difference in percentages doesn't tell you anything about the quality of beans, or how they were processed. Fermentation, drying and roasting are just as important as the percentage of cocoa solids to bring out those beautiful flavor notes!

    If you're not sure which chocolate to buy, don't just think of the cocoa content when making your decision. The taste of a bar can vary depending on what kind of palate you have and how high quality the beans are. No matter how high or low the cocoa percentage on a bar of chocolate, your taste buds will do just fine picking out whether it's delicious or not.

    Process of how to make triple chocolate cheesecake in Instant Pot

    How to Make the Triple Chocolate Cheesecake With Oreo Crust

    The steps to make this Triple Chocolate Cheesecake are quite simple. We mixed the ingredients in a food processor, but you could easily use a blender.

    1. Combine crushed Oreos and melted butter to form a crust. Press into the springform pan and freeze for 10 minutes.
    2. Combine cream cheese with your sugars and cocoa powder. Once combined, add eggs one at a time. Add the melted chocolate and sour cream. Pulse to continue to combine the ingredients.
    3. Scrape down the bowl and add vanilla and flour. Mix until creamy and then pour into your springform pan on top of your crust.
    4. Pour two cups of water into the bottom of the instant pot and lower in your springform pan using a tinfoil sling.
    5. Cover and set to seal and cook at high pressure for 28 minutes. Note: This does not include the time it takes for the Instant Pot to reach full pressure.
    6. Allow for a 15-minute natural pressure release before opening the instant pot and removing the cheesecake.
    7. Cool overnight in the fridge before topping with ganache and serving.
    Slice of cheesecake on plate

    FAQ

    How Do I Get the Cheesecake Pan In and Out of the Instant Pot?

    1. Make a tin foil sling.
    2. Get a piece of foil about 21 inches long. Fold it in thirds length wise like you would a letter.
    3. It's now ready to use for lifting the cheesecake in and out of the instant pot.
    4. If you don't want to make a tin foil sling, you can easily grab a nice silicone one that should last you the life of your instant pot.

    How Do I Know When the Cheesecake is Done?

    1. The middle needs to be set.
    2. You are looking for an internal temperature of about 150° Fahrenheit.
    3. Use an instant read thermometer for this or go with the jiggle test.

    What Do I Do If My Cheesecake Cracked?

    Here is where creativity comes into play. Your cheesecake will be covered in chocolate so you don't really see that much. But if you don't want the ganache topping, you could cover it with whipped cream or even berries.

    Can You Freeze Cheesecake?

    Yes you can! Most cheesecakes will last about a month in the freezer. You can freeze it whole or cut it in slices for easier access when you are ready.

    Steps to Freezing a Triple Chocolate Cheesecake

    1. Allow your cheesecake to cool completely.
    2. Slice and wrap with plastic wrap. If you are keeping it whole, just wrap with the plastic.
    3. Once it's wrapped in plastic, then wrap a second time, but with foil.
    4. Most important, when you are ready to eat the cheesecake allow to thaw at room temperature for 2-3 hours, or leave in refrigerator overnight.

    Can I Bake In The Oven If I Don't Have An Instant Pot?

    Yes, you can. Place cheesecake in a 325° Fahrenheit preheated oven in a water bath. Be sure to wrap your springform pan with foil to prevent any water from seeping in. Cook for about 60 minutes and start checking for doneness. You are looking for an internal temperature of 150° Fahrenheit. It could take up to 70 minutes, depending on your oven.

    Special Equipment Needed to Make Triple Chocolate Cheesecake

    Obviously this recipe requires an Instant Pot. We also used a 7-Inch Round Springform Pan. These are the only special requirements for this recipe.

    This is over the top decadent. Super rich and a little goes a long way. But soooooo good! We have now made four chocolate cheesecakes, and everyone I know has broken all New Year resolutions for weight loss.

    I hope you enjoy it as much as we did. Happy New Year!

    "Wow. This recipe was not at all difficult and it turned out perfectly. Really, really delicious! I’d had mixed success with cheesecakes in the oven before. This was too easy. I should add that the quality of ingredients makes a difference. I used 63% Scharffen Berger chocolate. Do use a quality chocolate as the chocolate flavor really is front and center in the final product. I followed the recipe exactly as written (used Fat Daddio’s 7-inch removable bottom pan) and it was flawless. Keeper for sure." ~Chris

    More Cheesecake Recipes You'll Love:

    • Raspberry Mousse Chocolate Cheesecake
    • Instant Pot Pumpkin Cheesecake
    • White Chocolate Peppermint Bark Cheesecake
    • The Best Lemon Cheesecake Recipe
    • Nailed It! Manchego Cheesecake

    Looking For More Recipes?

    Subscribe to my free newsletter to get new recipes in your inbox monthly. Find me sharing new recipes and tips on Pinterest, Instagram or Facebook.

    Piece of Instant Pot Triple Chocolate Cheesecake on a plate next to whole instant pot cheesecake

    I Just Want to Watch, Where is the Video?

    If you would like something other than ganache on top we made a Raspberry Mousse Chocolate cheesecake, and if chocolate isn't your thing at all, we also have a pumpkin cheesecake in the Instant Pot.

    Piece of Instant Pot Triple Chocolate Cheesecake

    Instant Pot Triple Chocolate Cheesecake

    This Instant Pot Triple Chocolate Cheesecake is over the top and you won’t believe how easy it is to make!
    5 from 16 votes
    Print Pin Rate
    Course: Dessert
    Cuisine: American
    Prep Time: 15 minutes minutes
    Cook Time: 45 minutes minutes
    Total Time: 1 hour hour
    Servings: 6 Servings
    Calories: 809kcal
    Author: Serena

    Ingredients

    Crust

    • 20 whole Oreo cookies
    • 4 tablespoon of unsalted butter melted then cooled

    Cheesecake

    • 1 lb room temperature cream cheese (At least 2 hours at room temp)
    • ¼ cup packed dark brown sugar
    • ¼ cup white sugar
    • 1 whole egg - room temperature
    • 2 egg yolks - room temperature
    • ¼ cup sour cream
    • 8 oz chocolate 53% - 60% Melted
    • 1 teaspoon vanilla extract
    • 1 tablespoon flour
    • 1 tablespoon cocoa powder

    Ganache

    • ¾ cup chocolate
    • 3 oz heavy whipping cream

    Instructions

    • Spray the 7" springform pan with cooking spray.
    • Add two cups of water to the instant pot and place the rack on the bottom.
    • Make a tin foil sling to lift the cheesecake in and out of the instant pot.

    Crust

    • In a food processor combine the whole Oreo cookies and the butter.
    • Pour the crumb butter mixture into the bottom of the pan and pat until even and going up the sides of the pan. Put in freezer for 10 minutes.

    Cheesecake

    • In a food processor, mix the cream cheese with dark brown and white sugar, and cocoa powder.
    • Once combined, add one egg followed by the 2 egg yolks.
    • Add the melted chocolate and sour cream.
    • Continually scrape the bowl down. Add vanilla flour and mix until creamy.
    • Pour mixture into the springform pan and smooth with a spatula.
    • Place pan on the tin foil sling and slowly lower into the Instant Pot.
    • Set Instant Pot to maximum pressure for 28 minutes.
    • Once done, turn machine off and let it return to normal pressure for 15 minutes.
    • Unlock lid and use sling to transfer pan to cooling rack for an hour.
    • Chill in refrigerator overnight.

    Ganache

    • Put the ¾ cup of chocolate in a bowl.
    • Heat the heavy whipping cream to a simmer. Pour over chocolate.
    • Chocolate will melt, stir until incorporated. Once incorporated, use a spatula and spread over the top of the cake.
    • Put back in refrigerator to cool.

    Notes

    Recipe Source: SerenaLissy.com
    This website provides approximate nutrition information for convenience and as a courtesy only. Nutrition data is gathered primarily from the USDA Food Composition Database via Spoonacular API, whenever available, or otherwise other online calculators. While this information can be helpful in estimating the nutritional information of a recipe, it is by no means accurate or official and is not evaluated by the Food and Drug Administration.
    All images and content are copyright protected. Do not use our images without prior permission.

    Nutrition

    Serving: 1Serving | Calories: 809kcal | Carbohydrates: 90g | Protein: 19g | Fat: 46g | Saturated Fat: 25g | Polyunsaturated Fat: 3g | Monounsaturated Fat: 15g | Trans Fat: 1g | Cholesterol: 146mg | Sodium: 755mg | Potassium: 540mg | Fiber: 5g | Sugar: 69g | Vitamin A: 668IU | Vitamin C: 1mg | Calcium: 331mg | Iron: 6mg
    Tried this Recipe? Pin it Today!Mention @SerenaLissy or tag #serenalissy!

    As an Amazon Associate and member of other affiliate programs, I earn from qualifying purchases. What that means is if you click on one of our affiliate links, they may toss a few pennies our way for a commission.

    Chocolate Cake with Earl Grey Buttercream

    April 2, 2021

    London Fog Cake with Earl Grey buttercream on plate

    London Fog Cake is the delicious comfort of an Earl Grey latte in cake form. Moist chocolate cake is layered with Earl Grey buttercream and topped with a silky and sweet caramel sauce.

    London Fog Cake with Earl Grey buttercream and a caramel drizzle on plate

    What is London Fog Cake

    I recently picked up the Layered cookbook by Tessa Huff. First, I'm going to say that this book is awesome. Quite a few incredible easy desserts in there. But her London Fog cake really stood out. I'm a huge fan of Earl Grey tea so we gave this a whirl. I'll say it was pretty delicious.

    For me, the most unforgettable flavors are those that are both familiar, yet somehow new. The sweet vanilla-infused Earl Grey tea latte is a classic for any coffee lover, but its London Fog twist makes this cake extra special. A bergamot orange flavor gives the buttercream an almost tangy undertone of citrus that goes so well with vanilla bean and black tea leaves. If you are an Earl Grey fan, this London Fog cake is a must!

    Bringing Out More Earl Grey Flavor

    What I ended up wanting from Tessa's recipe was just a bit more Earl Grey flavor, so we made a few adaptations to her Swiss Meringue buttercream recipe and ended with this recipe. We used our standard chocolate cake recipe for the cake layers. This makes two delicious chocolate layers. If you want more layers of cake go ahead and double the recipe, or 1.5 times it to give you three layers. We went with three, but two would easily work for this London Fog Cake and your buttercream will just be a bit thicker since you have one less layer to cover.

    Now when you think chocolate cake, what is the first thing that comes to mind? For many people, it's no doubt a delicious and moist cake topped with a decadent sauce or frosting.

    Caramel Topping

    The best part of this caramel topping recipe is how easy it is to make. You just boil the sugar down until browned, then add the dairy while stirring continuously. After cooking for a few minutes more, add butter and vanilla. It takes about 15 minutes from start to finish. We then topped the cake with this caramel sauce - which tastes amazing without but really tasty with...it just depends on your motivation and love of caramel. Personally I love adding a generous drizzle of this to my vanilla bean ice cream or even sprinkling over apple cobbler.

    Caramel Sauce:

    • ¾ cup sugar
    • 2 tablespoon light corn syrup
    • 2 tablespoon water
    • ½ cup heavy cream at room temperature
    • 1 tablespoon unsalted butter
    • 1 ½ teaspoon vanilla

    Place sugar, corn syrup and 2 tablespoon water in a medium saucepan. Heat over high heat, slowly swirling the pan until it turns a golden amber color, about 10 minutes. Once you have the right color, remove from heat and slowly whisk in the cream. (Be careful it will foam up and splash, so stand clear) Add the butter and continue to stir until melted. Add the vanilla and pour into a heat proof container until it cools.

    London Fog Cake Ingredients

    Ingredients In London Fog Cake

    Earl Grey Tea is the star of the buttercream for this recipe. Don't rush the steeping time for the tea and that will help its flavor to shine through.

    • All-purpose flour
    • Sugar
    • Cocoa powder
    • Salt
    • Baking powder
    • Cultured buttermilk
    • Vegetable oil
    • Water
    • Eggs
    • Unsalted butter
    • Earl grey tea
    • Egg whites
    • Vanilla
    London Fog Cake Process Collage

    How to Make Chocolate Cake with Earl Grey Buttercream

    1. Sift the flour and dry ingredients into the bowl of a stand mixer.
    2. Add oil, water and eggs (one at a time) until combined and pour into prepared round baking pans.
    3. Bake 30-35 minutes or until a toothpick inserted in the center comes out clean. Cool completely.
    4. Simmer Earl Grey tea in 1 cup of melted butter for 5 minutes then remove from the heat and steep for 5 more minutes.
    5. Strain the butter and refrigerate for 30 minutes.
    6. Beat egg white and sugar and then heat to 160°F over a double boiler before beating to stiff peaks.
    7. Beat in the vanilla, tea infused butter and remaining butter until smooth and fluffy.
    8. Spread buttercream between layers, on the sides and top of the cake.
    9. Refrigerate for 30 minutes that top with caramel sauce.

    If You Love London Fog Cake Try

    • Caramel Apple Chocolate Mousse Cake
    • Chocolate Pumpkin Stout Cupcakes
    • Lemon Poppy Seed Bundt Cake
    • Texas Sheet Cake
    • S’mores Cake

    Looking For More Recipes?

    Subscribe to my free newsletter to get new baking tips in your inbox monthly. Find me sharing new recipes and tips on Pinterest, Instagram, or Facebook.

    Chocolate Cake With Earl Grey Buttercream

    Chocolate Cake with Earl Grey Buttercream

    London Fog Cake is the delicous comfort of an Earl Grey latte in cake form. Moist chocolate cake is layered with Earl Grey buttercream and topped with a silky and sweet caramel sauce.
    5 from 4 votes
    Print Pin Rate
    Course: Dessert
    Cuisine: American
    Prep Time: 30 minutes minutes
    Cook Time: 35 minutes minutes
    Total Time: 1 hour hour 5 minutes minutes
    Servings: 8 Servings
    Calories: 1124kcal
    Author: Serena

    Ingredients

    Cake

    • 297 grams AP Flour
    • 425 grams sugar
    • 65 grams cocoa powder
    • 11 grams salt
    • 12 grams baking soda
    • 45 grams cultured buttermilk powder
    • 170 grams vegetable oil
    • 525 grams water
    • 80 grams eggs

    Earl Grey Buttercream

    • 2 cups 450 grams unsalted butter at room temperature
    • ¼ cup 25 grams Earl Grey tea
    • ½ cup plus 2 Tablespoons Egg Whites (160 ml egg whites)
    • 1 ¼ cups 250 grams sugar
    • 1 tablespoon vanilla

    Instructions

    Cake

    • Preheat oven to 350°F.
    • Spray two 8” round cake pans with cooking spray.
    • Sift flour, sugar, cocoa powder, salt, baking soda and buttermilk powder into mixing bowl of stand mixer.
    • With paddle attachment mix on low speed to combine.
    • Add oil, water, eggs, one at a time and continue mixing until blended together.
    • Pour into pans and bake for 30 - 35 minutes or until cake springs back when lightly touched or toothpick inserted into center comes out clean.
    • Remove from oven and let cool in pan for 15 minutes.
    • Remove from pan and cool on wire rack.

    Earl Grey Buttercream

    • Place one cup of the butter in a saucepan with the loose tea. Heat until the butter melts, then reduce heat to low and simmer for 5 minutes.
    • Remove from heat and let steep for 5 minutes more.
    • Strain the butter and then refrigerate it until it cools to the consistency of softened butter. About 30 minutes.
    • Place the egg whites and sugar in the bowl of a stand mixer and whisk by hand to combine.
    • Fill a saucepan with a few inches of water and place it over medium heat. Place the mixer bowl on top of the saucepan to create a double boiler. Whisk intermittently, and heat the egg mixture until it reaches 160 F.
    • Place the mixer bowl back onto the stand mixer.
    • With the whisk attachment beat the egg mixture for 10 minutes, until it holds medium stiff peaks.
    • Stop the mixture and change to the paddle attachment.
    • With mixture on low speed, add the vanilla, tea infused butter, and remaining one cup of butter, a tablespoon at a time.
    • Once all incorporated, mix until the buttercream is silky smooth, about 5 minutes.
    • Spread buttercream between layers and lightly on top and sides of cake.
    • Refrigerate until set, about 30 minutes.
    • Pour caramel drizzle onto cake.

    Notes

    Recipe Source: SerenaLissy.com
    This website provides approximate nutrition information for convenience and as a courtesy only. Nutrition data is gathered primarily from the USDA Food Composition Database via Spoonacular API, whenever available, or otherwise other online calculators. While this information can be helpful in estimating the nutritional information of a recipe, it is by no means accurate or official and is not evaluated by the Food and Drug Administration.
     
    All images and content are copyright protected. Do not use our images without prior permission.

    Nutrition

    Serving: 1Serving | Calories: 1124kcal | Carbohydrates: 121g | Protein: 11g | Fat: 70g | Saturated Fat: 34g | Polyunsaturated Fat: 14g | Monounsaturated Fat: 18g | Trans Fat: 2g | Cholesterol: 163mg | Sodium: 1025mg | Potassium: 312mg | Fiber: 4g | Sugar: 88g | Vitamin A: 1482IU | Vitamin C: 1mg | Calcium: 106mg | Iron: 3mg
    Tried this Recipe? Pin it Today!Mention @SerenaLissy or tag #serenalissy!

    And if you find you love this London Fog Cake we also used the cake recipe in our  chocolate peppermint cupcakes, and the red wine chocolate cupcakes.

    As an Amazon Associate and member of other affiliate programs, I earn from qualifying purchases. What that means is if you click on one of our affiliate links they may toss a few pennies our way for a commission.

    • « Go to Previous Page
    • Go to page 1
    • Interim pages omitted …
    • Go to page 5
    • Go to page 6
    • Go to page 7
    • Go to page 8
    • Go to page 9
    • Interim pages omitted …
    • Go to page 17
    • Go to Next Page »

    Primary Sidebar

    Hi, I'm Serena!

    Join us and you will learn all sorts of creative techniques from baking to food photography that is easy enough for a novice to recreate at home, but look and taste like they were made by a seasoned pro.

    Get Inspired, Cook Confidently, Eat Well

    More about me →

    Ice Cream Recipes

    • Scoop of chocolate mint ice cream in bowl with ice cream cone
      No Churn Chocolate Mint Ice Cream
    • Bowl of key lime pie ice cream with a spoon
      No Churn Key Lime Pie Ice Cream
    • Apple Ice Cream in a waffle cup
      Apple Ice Cream
    • Chocolate Chunk Ice Cream In A Bowl
      Chocolate Chunk Ice Cream
    • Frozen Greek Yogurt from your Instant Pot
      Instant Pot Frozen Greek Yogurt
    • Avocado Ice Cram In a serving Bowl
      Easy Avocado Ice Cream Recipe

    Popular Recipes

    • Jamaican Sweet Potato Pudding
      Jamaican Sweet Potato Pudding
    • Peanut Butter Fudge Cups
      Peanut Butter Fudge Cups
    • Samoas on a plate
      Make at Home Samoas - Homemade Samoas: Girl Scout Cookies
    • Italian Chocoalte Walnut Cake
      Italian Chocolate Walnut Cake (Torta di Noci)

    Photography Challenge

    Master The Art of Food Photography

    Footer

    ↑ back to top

    About

    • Privacy Policy

    Newsletter

    • Sign Up! for emails and updates

    Contact

    • Contact

    As an Amazon Associate, I earn from qualifying purchases.

    Copyright © 2023 Serena Lissy