If you are new to the world of baking, it can be a bit overwhelming. Maybe you want to learn how to bake cookies or make a chocolate cake for an upcoming birthday. You might not know where to start, but don't worry! Baking is easier than you think, and we have put together some basic baking essentials and tools that will help you get started and be on your way to becoming a better baker.
My love of baking goes back most of my life, or at least I should say as long as I can remember. But as the years go by, there are more and more gadgets and baking tools. Some people think they might need every single cooking utensil, but all you really need are a few key items like measuring cups, mixing bowls, and spatulas, for starters. And while it's nice to have some variety with your pans, you don't always need them. The most important thing is finding what works best for you and not spending all your time looking around for other options when you already know what works for you. So with that being said, I understand which kitchen tools bakers need to really make life easier and which they can do without.
1.Oven Thermometer
What I use: Taylor Oven Thermometer I love to cook, but it can be a real pain when the oven turns out too cool or too hot. I've had many brand new ovens in my life, and not one has had a perfect temperature. And I'm betting more times than not; your oven temperature is slightly off as well. It's just the nature of the beast. My last oven from the factory was off by 50 degrees once installed at my house. Even after calibration, it is consistently 10 degrees different than what it should be. Let me just say there is nothing worse for baking than having an unreliable heat source. So always remember, the perfect oven is a myth. We put a lot of time into the prep of the recipe and money into the ingredients, and to have it ruined by incorrect temps is a very frustrating experience. This is a relatively inexpensive tool but worth its weight in gold!
2. Kitchen Scale
What I use: Amazon Basics Stainless Steel Kitchen Scale We use this because, in baking, precision is everything! I prefer to use grams instead of empirical measurements. Why? The reason for this is that a gram is always a gram, while a cup will vary. Think about all the ways you grab a cup of flour. Did you scoop and then use a straight edge to level the flour? Did you fluff the flour first, or was it packed down? Remember, precision is everything, which means that if you are off by just ⅛th of a cup or half a teaspoon of vanilla extract, it could spell disaster. And for even the tiniest of measurements, I will use this mini pocket scale. This is great for that pinch of something because sometimes the small quantity of powders doesn't even register on a regular kitchen scale. So we have both baking tools in our kitchen.
3. Sheet Pans
What I use: Nordic Ware Commercial Baker's Half Sheet Pan I can not even begin to count how many of these I have on hand. I love them and use them almost daily. This is the 12 x 17 inch size that should fit perfectly into your oven. I also have these lids designed just for the sheet pans. Now the lids aren't a necessity, just a luxury item. But one that is so worth investing in. Not only will these be your baking go-to pan, but they are great for cooking meats, fish, and vegetables.
4. Cooling Racks
What I use: Bakers Secret Cooling Rack Cookies and cakes deserve the best care possible. The bottom of your baked goods needs air to cool evenly and stop the cooking process. If you've ever left cookies or cakes on the sheet pan too long, and they got icky brown bottoms, that was probably because the bottom of your baking pan wasn't getting any air, resulting in overcooked baked goods or soggy bottoms. And no one wants that!
5. Rolling Pin
What I use: Wood Rolling Pin I will say rolling pins are a necessity. This is definitely one of those items that style will be a personal preference. I am a fan of using rolling pins that do not have handles. There are also many out there that are wood, marble, stainless and other materials. Again, personal preference. I know a rolling pin is an essential baking tool; how it looks is up to you.
6. Whisks & Spatulas
What I use: Oxo Whisks & Silicone Spatulas Many different kitchen utensils can be used for baking, but a spatula is one of the most versatile. It's useful for tasks as mundane as stirring and mixing to more advanced tasks like spreading frosting or even scraping down the sides of your mixing bowl. I think spatulas are one of those things that you will use every single time you bake something. Now for the whisks, I'm suggesting the OXO brand of whisks. They have multiple sizes, which makes it nice as you advance in the baking world. For just getting started, this size is perfect and will be a go-to for quite some time.
7. Measuring Cups & Spoons
What I use: OXO Measuring Cup and Spoon set is a great set to have. This set holds up well and gives you all the tools you need for your dry goods. I'd also have at least one liquid measuring cup. One will hold you over for quite a while, but sometimes it's nice to have larger sizes. One that holds up to a quart of liquid is definitely a luxury item but nice to have.
8. Cookie Scoops
What I use: OXO Good Grips Cookie Scoop This is another one of those multi-purpose tools for baking. This set comes in three sizes, and you will definitely use all three sizes. Think cookies, muffins, truffles... ice cream! Now the ice cream is where I mostly use the large scoop, and it's definitely a guilty pleasure.
9. Hand Mixer
What I use: KitchenAid 5-Speed Hand Mixer I got my first stand mixer many years ago as a gift to myself. I was really excited, and then I realized it's not the most useful tool in the kitchen when you are cooking for one or even two people. But, when making something small, or if you need to mix something for a minute, this is where the hand mixer reigns. It has become such an important part of my baking routine. Now, if you have it in the budget, I'd definitely say grab both. But if not, start with the hand mixer.
10. Mixing Bowls
What I use: Stackable Glass Mixing Bowls When I first started out, I got a set of metal mixing bowls. Which are still great to have, but I soon realized I couldn't put them in the microwave if I need to melt something quickly. So I added these glass mixing bowls to my collection. This is a great 10 piece set that gives you many options to work with in your day to day baking. You pretty much can't go wrong with most online choices, and there are plenty of them!
11. Baking Pans & Baking Mat
What I use: Fat Daddio's Round Cake Pans are a great starter set to have in any kitchen. This gives you a 10", 8", and a 6" baking pan, perfect for most needs. They also make a 9" x 13" sheet pan that is indispensable in your kitchen. I love this brand because they have the right amount of versatility to suit many cooking needs, from making delicious cakes to preparing savory dishes such as lasagna.
What I use: Silpat NonStick Silicone Baking Mat Now parchment paper is great, but I really love these mats. It lays flat on the cookie sheet! Can I get a hallelujah! I use these almost every time I use a sheet pan. Every cookie I make is baked on top of one of these. It's also great for your savory dishes. I also roll dough onto them. I could go on and on about their uses. I probably own 10 of these, but I use them daily. Start with one, and you will soon see how much you love it, and then start adding it to your Christmas and birthday wish lists!
12. Cooking Alarm & Thermometer
What I use: ChefAlarm® Cooking Alarm Thermometer and Timer by Thermoworks. I use this almost every time I bake something. Either for the timer feature for baking or the thermometer to ensure my recipes are always just right no matter what type of dessert I create - whether cookie doughs and caramels that call for precise temperature or time ranges in their instructions. I love the easy-to-read digital readout on top with alert settings built into them, so there's never any guesswork involved whatsoever. This company has multiple thermometers, and this one is a great basic thermometer and timer.
What are your favorite tools for baking? Please share in the comments, I always love hearing other ideas!
More Baking Basics Posts:
Ginger Molasses Pizzelles
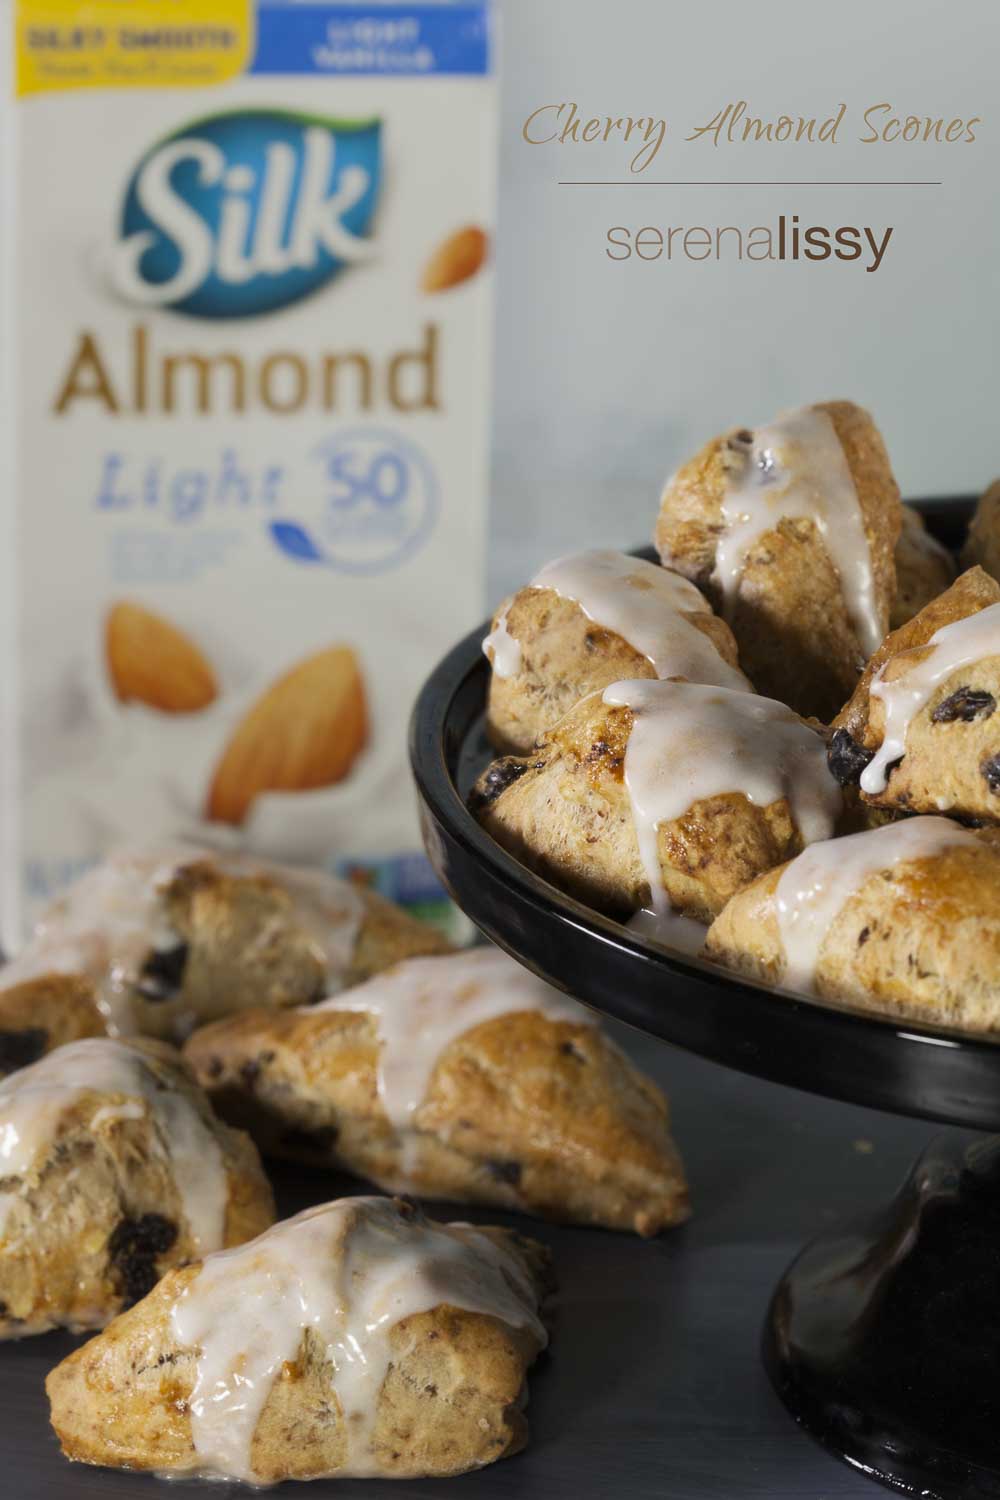
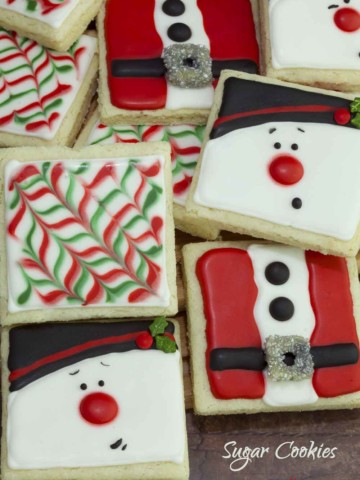
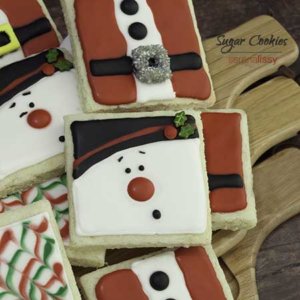
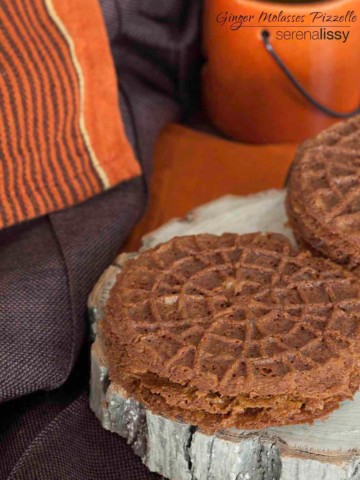
I picked up a new Pizzelle maker this last week and wanted to give it a try. Initially I was going for some cheesy pizzelles to have with the homemade pasta I was working on for dinner. After whipping up a batch of those I was hooked. At that moment, my only regret was that I got a machine that only made two at a time. Probably because I wanted them warm to eat with dinner. And I certainly wanted more than two! I think if I were to have an event that I needed to make a large quantity of these I'd get a different machine. But this Cuisinart that I picked up worked perfectly. It cooked perfectly and the cleanup was quick and easy. I'd definitely recommend it.
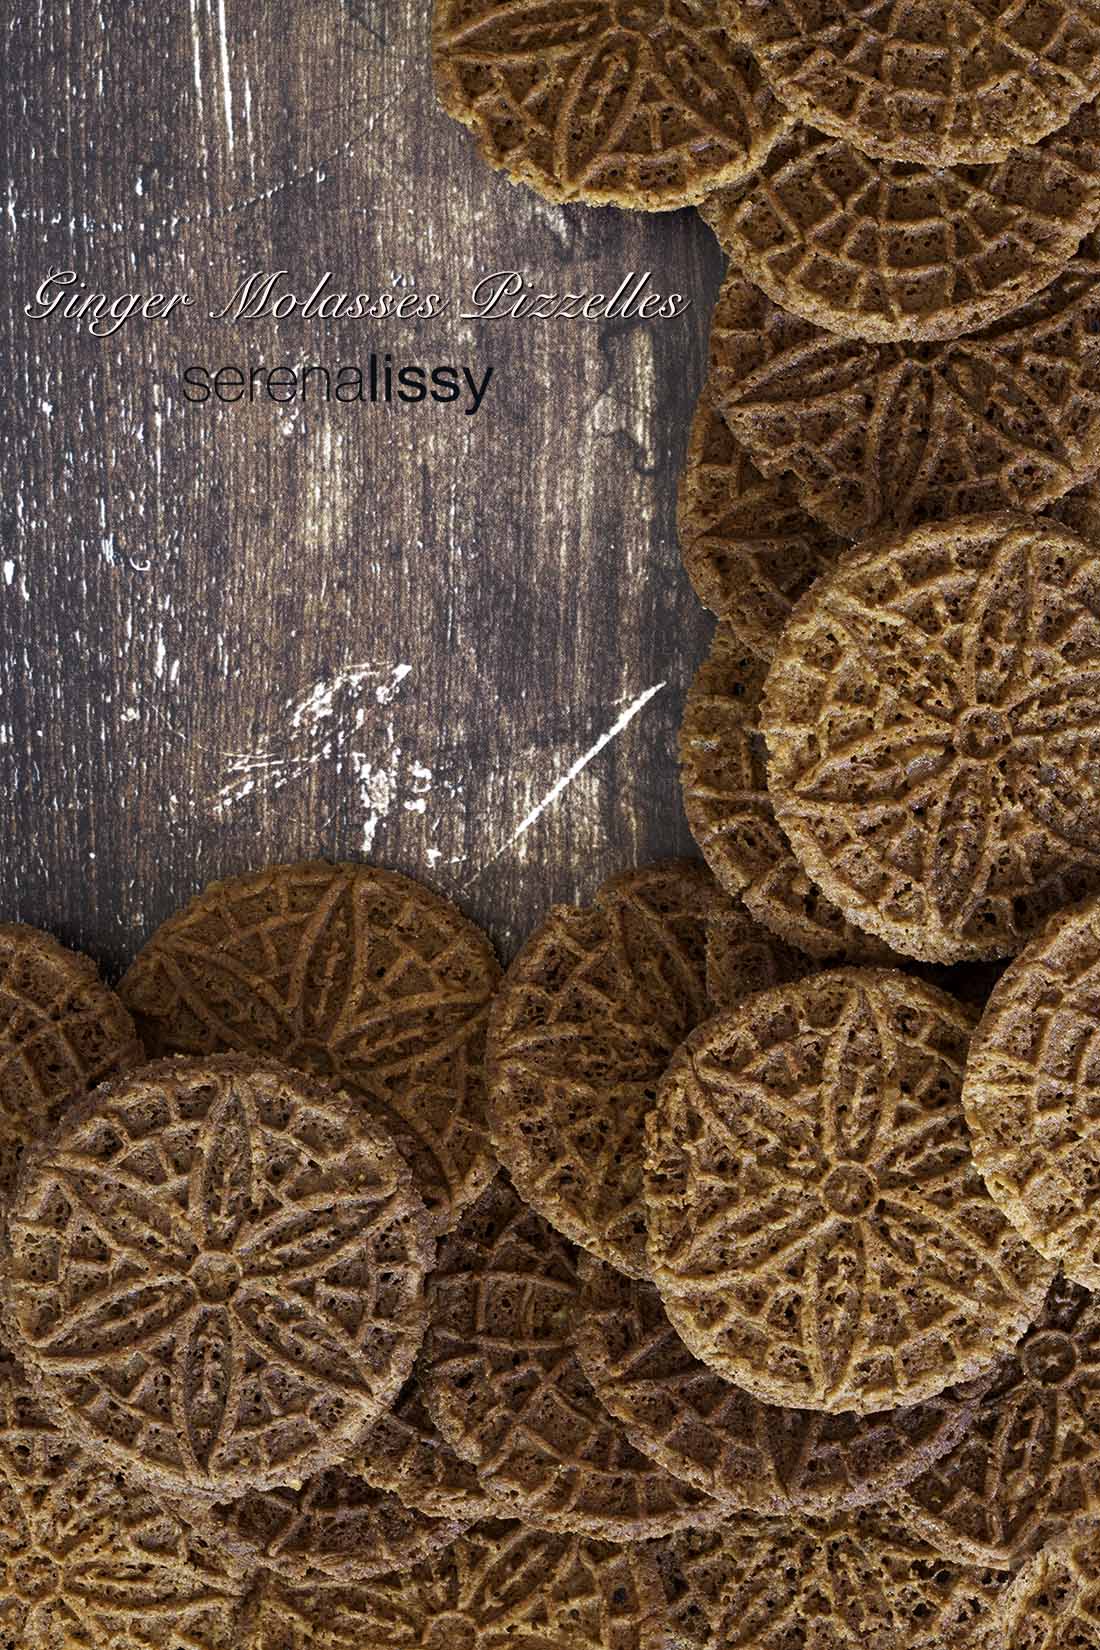
Then I wanted to move onto the sweet delicious pizzelles that I could have with coffee or tea. I saw a recipe in Sift magazine for ginger molasses cookies and decided to make a few modifications and turn that into a ginger molasses pizzelle recipe.
Tips to cook down the Ale:
This recipe utilizes an amber ale. Don't skip it, that tiny bit of beer gives a huge flavor punch. I went simple and used a Fat Tire Amber Ale. You could use whatever you like, I just happened to have one of those in the fridge. And be sure to cook that bottle of beer all the way down to 1 ½ ounces. It's going to taste extremely bitter, but once it mixes with the pizzelle dough something magical happens! I kept a heat proof measuring cup next to the cooktop and once I thought it was close, I just poured the beer into the cup and measured. Just under a quarter of a cup is what you are looking for. If you have more than that, put it back in the pan and keep cooking.
Pizzelle tips:
The only other thing to know is when to take the cookie out of the pizzelle press. I have a setting of 1-5. Five being the longest cook time and one is the shortest. I like my pizzelles crispy and firm, so I cooked then on a setting of four. For each one, I used about a tablespoon of dough.
My press came with a measuring spoon for the dough, if yours doesn't just grab a tablespoon and go with it. After one pizzelle you will know if you have too much or too little dough.
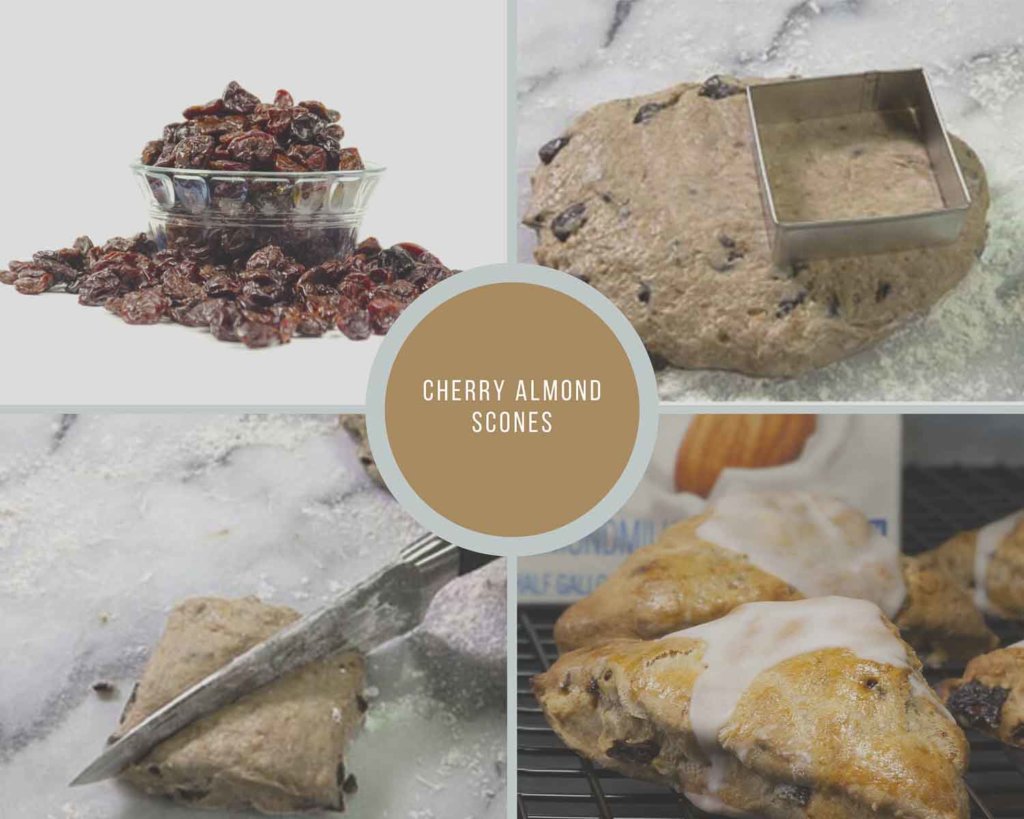
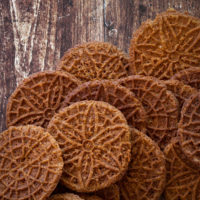
I was slightly obsessed about having clean edges on the cookies. Once they cooled a bit, I got out the kitchen shears and cut the edges to be smooth. If you don't care about this, then don't bother just enjoy the cookie.
I also cut the ginger pretty small as you can see in the image. I didn't want large clumps in the cookie, so I cut small, and they worked out well with the press.
How to keep your Pizzelles crisp:
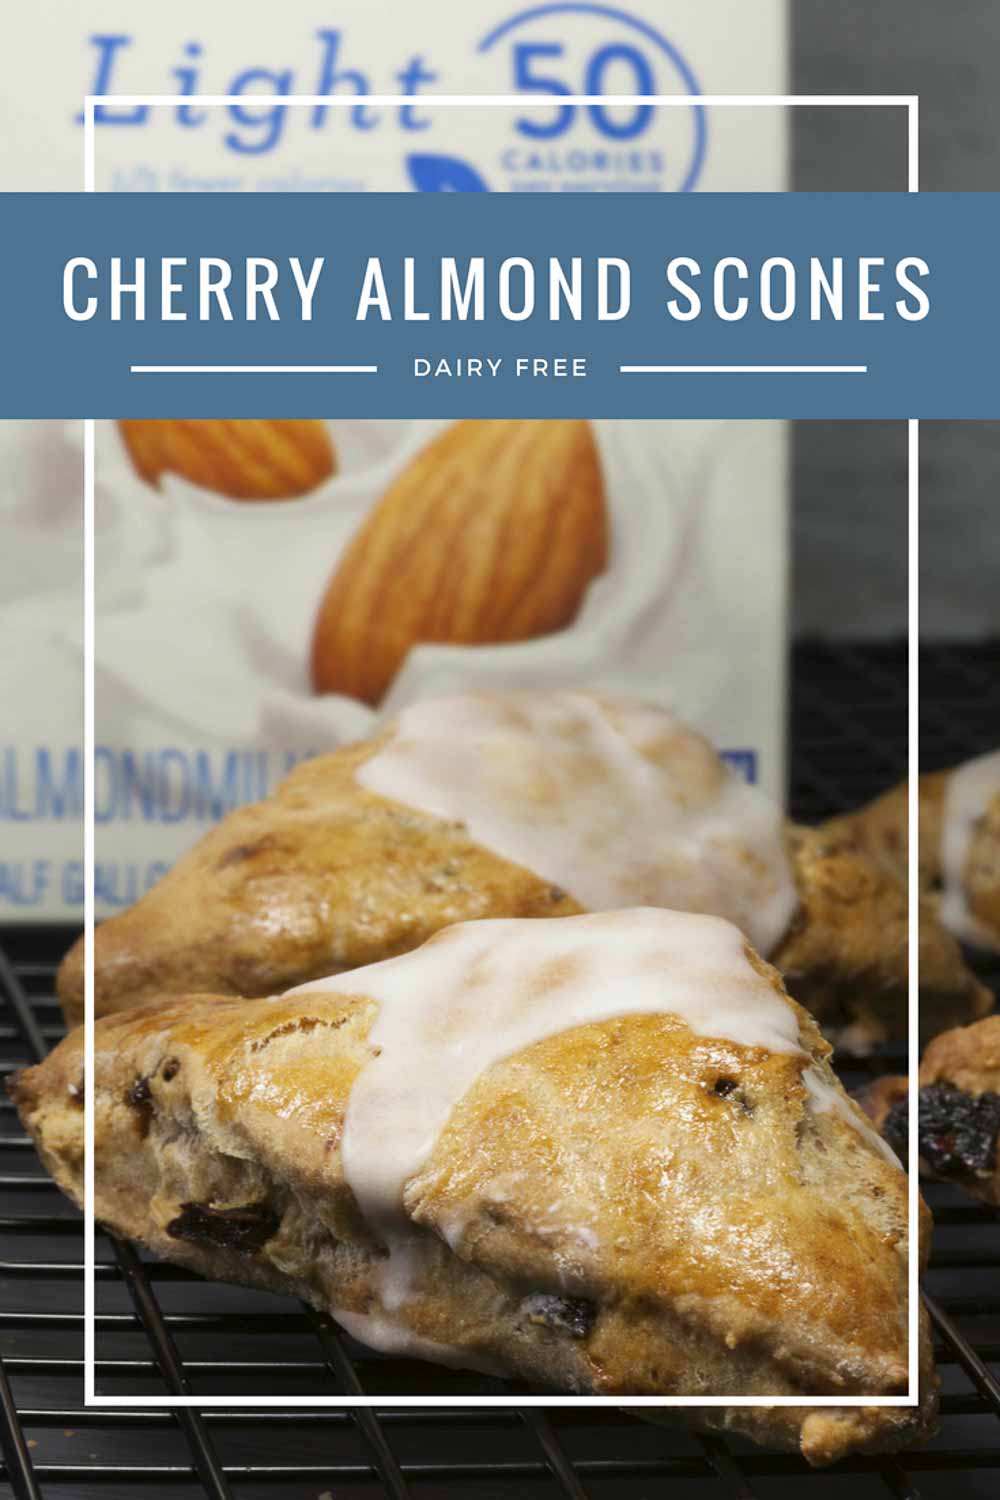
Store your pizzelle cookies in an airtight container for two - three weeks. When exposed to the air your pizzelles will absorb moisture and lose the crunch. If this happens put them in a warm oven for a couple of minutes and they will become crisp again. You can also wrap your pizzelles in plastic and store in a airtight container and freeze them for two - three months.
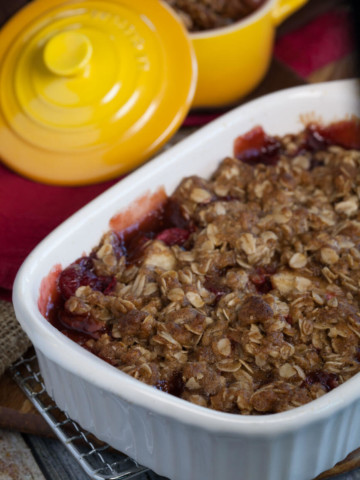
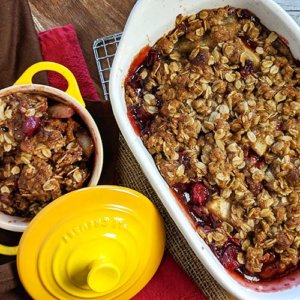
Now if pizzelles aren't your thing, but you are looking for some fall flavors for dessert we have a few pear and cranberry items that work perfectly for the season. Or even this cran apple crostata. Whatever you choose, I hope you are enjoying the season. Please share if you end up making any of the recipes, we always love hearing how they turn out.
Looking For More Recipes?
Subscribe to my free newsletter to get new baking tips in your inbox monthly. Find me sharing new recipes and tips on Pinterest, Instagram, or Facebook.
Ginger Molasses Pizelles
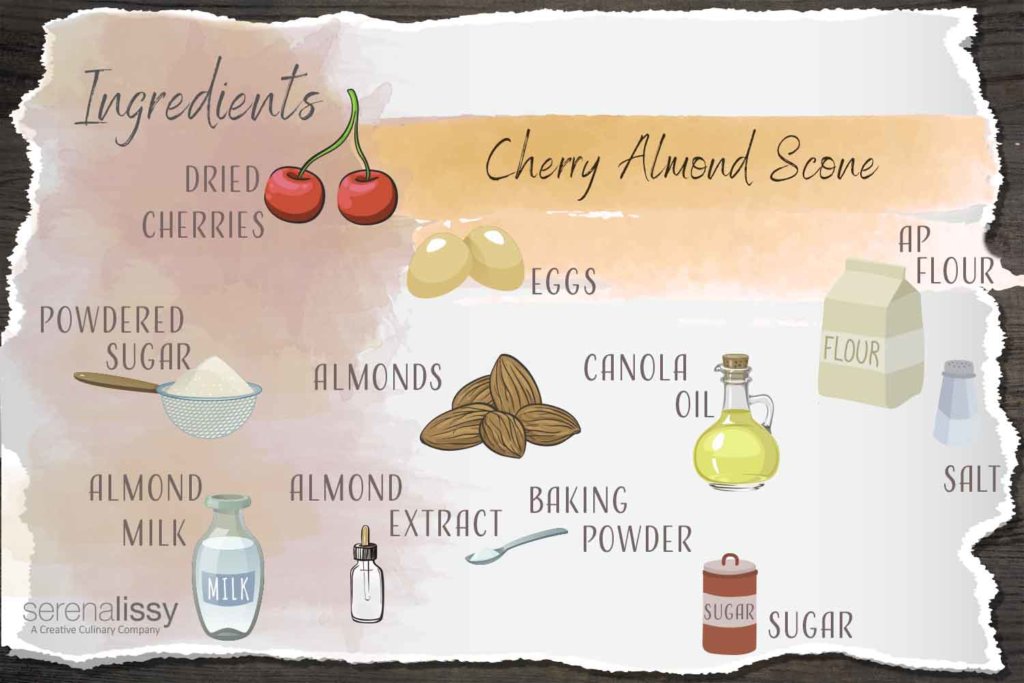
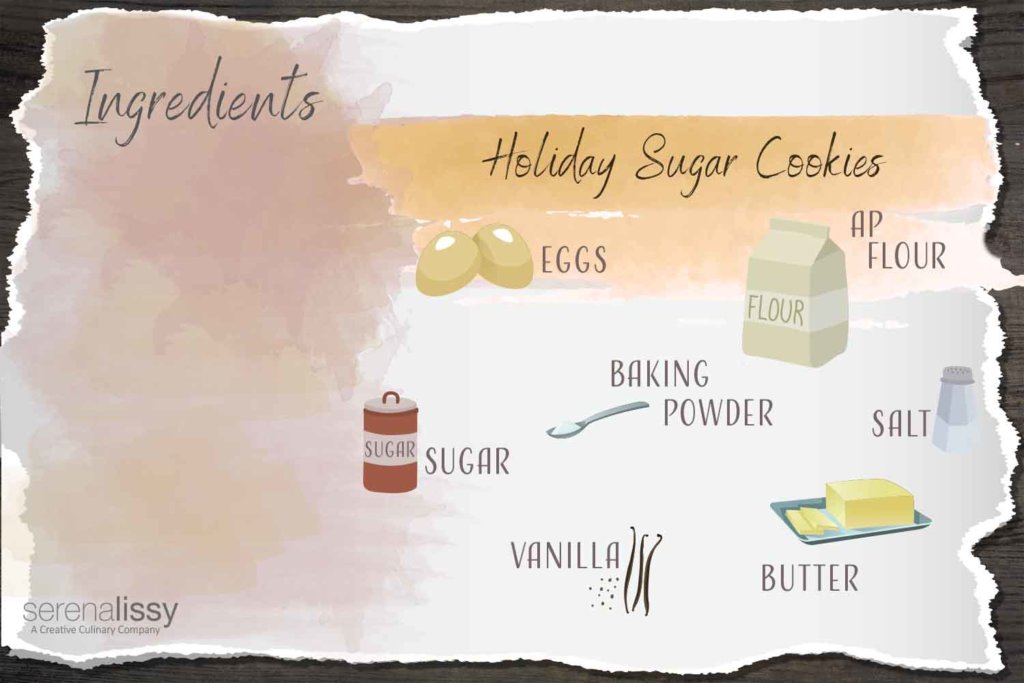
Ingredients
- 1 Bottle Amber Ale (12 ounces)
- 1 cup Unsalted Butter (8 ounces)
- ¼ cup Molasses (3 ounces)
- 2 ¼ cup Sugar (15.75 ounces)
- 1 teaspoon Salt
- 2 tsps Ground Ginger
- 1 teaspoon Ground Allspice
- 3 cups AP Flour (12.75 ounces)
- 1 teaspoon Baking Soda
- 1 Egg
- ½ cup Finely diced crystallized ginger (3.25 ounces)
Instructions
- Bring the beer to a simmer in a medium sized saucepan over medium heat. Stir occasionally and make sure it doesn't foam over. Gradually bring to a low boil and cook, stirring frequently for about 15 - 20 minutes. It will thicken and reduce to 1 ½ ounces. About 3 tablespoons. Set aside to cool.
- In a medium saucepan, heat the butter, molasses, sugar and salt over low heat. Stir often until the butter melts and the sugar and salt dissolve. Around 10 minutes. Remove from heat, add the spices and the amber ale reduction. Let cool for 10 minutes.
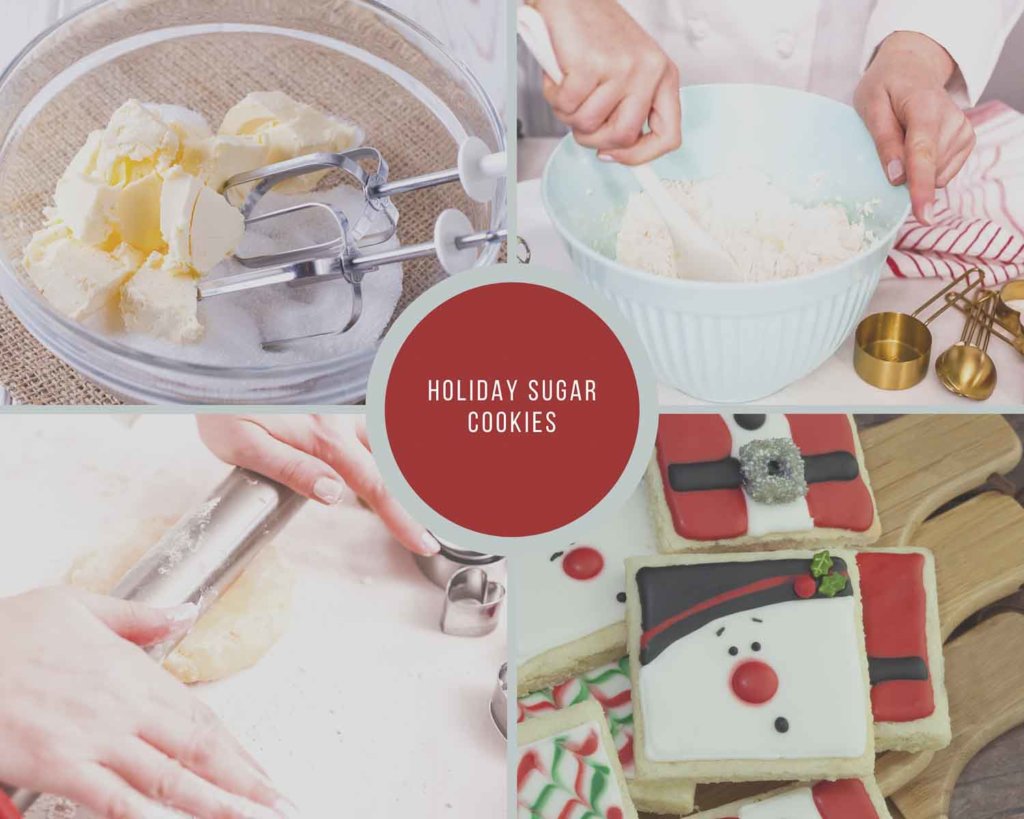
- Whisk together the flour and baking soda in a large stand mixer bowl. Turn the mixer to low and slowly pour in the liquid ingredients. Add the egg. Mix until blended and a thick batter forms. Stir in the ginger. Cover the dough and put in the refrigerator for at least one hour, until it is firm.
- Once the dough has firmed up and cooled, turn on the pizzelle press and get it warmed up. I lightly greased the press with vegetable oil. Scoop the dough by tablespoon and place it on the press. Lower the lid and the timer of the press will begin based on the number you have chosen for the cook time. The press will beep once done and you can remove the pizzelles at that time. I removed them from the press and put them on a wire rack to cool.
- Clean up any crumbs from the cookies and reapply vegetable oil if needed. Cook your next batch of cookies.
Notes
Nutrition
As an Amazon Associate and member of other affiliate programs, I earn from qualifying purchases. What that means is if you click on one of our affiliate links they may toss a few pennies our way for a commission.
Cranberry Pear Spice Crisp
I don't know about you, but we seem to get a lot of gift baskets the last quarter of the year and they usually contain pears. So we are whipping up some easy holiday baking recipes utilizing pears this month and this cranberry pear spice crisp is top on the list.
Because pears are related to apples, it's a general rule that if a recipe calls for apples, pears can be used instead. Just like apples, there are a huge variety of pears to use and they make a great dessert.
We used Bosc pears for this recipe, they have a densely bold, sweet flavor. It holds up perfectly with hearty spices like cinnamon, clove and nutmeg, not to mention tart cranberries too!
Pear Tips:
- What to look for: Look for fruit with smooth skin that is free from blemishes, with their stems still attached. They should be fragrant and just beginning to soften near the stem. Leave them at room temperature to soften and sweeten. To ripen more quickly, store them in a paper bag with an apple.
- General pear knowledge can be found at PickYourOwn.com. Lots of tips here on the varieties of pears, picking and ripeness.
- Prepping: Pears can be left unpeeled for eating fresh, but be sure to peel them before cooking. Although the peel is edible, some may have tough skins with a slightly bitter flavor that’s more pronounced once cooked.
This cranberry pear crisp is the perfect holiday dessert because it's easy to make and perfect for sharing! With hints of cinnamon, allspice and nutmeg in the cranberry pear crisp, it really does taste like the perfect autumn night - even if you aren't eating it outside.
The hardest part of this recipe is cutting the pears, if you count that as difficult. You are basically measuring everything out and putting it into the ramekins, then topping with the oatmeal crisp. I'd keep the pear slices thin like you see in the image and be consistent with cut and size for even cooking. We made four ramekins plus this white larger dish. If you wanted you could even put the entire recipe into a 9x13 pan and bake for a family style dish.
Ingredients
- Cranberries
- Pears
- Oatmeal
- Brown Sugar
- Butter
- AP Flour
- Salt
- Allspice, Cinnamon and Nutmeg
Crumbles, crisps and cobblers
Crumbles, crisps, and cobblers often get lumped together as the same dessert. While they share some of the same ingredients such as fruit and flour, each one has a very distinctive texture that sets it apart from its siblings.
Cobblers have a biscuit dough with a buttery, delicious crust. Crumbles and crisps are remarkably similar. The main difference being that crisps have whole oats and crumbles do not, yet once baked their texture is much the same.
Make ahead crisps
Crisp toppings are always a hit, regardless of the time or season. Not only can you make them in large batches and store them for later use, but they also freeze beautifully to give that extra touch of crispiness whenever you need it.
How to Make The Cranberry Pear Spice Crisp
- Preheat oven to 375°. Spray 6 (8 ounce) ramekins with baking spray.
- In a large bowl, whisk together brown sugar, flour, salt, cinnamon, nutmeg, allspice.
- Stir in pears and cranberries until combined.
- Divide mixture into prepared ramekins.
How to Make The Crisp Topping
- In a small bowl, combine oats, brown sugar, butter, flour, and cinnamon until the mixture resembles coarse crumbs.
- Sprinkle over the fruit.
- Bake until golden brown and bubble, 30 – 35 minutes. Let cool for 15 minutes before serving.
Other Cranberry Recipes
If you find yourself looking for other cranberry or even other easy holiday baking recipes you could try the CranApple Crostata or Chocolate Cranberry Scones. Don't let fall go by without making this crisp.
Looking For More Recipes?
Subscribe to my free newsletter to get new baking tips in your inbox monthly. Find me sharing new recipes and tips on Pinterest, Instagram, or Facebook.
Cranberry Pear Spice Crisp
Ingredients
- ¾ Cup Light Brown Sugar, firmly packed
- 3 tablespoon AP flour
- ½ teaspoon Salt
- ¼ teaspoon Cinnamon
- ⅛ teaspoon Ground Nutmeg
- ⅛ teaspoon Ground Allspice
- 4 large Pears
- 2 Cups Frozen Cranberries (drained & thawed) (or fresh)
Crisp Topping
- 1 Cup Quick cooking or old fashioned oats
- ½ Cup Packed Brown Sugar
- ½ Cup Butter, melted
- ⅓ Cup AP flour
- 1 teaspoon Cinnamon
Instructions
- Preheat oven to 375°. Spray 6 (8 ounce) ramekins with baking spray.
- In a large bowl, whisk together brown sugar, flour, salt, cinnamon, nutmeg, allspice.
- Stir in pears and cranberries until combined.
- Divide mixture into prepared ramekins.
Crisp Topping
- In a small bowl, combine oats, brown sugar, butter, flour, and cinnamon until the mixture resembles coarse crumbs.
- Sprinkle over the fruit.
- Bake until golden brown and bubble, 30 – 35 minutes. Let cool for 15 minutes before serving.
Notes
Nutrition
As an Amazon Associate and member of other affiliate programs, I earn from qualifying purchases. What that means is if you click on one of our affiliate links they may toss a few pennies our way for a commission.
Almond Milk Cherry Almond Scones
Tender and light, dairy free Cherry Almond scones are loaded with tart cherries and topped with a sweet almond milk glaze.
Almond Milk as a Milk Substitute
It's that time of year when everyone is on the New Year resolution train. Not something I ever take part in. I'm a pretty consistent goal maker all year long. It's also that diet and exercise time of the year. Also very rare for me to ever diet and I try to maintain a consistent exercise schedule. I try to eat healthy (at least most of the times) and am a big believer in portion control. Now if I find something I like that I can add into my daily life to help with cutting calories, I usually do it. For me that something is Silk Almond Milk. I use it all the time as a milk alternative. And for the record, they aren't paying me, they aren't sponsoring me, this is just my opinion.
I have zero aversions to dairy. I grew up on it, love it and enjoy it daily. But as I got older I discovered Almond milk. My previous career I was a heavy duty traveler and it made me crazy to come home from a week or two of travel and have nothing in the fridge. Usually I was home for a day then head back out on the road again. This is where I found a love for soymilk, almond milk and many dairy alternatives. The shelf life of these products was just heaven for me. I loved the taste of them so why not incorporate them into my life.
I've incorporated almond milk in a lot of my baked goods. For this recipe I used a light vanilla almond milk, but you could use full fat original almond milk. (Shoot if you didn't want to go dairy free, just use milk in the recipe. Both ways are delicious.)
Ingredients in Cherry Almond Scones
The deliciously tender dried cherry almond scones are dairy free and full of almonds and cherries for a tasty breakfast treat or afternoon snack. You'll find most of these ingredients in a well-stocked pantry.
- Flour
- Sugar
- Baking powder
- Salt
- Canola oil
- Silk almond milk
- Eggs
- Almond extract
- Toasted almonds
- Dried Cherries
- Powdered sugar
How To Make Dried Cherry Almond Scones
This is a super easy recipe. I used a 3" square cookie cutter to make the scone then used a knife to cut the square into little triangles. If you want, you could easily freeze the dough once you have it cut and pull out a few at a time to bake instead of baking the entire batch all at once.
- Mix the dry ingredients in a large bowl and stir in the canola oil being carful not to overwork the dough.
- Combine the remaining wet ingredinets in a small bowl then mix into the flour mixture with a fork until just moistened.
- Add in the almond and cherries.
- Knead the dough on a floured surface until nearly smooth.
- Divide the dough in half and form two squares. Cut each square on an angle to make four triangle.
- Bake 12-15 minutes then cool slightly before drizzling with glaze.
Almond Milk Glaze
I also topped these with a glaze made from powdered sugar and almond milk. If you didn't want to do that it's fine. Skip it, or even sprinkle on some sugar in the raw before baking. It's entirely up to you.
More Delicious Breakfast Receipes
Looking for More Recipes?
Subscribe to my free newsletter to get new recipes in your inbox monthly. Find me sharing new recipes and tips on Pinterest, Instagram or Facebook.
What are some of your things you like to incorporate into your diet to help with reducing calories or eliminating dairy? And if you just love dairy and aren't giving any of it up, we also whipped up a chocolate cranberry scone that is pretty delicious. I hope you enjoy these Cherry Almond Scones as much as we do. Please share if you end up making them. Happy New Year!
Cherry Almond Scones
Ingredients
- 2 ½ cup flour 355 grams
- 2 tablespoons sugar 28 grams
- 1 tablespoon baking powder 15 grams
- ¼ teaspoon salt 2 grams
- ⅓ cup canola oil 73 grams
- ¾ cup Silk Almond milk 181 grams
- 2 eggs
- ½ teaspoon almond extract 3 grams
- ⅓ cup almonds toasted and chopped in food processor 55 grams
- 1 cup dried cherries 172 grams
Almond milk glaze
- 1 cup powdered sugar
- 1 tablespoon almond milk
Instructions
- Preheat oven to 350° F.
- In a large bowl stir together flour, sugar, baking powder, and salt. Add the canola oil. Do not overwork the dough.
- In a medium bowl combine eggs, almond milk, almond extract.
- Add egg mixture to flour mixture. Stir using a fork until just moistened. Add the almonds and dried cherries and continue to stir until just moistened.
- Turn dough onto lightly floured surface. Knead dough for 10 - 15 strokes until it is nearly smooth.
- Divide dough in half. Roll each portion into a 6" square. Cut each square into four squares. We used a cutter. Then cut each square into half diagonally to create triangles of dough.
- Place on an ungreased baking sheet. Brush the triangles with additional milk. Place these in the freezer uncovered for about 30 minutes.
- Remove from freezer and bake for 12 - 15 minutes until golden. Cool slightly and drizzle with glaze.
Almond Milk Glaze
- In a small bowl stir together the powdered sugar, almond milk. Stir in additional almond milk if needed to reach a drizzling consistency.
Notes
Nutrition
Disclaimer: this post contains affiliate links, which means that if you purchase an item after clicking on the link, I will receive a small commission from the sale. This is at no extra cost to you, and as always, all opinions and recommendations are my own.
Holiday Sugar Cookies
Holiday Sugar Cookies are the perfect treat for your holiday get-together and these square sugar cookie designs don't require buying any fancy cookie cutters.
Christmas Cookie Decorating Ideas
I'm a huge fan of gourmet sugar cookies. But I'm not a huge fan of accumulating a bunch of cookie cutters that I have to store somewhere when not in use. So, I decided to whip up some holiday sugar cookies and surf Pinterest for a few Christmas cookie decorating ideas. Wowza, it's amazing what is out there. Some pretty creative bakers in the Pinterest world.
For this recipe, I used a 3" square cookie cutter. In the picture are just three examples of square sugar cookie designs that we used for these cookies. These were all decorated with royal icing but many times you can buy Wilton decorating kits that will have a few of the needed accessories, like eyes or belt buckles. You get the idea. Or just go with sanding sugar to sprinkle on top. Doesn't get any easier than that.
Ingredients in Holiday Sugar Cookies
All of these simple ingredients can be found in your pantry and everything is readily available at your local grocery store.
- Sugar
- Butter
- Eggs
- Vanilla
- All-purpose flour
- Baking powder
- Salt
Royal Icing for Decorating Sugar Cookies
We used the same royal icing recipe as we used for the Halloween cookies. No change just different colors. For the Santa belt buckle, we used the Wilton kit. We then frosted the belt buckle and dipped it in sprinkles. The original color was yellow and that just didn't seem to be the color we were going for. And besides who doesn't love a little sparkle on their belt buckle. If you didn't want to go through the effort of decorating you could just sprinkle some sanding sugar on before baking and call it done.
How to Make Sugar Cookies
The recipe makes two dozen cookies. You could cut it in half if you only wanted one dozen. It's a simple recipe. A few ingredients and nothing fancy.
- Beat butter and sugar in stand mixer.
- Add vanilla and eggs.
- Stir in the dry ingredients. Not much to it.
When you first make the dough, it will be sticky and not very manageable. You are going to need to chill it for a few hours before rolling it out. The flavor of these is just delicious and worth the wait. They are soft and delicate. I stored them in an airtight container for a week after and continued to enjoy fresh cookies that entire time.
It's important to not overcook sugar cookies. When the edges start (and by start, I mean barely light golden brown) to get brown you are done.
With all that said, you have the perfect base for frosting, sprinkles, or other decorations.
Tips for making the perfect sugar cookie:
- When cutting out your cookies you want to keep the cuts as close as possible to avoid wasting any dough. You will reroll the scraps but then you must flour the surface again. Which is now adding too much flour to your cookies.
- For thinner, crispier cookies roll the dough to an ⅛ of an inch. And the edges will become golden brown.
- For thicker softer cookies (which are my favorite way to have this recipe) roll the dough to a ¼ of an inch. Watch for the cookies to just begin turning lightly golden brown at the edges and remove from the oven. Cool on the pan. They will break if you try to move them too early.
I hope you enjoy these holiday sugar cookies made in square sugar cookie designs as much as we do. If sugar cookies aren't your favorite I'd suggest these Bailey's Chocolate Truffles for a super easy alternative. Please share if you end up making them. We always love to hear how it turns out. Happy holidays!
Looking For More Recipes?
Subscribe to my free newsletter to get new baking tips in your inbox monthly. Find me sharing new recipes and tips on Pinterest, Instagram, or Facebook.
Holiday Sugar Cookies
Ingredients
- 13.25 ounces sugar
- 12 ounces butter
- 4 eggs
- 1 teaspoon vanilla
- 23.5 ounces AP flour
- 2 teaspoons baking powder
- 1 teaspoon salt
Instructions
- Line a sheet pan with parchment paper.
- In the bowl of a stand mixer with the paddle attachment, beat the sugar and butter until pale and fluffy.
- Add the eggs and vanilla and continue to mix until incorporated.
- In a separate bowl stir together AP flour, baking powder and salt.
- Add the dry mix into the mixer bowl and hand stir until incorporated.
- Lay out a large piece of plastic wrap and put ½ of the dough onto the wrap.
- Cover with plastic wrap and mold into a disk. Do the same with the other half of the dough.
- Refrigerate for 3-4 hours.
- Once dough has finished chilling, heat oven to 350°F.
- Generously dust a clean surface with flour and roll the dough out to ¼ inch.
- Use a cookie cutter to cut out shapes and a spatula to transfer them to the baking sheet.
- Bake at 350° for 7-10 minutes or until edges begin to turn lightly golden brown.
- Remove from oven and let cool on the pan.
Notes
Nutrition
As an Amazon Associate and member of other affiliate programs, I earn from qualifying purchases. What that means is if you click on one of our affiliate links, they may toss a few pennies our way for a commission.
White Chocolate Peppermint Bark Cheesecake
If you are a fan of Cheesecake Factory then you will know this seasonal delight. The Instant Pot white chocolate peppermint bark cheesecake topped with a white chocolate mousse. Oh yeah...that one...
Holiday Cheesecake Recipes
If you have been following along then you know our love of the Instant Pot and the ability to make great desserts quickly. We started with the Triple Chocolate Cheesecake, then whipped up a Pumpkin Cheesecake for Thanksgiving. It only seemed logical that we continue with Christmas.
White Chocolate Peppermint Bark Cheesecake is a fan favorite at the Cheesecake Factory during the holidays but you can make it at home any time. This Instant Pot White Chocolate Peppermint Bark Cheesecake is easy and delicious. We won't even tell if you decide to make this in the middle of the summer!
Ingredients in this Instant Pot Christmas Cheesecake
Cookie Crust
- Oreo Cookies
- Butter
Peppermint Bark Cheesecake
- Cream cheese
- Sugar
- Eggs
- Egg yolk
- White chocolate
- AP flour
- Vanilla
- Peppermint Bark
Chocolate Mousse
- White chocolate
- Heavy whipping cream
- Sugar
- Cream cheese
- Peppermint extract
We tested this recipe a few times and had a few different results based on the chocolate used. When I used a high quality European chocolate we had a few problems with the chocolate seizing up and texturally it was wrong for a cheesecake. After a few experiments we ended up going with Ghirardelli White Chocolate Chips. Since we were using them for the white chocolate we the figured that we may as well use their Peppermint Bark also. By all means you could easily make your own bark and use in the recipe. Just make sure the peppermint is finely chopped.
How to make Instant Pot White Chocolate Peppermint Bark Cheesecake
It is so easy and impressive to make cheesecake in the Instant Pot. It comes out perfect every single time.
- Make the cookie crust and press it into the springform pan. Freeze for about 10 minutes to set.
- Use a mixer to combine the cream cheese and sugar then add the eggs one at a time. Follow with the remaining ingredients but hand fold the peppermint bark into the mixture.
- Add water to the instant pot and lower in the pan. Cover lightly with foil.
- Process at high pressure for 27 minutes followed by a 15 minute natural pressure release.
- Allow to cool for one hour before refrigerating overnight.
- Prepare the mousse and spread it on to the cheesecake.
- Allow it to set before serving.
Recipe Notes:
When the recipe specifies melted white chocolate, just melt it a bit in the microwave. Enough to melt the chips but it doesn't need to be over heated to boiling hot. White chocolate is delicate and overheating it results in a horrible texture.
For the crust we used the entire Oreo. Filling and all. I kept the crust low instead of running the crust some up the sides. I just wanted a little more elegant look. But if you don't care about that and just love Oreos, then run some of the crust up the sides like our other instant pot recipe calls for.
We used a six quart Instant Pot to make the recipe with a 7-Inch Round Springform Pan. And from past comments we learned that not all 7" pans are the same height. So just make sure not to overfill your pan. I used the entire recipe in my pan with no spill overs. But if your pan is a bit shorter, make sure to leave some room for the cake rise so you don't have spill over in the pot.
We also made the mousse the next day. You could make it the same day just make sure the cheesecake is cold before putting the mousse on top.
This holiday cheesecake recipe makes a great Christmas day dessert or would be a crowd stopper for any event over the holidays. I also found that if a clean cut is what you need for presentation, we froze the cheesecake for about an hour after putting the mousse on. I have to photograph it and clean cuts are super important for the visual. But if you want to cut small pieces and want them to be beautiful, this helps with the cut.
I hope you enjoy this Instant Pot Christmas Cheesecake as much as we do. Please share if you end up making this. We would love to hear how it worked for you.
More Holiday Cheesecake Recipes
Looking for more recipes?
Subscribe to my free newsletter to get new recipes in your inbox monthly. Find me sharing new recipes and tips on Pinterest, Instagram or Facebook.
White Chocolate Peppermint Bark Cheesecake
Ingredients
Crust
- 12 Oreo cookies
- 3 tablespoons butter melted
Cheesecake
- 1 pound 16 ounces cream cheese
- ¼ cup sugar
- 2 large eggs
- 1 egg yolk
- 4 ounces white chocolate melted and cooled
- 1 tablespoon AP flour
- 1 teaspoon vanilla
- 3 ounces peppermint bark chopped
Mousse
- 2 oz white chocolate melted and cooled
- 1 cup heavy whipping cream
- 2 tablespoons sugar
- 4 ounce cream cheese softened
- ¼ teaspoon peppermint extract
Instructions
- Spray the 7" springform pan with cooking spray.
- Add two cups of water to the instant pot and place the rack on the bottom.
- Make a tin foil sling to lift the cheesecake in and out of the instant pot.
Crust
- In a food processor combine the whole Oreo cookies and the butter.
- Pour the crumb butter mixture into the bottom of the pan and pat until even. Put in freezer for 10 minutes.
Cheesecake
- In a food processor, mix the cream cheese with the sugar.
- Once combined, add eggs one at a time followed by the egg yolk.
- Add the melted chocolate.
- Continually scrape the bowl down. Add vanilla and flour and mix until creamy.
- Stir in the peppermint bark by hand.
- Pour mixture into the springform pan and smooth with a spatula.
- Place pan on the tin foil sling and slowly lower into the Instant Pot.
- Cover cheesecake loosely with a piece of foil to prevent moisture from getting on to the top of the cake.
- Set Instant Pot to maximum pressure for 27 minutes.
- Once done, turn machine off and let it return to normal pressure for 15 minutes.
- Unlock lid and use sling to transfer pan to cooling rack for an hour.
- Chill in refrigerator overnight.
Chocolate Mousse
- Melt chocolate and let cool.
- Whip heavy cream to soft peaks and then add sugar. Continue mixing on high until stiff peaks.
- In another bowl, whip cream cheese until smooth. Add chocolate and peppermint extract.
- By hand, fold cream cheese mixture into whip cream mixture. Do not overmix.
- Spread onto the cheesecake and let set.
Notes
Nutrition
As an Amazon Associate and member of other affiliate programs, I earn from qualifying purchases. What that means is if you click on one of our affiliate links, they may toss a few pennies our way for a commission.
Sweet Potato Bundt Cake
Moist and flavorful sweet potato cake has a wonderful cream cheese surprise in the middle. Individual Sweet Potato Bundt Cakes can be frozen for snacking and simple desserts throughout the holidays and all season long.
If you have been following along, you know that I made too many sweet potatoes last week in an attempt to get puree for our Sweet Potato Cake. I couldn't let the puree go to waste, so I made some modifications to this recipe from Dixie Crystals and turned some of that puree into a Sweet Potato & Cream Cheese Bundt Cake.
I made individual Bundt cakes because I wanted to freeze the excess cakes and pull out a little snack once in a while after the holidays. If I made a regular size Bundt cake, I felt that I had to eat the entire thing and I wouldn't have frozen it.
Ingredients in Sweet Potato Cake
- Cream cheese
- Butter
- Sugar
- Egg
- AP flour
- Vanilla extract
- Baking soda
- Cinnamon
- Cloves
- Nutmeg
- Ginger
- Salt
- Sweet potato puree
- Vegetable oil
- Whole milk
How to Make Homemade Sweet Potato Puree
I want to stress again about the puree, do not go to the store, and get a can of sweet potatoes in the syrup. It's just too much sugar. If you find a can of sweet potato puree without syrup, feel free to use it. I didn't have any luck finding some at the grocery store, so I baked a few potatoes. Once they cooled off, I removed the skin, put them in the blender, and pureed the potato until it was smooth. You could also boil the potato. Cut the potato into chunks and boil them. Once done, let cool, remove the skin, and puree in the blender. I find it's much easier to remove the skin once the potato has been cooked. You could peel the potatoes before boiling if you want; I usually do it once cooked.
How to Make Sweet Potato Bundt Cake
- Make the cream cheese filling and set it aside.
- Prepare the cake batter and fill the prepared bundt pans half way.
- Top evenly with the cream cheese filling leaving a border.
- Pour the remaining batter on top and bake until a toothpick inserted in the center comes out clean.
This is a really easy baking recipe and quick if you already have the puree made. The biggest challenge I had on the individual Bundt cakes was getting the right ratio of cream cheese filling to the cake batter. I started with overfilling the individual pans then had to do a lot of scooping out. If you are going with individual Bundt cakes, look at the pan, plan for about 1" from the top to be the top of the cream cheese area. So for instance, if your Bundt pan is 3" tall, you could basically go with 1 " of cake batter, 1" of cream cheese filling, and the last 1" of more cake batter. I'm sure you get the idea.
Or if you are going with a full size Bundt pan, just pour half of the batter into the prepared Bundt pan. Top evenly with cream cheese filling, leaving about a 1" border around the pan. Top with remaining batter.
More Recipes You'll Love
This is a pretty moist sweet potato cake, and the cream cheese is a wonderful surprise in the middle. You could frost the cake, but I just went with a sprinkling of powdered sugar on top—no sense in taking away from the cake's flavor with sugary sweet frosting. Sweet potato bundt cakes are delicious in the morning with your coffee or make a great afternoon snack. Perfect for any holiday festivity and a quick and easy Thanksgiving dessert if you aren't a fan of pie.
I hope you enjoy these individual sweet potato cakes as much as I do. Please share in the comments if you end up making them and how they turned out. Happy Holidays!
Looking for more recipes?
Subscribe to my free newsletter to get new recipes in your inbox monthly. Find me sharing new recipes and tips on Pinterest, Instagram or Facebook.
Sweet Potato Bundt Cake
Ingredients
Cream Cheese Filling
- 8 ounces cream cheese softened
- 4 tablespoons butter softened
- ½ cup sugar
- 1 large egg
- 2 tablespoons AP flour
- 1 teaspoon vanilla extract
Sweet Potato Cake
- 2 cups AP flour
- 1 teaspoon baking soda
- ½ teaspoon cinnamon
- ¼ teaspoon cloves
- ¼ teaspoon nutmeg
- ¼ teaspoon ginger
- ¼ teaspoon salt
- ½ cup unsalted butter softened
- 1 ½ cup sugar
- 2 eggs
- 2 teaspoons vanilla extract
- 1 cup sweet potato puree
- ¼ cup vegetable oil
- ⅔ cup whole milk
Instructions
- Preheat the oven to 350°F. Grease a 10" bundt pan or individual bundt pans with baking spray.
Cream Cheese Filling
- In the bowl of your stand mixer fitted with the paddle attachment, combine cream cheese, butter and sugar until light and fluffy. Add egg, flour, vanilla, and continue mixing until smooth. Scoop out into a bowl and wash the stand mixer bowl and paddle attachment to be ready to use for the cake.
Cake
- In a medium bowl, mix flour, baking soda, cinnamon, cloves, nutmeg, ginger and salt. Set aside.
- In bowl of stand mixer fitted with paddle attachment, cream butter and sugar until light and fluffy. Beat in eggs one at a time and then stir in vanilla, sweet potato puree and vegetable oil until combined. Beat in flour mixture alternating with milk.
- If you are using a 10" Bundt pan, pour half of the cake batter into prepared pan. Top evenly with cream cheese filling, leaving about a 1" border around pan. Top with remaining cake batter.
- Insert a knife into the cake batter and lightly swirl cream cheese filling into the cake. Just swirl a couple of times.
- Bake for 55 - 65 minutes, until center is set and toothpick inserted in center comes out clean. Allow cake to cool and invert onto plate.
Notes
Nutrition
As an Amazon Associate and member of other affiliate programs, I earn from qualifying purchases. What that means is if you click on one of our affiliate links, they may toss a few pennies our way for a commission.
Sweet Potato Cake
Sweet Potato Cake is dense and heavy but full of flavor for an extremely moist layer cake that's topped with luscious buttercream and candied pecans this decadent dessert is perfect for fall.
I love this time of year and all the fruits and vegetables that are available. Now if only the weather would cool down to acceptable fall temperatures this year, all would be great! A girl can dream! I know you can get sweet potatoes all year long, but something just seems right about a sweet potato cake close to Thanksgiving.
This cake is dense and heavy but full of flavor and extremely moist. I made my own sweet potato puree. It's super easy and worth the time. All I did was bake a few sweet potatoes, skin on. Then once they are cool from the oven, remove the skins, and put them in the food processor and puree the potato until it is smooth. You probably only need two medium sized potatoes for this recipe. I had no idea when I started and cooked six. You guessed it, there is more sweet potato recipes coming down the pipeline. We were eating sweet potato puree for days. It was a nice treat!
You may be tempted to go to the store and buy a can of sweet potatoes. You could do this, but make sure it isn't the stuff with syrup. Sweet potatoes are already sweet, you don't need syrup. I ended up making the puree because I couldn't find a can of sweet potato puree, and all the cans of sweet potatoes had the syrup.
Ingredients in Sweet Potato Cake
- AP flour
- Baking powder
- Baking soda
- Salt
- Cinnamon
- Butter
- Granulated sugar
- Light brown sugar
- Eggs
- Vanilla bean paste
- Sweet potato puree
- Marshmallow creme
- Confectioners sugar
- Milk
- Pecan halves
How to Make Sweet Potato Layer Cake
- Prepare the cake batter and divide between three round cake pans.
- Bake until a toothpick inserted in the center comes out clean.
- Cool completely, then trim the tops until they are even.
- Make the buttercream and frost the cake layers.
- Sprinkle with candied pecans before cutting and serving.
The buttercream is a light and fluffy one. The addition of the marshmallow creme made it a tiny bit sweet. I know you are thinking, how could you tell after 4 cups of powdered sugar... But you can. You could easily decorate this with regular buttercream and use no marshmallow creme if you would prefer. There was enough frosting to decorate the cake traditionally, but I'm still going with the naked cakes. I just like the look, and isn't this recipe really about the cake. So I try to give the cake its moment in the spotlight!
The candied pecans are a great addition for texture. They are easy to make; just be careful with the boiling sugar. If you don't want to candy the pecans, you could just cut them up and sprinkle chopped pecans on top for decoration.
The recipe makes three layers of cake, which is a perfect amount. We thought about turning this into a bundt cake and a few cupcakes but just liked the bites of frosting in the sweet potato layer cake.
Give the recipe a try. I hope you like it as much as we do. If you are looking for other sweet potato cake recipes we whipped up a great bundt cake also for the holidays. Happy Holidays!
More Decadent Cake Recipes
Looking for more recipes?
Subscribe to my free newsletter to get new recipes in your inbox monthly. Find me sharing new recipes and tips on Pinterest, Instagram or Facebook.
Sweet Potato Cake
Ingredients
- 3 cups AP flour
- 1 ½ teaspoons baking powder
- 1 ½ teaspoons baking soda
- 1 ½ teaspoons salt
- 1 ⅓ tablespoons cinnamon
- 1 ½ cups unsalted butter melted and browned, bits included
- 1 ¾ cups granulated sugar
- 1 ¼ cups packed light brown sugar
- 6 eggs lightly beaten
- 2 teaspoons vanilla bean paste
- 22 ounces sweet potato puree fresh not canned sweet potatoes
Buttercream
- 1 ½ cups unsalted butter softened
- 14 ounces marshmallow creme
- 4 cups confectioners sugar
- 2 tablespoons milk
Candied Pecans
- ½ cup brown sugar
- ¼ teaspoon salt
- ¼ teaspoon ground cinnamon
- 2 tablespoons water
- 1 cup pecan halves
Instructions
- Preheat the oven to 350°F. Butter and lightly flour three 8" round pans. Line with parchment paper.
- Melt the butter in a saucepan over medium heat. Cook, swirling occasionally until the butter turns bubbly and brown. Remove from heat and let cool.
- Sift together flour, baking powder, baking soda, salt, and cinnamon in a large bowl.
- In the bowl of your stand mixer with the paddle attachment, combine browned butter, sugar, brown sugar, eggs and vanilla bean paste. Stir until combined.
- Add in the dry ingredients in two batches.
- Add the sweet potato puree and mix well.
- Divide the batter evenly into the three round pans.
- Bake for 35 minutes or until a toothpick inserted in the center comes out clean.
- Let cool in the pan for 10 minutes and remove to wire rack
Buttercream
- In bowl of stand mixer, beat butter and marshmallow creme on medium speed with paddle attachment for about 2 minutes or until creamy.
- Add in confectioners sugar slowly mixing and scraping bowl as needed.
- Add milk and continue mixing on medium speed for 3-5 minutes or until fluffy.
Candied Pecans
- Combine brown sugar, salt, cinnamon, water in a skillet and cook over medium heat for a minute or two, until the sugar dissolves and mixture is bubbling.
- Add the pecans and continue to cook for 3 more minutes. Stirring to coat them with the glaze.
- Remove from heat and spread pecans out onto parchment paper to cool. Break apart once cooled and chop into small pieces.
Cake Assembly
- Once the cakes have cooled, trim the tops so they are even.
- Place one layer onto a serving tray and top with frosting. Place second layer on top and cover with frosting. Place third layer on and cover top and sides with frosting. Sprinkle candied pecans on top.
Notes
Nutrition
As an Amazon Associate and member of other affiliate programs, I earn from qualifying purchases. What that means is if you click on one of our affiliate links, they may toss a few pennies our way for a commission.
Pumpkin Spice Pull Apart Bread
Simple yet impressive, Pumpkin Spice Pull Apart Bread is flaky and tender and loaded with everyone's favorite pumpkin spice flavor then topped with a sweet cinnamon vanilla glaze. Served for breakfast or dessert, Pumpkin Spice Monkey Bread is a crowd pleaser.
Homemade Pumpkin Puree for Pull Apart Loaf
If you have been following along, then you know we have subscribed to a local farmhouse delivery service. Last week we got pumpkins in the bushel of food. I've always used canned pumpkin puree for all my recipes. But now I'm convinced that fresher is better. It is so easy to use the pumpkins to make puree. And if you find you have too much, just freeze it. We had only two small pumpkins but going forward, next time I will stock up on the pumpkins just to maximize my oven time. Baking for an hour plus is a bit time consuming, so I'd get as many pumpkins on the baking sheet as I could. I got almost 3 cups of puree from these two pumpkins. But I would have liked to freeze more for later.
To make the pumpkin puree I used two pie pumpkins, each one weighing close to three pounds.
Preheat oven to 375°F. Using a large knife, half the pumpkins lengthwise. Use a spoon to scrape out the seeds and pulp. Cut each half again in half. Arrange pieces rind side up on a foil lined baking pan. Bake, covered 1 - 1 ½ hours or until tender. Remove from oven, cool. Once cooled, scoop pulp from the rind. Place pulp in a food processor or blender and process until smooth. Spoon puree into a fine mesh sieve. I lined the sieve with cheesecloth. Let stand for an hour to drain. Discard liquid.
If you have more than you need, you can freeze this for later use. I would transfer 1 ¾ cup puree to quart size freezer bags. You can keep this for about 6 months in the freezer. To use, thaw in the refrigerator.
Also, I want to point out that this is going to be a bit more expensive than buying cans of Libby pumpkin. As always with everything local and fresh, it's not going through a large food processing plant with volume discounts and bulk production runs. It's more expensive but so worth it in terms of flavor.
Ingredients in Pumpkin Spice Pull Apart Bread
- Milk
- Active dry yeast
- Pumpkin puree - fresh is best but canned will work
- Butter
- Sugar
- Egg yolk
- Salt
- AP Flour
- Brown sugar
- Cinnamon
- Ginger
- Nutmeg
- Cloves
- Allspice
- Powdered sugar
- Milk
- Vanilla
How to Make Pumpkin Spice Monkey Bread
- Make the dough and let it rise for about an hour.
- Turn out the dough and roll it into a rectangle.
- Spread the pumpkin mixture over the dough followed by the cinnamon mixture.
- Cut the dough into strips and stack them in a loaf pan.
- Let rise for another hour.
- Bake 35-40 minutes until golden in color.
- Cool for 10 minutes then drizzle with the glaze.
We turned our puree into this yummy pull apart bread and also this pumpkin cheesecake. You could easily just roll this recipe into pumpkin rolls but I like the look of the pull apart. And it feels like every piece that I pull apart is the equivalent of the center of the roll. Which is my favorite part.
More Tasty Pumpkin Recipe
- Instant Pot Pumpkin Cheesecake
- Pumpkin Bread Cake Balls
- Easy Pumpkin Chocolate Chip Muffins
- Chocolate Pumpkin Stout Cupcakes
I hope you enjoy this pull apart loaf as much as we do. Please share and let us know how it turned out if you tried the recipe.
Looking for More Recipes?
Subscribe to my free newsletter to get new baking tips in your inbox monthly. Find me sharing new recipes and tips on Pinterest, Instagram, or Facebook.
Pumpkin Spice Pull Apart Bread
Ingredients
- ¾ cup milk
- 1 pkg active dry yeast
- 1 cup pumpkin puree - fresh is best but canned will work
- 3 tablespoons melted butter
- 2 tablespoons sugar
- 1 egg yolk
- 1 teaspoon salt
- 3 cups AP Flour
- 3 tablespoon melted butter
- ¾ cup packed brown sugar
- 1 tablespoon cinnamon
- 1 teaspoon ginger
- 1 teaspoon nutmeg
- ½ teaspoon cloves
- ½ teaspoon allspice
Glaze
- 1 cup powdered sugar
- 1 tablespoon milk
- ½ teaspoon cinnamon
- ¼ teaspoon vanilla
Instructions
- In small saucepan warm the milk up to 105°F. Once warm, combine in a large bowl, the milk and yeast.
- Stir to dissolve. Let stand 10 minutes or until foamy.
- Add ½ cup of pumpkin, 3 tablespoons of butter, sugar, egg yolk, and salt to the yeast mixture. Beat with a mixer on medium speed until combined. We used our KitchenAid, but a hand mixer will also work.
- Add half of the flour and continue mixing for 3 minutes. Once mixed, add the remaining flour.
- Once combined, shape dough into a ball. Place in a greased bowl, turning ball once to cover with grease.
- Cover and let rise in a warm place until nearly double in size. About an hour.
- Butter a 9x5 inch loaf pan.
- Turn dough onto lightly floured surface and roll into a 20x12 inch rectangle.
- In a small bowl, combine the remaining ½ cup pumpkin and 3 tablespoons of melted butter. Spread over the dough.
- Combine brown sugar, cinnamon, ginger, nutmeg, cloves and all spice. Sprinkle over the pumpkin mixture.
- Cut dough crosswise into five 12x4 inch pieces.
- Stack the strips, then cut crosswise into six 4x2 inch pieces.
- Leaving the stacks intact, loosely stagger pieces, cut side up into prepared loaf pan.
- Cover and let rise in a warm place until nearly double. About 60 minutes.
- Preheat oven to 350°F. Bake 35-40 minutes until golden brown. Cover with foil the last 15 minutes to prevent overbrowning if needed.
- Cool in pan on wire rack for 10 minutes.
Glaze
- In small bowl stir together powdered sugar, milk, cinnamon and vanilla. If needed add more milk 1 teaspoon at a time to achieve drizzle consistency.
- Remove bread from pan and drizzle with glaze.
Notes
Nutrition
As an Amazon Associate and member of other affiliate programs, I earn from qualifying purchases. What that means is if you click on one of our affiliate links, they may toss a few pennies our way for a commission.
Instant Pot Pumpkin Cheesecake
This Instant Pot Pumpkin Cheesecake recipe is easy, delicious, and full of just the right amount of pumpkin flavor for those who want something different this holiday season. This silky smooth cheesecake is the perfect way to enjoy a fall treat and will be an instant family favorite.
Instant Pot Cheesecake
Raise your hand if you pot an Instant Pot on Black Friday! Have you used it yet? Instant Pot cheesecake is incredibly creamy and it's so simple to do.
Thanksgiving is quickly approaching and I swear I have no idea where the last year went! It's been almost a year since we got the Instant Pot on Black Friday. It doesn't scare me anymore to use it, so that's a good thing. I love all the desserts that I get out of it. I have yet to use the one I bought for anything but desserts. I keep saying I'm going to have to get one for the house so I can cook regular meals with it. Maybe this Black Friday? Come on Amazon, I need a sale!
I'm a big fan of cheesecakes made in the Instant Pot. This is my first pumpkin anything from the gadget, but I would say this is a pretty tasty easy pumpkin cheesecake recipe. It would be great for any Thanksgiving dessert that you may need. This is simple to make and fairly quick.
Ingredients in Instant Pot Pumpkin Cheesecake
- Graham cracker crumbs
- Butter
- Cinnamon
- Ground almonds
- Cream cheese
- Dark brown sugar
- Sugar
- Egg
- Egg yolk
- Sour cream
- Pumpkin puree
- Vanilla extract
- Nutmeg
- Cloves
- Flour
We got pumpkins this year in our farmhouse delivery and so I roasted them up and pureed them to make my own homemade pumpkin puree. I love the taste and find it so much better than the canned stuff. But I know holidays are approaching and time is important. So if you want a quick and easy, just open the can. It's still good! Just be sure to buy pumpkin puree and not pumpkin pie filling.
How to Make Easy Pumpkin Cheesecake
- Combine the crust ingredients and press into a 7" springform pan. Freeze for 10 minutes.
- Prepare the cheesecake batter and pour it into the pan.
- Add two cups of water and a trivet to the Instant Pot and carefully lower in the unbaked cheesecake and cover with foil.
- Seal the lid and cook at high pressure for 27 minutes followed by a natural pressure release.
- Chill overnight in the fridge.
I made the crust with graham cracker crumbs. But you could easily substitute graham crackers for those little Biscoff Cookies. The cinnamon and brown sugar cookie flavor would be a great crust for the cake. I didn't realize how good those were until I started flying American Airlines so much this year and they always hand out those cookies on the morning flights. So good with coffee. Now if they could just make a good coffee, I may never want to get off the plane.
Also another note about the pans you use in the Instant Pot. I have a 7-Inch Round Springform Pan. It's the same equipment I used to create the Triple Chocolate Cheesecake recipe. After a few comments on that recipe about spill over when cooking, we discovered that all 7" pans are not the same height. So if you make this leave a little room at the top for the rise of the cake. About an inch should get you enough room so you don't have spill over.
More Pumpkin Desserts to Try:
Looking For More Recipes To Try?
Subscribe to my free newsletter to get new recipes in your inbox monthly. Find me sharing new recipes and tips on Pinterest, Instagram or Facebook.
I hope you enjoy the recipe as much as we do! Please share in the comments and let us know if you make this easy pumpkin cheesecake. Happy Holidays!
Instant Pot Pumpkin Cheesecake
Ingredients
Crust
- 1 cup graham cracker crumbs
- 2 Tablespoons butter melted
- ½ teaspoon cinnamon
- ½ cup ground almonds toasted and cooled
Pumpkin Cheesecake
- 1 pound cream cheese
- ¼ cup packed dark brown sugar
- ¼ cup sugar
- 1 whole egg room temperature
- 2 egg yolk room temperature
- ¼ cup sour cream
- 8 ounces pumpkin puree
- ½ teaspoon vanilla extract
- 1 teaspoon cinnamon
- ½ teaspoon nutmeg
- ½ teaspoon cloves
- 1 Tablespoon flour
Instructions
- Spray the 7" springform pan with cooking spray.
- Add two cups of water to the instant pot and place the rack on the bottom.
- Make a tin foil sling to lift the cheesecake in and out of the instant pot.
Crust
- In a food processor combine the graham crackers, almonds, cinnamon and the butter.
- Pour the crumb butter mixture into the bottom of the pan and pat until even and going up the sides of the pan. Put in freezer for 10 minutes.
Cheesecake
- In a food processor, mix the cream cheese with dark brown and white sugar.
- Once combined, add one egg followed by the 2 egg yolks.
- Add the sour cream and pumpkin.
- Continually scrape the bowl down. Add vanilla, cinnamon, nutmeg, cloves, and flour and mix until creamy.
- Pour mixture into the springform pan and smooth with a spatula.
- Place pan on the tin foil sling and slowly lower into the Instant Pot.
- Loosely cover the cheesecake with a foil lid to prevent moisture buildup on the top of the cake.
- Set Instant Pot to maximum pressure for 27 minutes.
- Once done, turn machine off and let it return to normal pressure for 15 minutes.
- Unlock lid and use sling to transfer pan to cooling rack for an hour.
- Chill in refrigerator overnight.
Notes
Nutrition
As an Amazon Associate and member of other affiliate programs, I earn from qualifying purchases. What that means is if you click on one of our affiliate links, they may toss a few pennies our way for a commission.
Apple Cinnamon Muffins
These easy apple cinnamon muffins topped with a delicious crumb top are a perfect way to use your fall apples and make a great breakfast recipe.
Enjoying Fall Fruits and Veggies
This week I got my first delivery from Farmhouse Delivery Service. I'd wanted to try them for a while but finally got around to ordering a bushel of their organically raised fruit and produce. It was an interesting basket of goodies that arrived on my doorstep Wednesday afternoon. It came with two pumpkins, collard greens, carrots, four apples, lettuce with the root ball still attached (does anyone know if I can plant that?), one avocado, and three tomatoes. And I had them throw in a ½ pound of locally produced bacon just for good measure. Which surprisingly wasn't the first thing I ate from the delivery. Still, it was really nice yesterday with breakfast and again for lunch on my bacon, lettuce, tomato, and avocado sandwich.
When the basket first arrived, I felt a lot of pressure to cook and find recipes. For instance, collard greens. Something that I may have eaten twice in my life, and neither time very memorable. Now I have a bunch of greens; what do I do with it? So I whipped up a nice dish of cream of collard greens. Not bad for my first time ever cooking them. Have to say, I would have never gone to the store to buy collard greens, but now I'm glad I know how to cook them. And once we finished eating them, it was fun to come up with other ways to use the greens and how we would change the recipe.
Yesterday I baked the pumpkins to make puree for a pumpkin loaf I'm making at the kitchen this week. By the way, did you know you could freeze this puree and use it later? So even if I don't get to the loaf this week, you can bet next week I will. And while I was at it, we whipped up some roasted pumpkin seeds. Just a bit of olive oil, salt and pepper. I enjoyed those while binge-watching Stranger Things on Netflix. Better than any microwave popcorn I've had.
I'm almost through the bushel and running out of most things. I'm definitely feeling a little better about the process. When you see a bushel of food, and you look around and there are only two people you are cooking for, I started to feel a wee bit nervous about wasting the food.
Tonight I'm using the tomatoes in a pasta dish, and later this week, I will finish off the carrots by turning them into french fries. So, all in all, I'd say it's a successful first week of my farmhouse delivery. They really make it convenient, affordable, and exciting for people to eat healthy, seasonal, local food.
Ingredients in Apple Cinnamon Muffins
I am so excited to use my fresh apples for this recipe. Fresh apples, along with a few ingredients from your baking pantry, are all you need to enjoy the flavors of fall.
- Cake flour
- All-purpose flour
- Baking powder
- Baking soda
- Salt
- Butter
- Sugar
- Brown sugar
- Eggs
- Vanilla extract
- Sour cream
- Apples
- Cinnamon
How to Make Apple Cinnamon Muffins with Streusel Topping
I love how easily these muffins come together. Because they are baked in muffin liners, cleanup is also fairly simple. These muffins will be a favorite treat in the fall. Make a double batch when apples are in season and toss the extras in the freezer to enjoy all year long. Wrap each muffin in plastic wrap and store them in a freezer bag. Pull out a few and thaw overnight on the counter.
- Combine the dry ingredients in a bowl and set aside.
- Cream butter and sugar in a stand mixer until light and fluffy, then add in the eggs and other wet ingredients.
- Slowly mix in the dry ingredients until just combined and stir in the apples and cinnamon.
- Pour the batter into a prepared muffin tin and sprinkle the top of each with the streusel topping.
- Bake for 17-25 minutes or until done.
More Fall Treats to Try:
This is the recipe for the apple cinnamon muffins that I used the apples in. I used a base recipe for muffins from King Arthur Flour, and I just added some apples and cinnamon and put a crumble top on it. I hope you enjoy it as much as we did.
Looking For More Recipes?
Subscribe to my free newsletter to get new baking tips in your inbox monthly. Find me sharing new recipes and tips on Pinterest, Instagram, or Facebook.
Apple Cinnamon Muffins
Ingredients
- 14 ounces cake flour
- 2 teaspoons baking powder
- ½ teaspoon baking soda
- 1 teaspoon salt
- 8 tablespoons butter
- 7 ounces sugar
- 3 large eggs
- 2 teaspoons vanilla extract
- 8 ounces sour cream
- 4 apples peeled and grated
- ¼ cup cinnamon
Streusel Top
- 2 ¼ ounces AP flour
- 3 ounces brown sugar
- ½ teaspoon cinnamon
- 3 tablespoons soft butter
Instructions
- Preheat the oven to 400°F
- Line 16 muffin cups with paper liners, or lightly grease if you don't have the liners.
- In a medium sized bowl, whisk together flour, baking powder, baking soda, salt.
- In a stand mixer with the paddle attachment, cream the butter and sugar together until light and fluffy.
- Add the eggs one at a time, mixing well after each addition.
- Add the vanilla and sour cream, mix until incorporated.
- Add the dry ingredients and mix on low until just blended.
- Stir in the apples and cinnamon.
Streusel Topping
- Mix together all the ingredients until crumbly.
- Sprinkle each muffin with the topping.
- Bake muffins 17 - 25 minutes or until a cake tester inserted into center comes out clean.
- Remove from oven and cool in the pan for 5 minutes.
- Remove from pan and finish cooling on a rack.
Notes
Nutrition
As an Amazon Associate and member of other affiliate programs, I earn from qualifying purchases. What that means is if you click on one of our affiliate links, they may toss a few pennies our way for a commission.
Elegant Halloween Cakes
Halloween is for kids and adults alike. It's a day of fun and indulgence, the best time to indulge in cake! Whether you're throwing a Halloween party or just want something new this year, gather your favorite Halloween cake decoration and make an elegant Halloween cake that will surely spook up your night.
Beautiful Halloween Cake with Layers
If you have a Halloween party coming up, this beautiful Halloween cake with three layers would be an easy addition to the menu.
I know layer cakes seem sometimes overwhelming, but just take it step by step. You could even spread the baking tasks out over a day or two. I baked the layers on day one. On day two, I made the buttercream and the ganache then assembled and decorated the cake.
Elegant Halloween Cake Ingredients
I love how simple this cake is. There are no fancy ingredients, just things you can easily find in your pantry.
- Sugar
- Cake flour
- Baking powder
- Salt
- Milk
- Eggs
- Egg yolk
- Vanilla
- Butter
- Egg Whites
How To Assemble This Halloween Cake
This recipe makes three 8" yellow cakes. I threw in a chocolate layer for good measure, because well, why not.
Assembling is fairly straightforward, but don't forget to cut the cake top off of the layers to make sure you get a flat surface to work with. I use a knife for this but you could use this Wilton cake leveler gadget. You can get this from Amazon, and also most craft stores will carry this in their cake making section.
- Layer Italian buttercream between each of the three layers of cake.
- Top the final layer with buttercream.
- Pour slightly cooled ganache (recipe below) onto the top of the cake adding just enough that a bit drizzles down the side.
- Top the cake with a collection of your favorite Halloween candies.
The ganache recipe was a very simple one. It's easy to whip up, and just pour it right on top once you have iced the cake.
Chocolate Ganache
¼ cup heavy whipping cream
2 oz bittersweet chocolate
1 tablespoon corn syrup
½ teaspoon vanilla
In a microwavable measuring cup combine, whipping cream, chocolate, corn syrup. Put in microwave for 15 second intervals until the chocolate is melted. Stir and add in the vanilla. Let this cool a tiny bit before pouring onto the cake top. To stop the drips from running completely down the cake, I put the cake in the refrigerator once I poured it to quickly thicken the ganache. I wanted just a few short drips, not ganache running down every part of the cake. Then it's as easy as sprinkling on your favorite Halloween candies.
Halloween Cake Decorations
I'm a fan of the naked cake look. I think it's just an elegant presentation and I get a bit less buttercream with each bite. Somehow that makes me think it's a wee bit healthier. I know...denial
You could easily decorate the cake with the buttercream instead of going with the naked look. It's entirely up to you.
This is filled with Italian buttercream and a little chocolate ganache at the top. Decorate with your favorite halloween candy pieces, and there you go. A show stopper fun dessert that will win over any guests you have this Halloween. You could also crumble up Oreo cookies and go with a grave yard dirt look with gummy worms and Peeps tombstones to give you another idea for the decorations.
More Halloween and Seasonal Desserts You Will Love:
And there you have it, cute, fun and not too spooky. No tricks, just treats.
Looking For More Recipes?
Subscribe to my free newsletter to get new baking tips in your inbox monthly. Find me sharing new recipes and tips on Pinterest, Instagram, or Facebook.
Elegant Halloween Cakes
Ingredients
- 1 lb 5 oz sugar
- 1 lb 4 oz cake flour
- ¾ oz baking powder
- ½ oz salt
- 9 fl oz milk
- 6 ¾ oz eggs
- 5 oz egg yolk
- ¾ oz vanilla
- 12 oz butter softened
Italian Buttercream
- 1 lb sugar
- ½ lb egg whites
- 4 oz water
- 1 ½ lb butter cut into 1" cubes
- 1 ½ teaspoon vanilla
Instructions
- Preheat oven to 350°F
- Coat three 8" round pans with cooking spray and line with parchment circles
- Sift together the dry ingredients into a stand mixer bowl
- In a medium bowl combine milk, eggs, egg yolks and vanilla
- Pour ½ of the milk mixture into the stand mixer bowl, add butter and mix on medium speed with paddle attachment for 4 minutes
- Add the remaining milk mixture in three additions, mixing 2 minutes after each addition
- Pour 24 ounces of batter into each pan
- Bake until the cake springs back when lightly touched in the center, about 35 minutes
- Once done, cool cake in the pan for a few minutes then unmold onto rack to cool completely
Italian Buttercream
- Combine 4 oz of sugar with the egg whites in the bowl of your stand mixer
- Combine the water with the remaining sugar in a saucepan. Cook the mixture until it reaches 240°F
- When the sugar syrup reaches 230°F, turn on the stand mixer with the whisk attachment to medium
- Stream the hot sugar into the whipping whites. Continue whipping until cooled to room temperature
- Once meringue is cooled, switch whisk attachment to the paddle attachment and start slowly adding the butter on medium speed. (This will look broken once all the butter is in, but keep whipping it will smooth out)
- Cream until smooth and light
Notes
Nutrition
As an Amazon Associate and member of other affiliate programs, I earn from qualifying purchases. What that means is if you click on one of our affiliate links, they may toss a few pennies our way for a commission.